#Finding Lane Lines on the Road

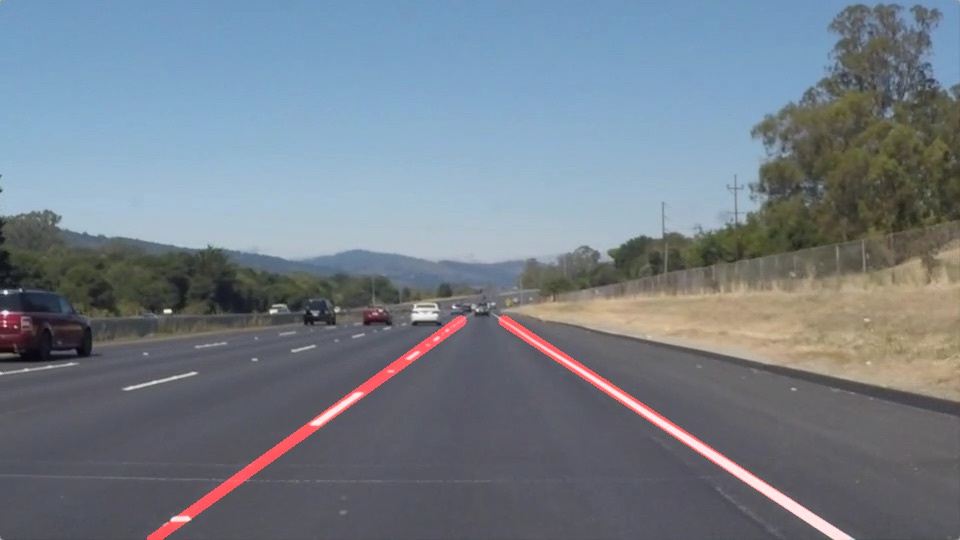
Given an image of a road, I identify the lane lines and draw them on in real-time videos.
All made possible by Udacity's Self-driving Car Nanodegree.
Steps:
- Detect the line segments in the image (canny edge detection)
- Crop the photo to just the part that may contain lane lines
- Average/extrapolate the vertical lines (hough transformation)
- Draw the lines onto the image for display.
- P1.ipynb: contains all the image processing and output videos
- white.mp4 and yellow.mp4 are the output videos after finding lane lines
Step 1: Getting setup with Python
To do this project, you will need Python 3 along with the numpy, matplotlib, and OpenCV libraries, as well as Jupyter Notebook installed.
> source activate yourNewEnvironment
Step 2: Installing OpenCV
Once you have Anaconda installed, first double check you are in your Python 3 environment:
>python
Python 3.5.2 |Anaconda 4.1.1 (x86_64)| (default, Jul 2 2016, 17:52:12)
[GCC 4.2.1 Compatible Apple LLVM 4.2 (clang-425.0.28)] on darwin
Type "help", "copyright", "credits" or "license" for more information.
>>>
(Ctrl-d to exit Python)
run the following commands at the terminal prompt to get OpenCV:
> pip install pillow
> conda install -c https://conda.anaconda.org/menpo opencv3
then to test if OpenCV is installed correctly:
> python
>>> import cv2
>>>
(Ctrl-d to exit Python)
Step 3: Installing moviepy
wxx
To install moviepy run:
>pip install moviepy
and check that the install worked:
>python
>>>import moviepy
>>>
(Ctrl-d to exit Python)
Step 4: Opening the code in a Jupyter Notebook
You will complete this project in a Jupyter notebook. If you are unfamiliar with Jupyter Notebooks, check out Cyrille Rossant's Basics of Jupyter Notebook and Python to get started.
Jupyter is an ipython notebook where you can run blocks of code and see results interactively. All the code for this project is contained in a Jupyter notebook. To start Jupyter in your browser, run the following command at the terminal prompt (be sure you're in your Python 3 environment!):
> jupyter notebook
A browser window will appear showing the contents of the current directory. Click on the file called "P1.ipynb". Another browser window will appear displaying the notebook. Follow the instructions in the notebook to complete the project.