If you use nodejs-template as a starting point for new Node.js projects you will get:
| ✅ | Custom Module Aliases |
| ✅ | Type checks (optional) using Flow. |
| ✅ | Unit Tests (optional) using Jest. |
| ✅ | Basic Babel Configuration |
| ✅ | Basic ESLint Configuration |
| ✅ | Plays well with Visual Studio Code. |
| ✅ | Useful npm Scripts. |
| ✅ | A helpful README to get you started. |
Table of Contents
- Getting Started
- Changelog
- Compiling
- Running
- Debugging
- Testing
- Custom Module Aliases
- What is this?
- Future
Using this template is easy:
$ git clone https://github.com/ChristianKienle/nodejs-template.git myproject
$ rm -rf myproject/.git
$ cd myproject
$ npm install && npm run build && npm run start
You can edit package.json accordingly and adapt the template to your needs.
- NEW – Custom Module Aliases:
require('@lib')vs.require('./../../../../../lib'). - NEW – npm scripts:
lintandlint:fix. - FIX – Enabled ESLint for config files.
- Relaxed flow linting rules a little.
Since this template is using Flow (for type checking) the code has to be compiled before it can be executed. However, compiling is optional if you are:
- not using Flow at all or if you are
- only using Flows comment-based syntax.
Personally I like the comment-based syntax very much. It definitely has several benefits: You obviously don't have this extra compile step and thus makes adoption easier. Personally I usually start by using the comment-based syntax and then later on I switch to Flows full blown feature set. There are two npm-build-scripts:
npm run build
This runs a one-off compilation. In contrast:
npm run build:watch
is watching ./src for changes and automatically runs the compiler once a change is detected. In both cases the compiled code is written to ./dist (alonside with source maps).
There are multiple ways to execute and debug the code. The most basic one is to use the predefined npm-scripts. Execute the start-script in order to simply start the execution:
npm run start
There is also a debug version of the start-script available:
npm run start:debug
The start:debug-script does the same as the start-script but halts execution until a debugger is attached. There are multiple ways to attach a debugger to the waiting Node process. More about that later.
This template comes with a Visual Studio Code launch configuration (called Launch) which you can use to start execution. If you are using the Launch configuration then you don't have to compile anything beforehand because it is done automatically.
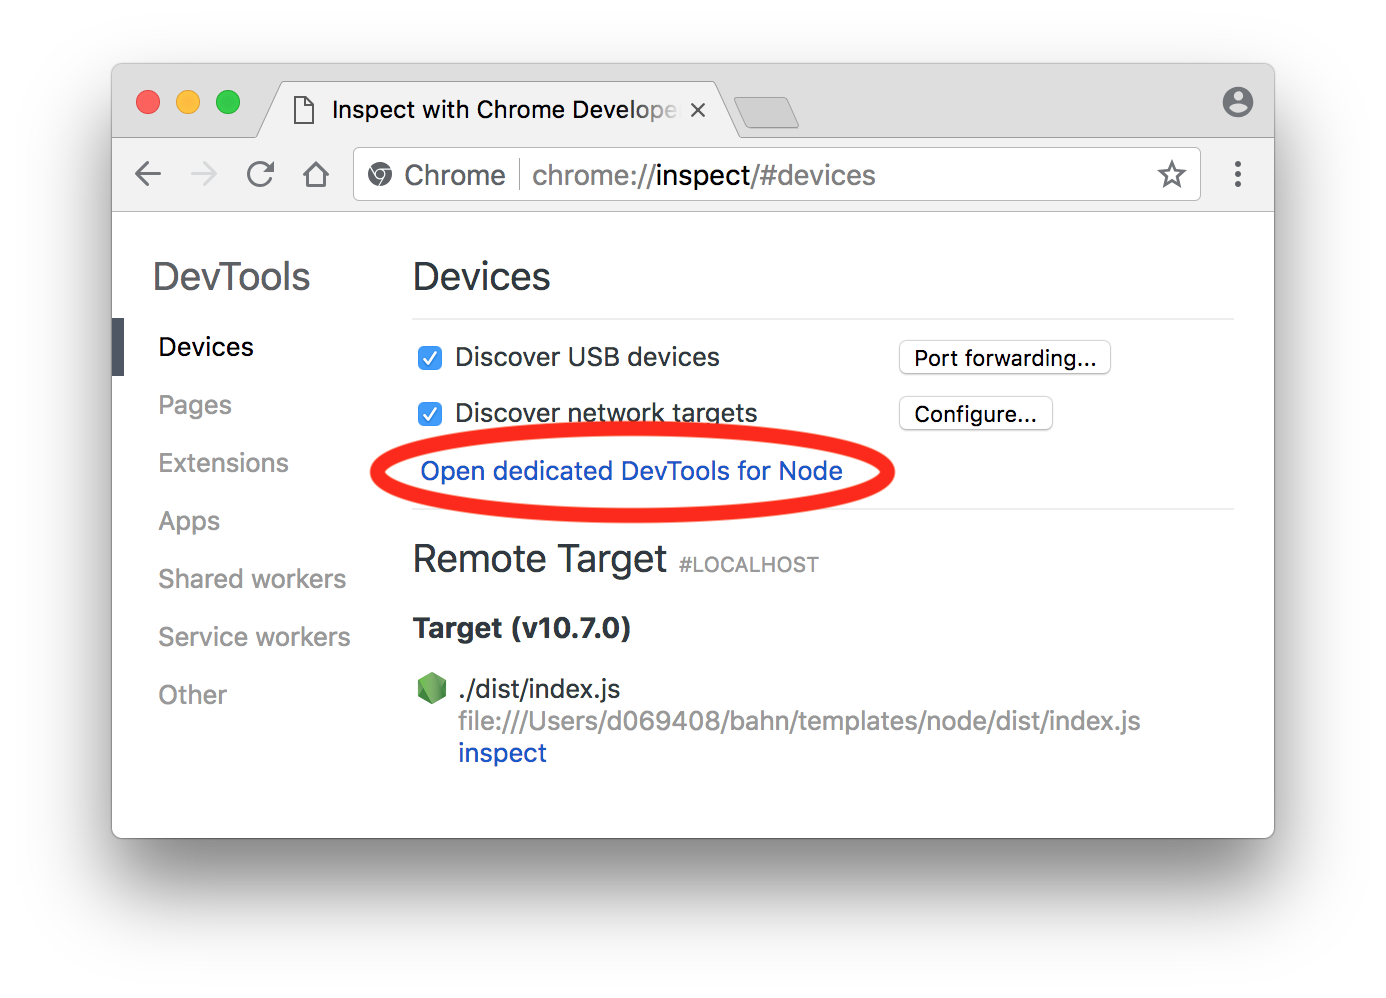
Simply execute start:debug as described above and then launch Chrome and open chrome://inspect. You should see something like this:
Launch the debugger by clicking on the circled link. This should open the debugger.
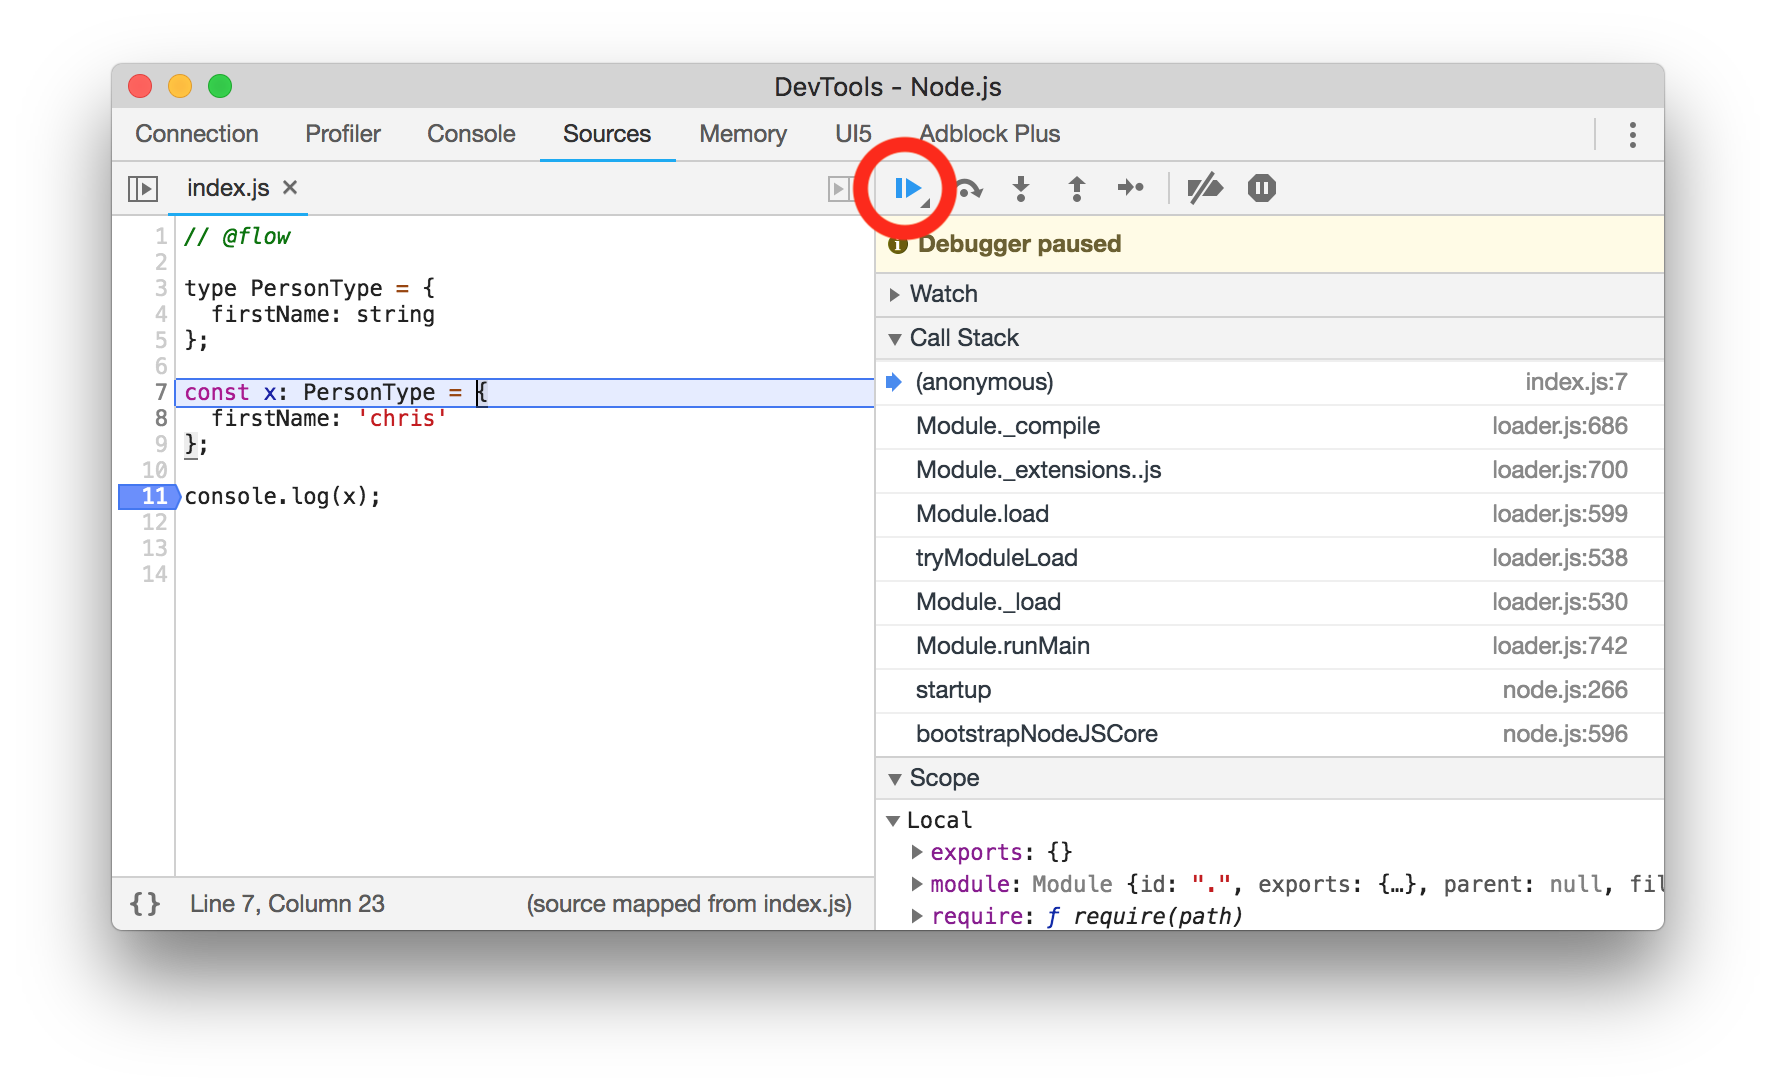
You can now add breakpoints, watch expression (...). Once you are ready click on Resume (circled in red).
If you use the Launch launch configuration breakpoints in Visual Studio Code should work out of the box. You can also use the auto attach feature of Visual Studio Code.
- Make sure that auto attach is on.
- If you fail to end up in your debugger auto attach may be disabled.
- In that case you can try to toggle auto attach.
- Open the command palette ⇧⌘P (macOS).
- Execute the toggle auto attach command.
- Try again.
- Then you can use the integrated terminal and execute the
start:debug-script. - You should also end up in your debugger if a breakpoint is hit. Magic!
Because testing should be delightful this template is using Jest. You can run tests via npm:
$ npm test
or
$ npm run test:watch
The latter command will execute all tests automatically whenever a change is detected.
NOTE
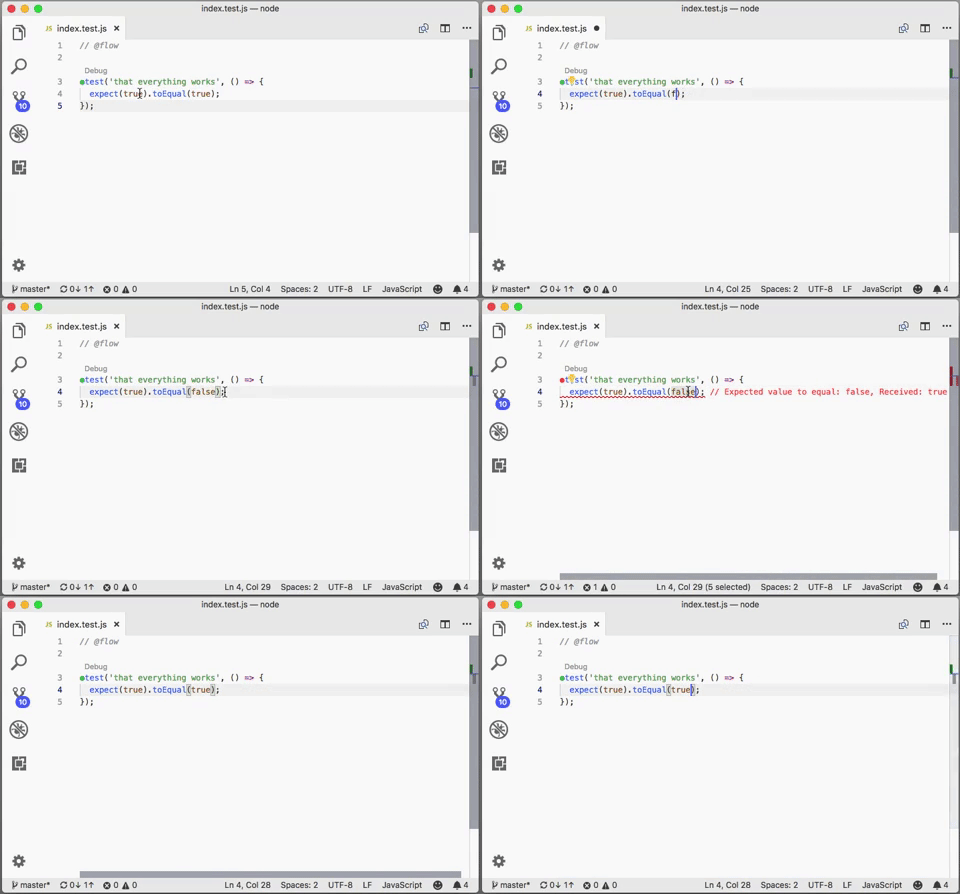
If you are using Visual Studio Code executing npm run test:watch is usually not needed. Visual Studio Code provides live feedback already.
You can also start an individual test in Visual Studio Code. Above each test there is a Debug-button. Click that and only the corresponding test will be executed.
A few notes about testing and this template:
- There is a sample test (
./src/sample.test.js). - You may have to install the Jest Visual Studio Code extension in order to get all the benefits from Jest + Visual Studio Code.
- Type checking using Flow should work in tests (Jest type annotations are installed and enabled)
- ESLint is configured to ignore type definitions installed via flow-typed (subfolder: npm).
- Files matching
src/**/*.test.jswill be executed by Jest.
You can easily define custom module aliases. A custom module alias allows you to replace relative imports/requires like require('./../../../../../lib') with just require('@lib').
In face, this template project comes with a single preconfigured module alias: @lib. Everything inside the src/lib folder can be imported by using @lib.
Creating a custom module alias:
In order to create a custom module alias called @utils you have to:
1. Create a new directory
$ mkdir ./src/utils
2. Add the alias to .babelrc.js
…
const plugins = [
  ['module-resolver', {
    'root': ['./src'],
    'alias': {
     '@lib': './src/lib',
     '@utils': './src/utils',
//    ^
//    ^___ this is your new alias
    }
  }]
];
…
3. Add the alias to ./src/.flowconfig (optional)
…
[options]
…
module.name_mapper='^@utils$' -> '<PROJECT_ROOT>/utils/'
module.name_mapper='^@utils\/\(.*\)$' -> '<PROJECT_ROOT>/utils/\1'
…
It is being said that getting into JavaScript development is easy. This may be true. The language it very forgiving (wat?) and (compared to many other languages) has very few key concepts (which is a good thing IMHO. Writing the first 100 lines of JavaScript code is easy. However, without any tooling writing more code than that quickly becomes unmanageable. Fortunately there are many tools that make it a joy to write more than 100 lines of JavaScript. Unfortunately setting those tools up can be frustrating. It is usually a mix of trial and error with a lot of reading in-between. This repository contains a very basic project template that can be used as a basis for new Node.js projects. If you use this template as a starting point you get the following things (preconfigured):
- Linting (using ESLint): Enforces a consistent code style and (more importantly) enforces best practices.
- Type checking (using Flow; optional): To catch type/null errors and for auto completion.
- Testing (using Jest; optional)
- Multiple ways to debug your code (using Chrome DevTools and Visual Studio Code)
This template is merely a composition of existing tools and a hopefully helpful Readme. It tries to include the least amount of stuff but, at the same time, provide the maximum benefit. Everything in this template is optional. For example: If you don't like type checks simply remove .src/.flowconfig. If you don't like testing your code simply remove the sample test. If you want type checks but hate an extra compile step simply use comment-based type annotations. If you hate Visual Studio Code simply remove the .vscode folder.
To me nodejs-template is the basis for a developer tool which will be able to generate new projects. Think of it as a combination of Yeoman and Vue CLI.


