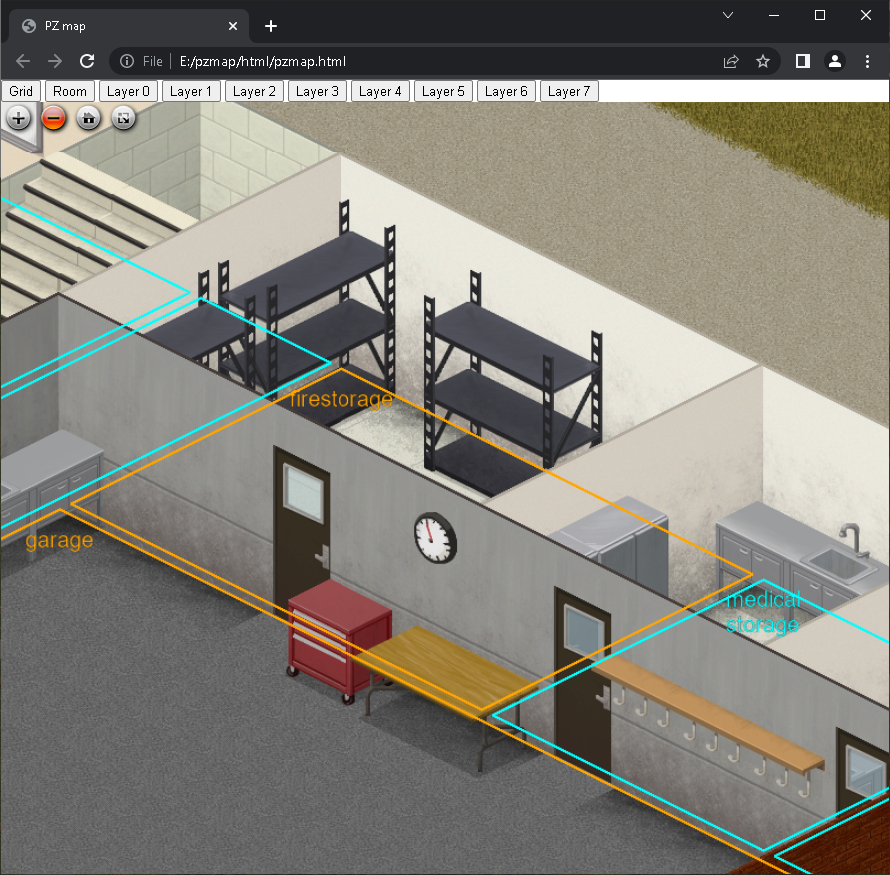
pzmap2dzi is a command-line tool running on Windows to convert Project Zomboid map data into Deep Zoom format.
- Supports both python 2 and python 3
- HTML viewer for viewing the generated Deep Zoom image.
- Various plant rendering configurations (snow, flower, tree size, etc.).
- Supports multi-thread acceleration
- Supports resuming from a breakpoint
- Supports map grid and room info rendering
- Supports game version 41.68
- The full output size for game version 41.68 is around 1.1TB and consists of 1.3M files. Make sure your output to a hard drive has enough free space.
- The rending process will take a very long time, so it's better to have a high-performance CPU, hard drive, and large memory.
- (The rending took around 18 hours on an AMD 3700X with 64GB DDR4 2133 memory and a SATA3 mechanical hard drive using a 16 thread setting)
-
Install python
-
Clone or download the project
-
install requirements
python -m pip install -r requirements.txt -
Edit the
pz_path.txtfile to contain the correct path where your ProjectZomboid located on your computer -
Edit the
out_path.txtfile to contain the desired output path -
run the tool
run.bat
- Change thread numbers (default is 16 threads)
- In the
scripts/folder, you can edit the starter command in the following files
- In the
unpack_texture.bat
render_base.bat
render_grid.bat
render_room.bat
- Change `-m 16` to `-m 4` to use only four threads.
- Do not render grid and room info
- Remove the calling of
render_grid.batandrender_room.batfromrun.bat
- Remove the calling of
- Config a hotkey to elegantly stop rendering at a breakpoint so you can resume later
- Similar to the config of thread numbers, add
-s <hotkey>to starter commands- For example,
-s "<f9>"make the rendering process stop when you hit F9
- For example,
- To resume, run
run.batagain
- Similar to the config of thread numbers, add
After the rendering, you get an html folder in your output path.
html
├── base/
├── grid/
├── openseadragon/
├── room/
├─ chrome_allow_file(need close chrome first).bat
├─ chrome_no_sicurity.bat
├─ pzmap.html
└─ run_server.bat
Directly open pzmap.html will NOT work, as the Cross-Origin Resource Sharing (CORS) Policies will refuse to load Deep Zoom tiles from your locale disk by default.
There are two ways to bypass CORS:
- Start a server and host your files on your drive
- run
run_server.bat - Afterwards, you can open
http://localhost:8880/pzmap.htmlto view the image
- run
- If you are using Google Chrome with the default install path, you can do one of the followings:
- open
pzmap.htmlin a standalone tab with all web security disabled.- To do this, run
chrome_no_sicurity.bat
- To do this, run
- restart Chrome to allow locale HTML access to locale files.
- To do this, you close all opening Chrome tabs
- Then run
chrome_allow_file(need close chrome first).bat
- open

