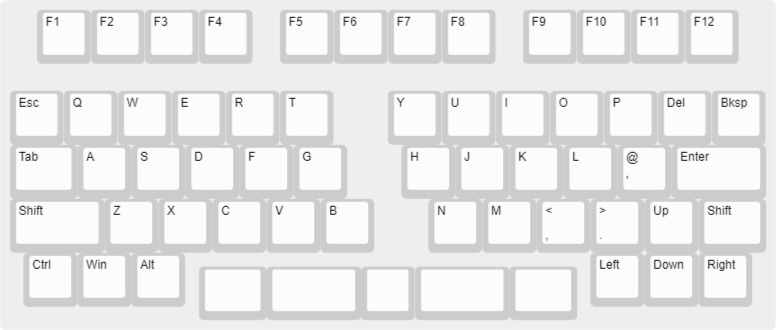
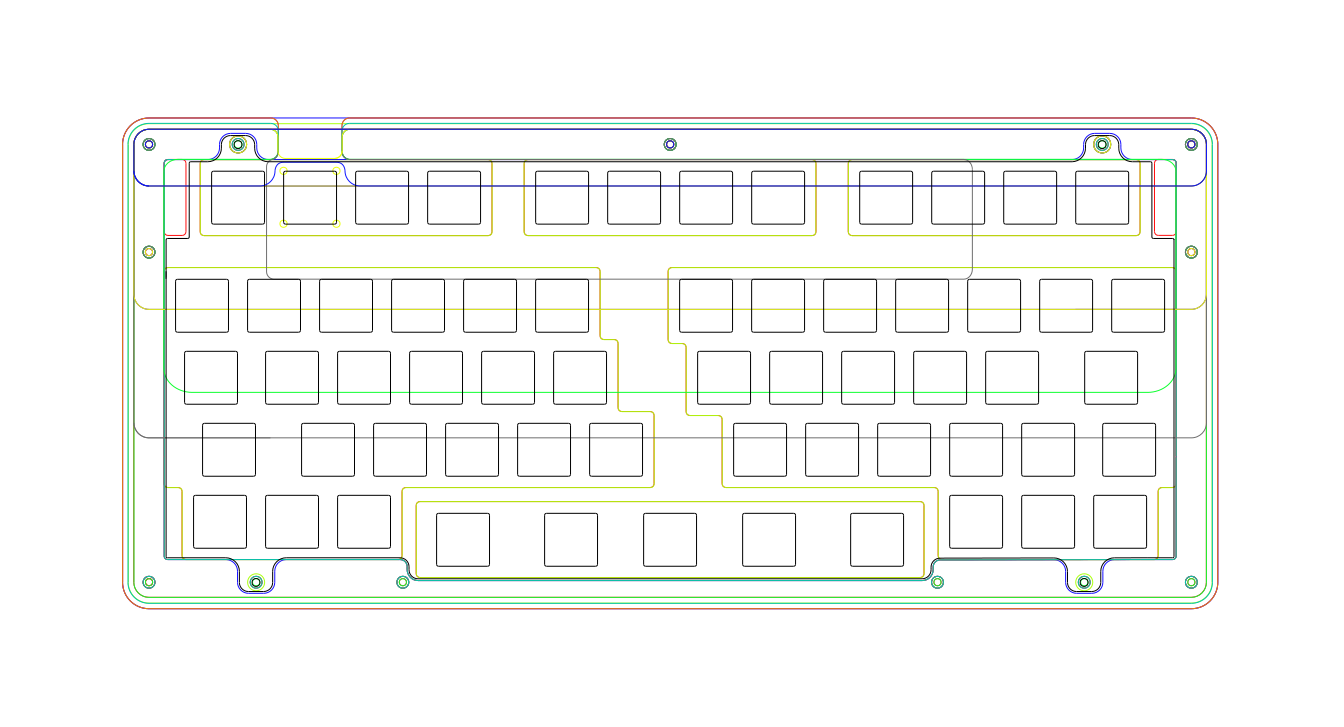
Stacked acrylic keyboard case designed for handwiring with a Waveshare RP2040-Tiny. Iterated from P3D Jake's Hydra Invisibolt case which was designed for MechVault's Hydra PCB. Thanks Jake for allowing me to open source this after I took his Hydra case designed and ruined modified it. Thanks Cain at MechVault for the layout inspiration. If you decide to make one of these then consider donating to Jake's coffee fund.
Feel free to do whatever you want with the files. If you have any questions just ask (Discord username elkinoflop) and if you make one then share a photo with me!
Differences from the original
- Added F-Row with accents to the side
- Removed the 'invisibolt' part so there are now visible bolts on the top
- Added extra foot layer
- Added cutout to the base to allow a bit more space for handwiring
- Added mounting points for the daughterboard
- Slightly reshaped the feet and front edge
- Only a single (stabless) layout
- Changed from gasket to bottom mount
- Designed to be cut from 3mm acrylic
- I have included 2 variants of the layers 9 & 10. A standard version for use with a PCB and a handwire/HW version with mounting points for a daughterboard
- There are multiple versions of the top layer (1) with different accents to the side of the F-Row
- If you want more space in the case you could double up on one of the layers (I would recommend 4). I didn't do this but depending on how bulky your handwiring is you might find the case tight for space
- As a rough idea of cost Mechboards.co.uk was the best price I could find in the UK to get the acrylic cut at around £65-£75 depending on what acrylic you choose
- One of each DXF file (except for the plate) cut from 3mm acrylic.
- Plate DXF file cut from 1.5mm metal/carbon. Plastic is not suggested as it will be too flexy and your switches will probably pop out
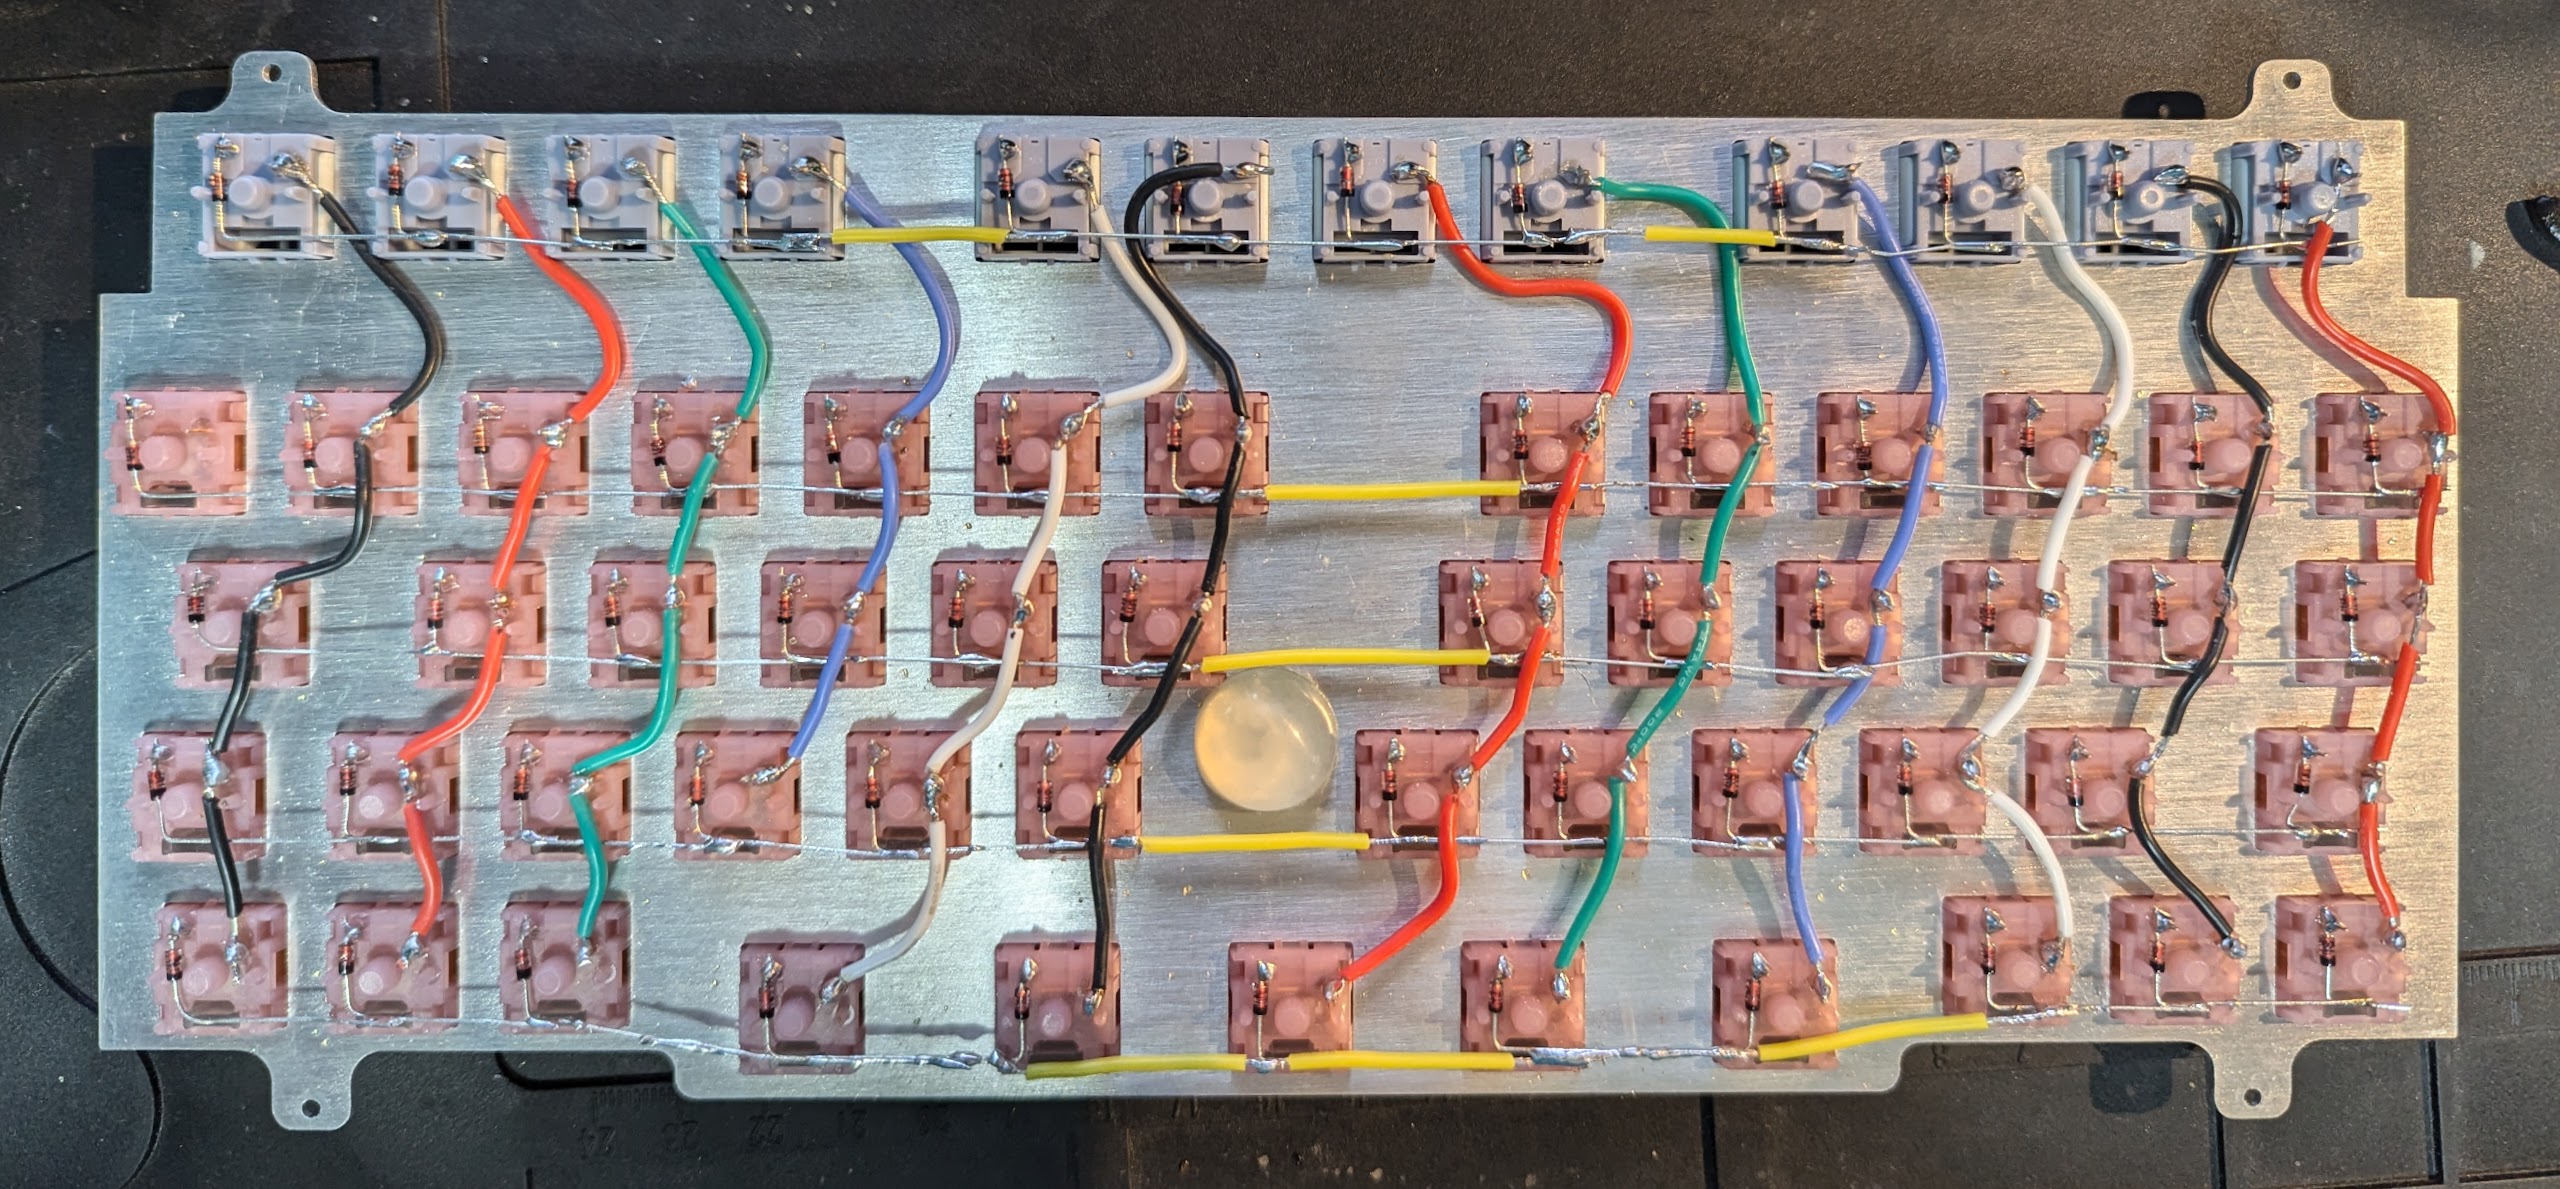
- A single 8-9mm thick silicone rubber foot/bumpon or similar. Even with a stiffer plate it will still sag in the middle when built handwired. Extra mounting points could be added to fix this but I had already got a plate cut! This Bumpon is stuck to the under side of the plate (between the B and N keys) to support the plate. If a PCB is used this shouldn't be required. Amazon rubber feet
- Waveshare RP2040-Tiny
- M2 Standoffs with a outside diameter of 3mm. 16, 8 and 6mm lengths. Amazon Standoffs
- M2 Hex socket button head bolts. 5, 6 and 8mm lengths. AliExpress bolts
- M2 Washers. To go under the bolt heads that hold the daughterboard in. These might not be required. AliExpress M2 0.5mm thickness plastic washers
- M2 nuts to hold the daughterboard. Included with the standoffs linked above
- Optional - WS2812B LEDs. There's enough pins on the controller to add some RGB if you want
- Wire! Solid core 22 AWG suggested
- Optional - Headers (right angle, single row, 2.54mm pin pitch) and dupont wires so the controller can easily be unplugged if required. The Pi Hut Dupont wires
- 60x MX Switches
- 60x 1N4148 Diodes
If you have wired up the matrix and connected it to the same controller pins as I have then you should be able to use my firmware. Install Circuit Python onto the controller first and then copy all the unzipped files from 'firmware' onto the drive.
This is how I handwired the Matrix. Excuse the poor soldering (and out of focus photo), it was my first attempt at handwiring. The second photo shows the controller and LEDs wired up too. I used dupont wires and soldered headers to the controller so they can easily be removed. Depending on the cutting of the acrylic you might find some of the standoffs tight to push through. Don't force them through. I used a small round file useful just to very slightly widen a couple of holes. The small round file from Draper 'Soft Grip Needle File Set, 140mm (6 Piece) (83982)' was the perfect size. There is a PCB by ShrimpedKeyboard that uses an external pro micro style RP2040 controller. This PCB is untested.


