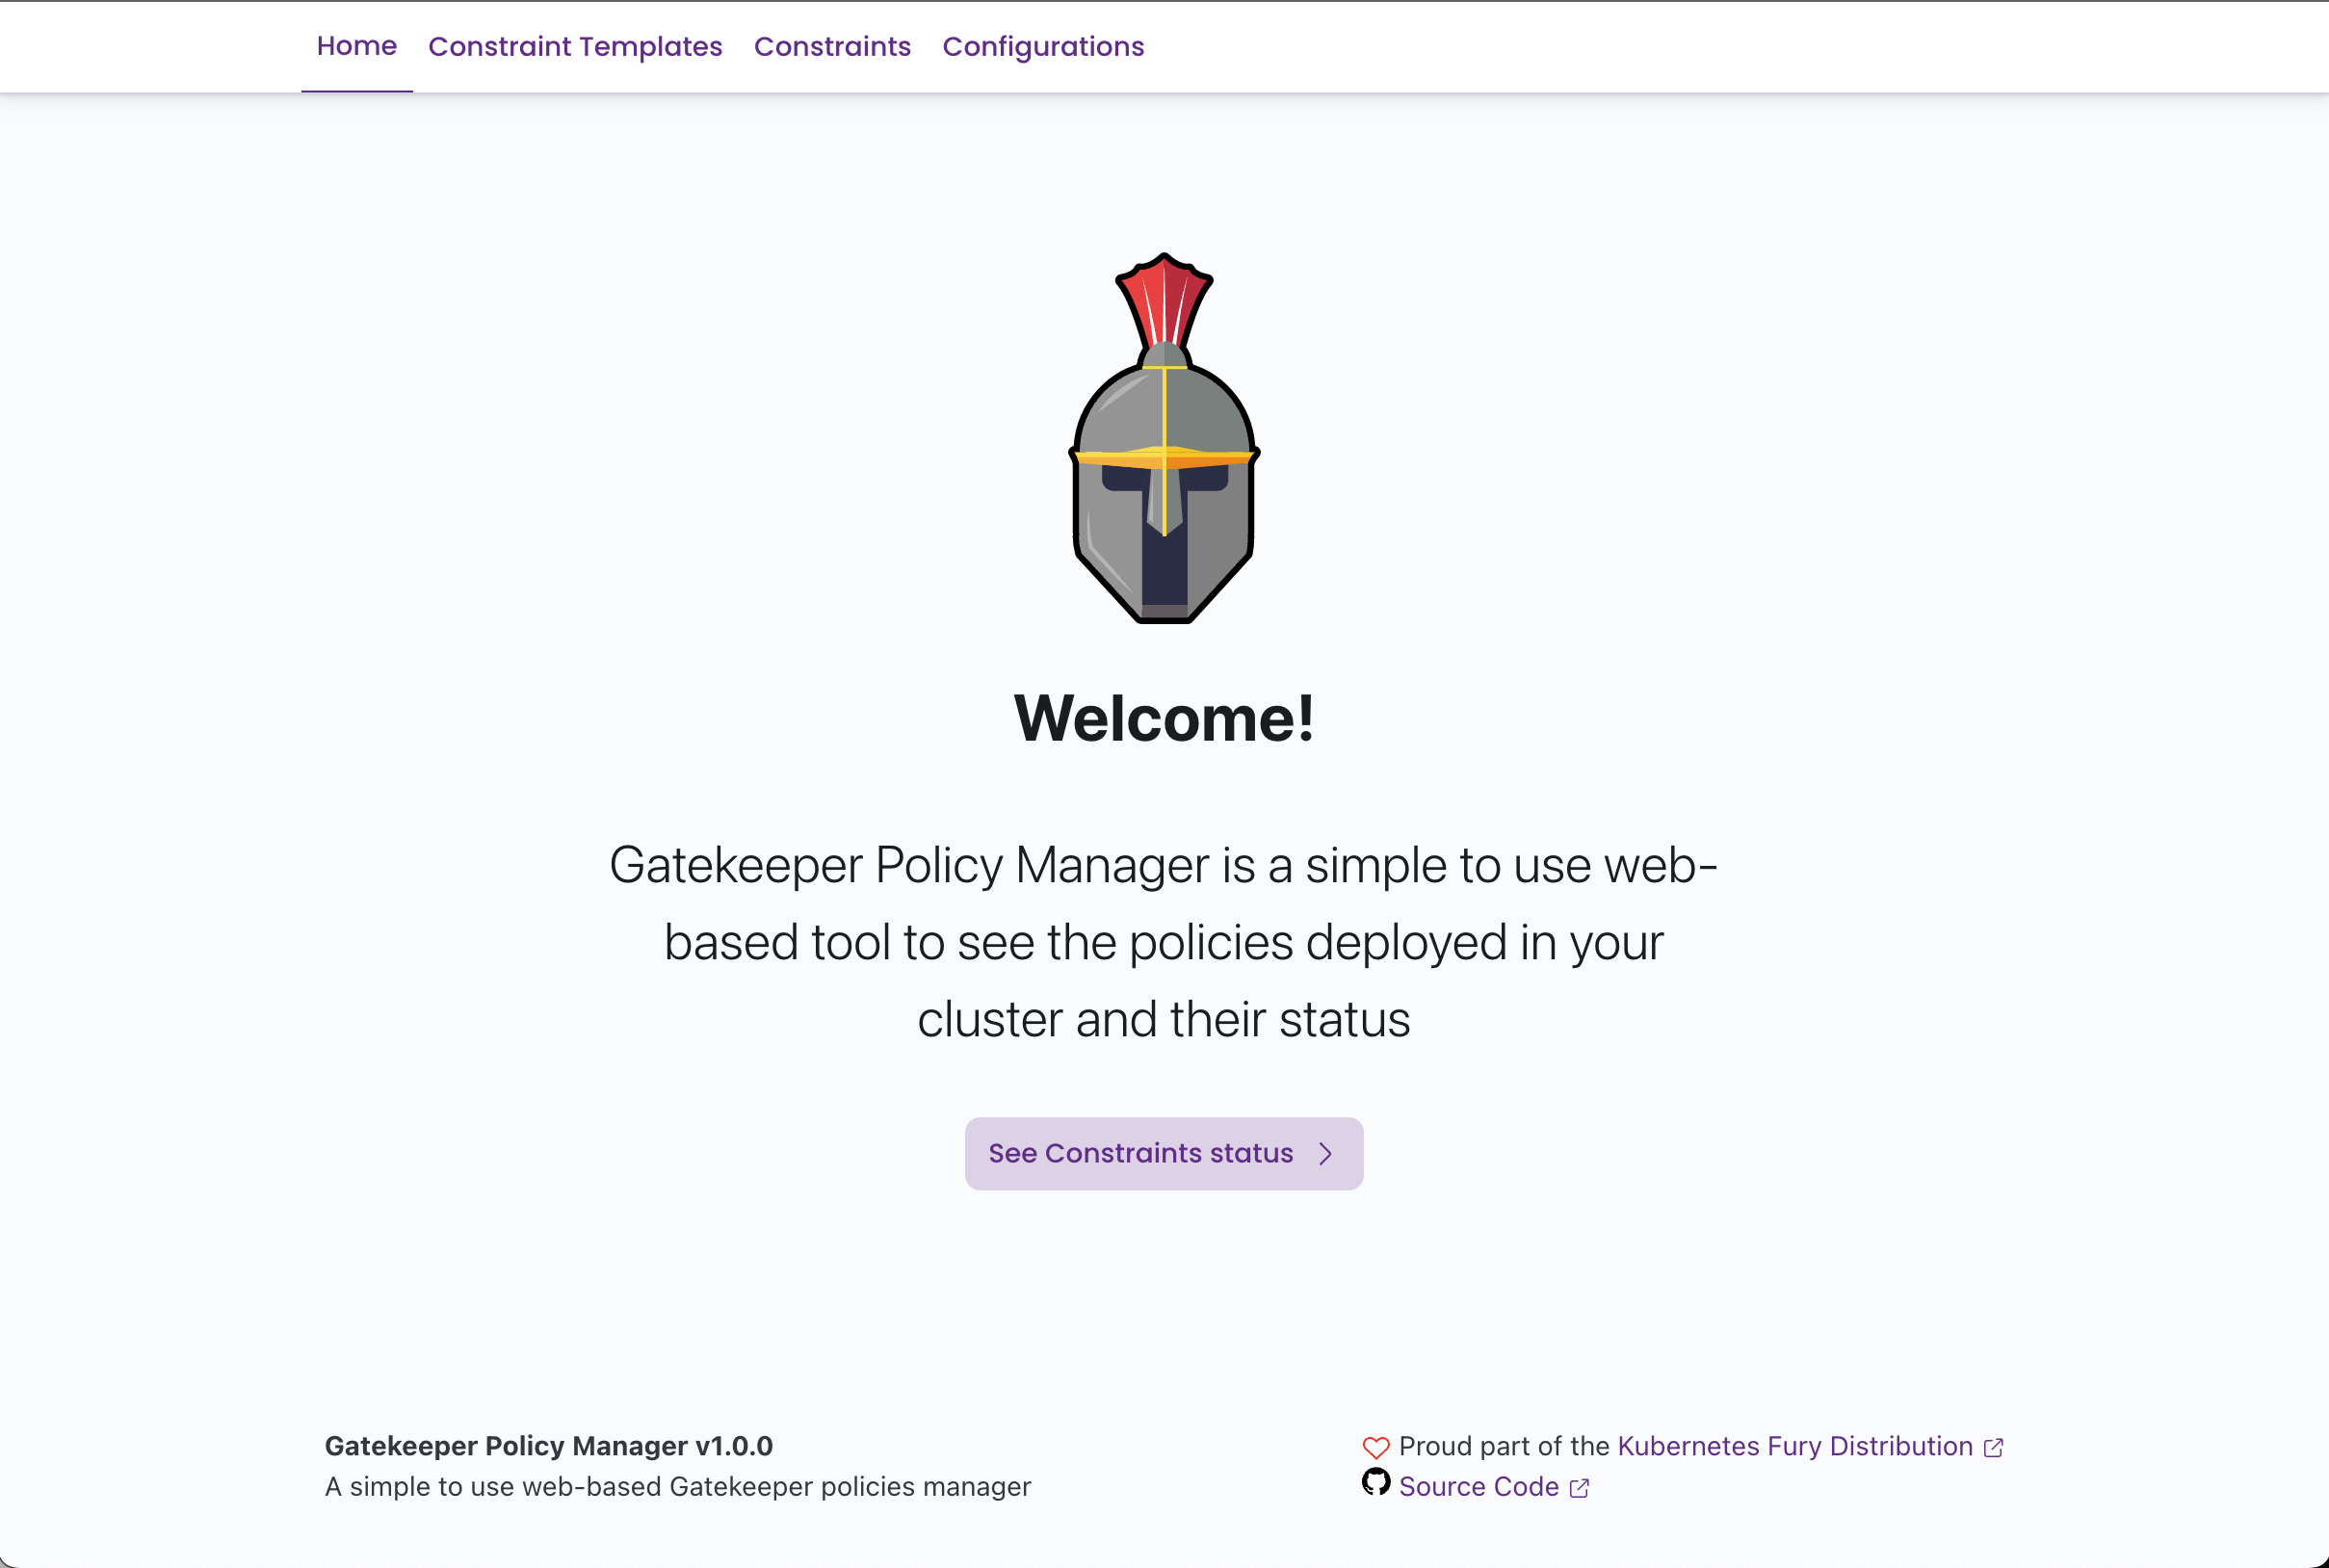
Gatekeeper Policy Manager is a simple read-only web UI for viewing OPA Gatekeeper policies' status in a Kubernetes Cluster.
The target Kubernetes Cluster can be the same where GPM is running or some other remote cluster(s) using a kubeconfig file. You can also run GPM locally in a client machine and connect to a remote cluster.
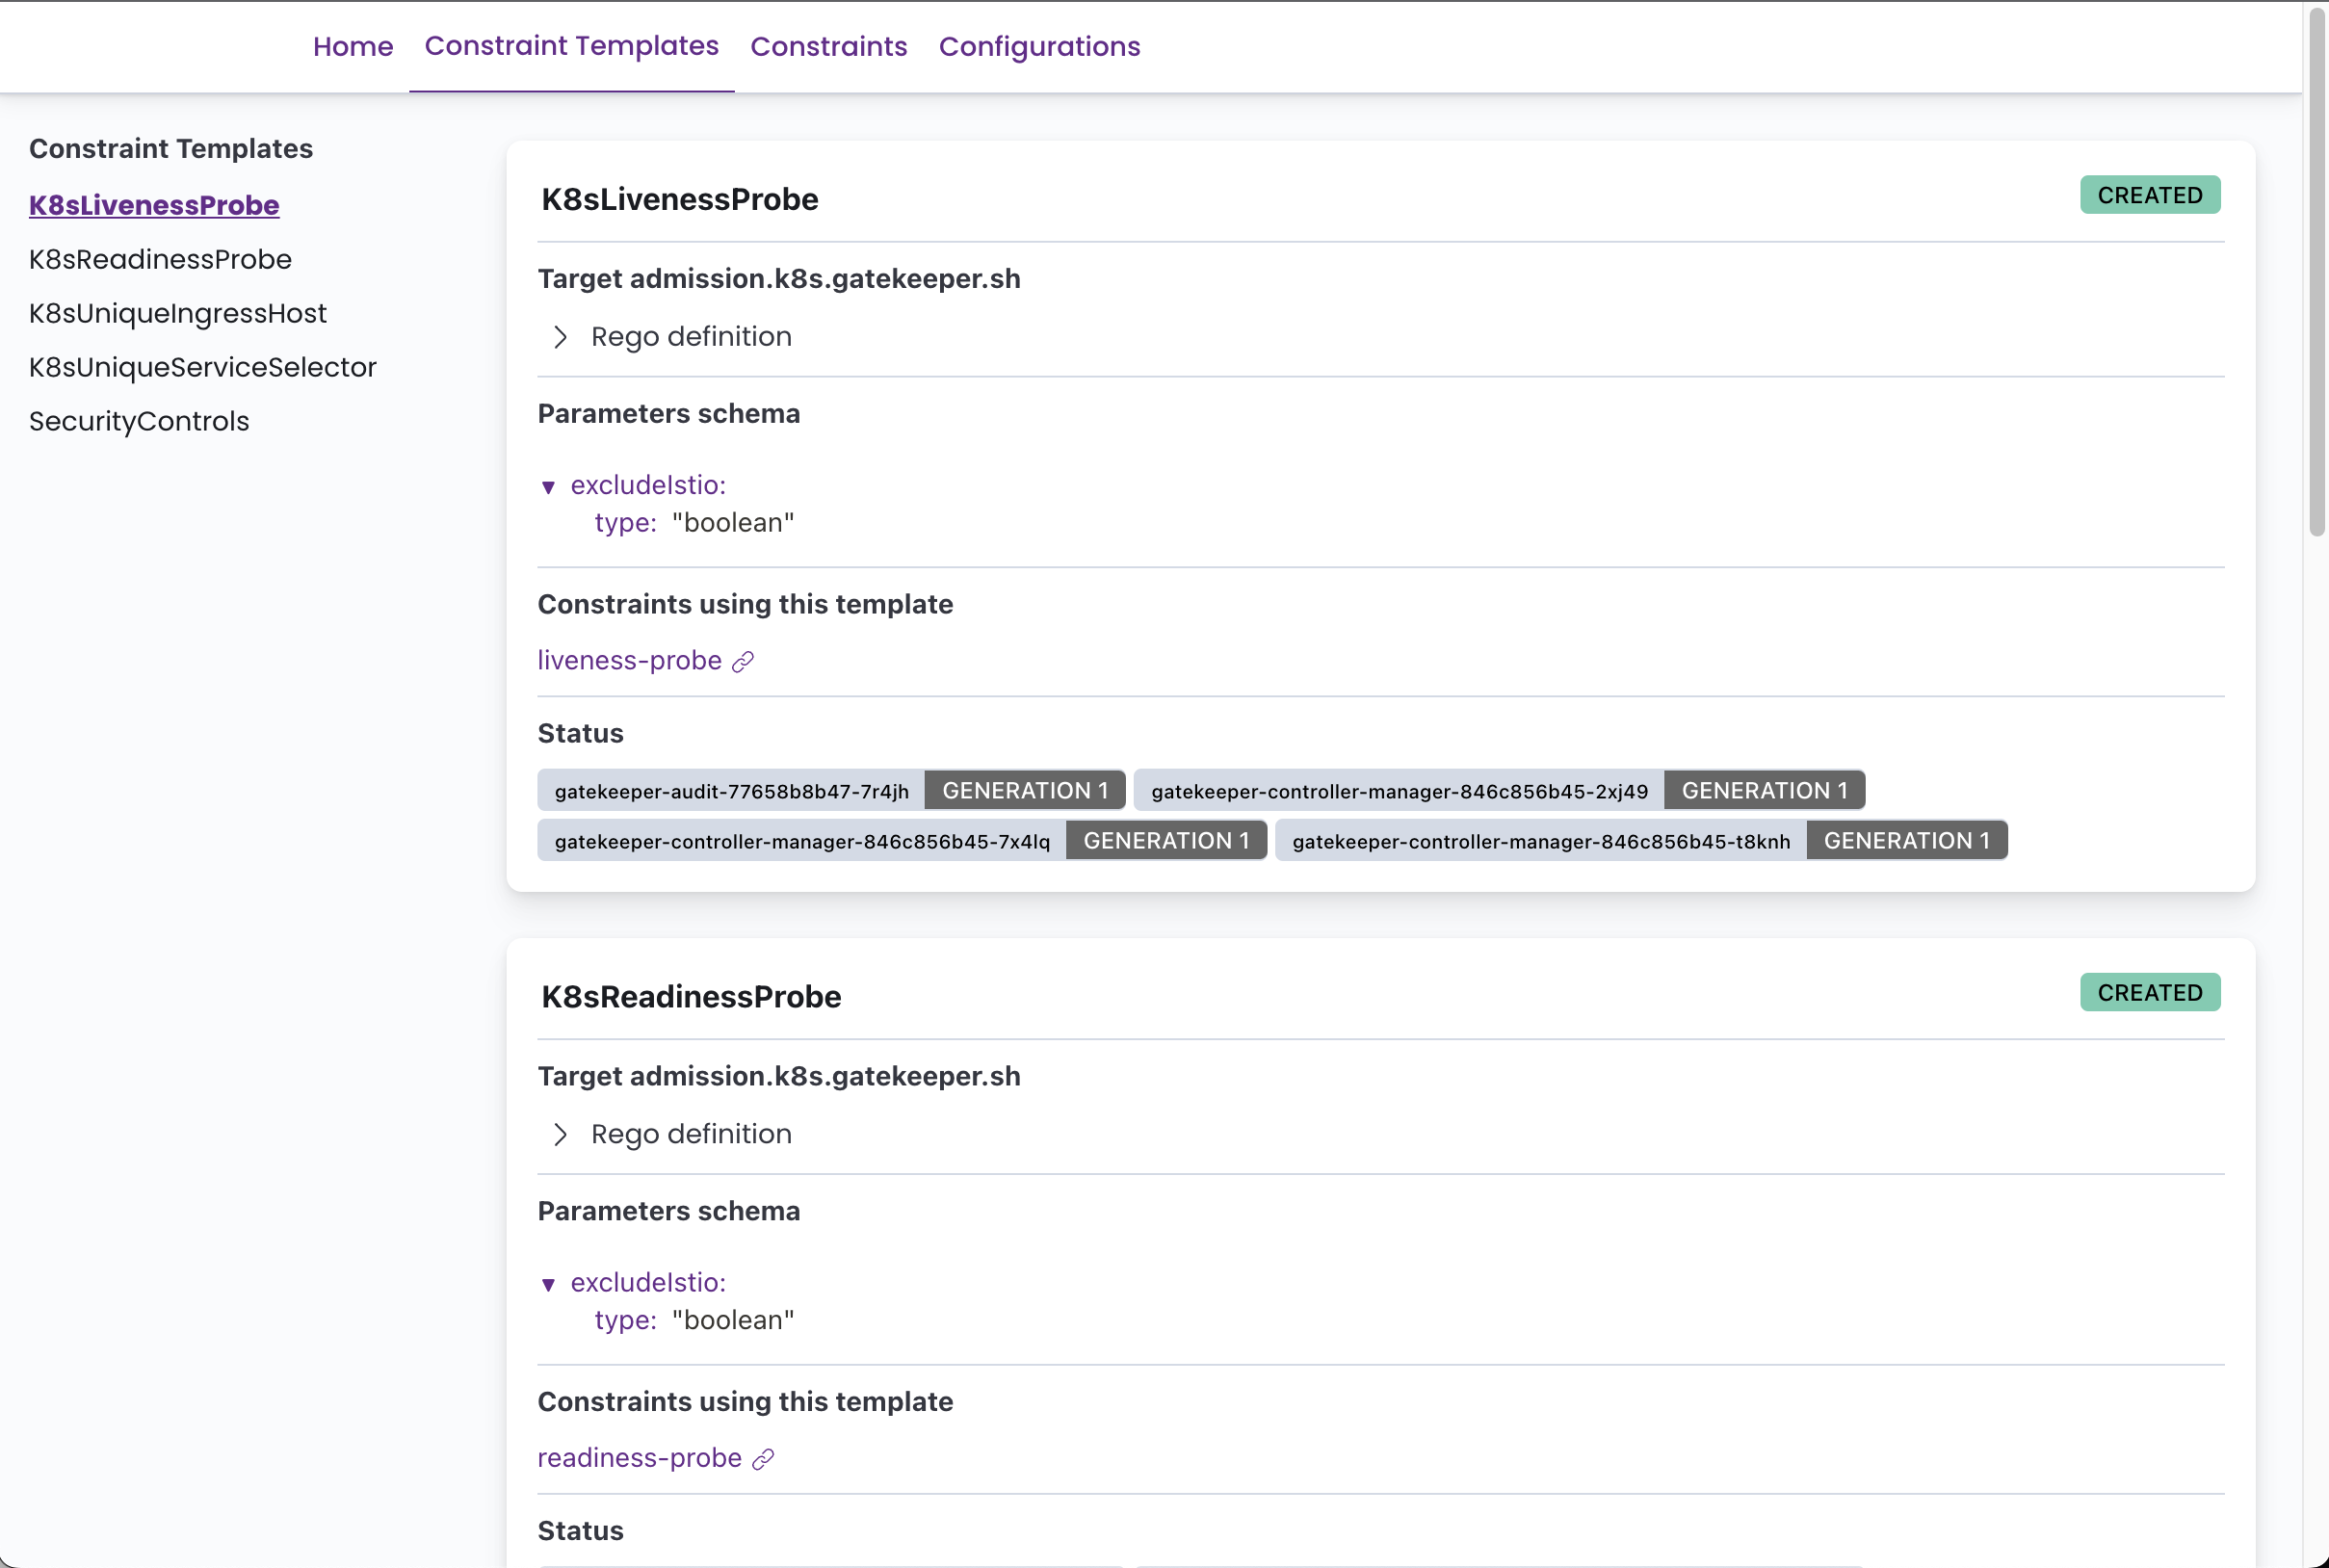
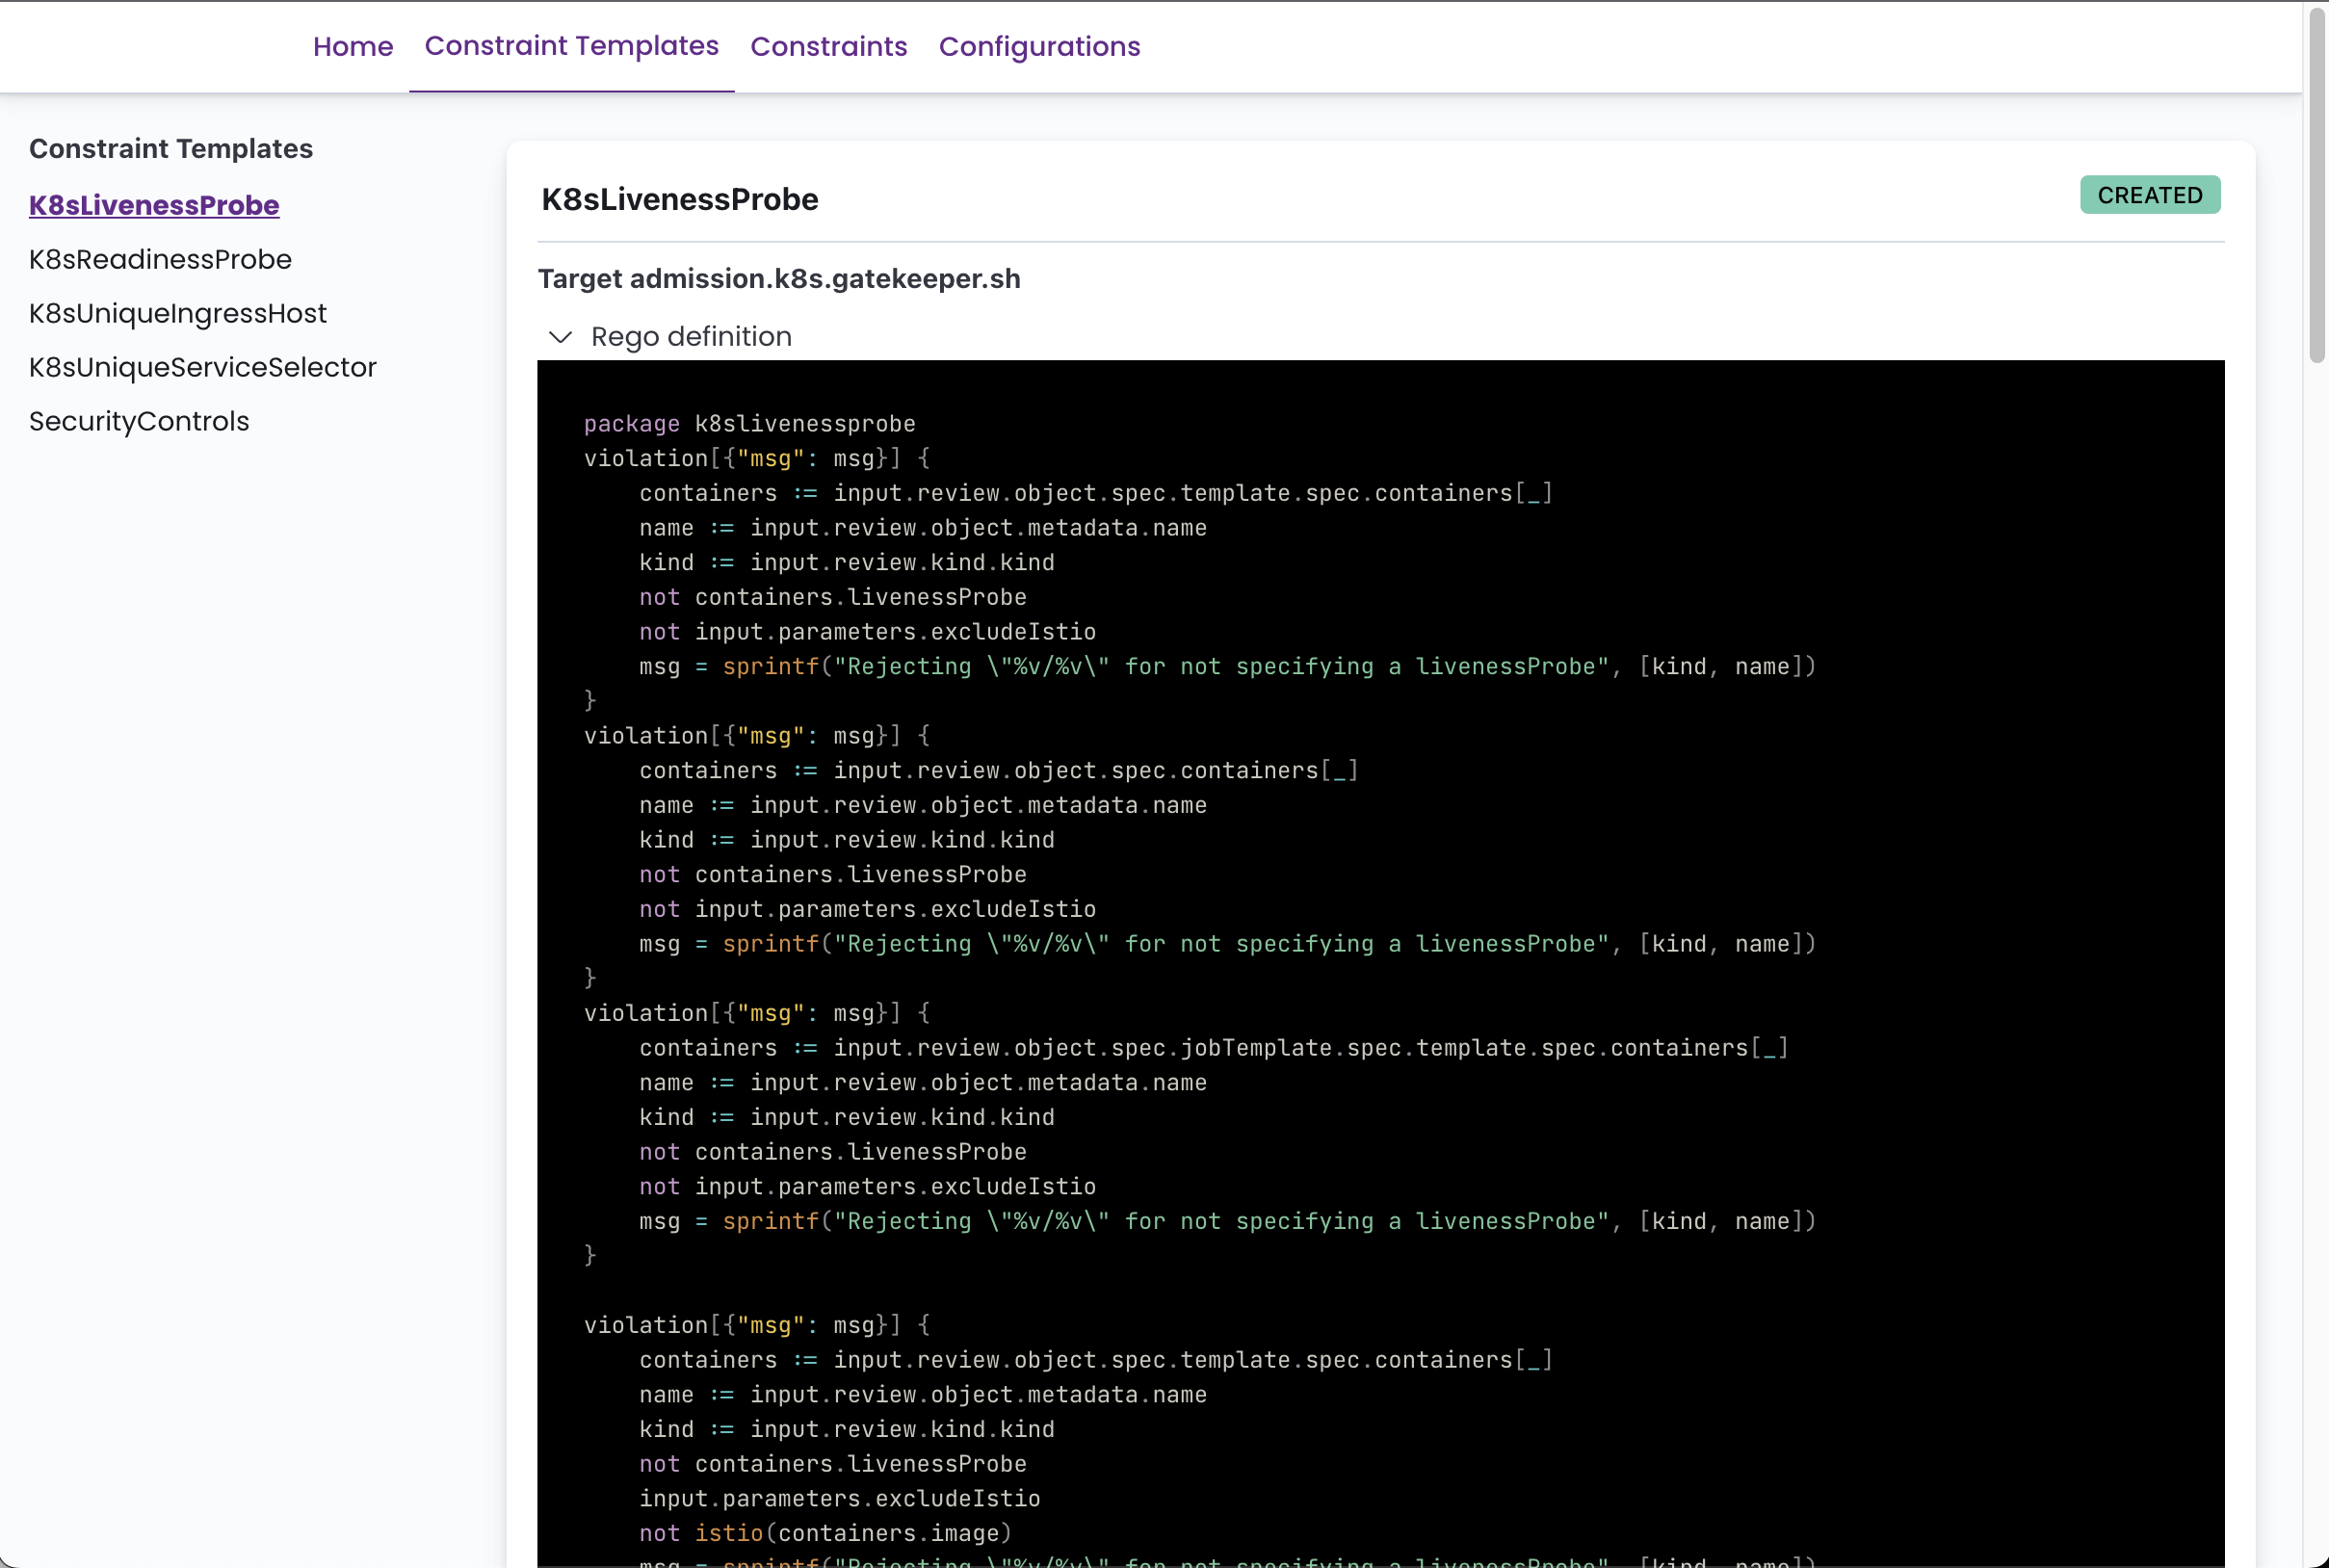
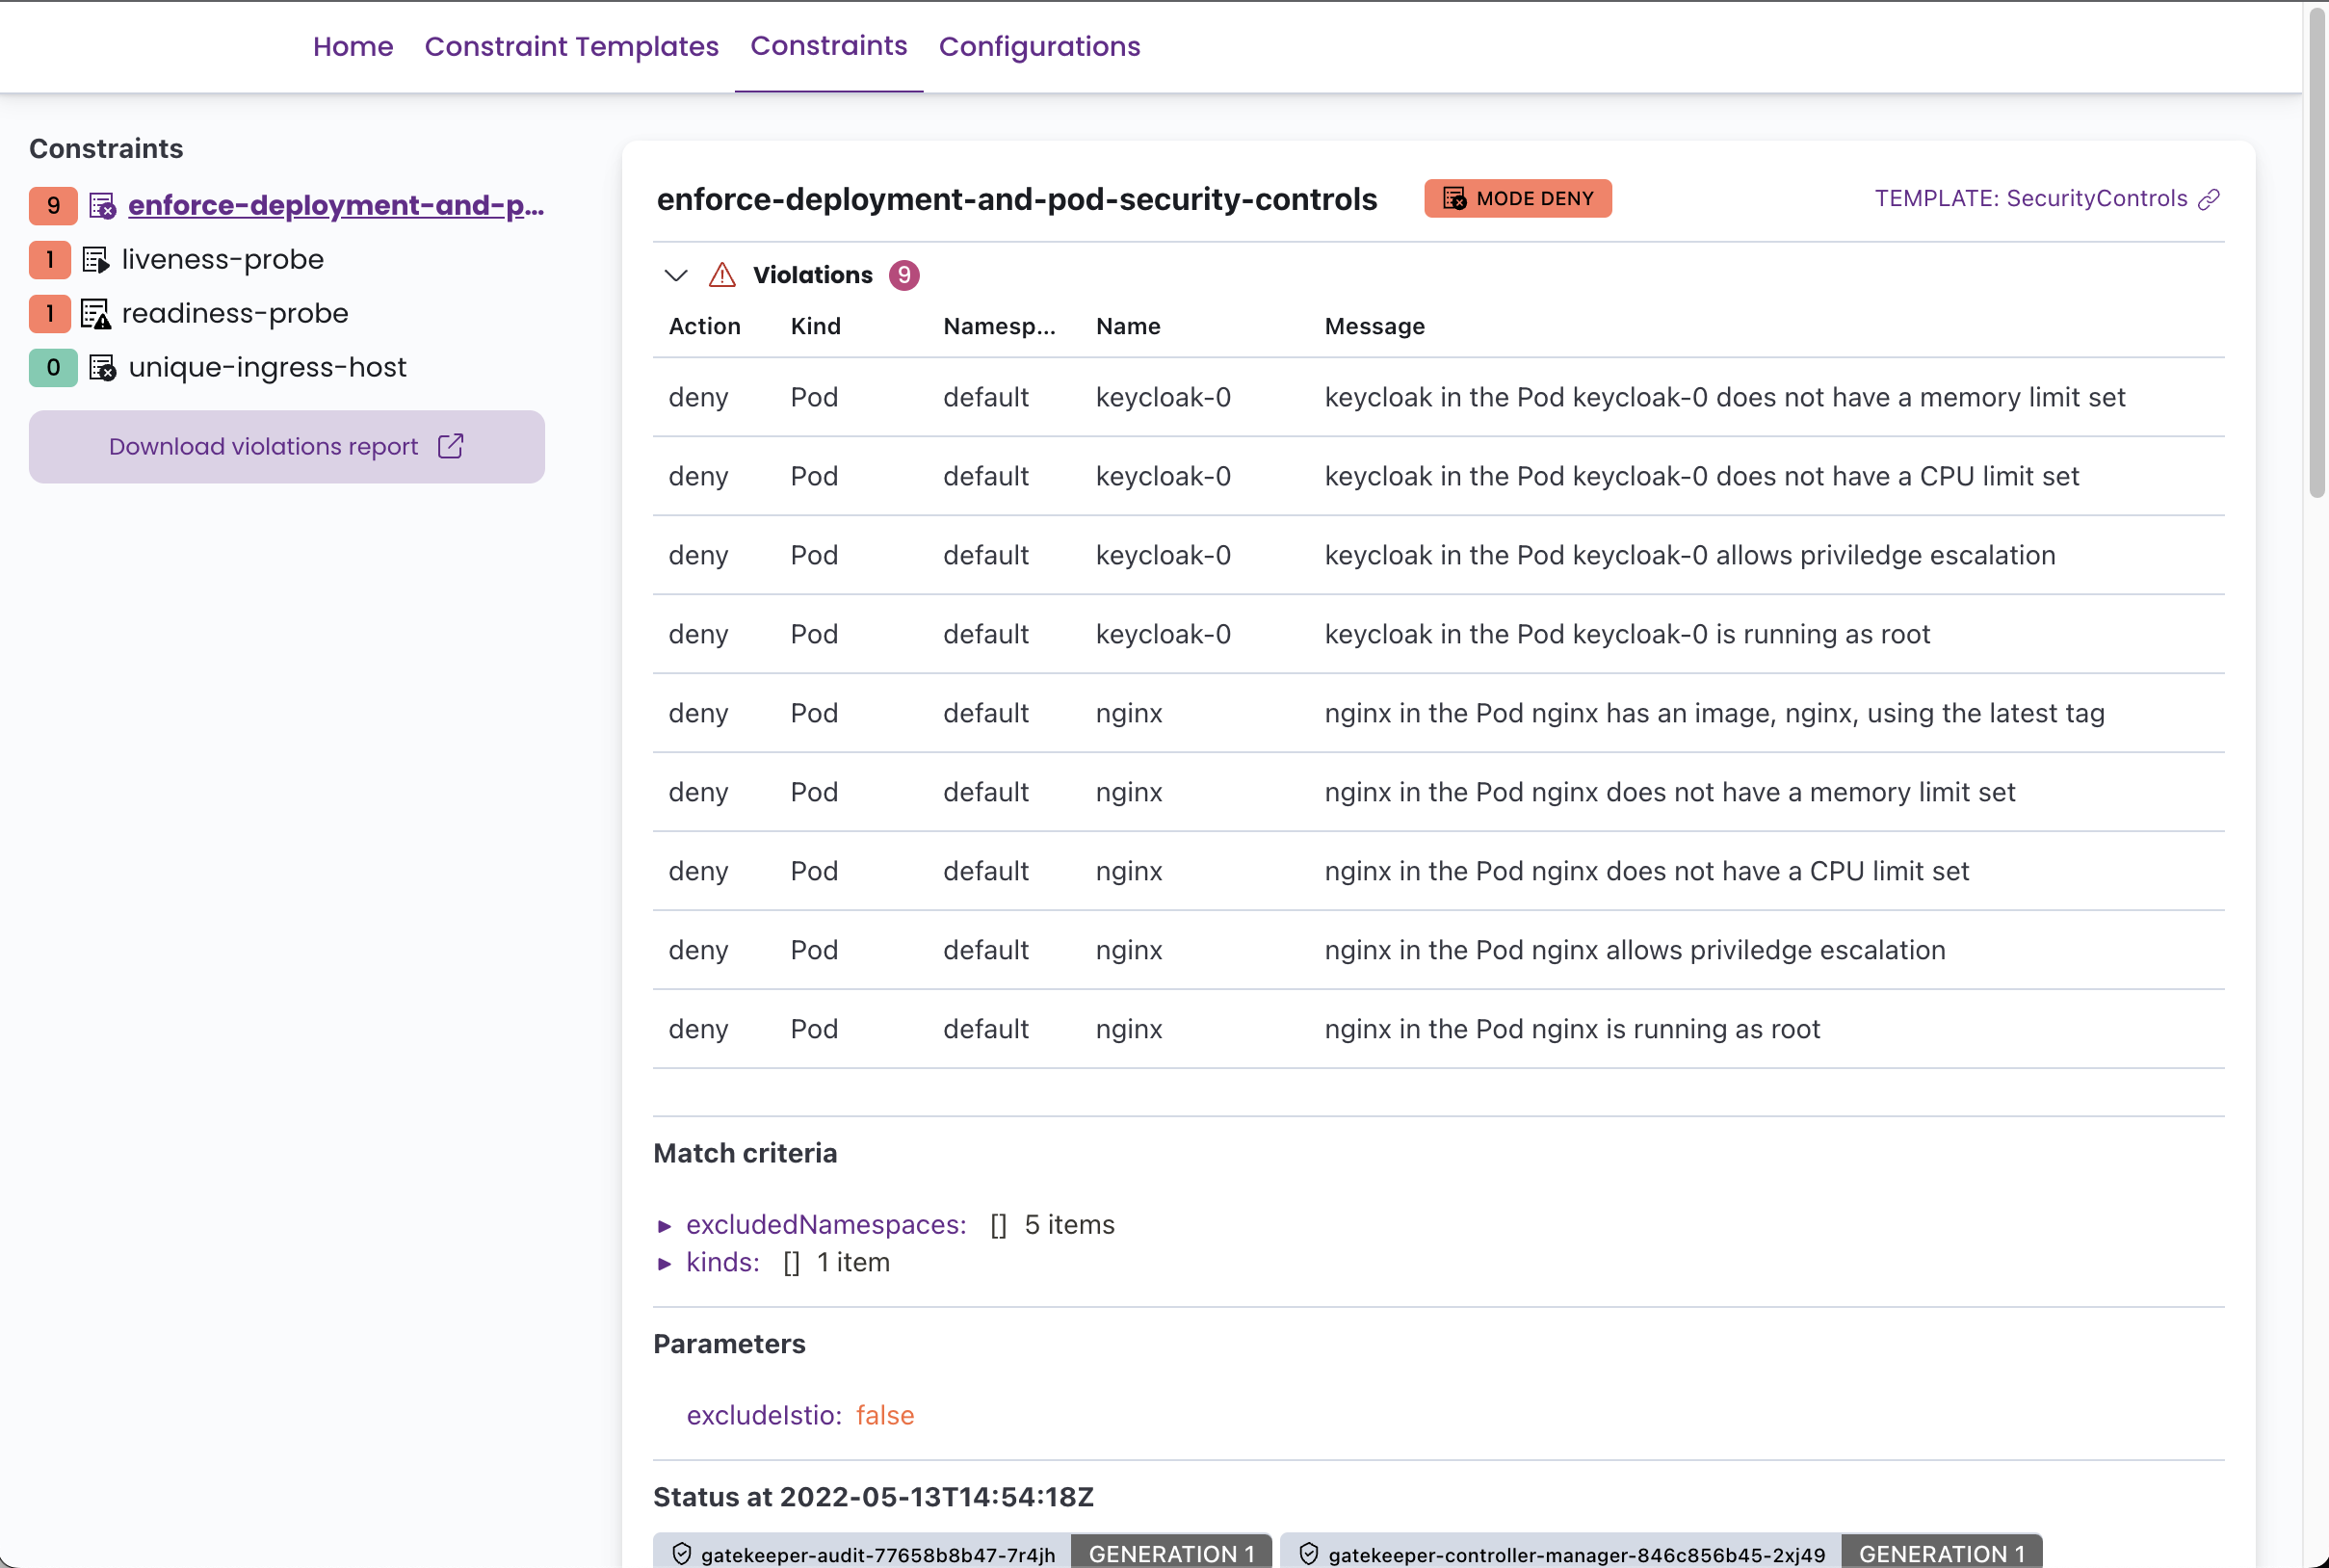
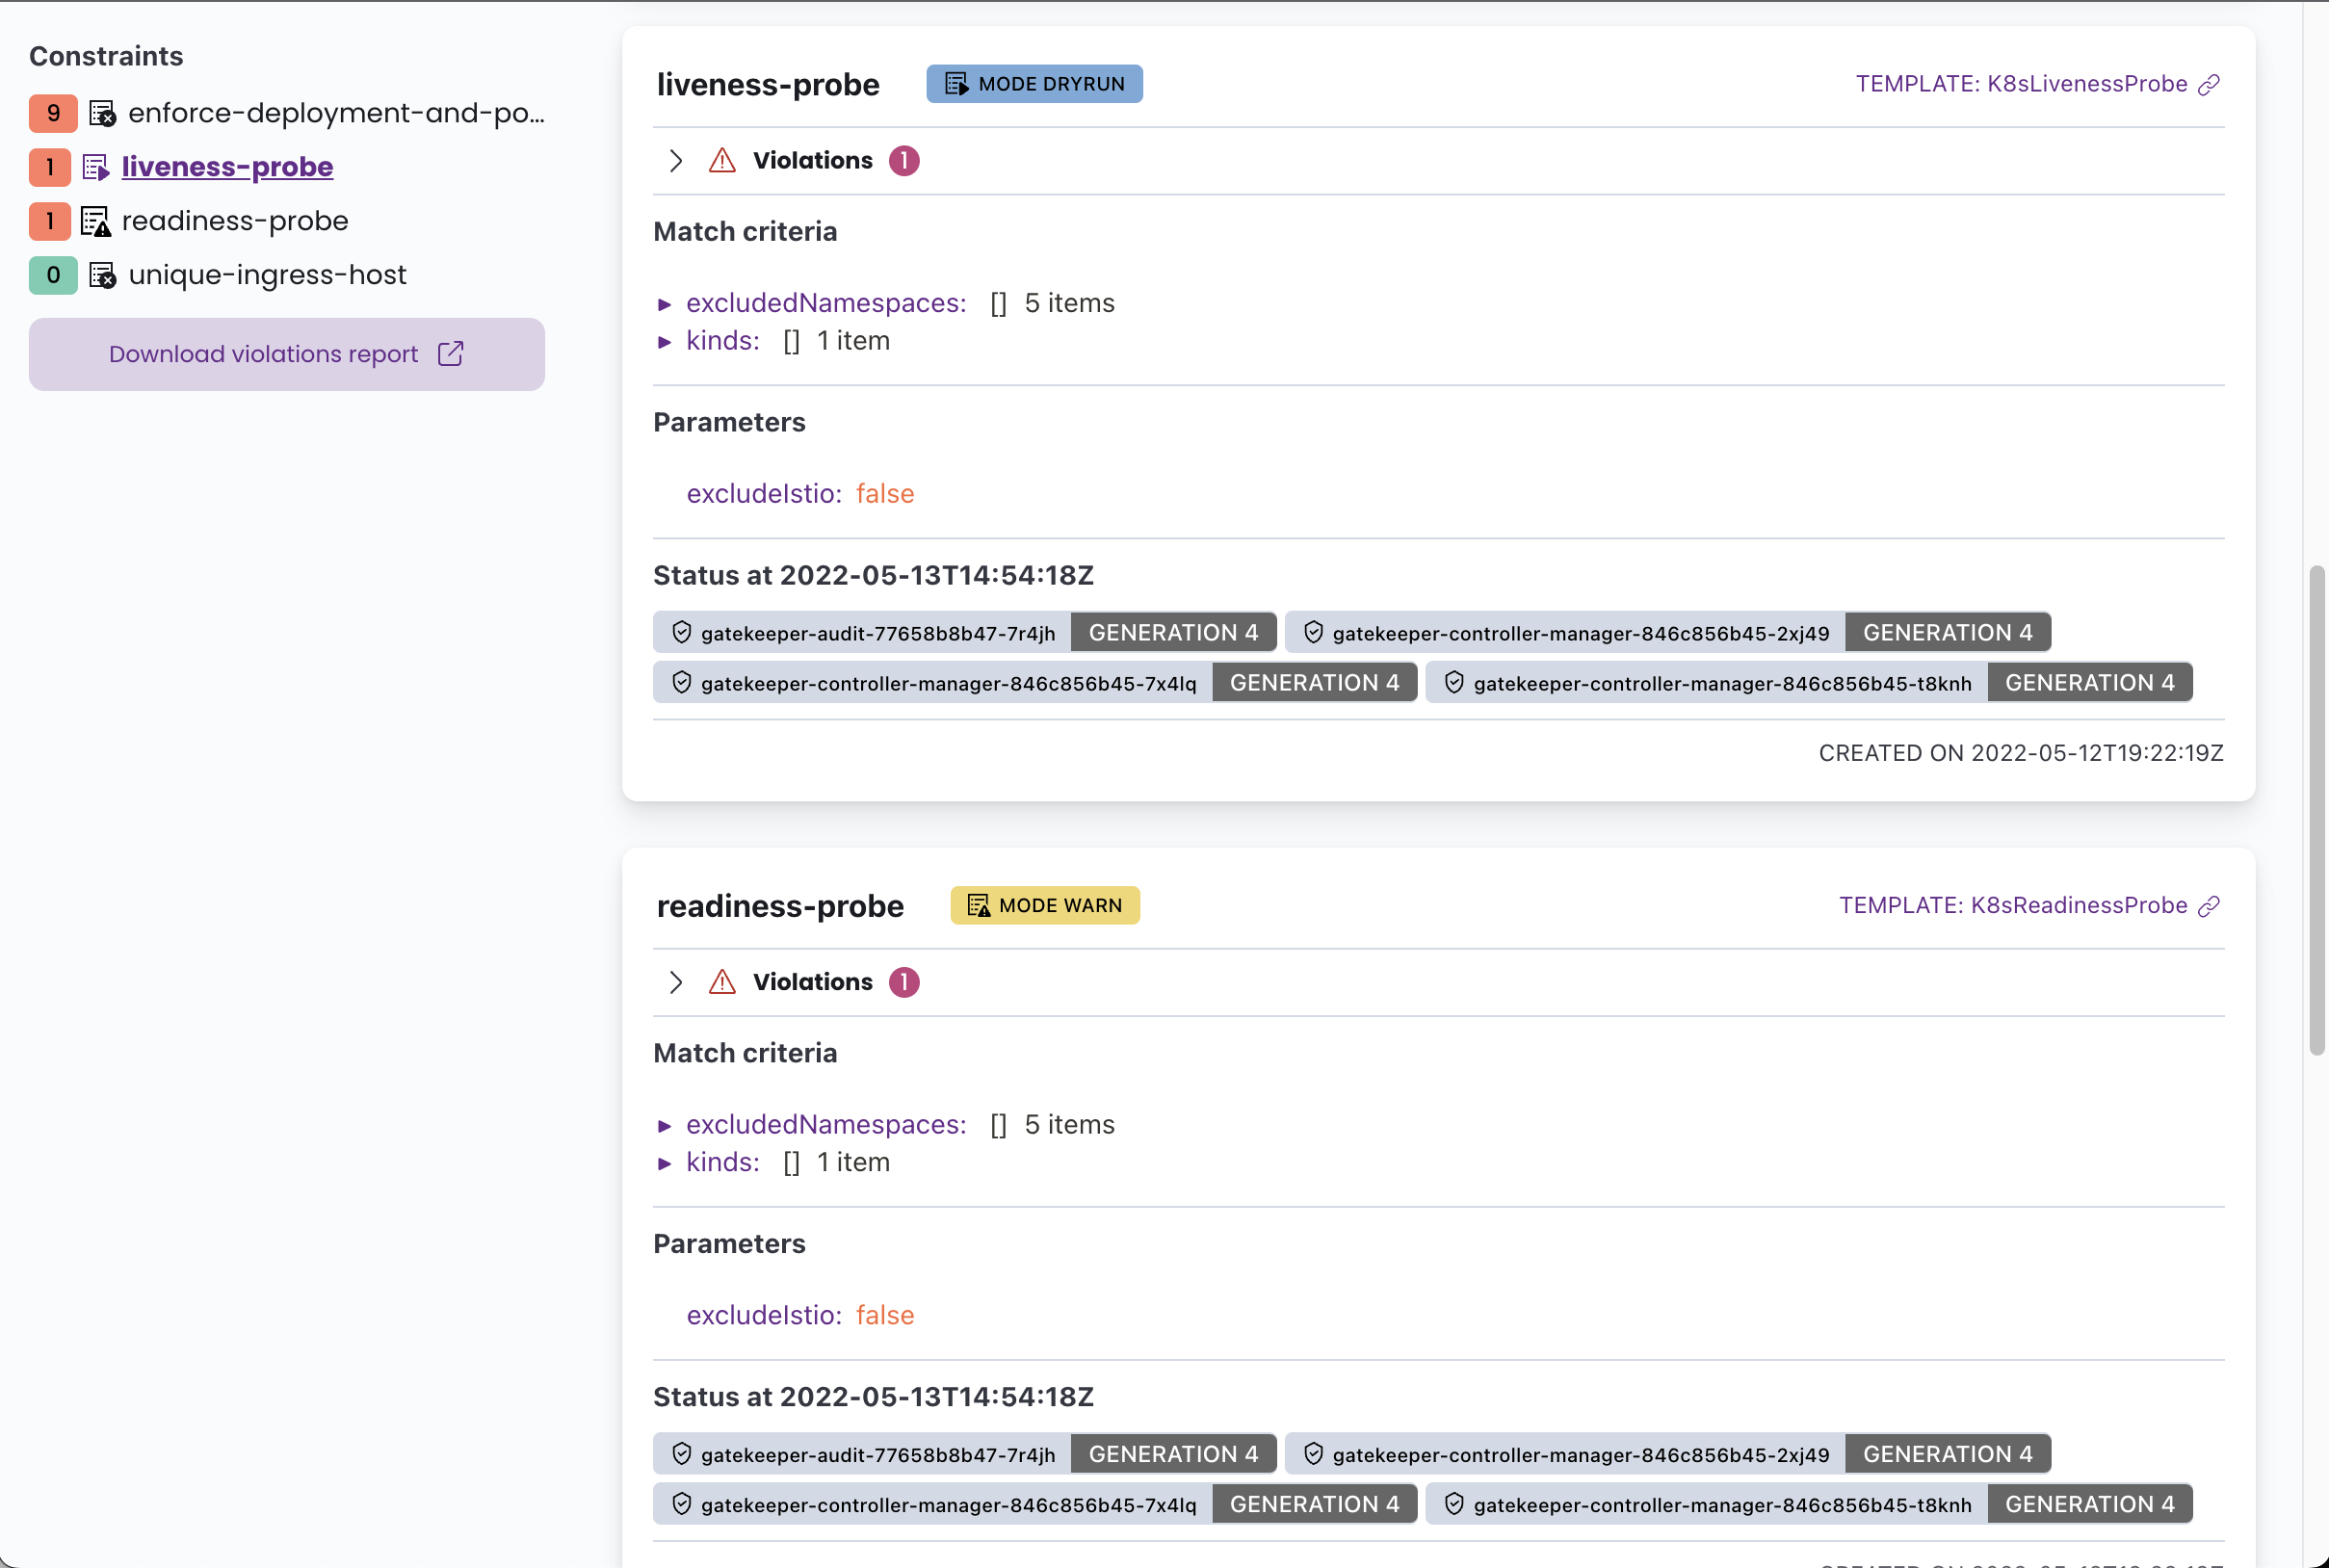
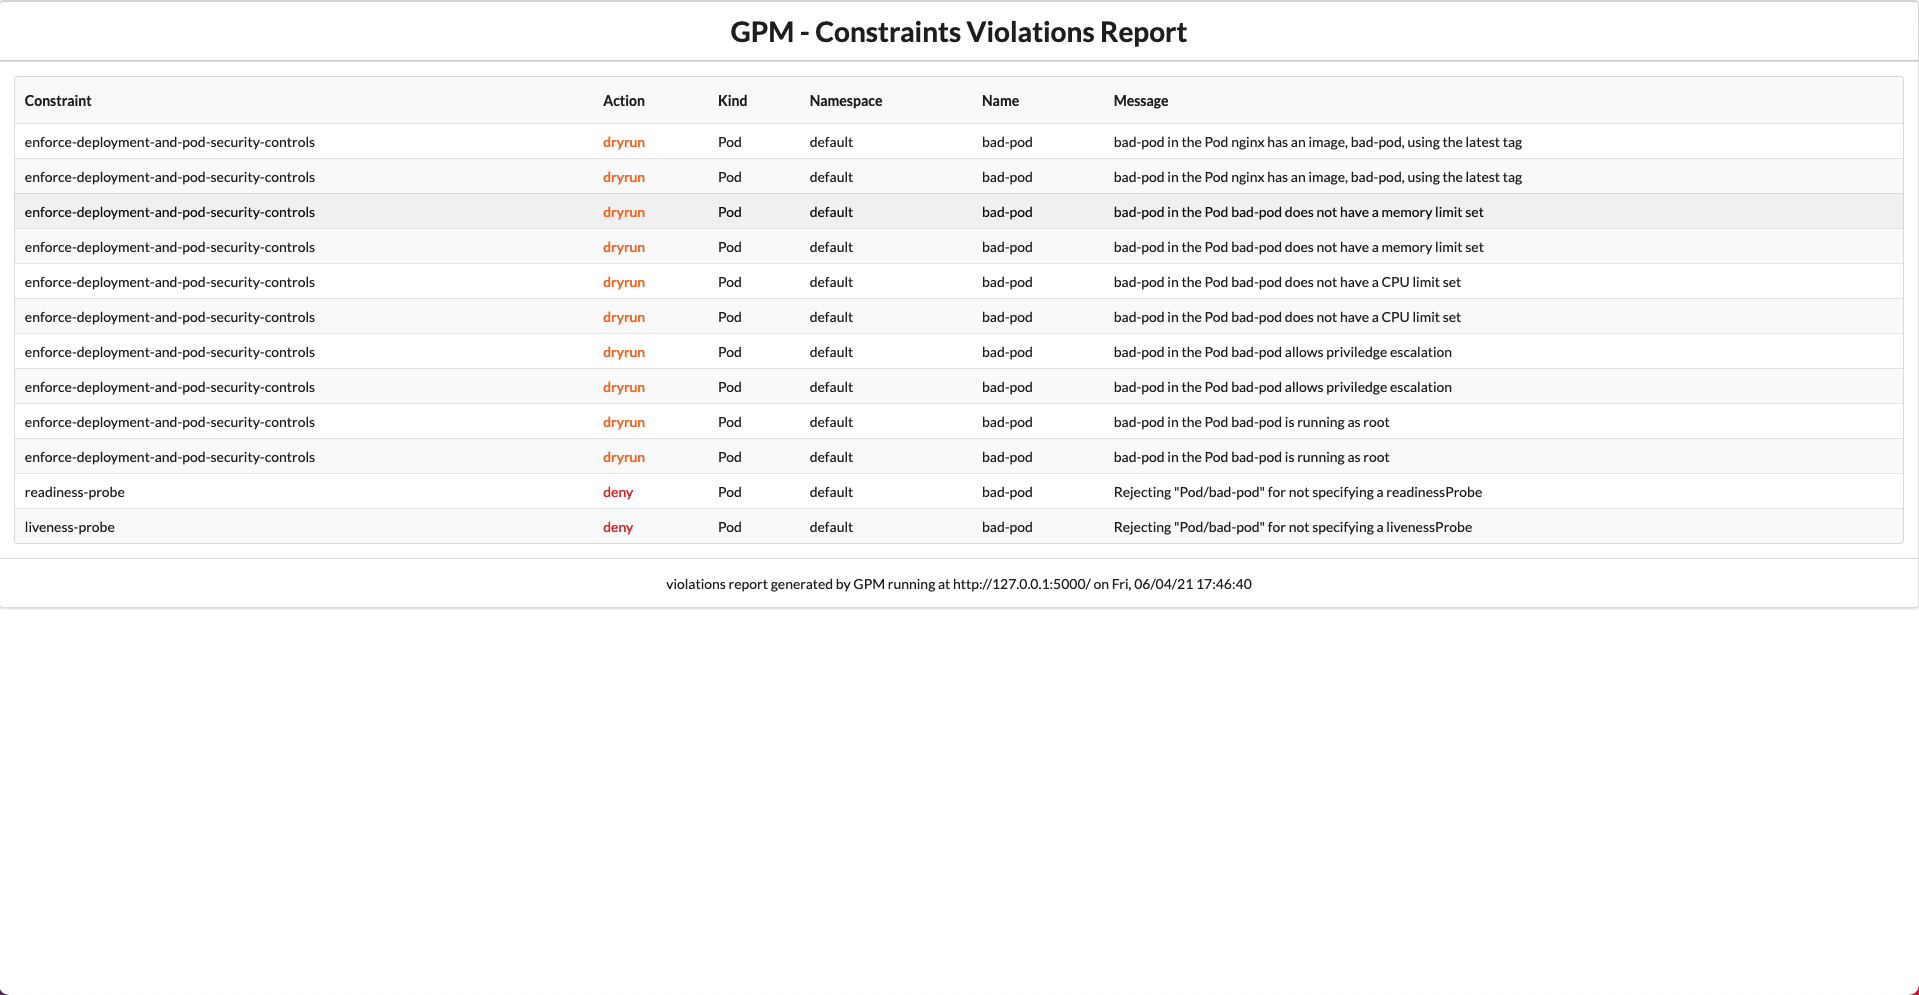
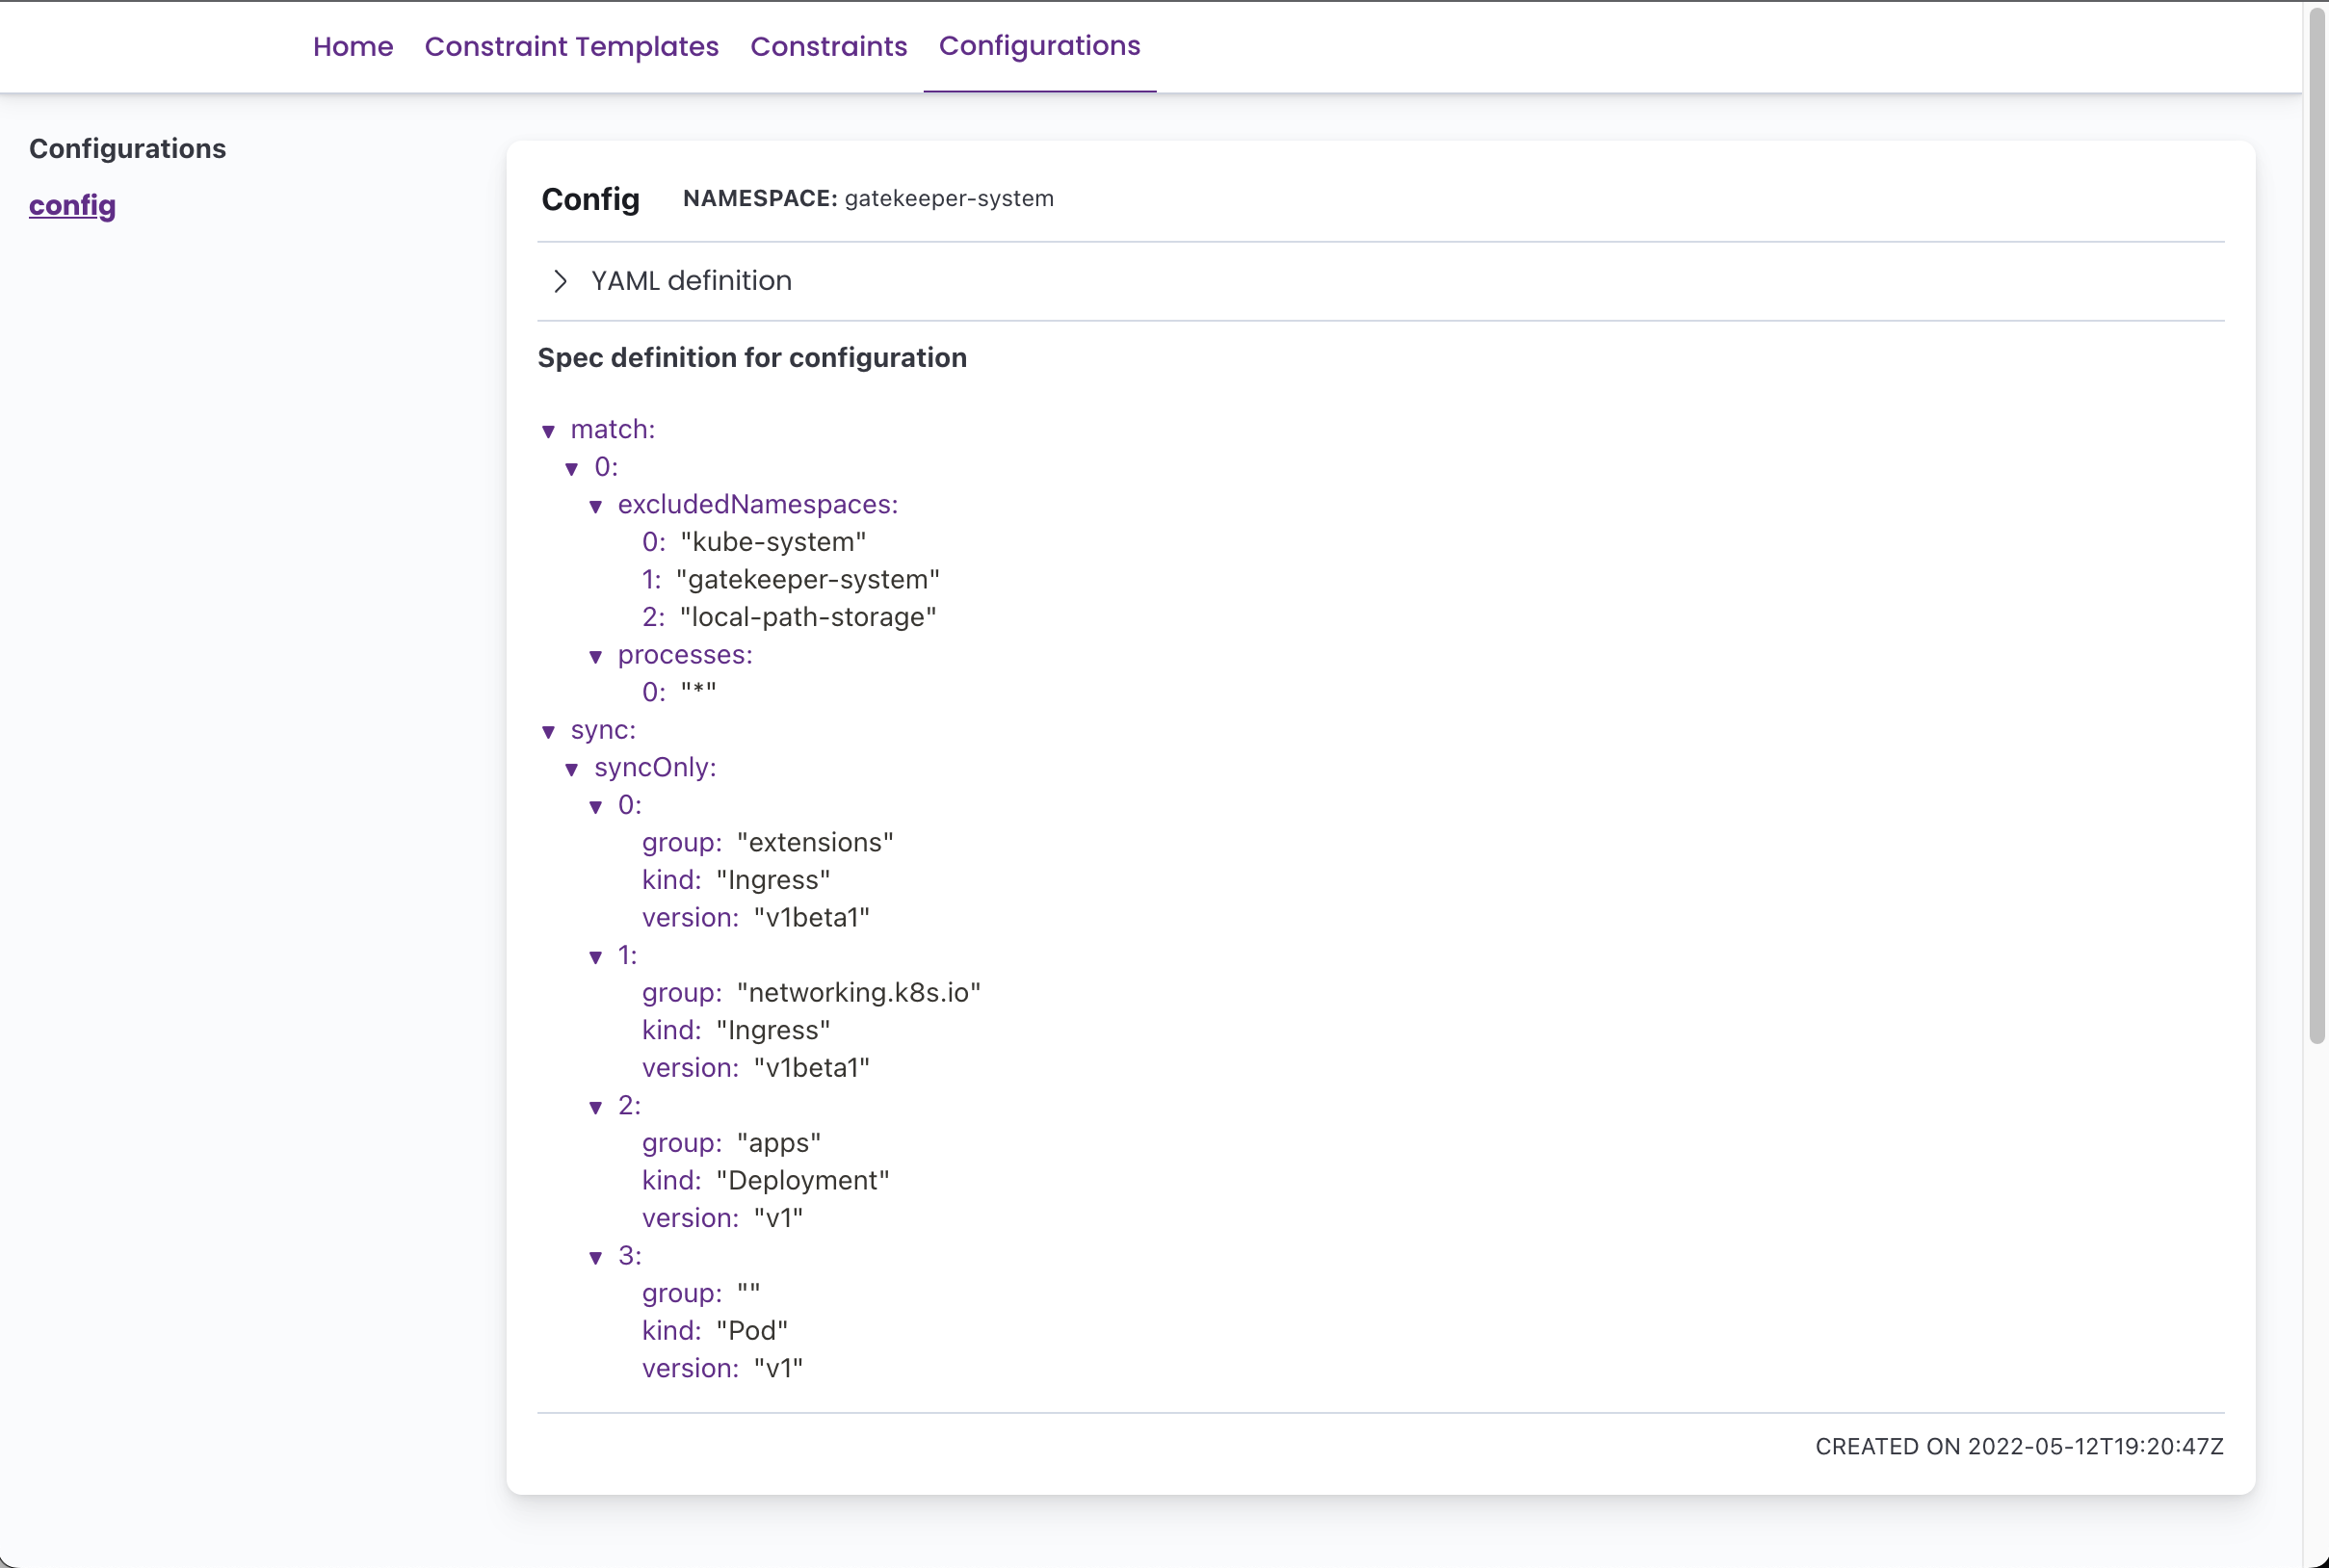
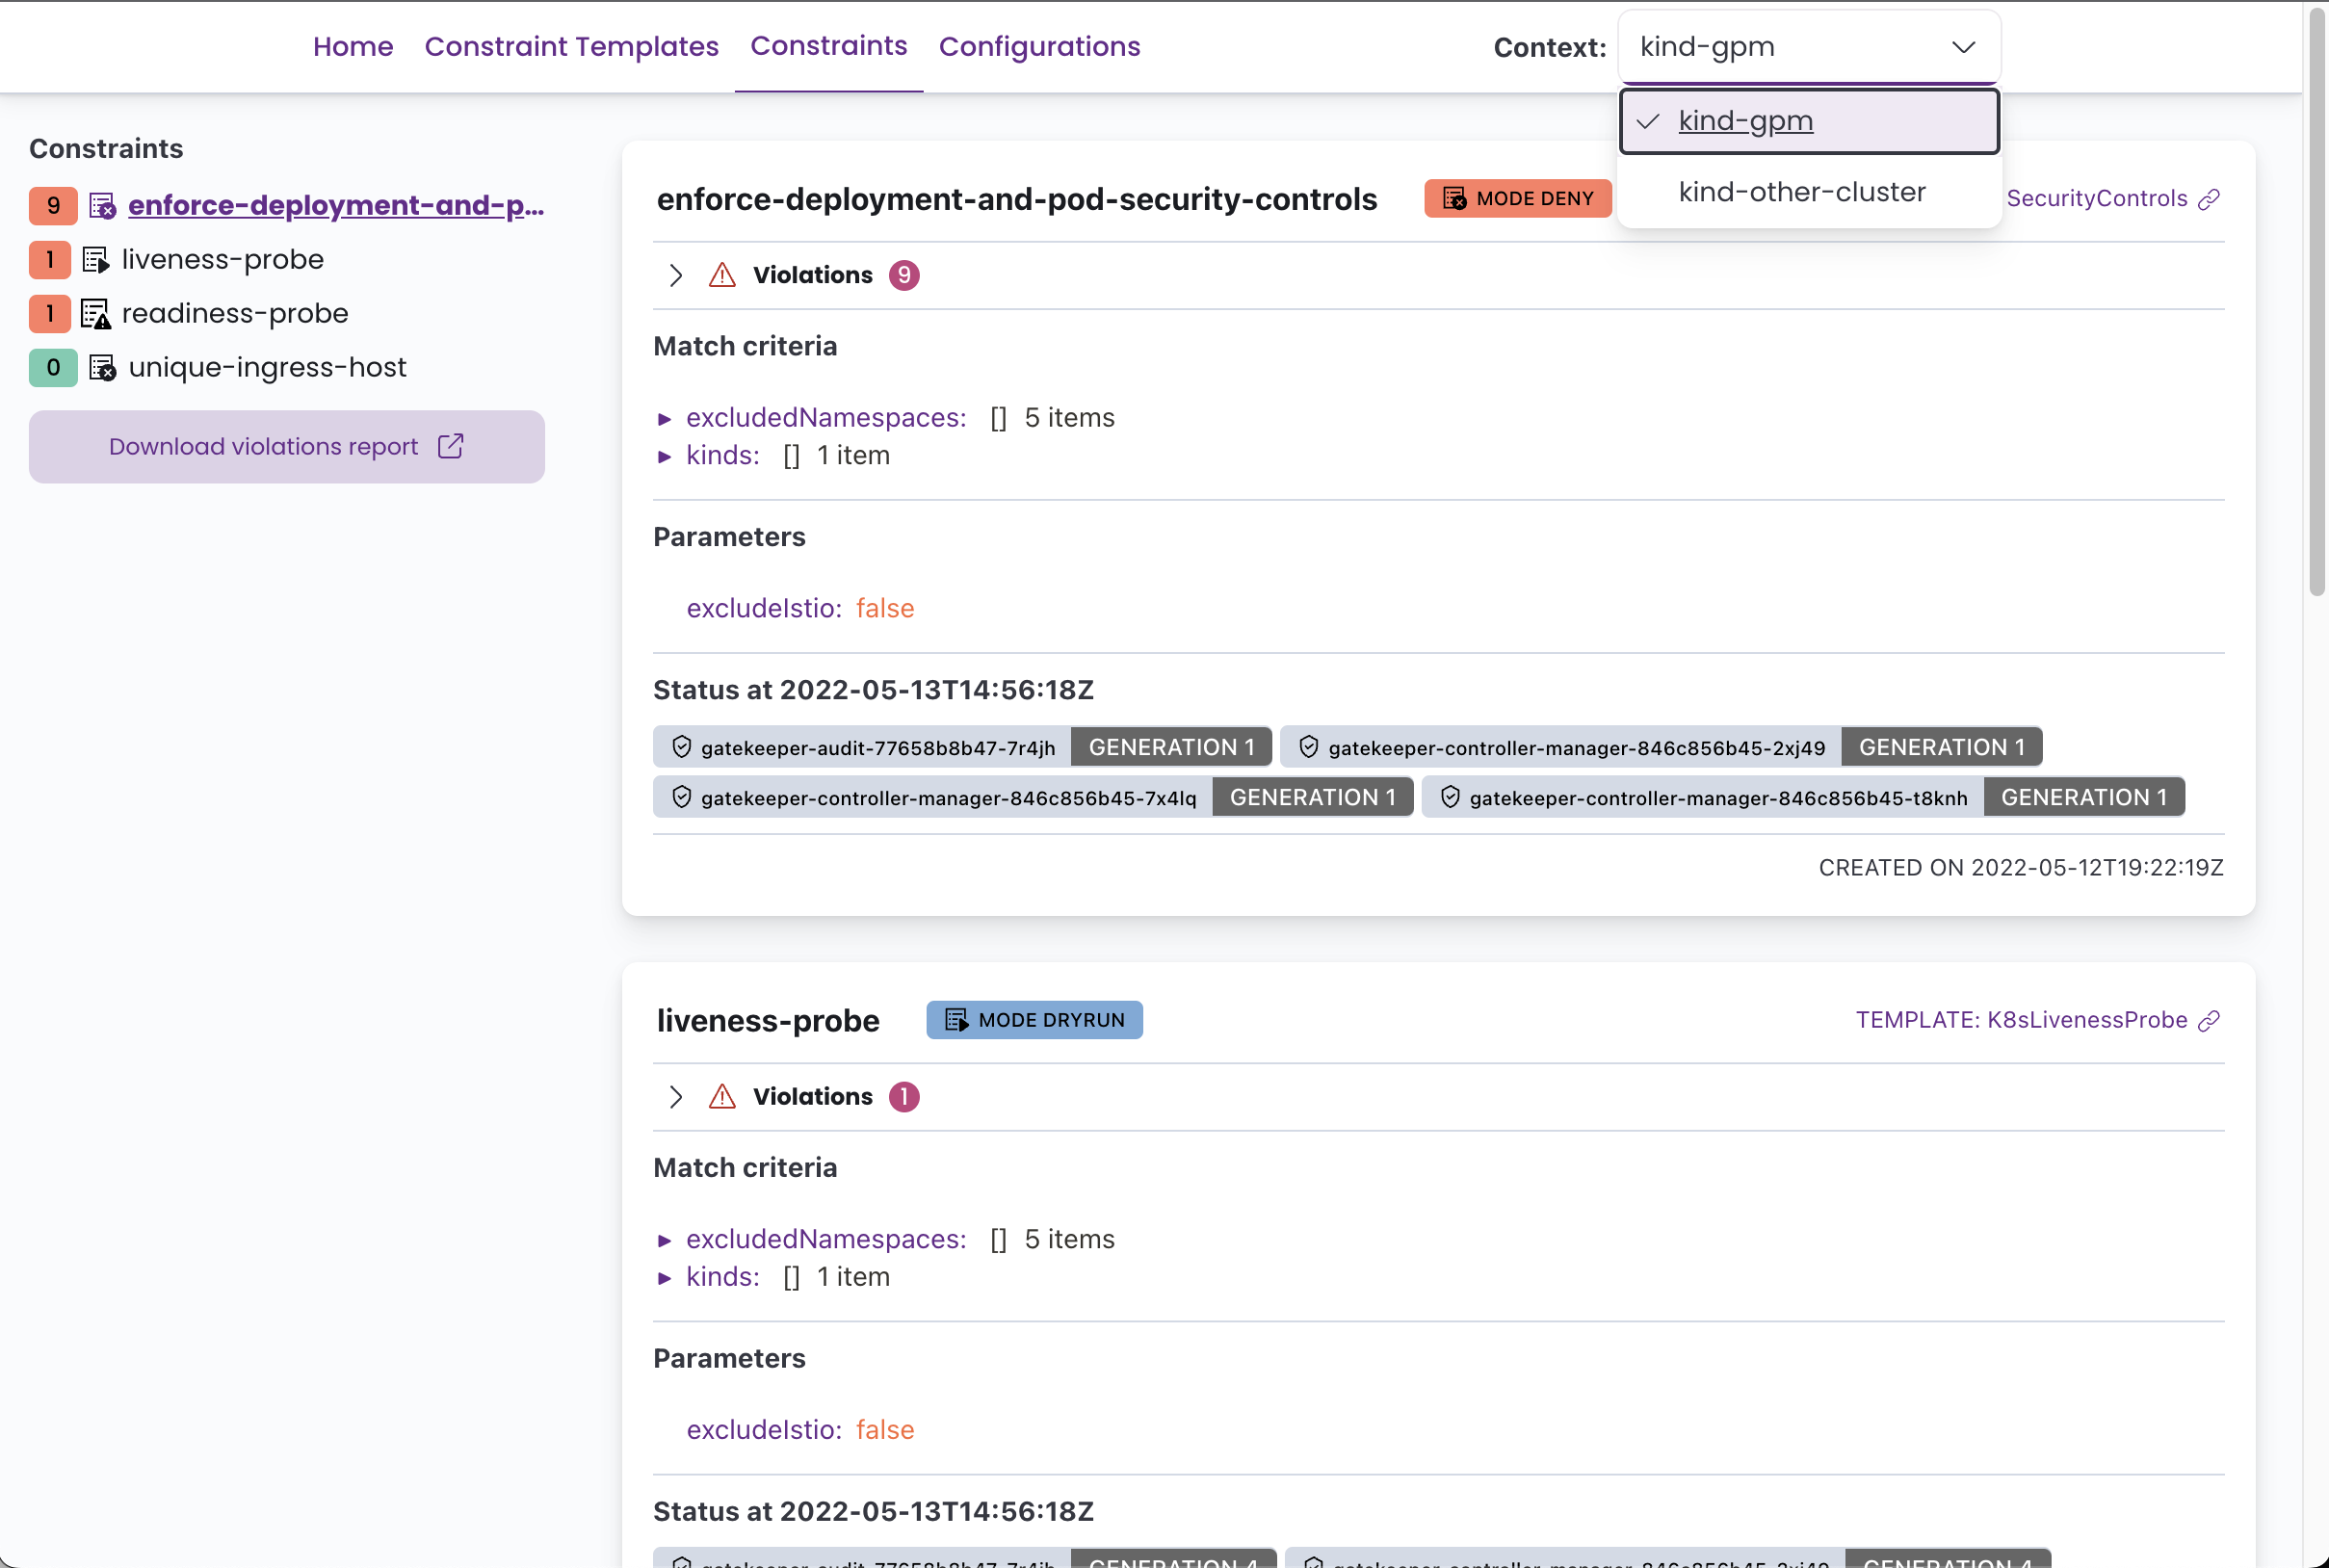
GPM can display all the defined Constraint Templates with their rego code, all the Gatekeeper Configuration CRDs, and all the Constraints with their current status, violations, enforcement action, matches definitions, etc.
You can see some screenshots below.
You'll need OPA Gatekeeper running in your cluster and at least some constraint templates and constraints defined to take advantage of this tool.
ℹ You can easily deploy Gatekeeper to your cluster using the (also open source) Fury Kubernetes OPA module.
To deploy Gatekeeper Policy Manager to your cluster, apply the provided kustomization file running the following command:
kubectl apply -k .By default, this will create a deployment and a service both with the name gatekeper-policy-manager in the gatekeeper-system namespace. We invite you to take a look into the kustomization.yaml file to do further configuration.
The app can be run as a POD in a Kubernetes cluster or locally with a
kubeconfigfile. It will try its best to autodetect the correct configuration.
Once you've deployed the application, if you haven't set up an ingress, you can access the web-UI using port-forward:
kubectl -n gatekeeper-system port-forward svc/gatekeeper-policy-manager 8080:80Then access it with your browser on: http://127.0.0.1:8080
It is also possible to deploy GPM using the provided Helm Chart.
First create a values file, for example my-values.yaml, with your custom values for the release. See the chart's readme and the default values.yaml for more information.
Then, execute:
helm repo add gpm https://sighupio.github.io/gatekeeper-policy-manager
helm upgrade --install --namespace gatekeeper-system --set image.tag=v1.0.2 --values my-values.yaml gpm/gatekeeper-policy-managerGPM can also be run locally using docker and a kubeconfig, assuming that the kubeconfig file you want to use is located at ~/.kube/config the command to run GPM locally would be:
docker run -v ~/.kube/config:/home/gpm/.kube/config -p 8080:8080 quay.io/sighup/gatekeeper-policy-manager:v1.0.2Then access it with your browser on: http://127.0.0.1:8080
You can also run the flask app directly, see the development section for further information.
GPM is a stateless application, but it can be configured using environment variables. The possible configurations are:
| Env Var Name | Description | Default |
|---|---|---|
GPM_AUTH_ENABLED |
Enable Authentication current options: "Anonymous", "OIDC" | Anonymous |
GPM_SECRET_KEY |
The secret key used to generate tokens. Change this value in production. | g8k1p3rp0l1c7m4n4g3r |
GPM_PREFERRED_URL_SCHEME |
URL scheme to be used while generating links. | http |
GPM_OIDC_REDIRECT_DOMAIN |
The server name under the app is being exposed. This is where the client will be redirected after authenticating | |
GPM_OIDC_ISSUER |
OIDC Issuer hostname | |
GPM_OIDC_AUTHORIZATION_ENDPOINT |
OIDC Authorizatoin Endpoint | |
GPM_OIDC_JWKS_URI |
OIDC JWKS URI | |
GPM_OIDC_TOKEN_ENDPOINT |
OIDC TOKEN Endpoint | |
GPM_OIDC_INTROSPECTION_ENDPOINT |
OIDC Introspection Enpoint | |
GPM_OIDC_USERINFO_ENDPOINT |
OIDC Userinfo Endpoint | |
GPM_OIDC_END_SESSION_ENDPOINT |
OIDC End Session Endpoint | |
GPM_OIDC_CLIENT_ID |
The Client ID used to authenticate against the OIDC Provider | |
GPM_OIDC_CLIENT_SECRET |
The Client Secret used to authenticate against the OIDC Provider | |
GPM_LOG_LEVEL |
Log level (see python logging docs for available levels) | INFO |
KUBECONFIG |
Path to a kubeconfig file, if provided while running inside a cluster this configuration file will be used instead of the cluster's API. |
⚠️ Please notice that OIDC Authentication is in beta state. It has been tested to work with Keycloak as a provider.These environment variables are already provided and ready to be set in the
manifests/enable-oidc.yamlfile.
Since v1.0.2 GPM has basic multi-cluster support when using a kubeconfig with more than one context. GPM will let you chose the context right from the UI.
If you want to run GPM in a cluster but with multi-cluster support, it's as easy as mounting a kubeconfig file in GPM's pod(s) with the cluster access configuration and set the environment variable KUBECONFIG with the path to the mounted kubeconfig file. Or you can simply mount it in /home/gpm/.kube/config and GPM will detect it automatically.
Please remember that the user for the clusters should have the right permissions. You can use the
manifests/rabc.yamlfile as reference.Also note that the cluster where GPM is running should be able to reach the other clusters.
When you run GPM locally, you are already using a kubeconfig file to connect to the clusters, now you should see all your defined contexts and you can switch between them easily from the UI.
If you want to use a Kubeconfig with IAM Authentication, you'll need to customize GPM's container image because the IAM authentication uses external AWS binaries that are not included by default in the image.
You can customize the container image with a Dockerfile like the following:
FROM curlimages/curl:7.81.0 as downloader
RUN curl https://github.com/kubernetes-sigs/aws-iam-authenticator/releases/download/v0.5.5/aws-iam-authenticator_0.5.5_linux_amd64 --output /tmp/aws-iam-authenticator
RUN chmod +x /tmp/aws-iam-authenticator
FROM quay.io/sighup/gatekeeper-policy-manager:v1.0.2
COPY --from=downloader --chown=root:root /tmp/aws-iam-authenticator /usr/local/bin/
You may need to add also the aws CLI, you can use the same approach as before.
Make sure that your kubeconfig has the apiVersion set as client.authentication.k8s.io/v1beta1
You can read more in this issue.
GPM is written in Python using the Flask framework for the backend and React with Elastic UI and the Fury theme for the frontend.
To develop GPM, you'll need to create a Python 3 virtual environment, install all the dependencies specified in the provided requirements.txt, build the react frontend and you are good to start hacking.
The following commands should get you up and running:
# Build frontend and copy over to static folder
$ pushd app/web-client
$ yarn install && yarn build
$ cp -r build/* ../static-content/
$ popd
# Create a virtualenv
$ python3 -m venv env
# Activate it
$ source ./env/bin/activate
# Install all the dependencies
$ pip install -r app/requirements-dev.txt
# Run the development server
$ FLASK_APP=app/app.py flask run
Access to a Kubernetes cluster with Gatekeeper deployed is recommended to debug the application.
You'll need an OIDC provider to test the OIDC authentication. You can use our fury-kubernetes-keycloak module.
The following is a wishlist of features that we would like to add to GPM (in no particular order):
- List the constraints that are currently using a
ConstraintTemplate - Polished OIDC authentication
- LDAP authentication
- Better syntax highlighting for the rego code snippets
- Root-less docker image
- Multi-cluster view
- Minimal write capabilities?
- Rewrite app in Golang?
Please, let us know if you are using GPM and what features would you like to have by creating an issue here on GitHub 💪🏻


