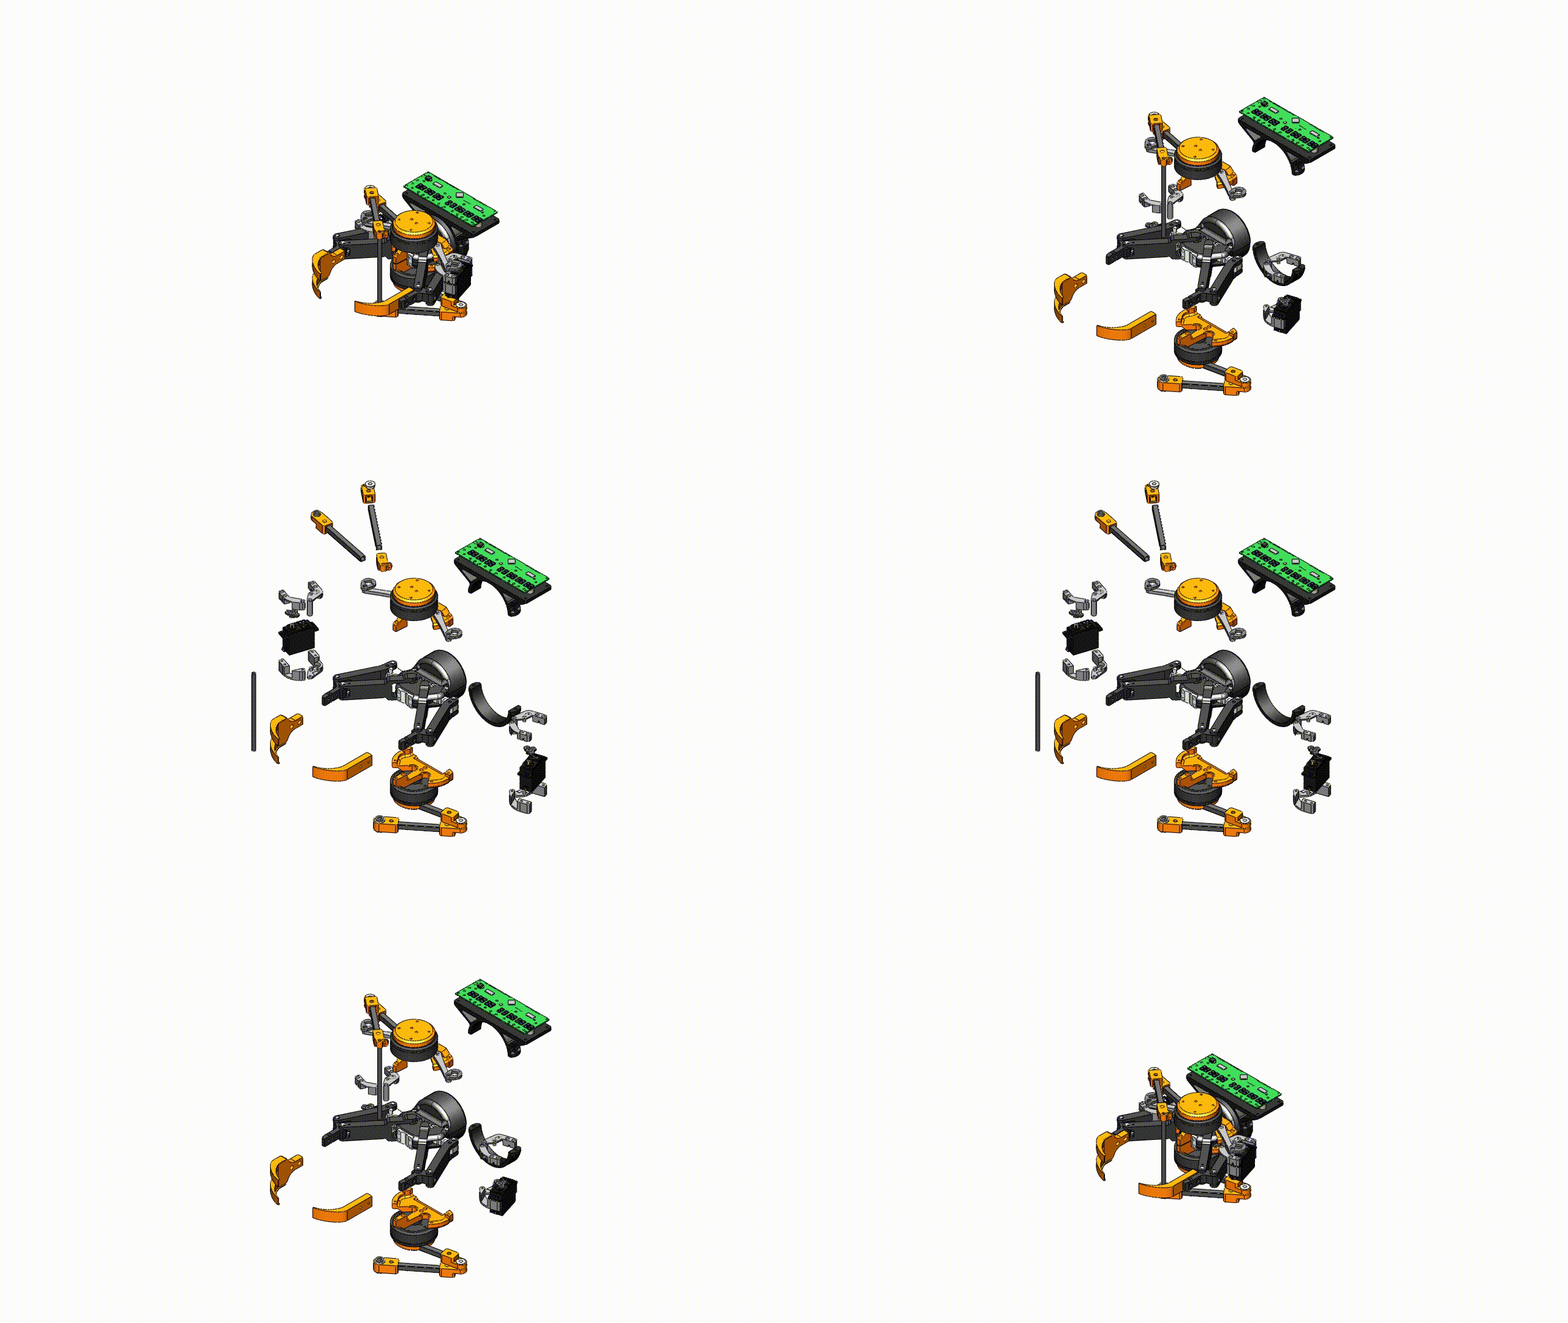
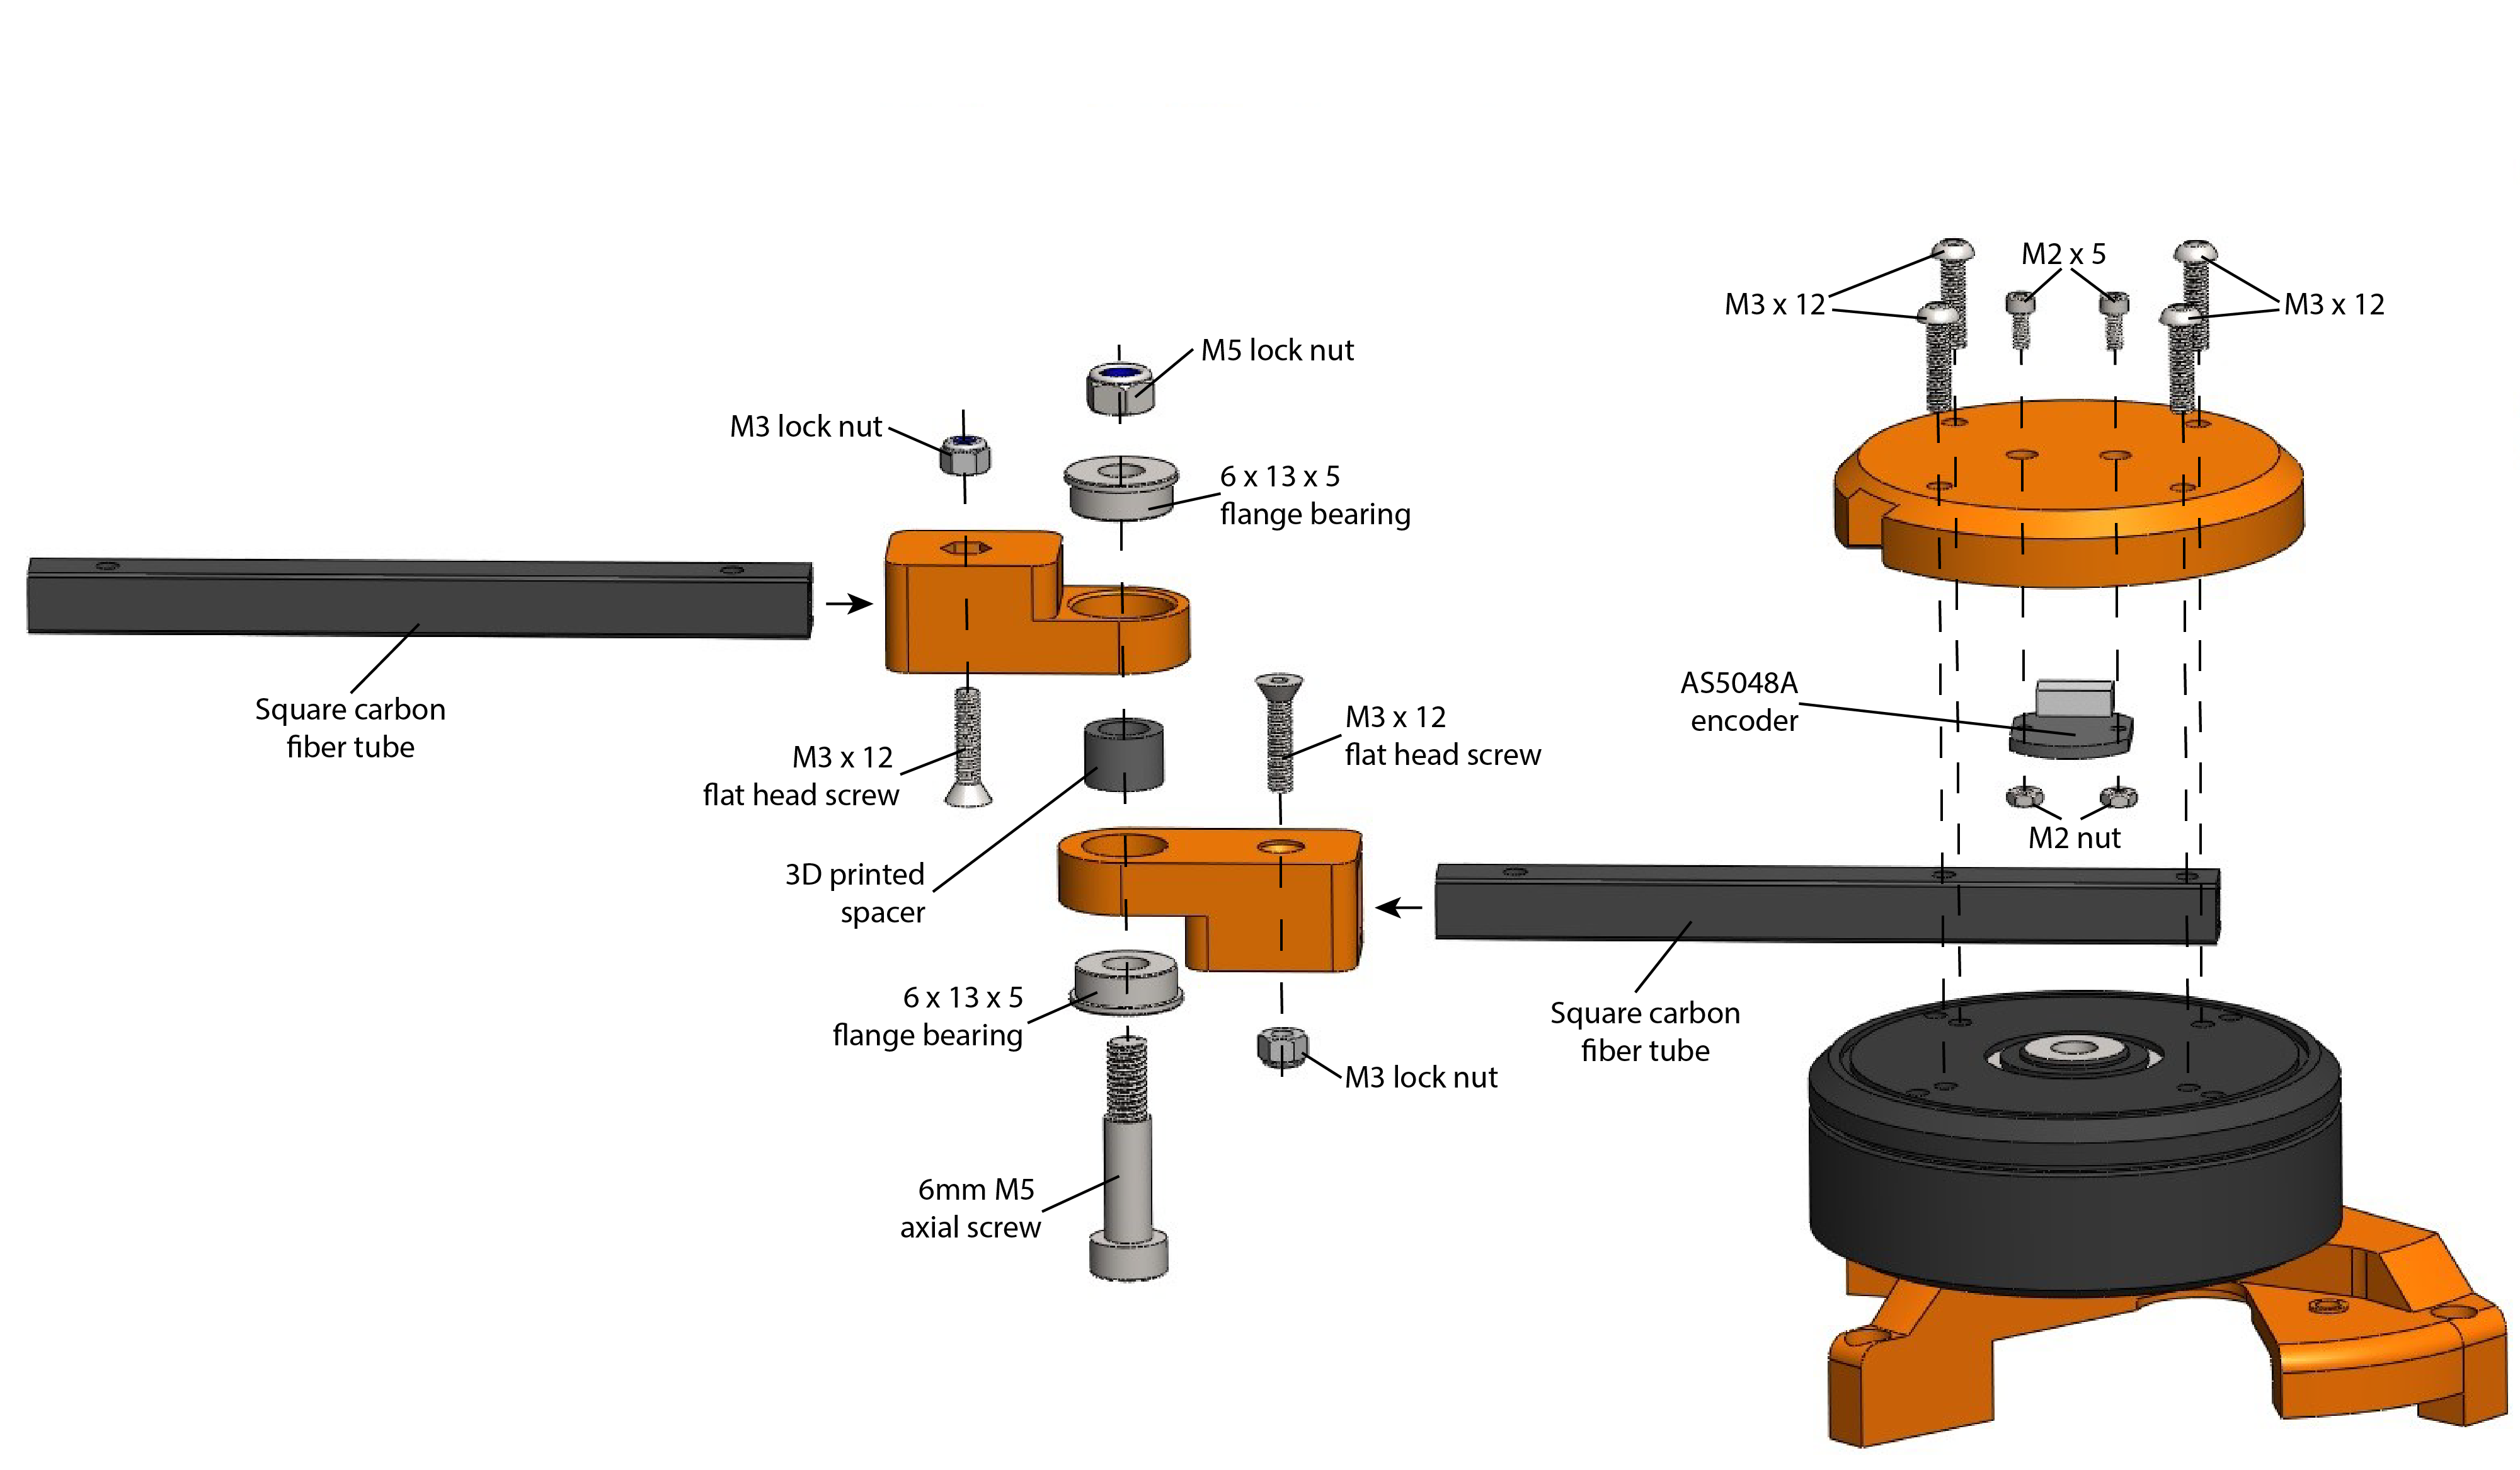
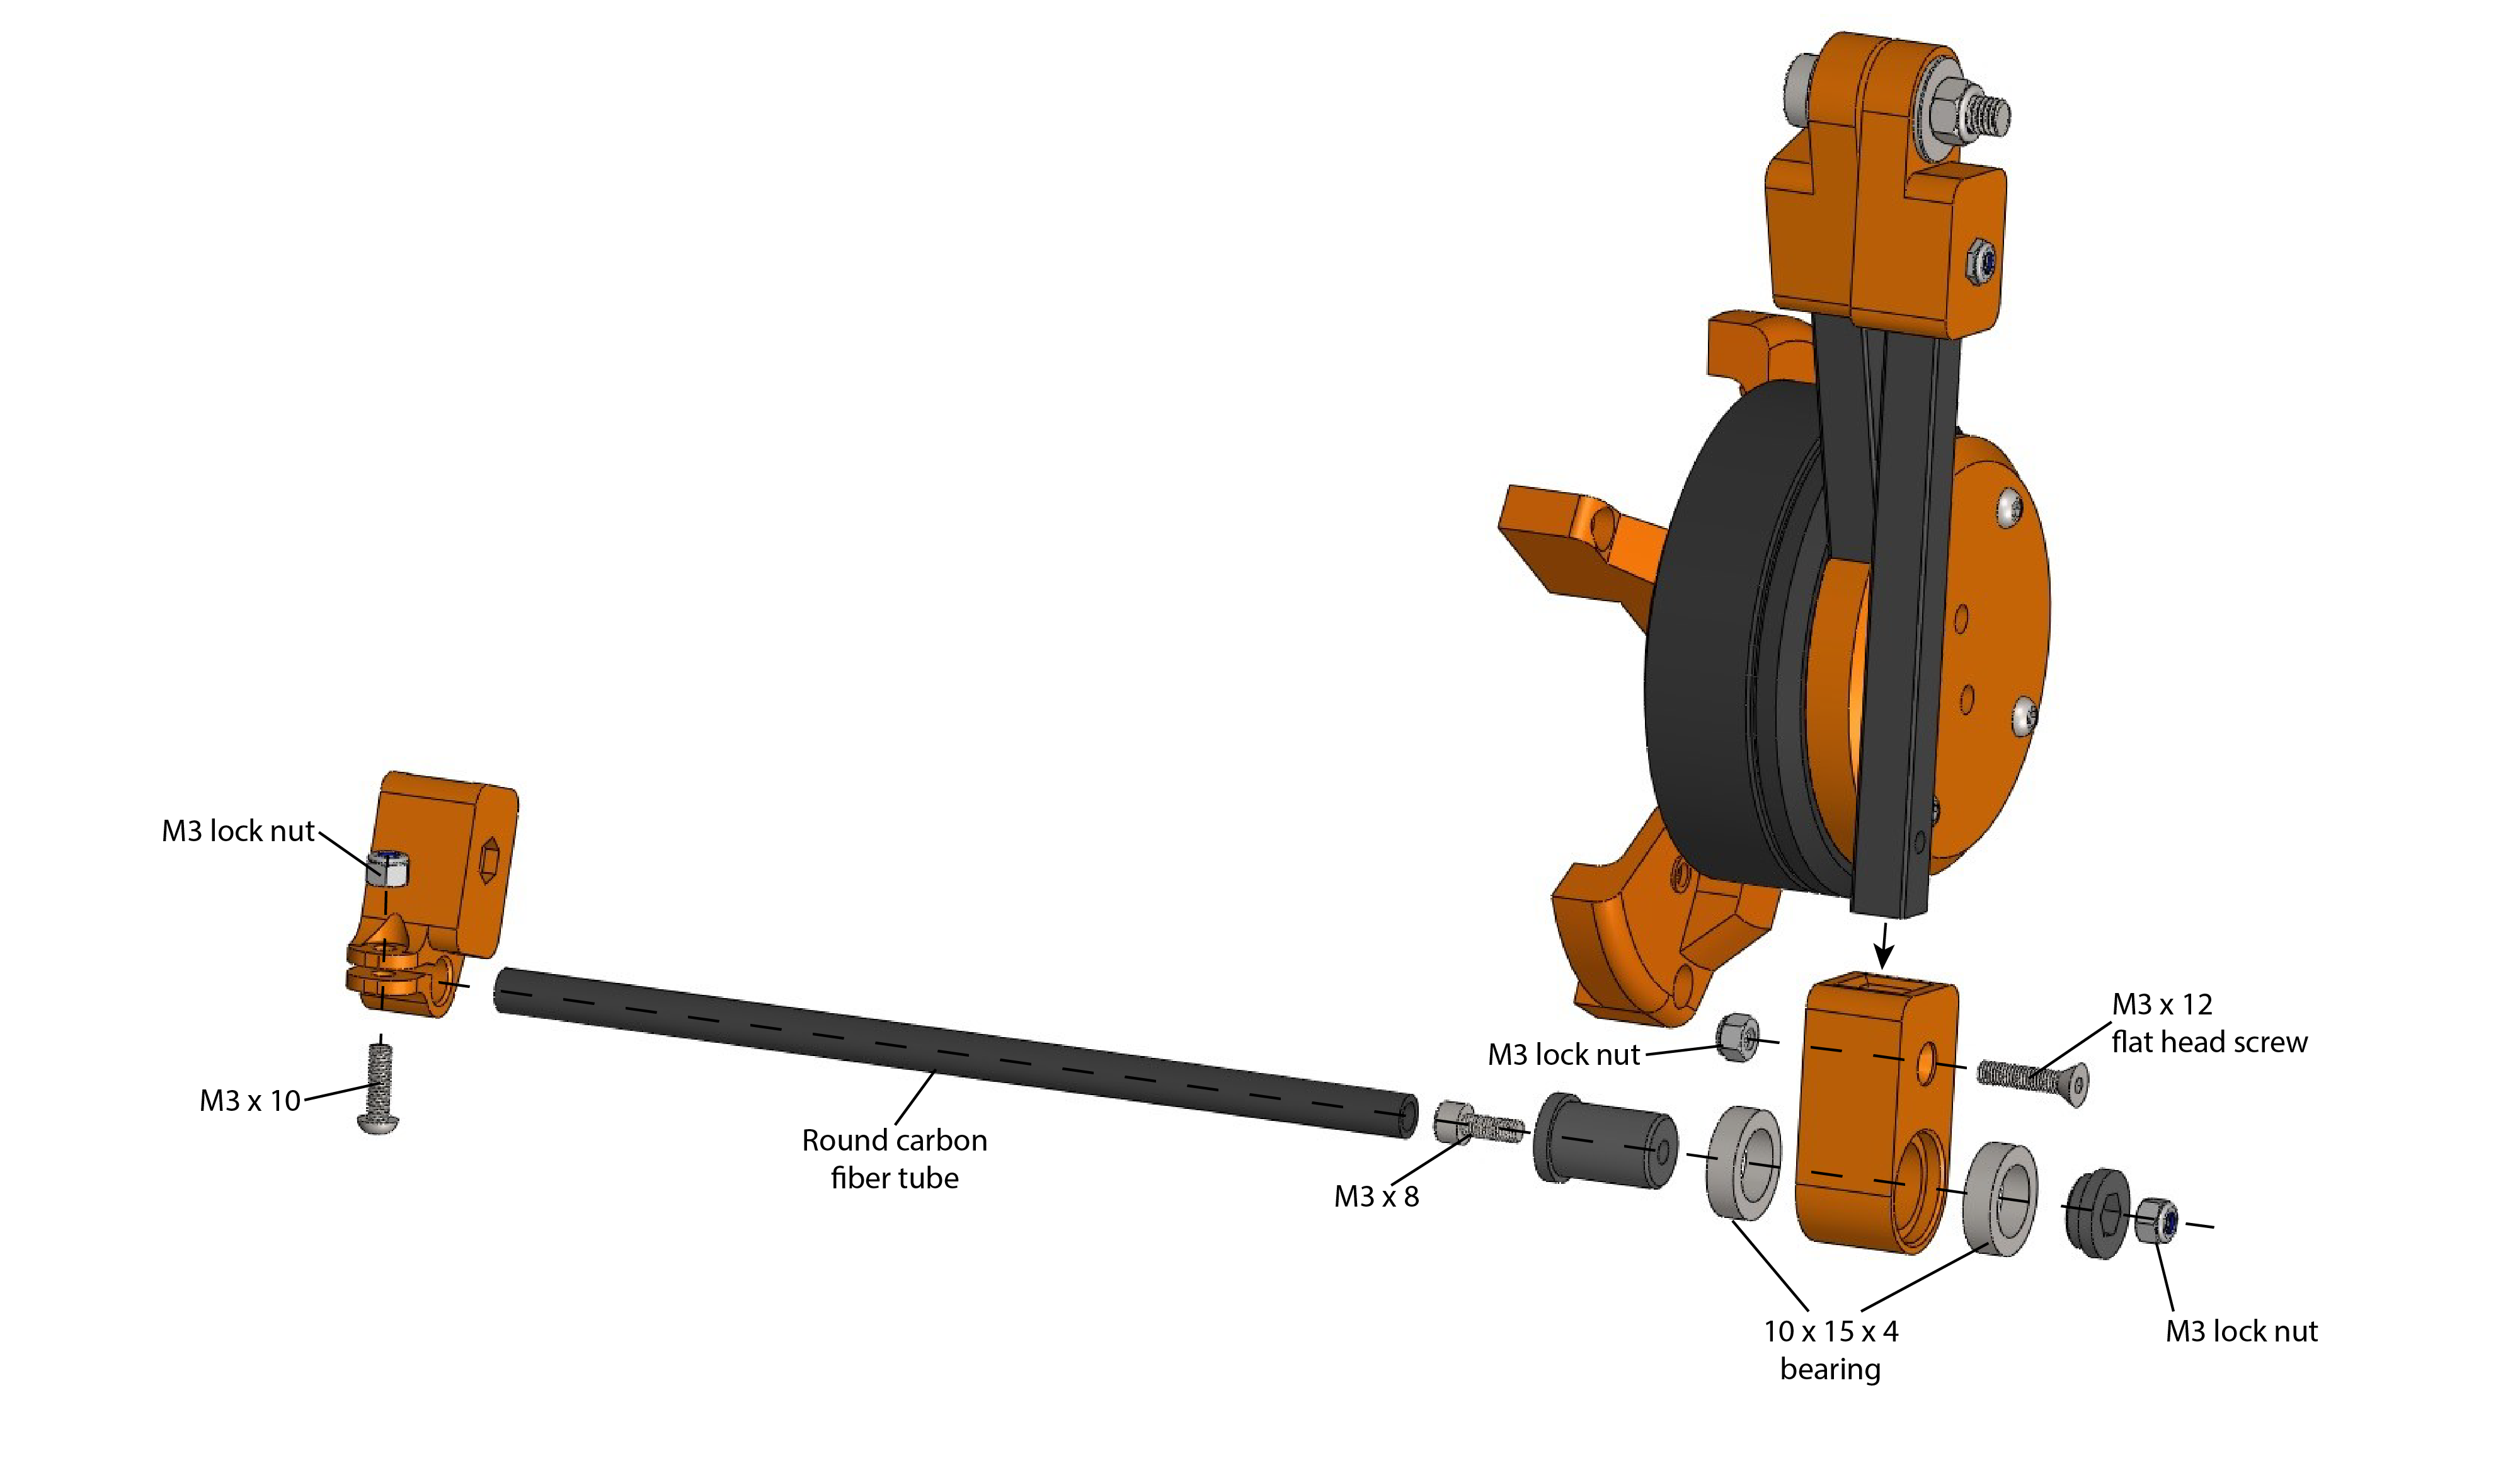
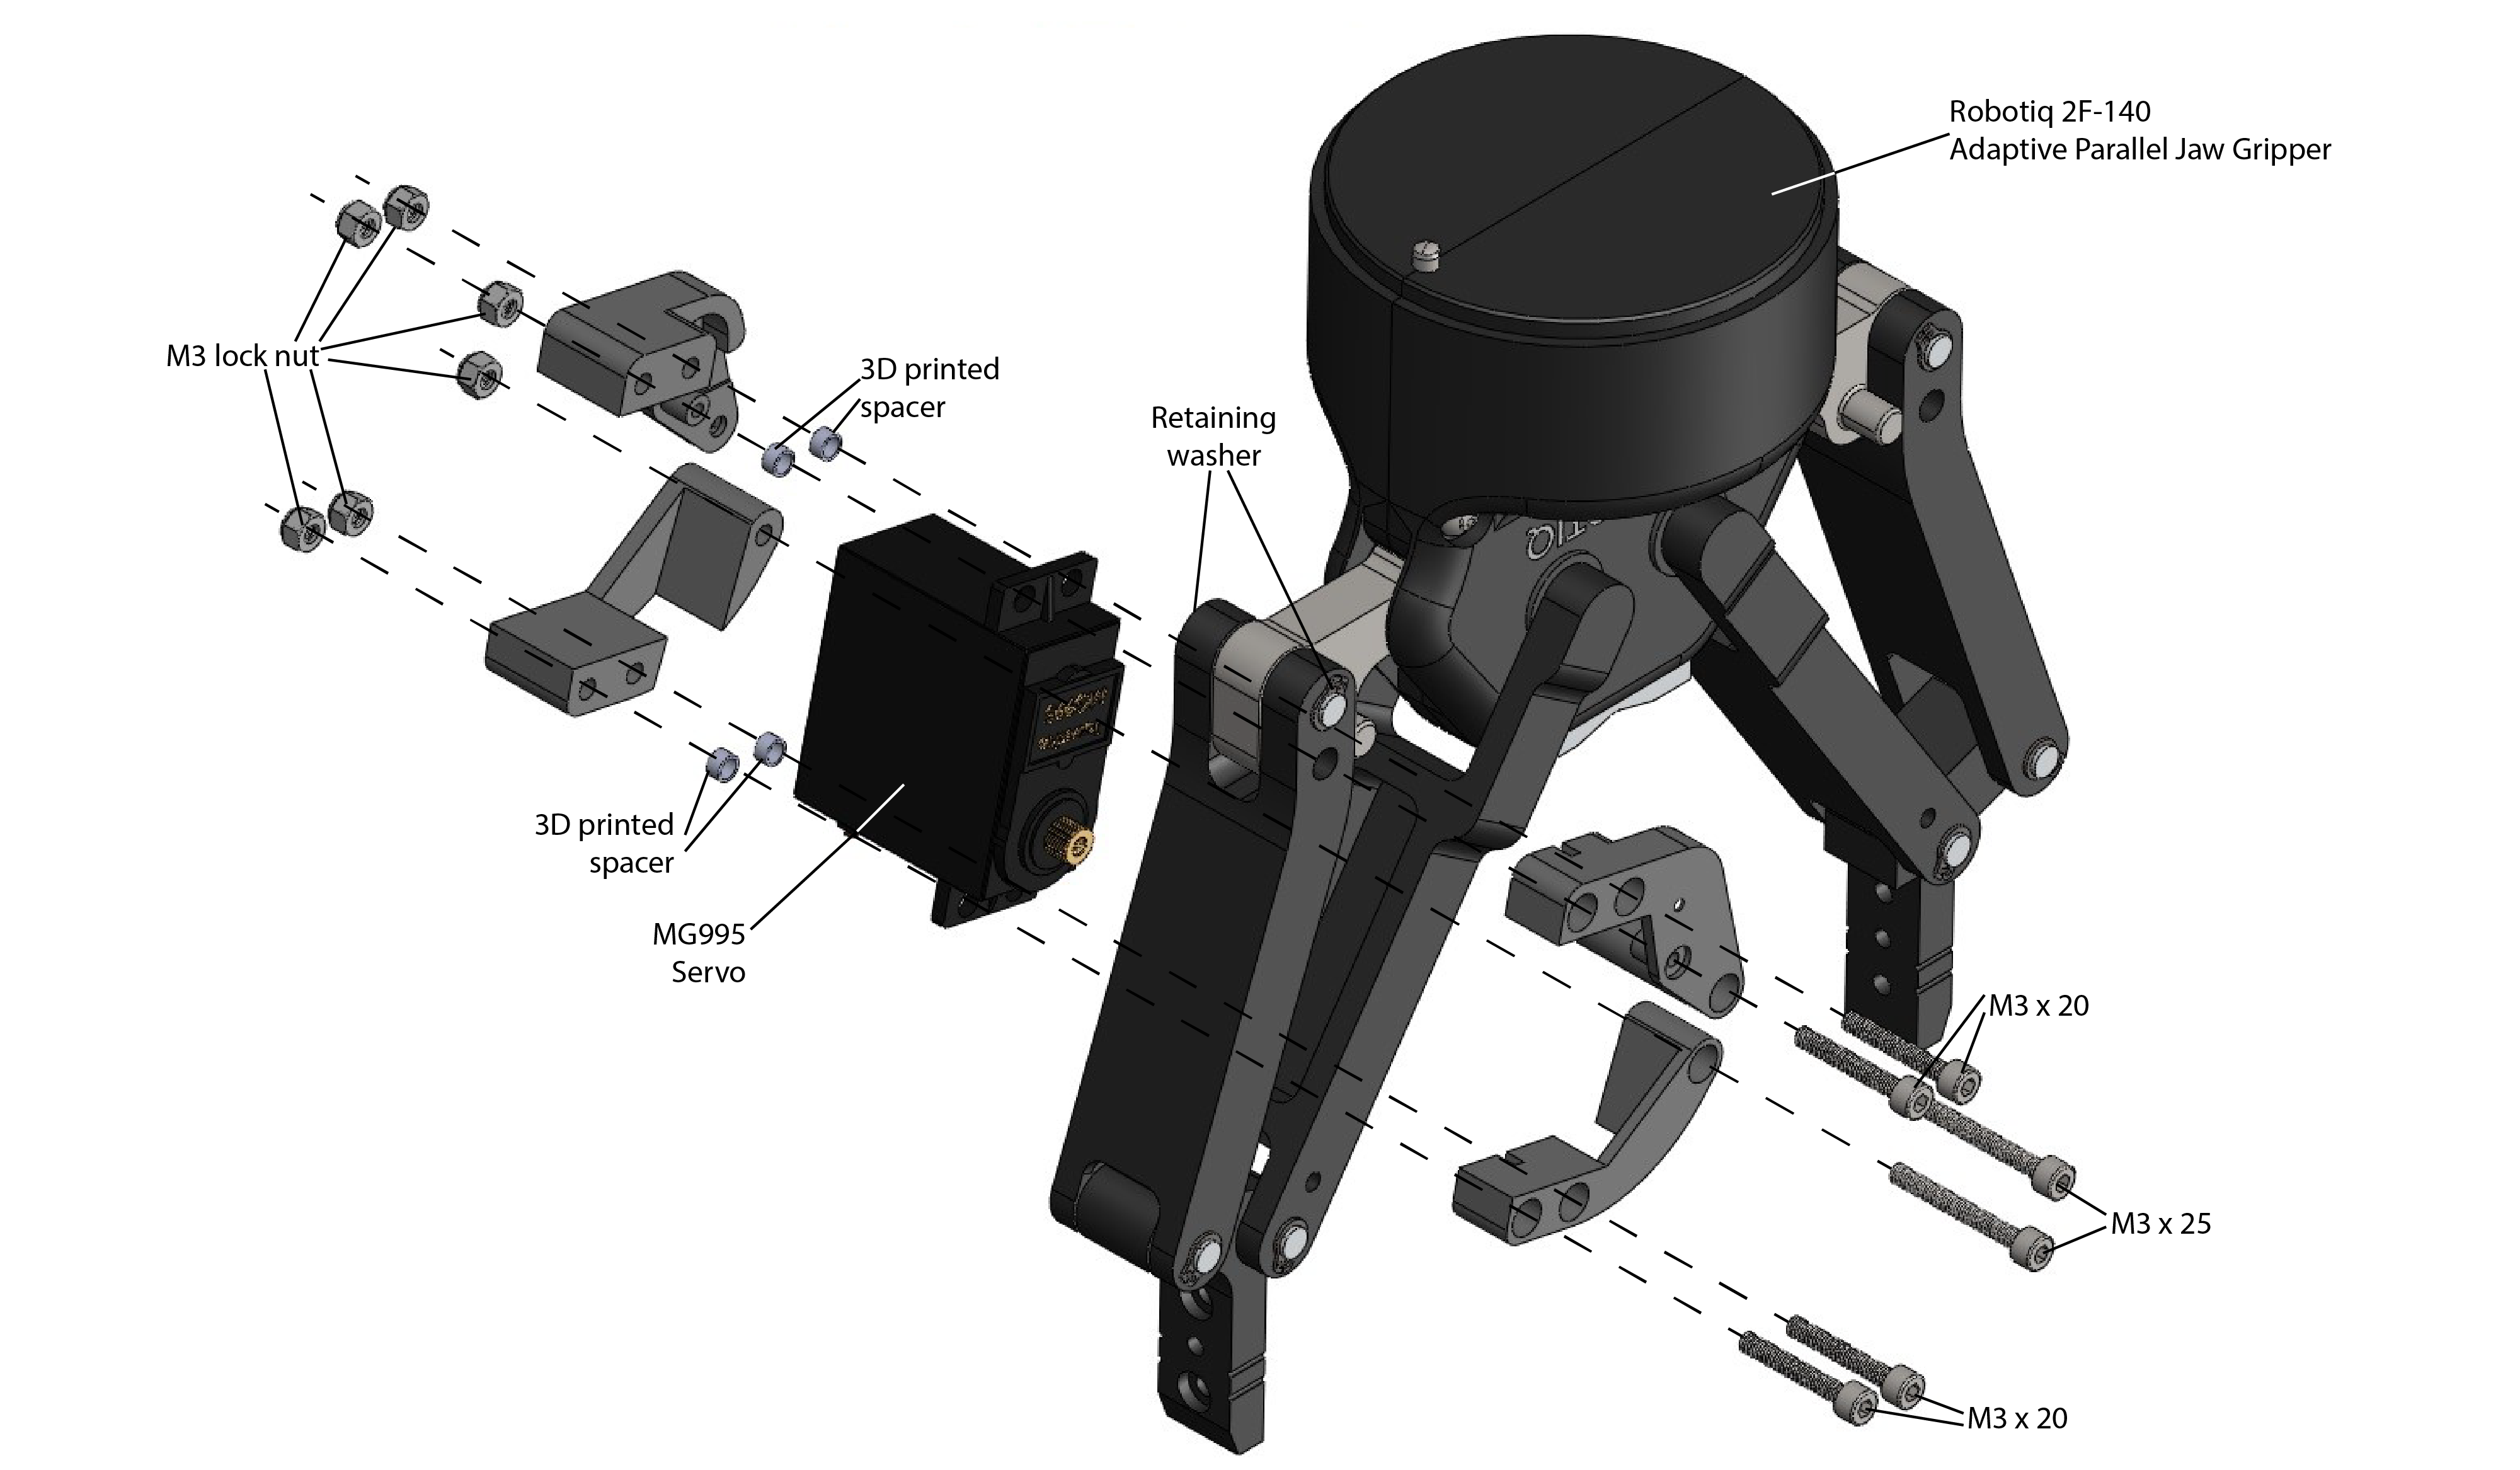
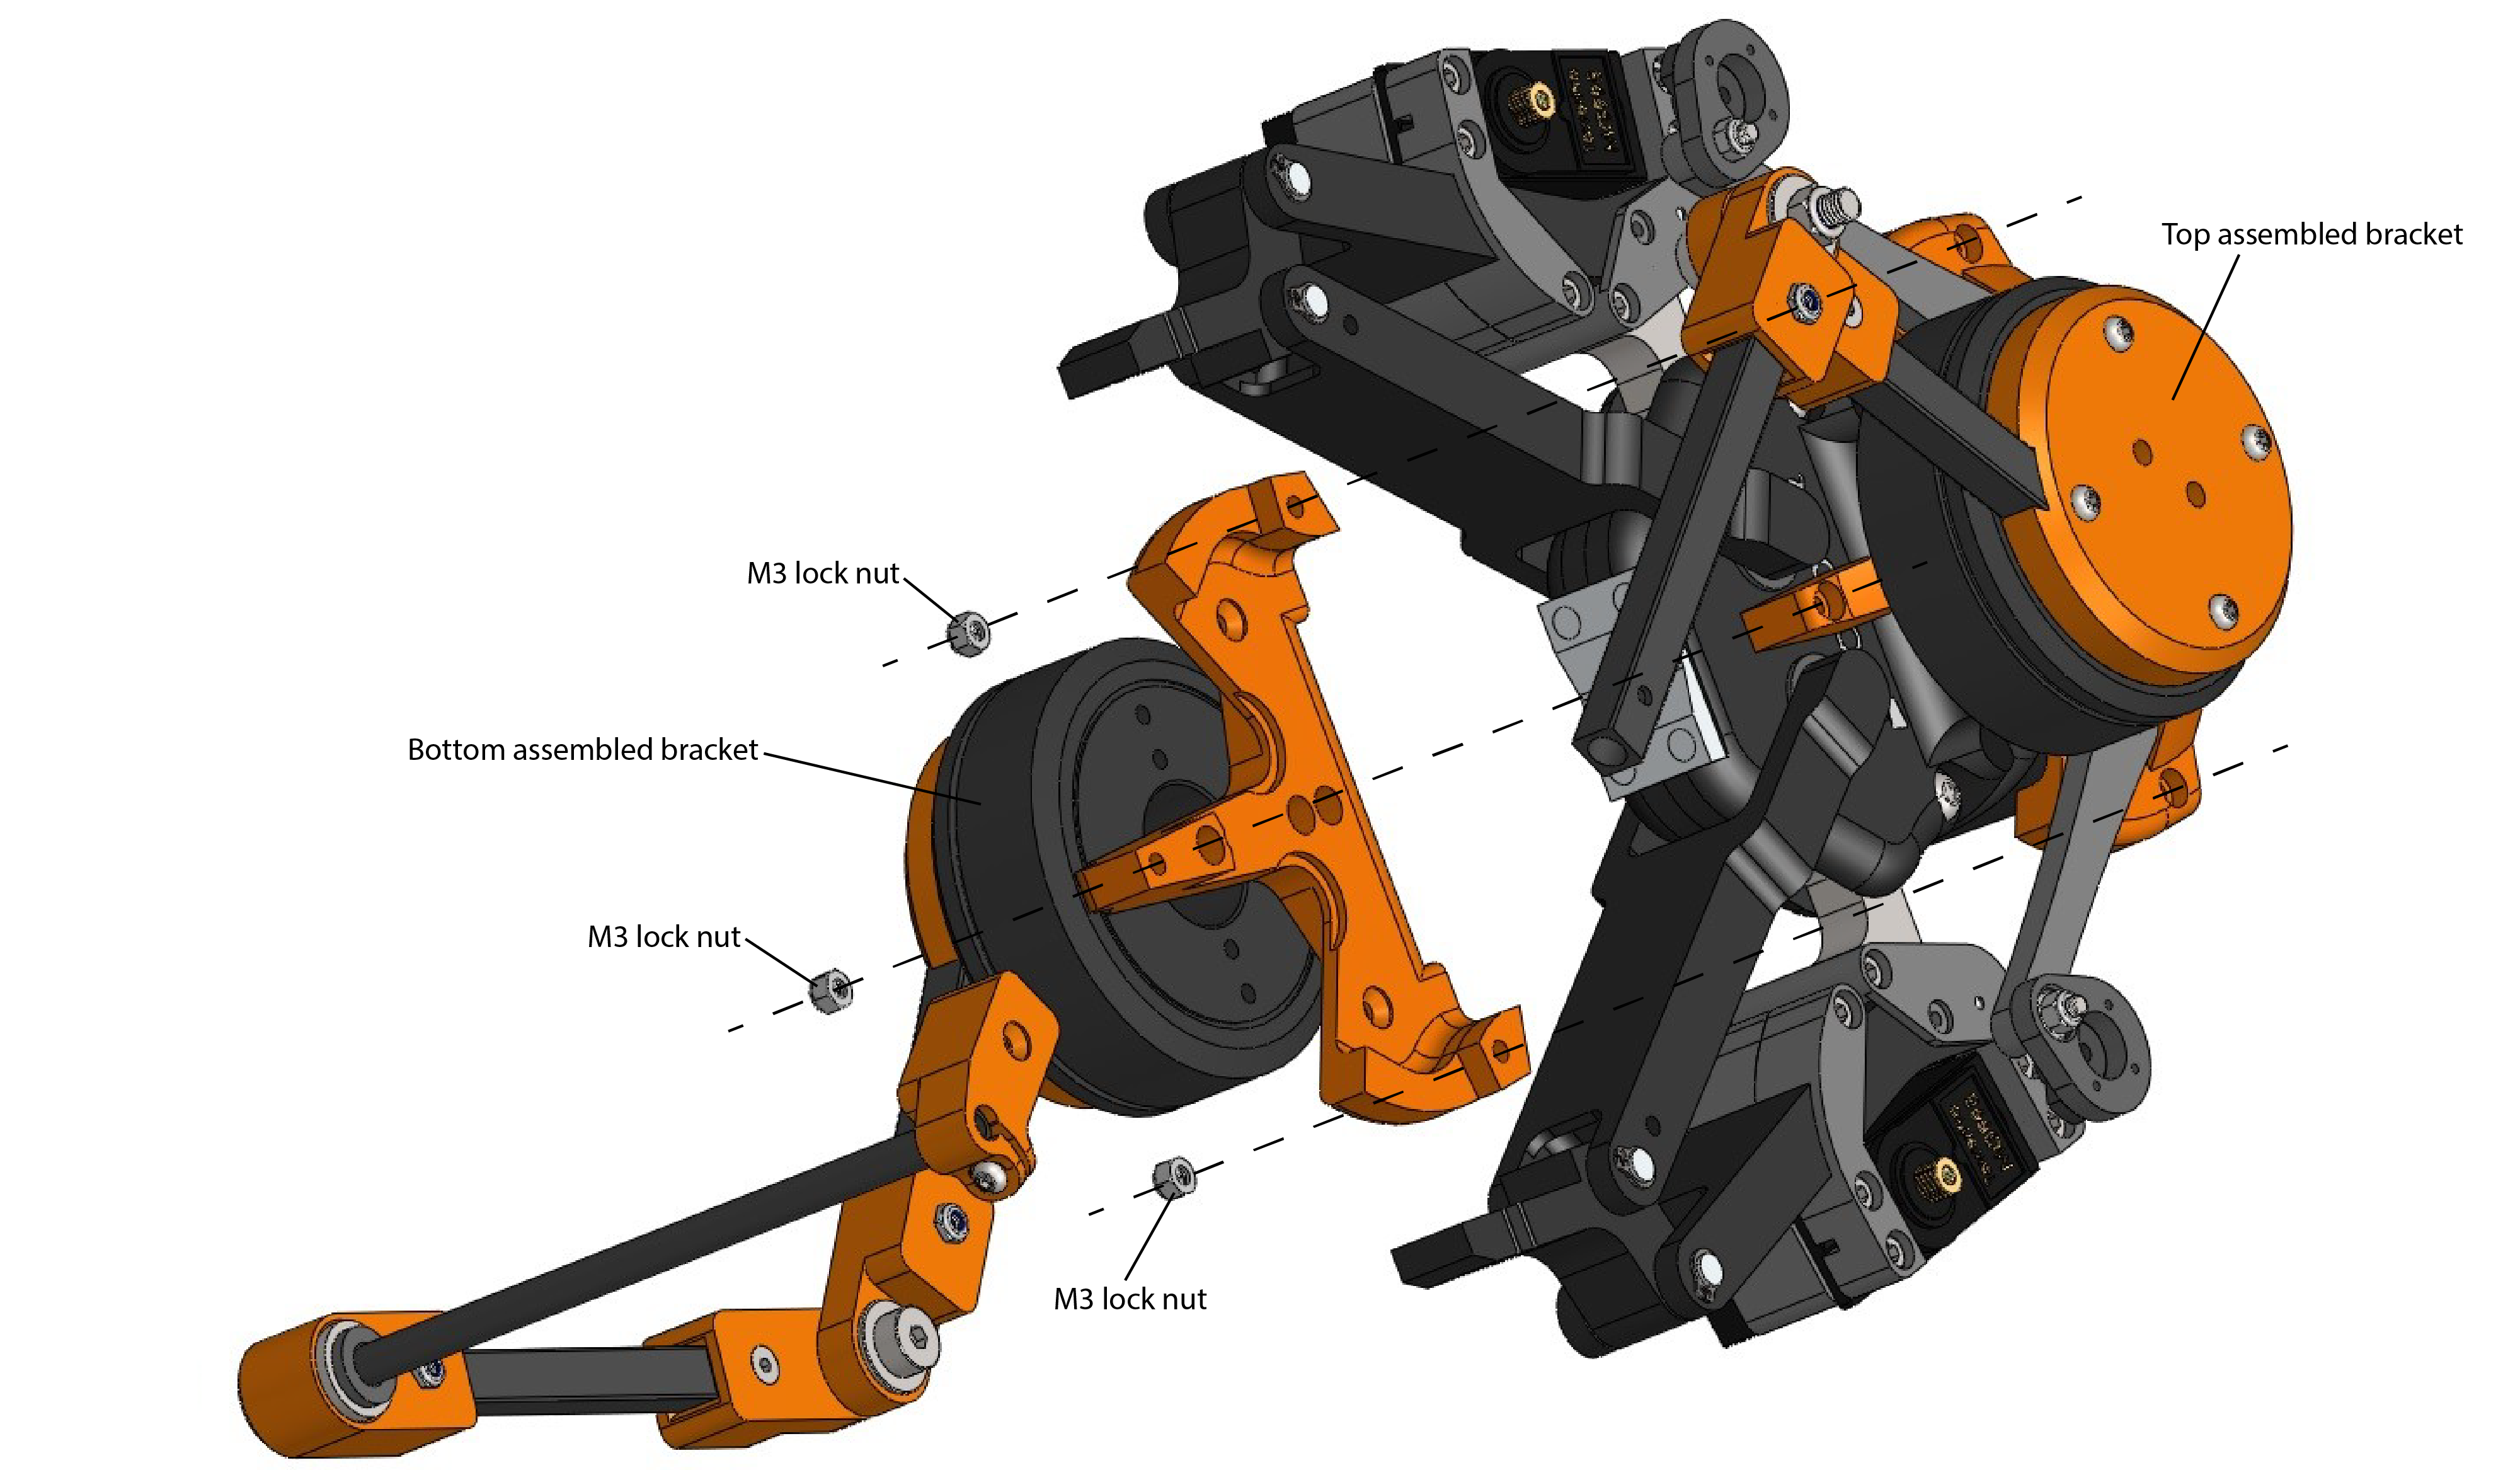
The parrot gripper is a robotic end-effector that imitates the parrot's feeding apparatus with a pair of powerful beaks and a soft tongue. This end-effector is implemented by retrofitting an off-the-shelf industrial robotic gripper with customized hardware devices. The tongue (or palm) is a five-bar parallel manipulator that is direct-driven by two brushless gimbal motors, which can achieve force control, virtual compliance, and rapid motion. The beaks (or fingers) are actuated by two servo motors that morphs the adaptive linkages of the gripper.
This repository provides the instructions of assembling and controlling the parrot gripper.
Related Patents:
- K. H. Mak, Z. Yin, and J. Seo, "System and Method for Robotic In-Hand Manipulation," (Under preparation).
CAD Model (SolidWorks2018 or newer is required)
- Version 1.0 (10 Nov. 2021)
Actuators
- Robotiq 2F-140: Adaptive Parallel Jaw Gripper x 1
- GB6010 gimbal motor x 2
- MG995 servo motor x 2
Electronics
- ODrive v3.6: brushless motor controller x 1
- AS5048A encoder x 2
- Arduino Micro x 1
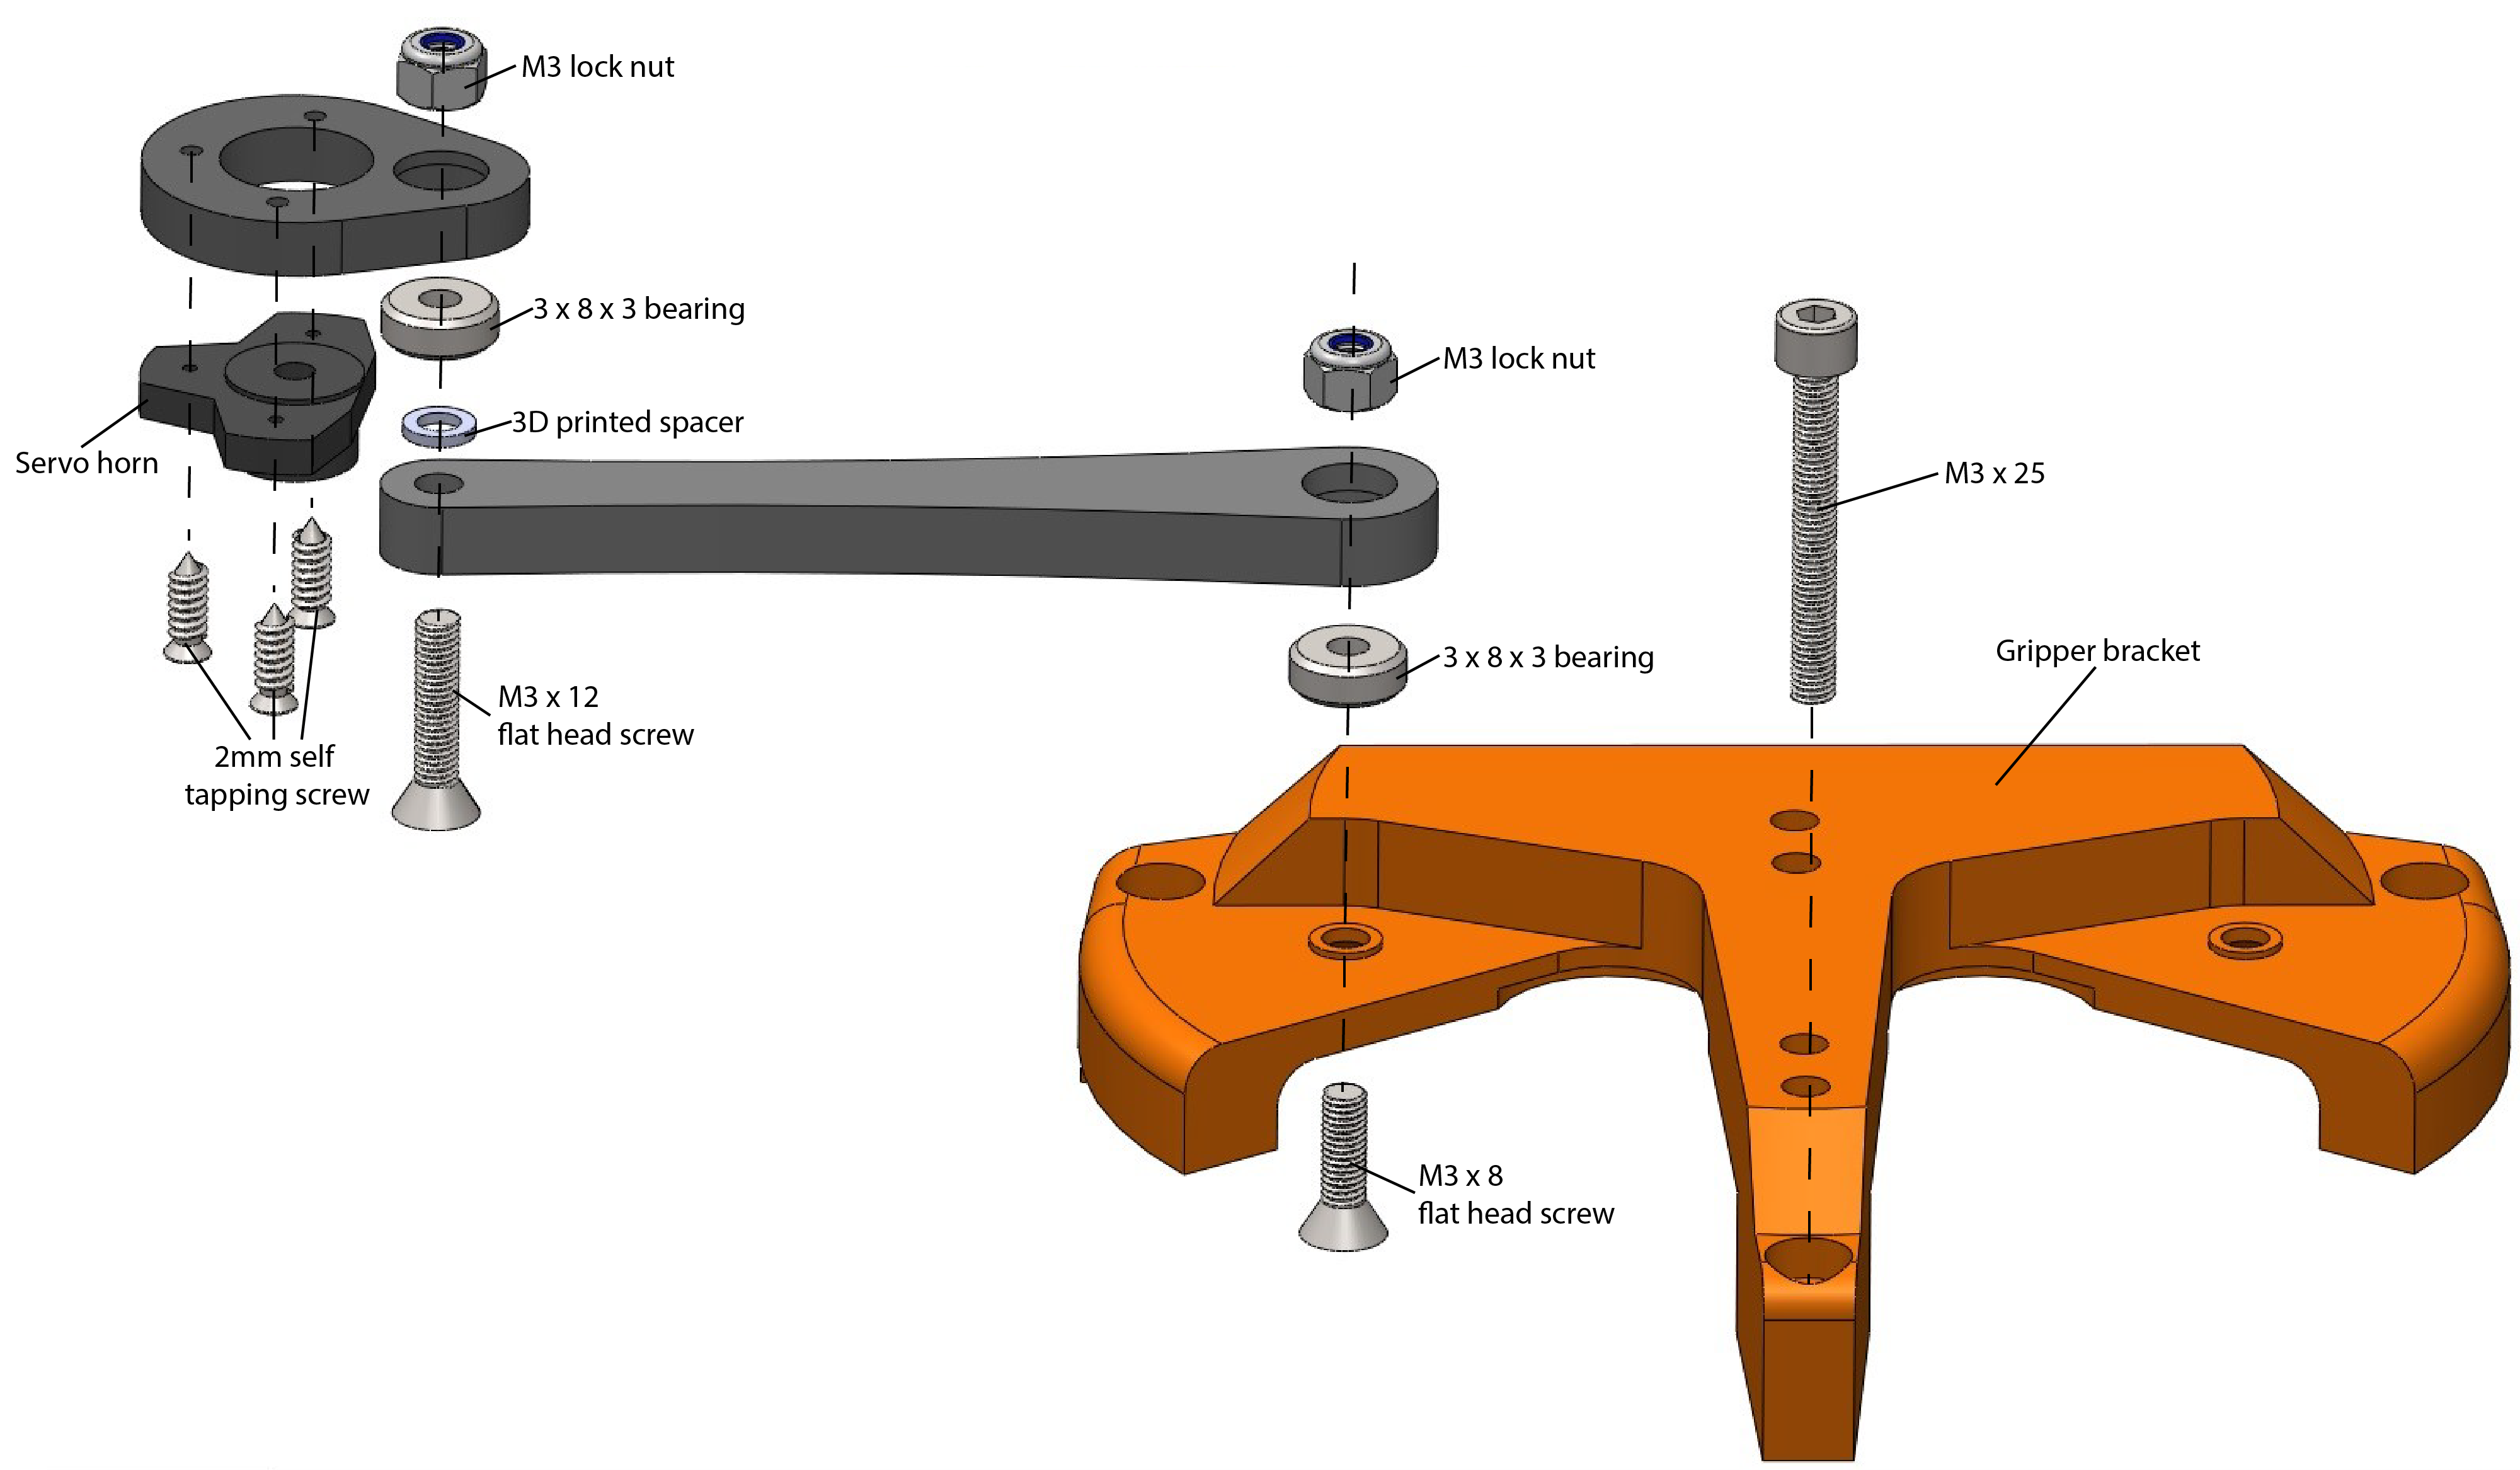
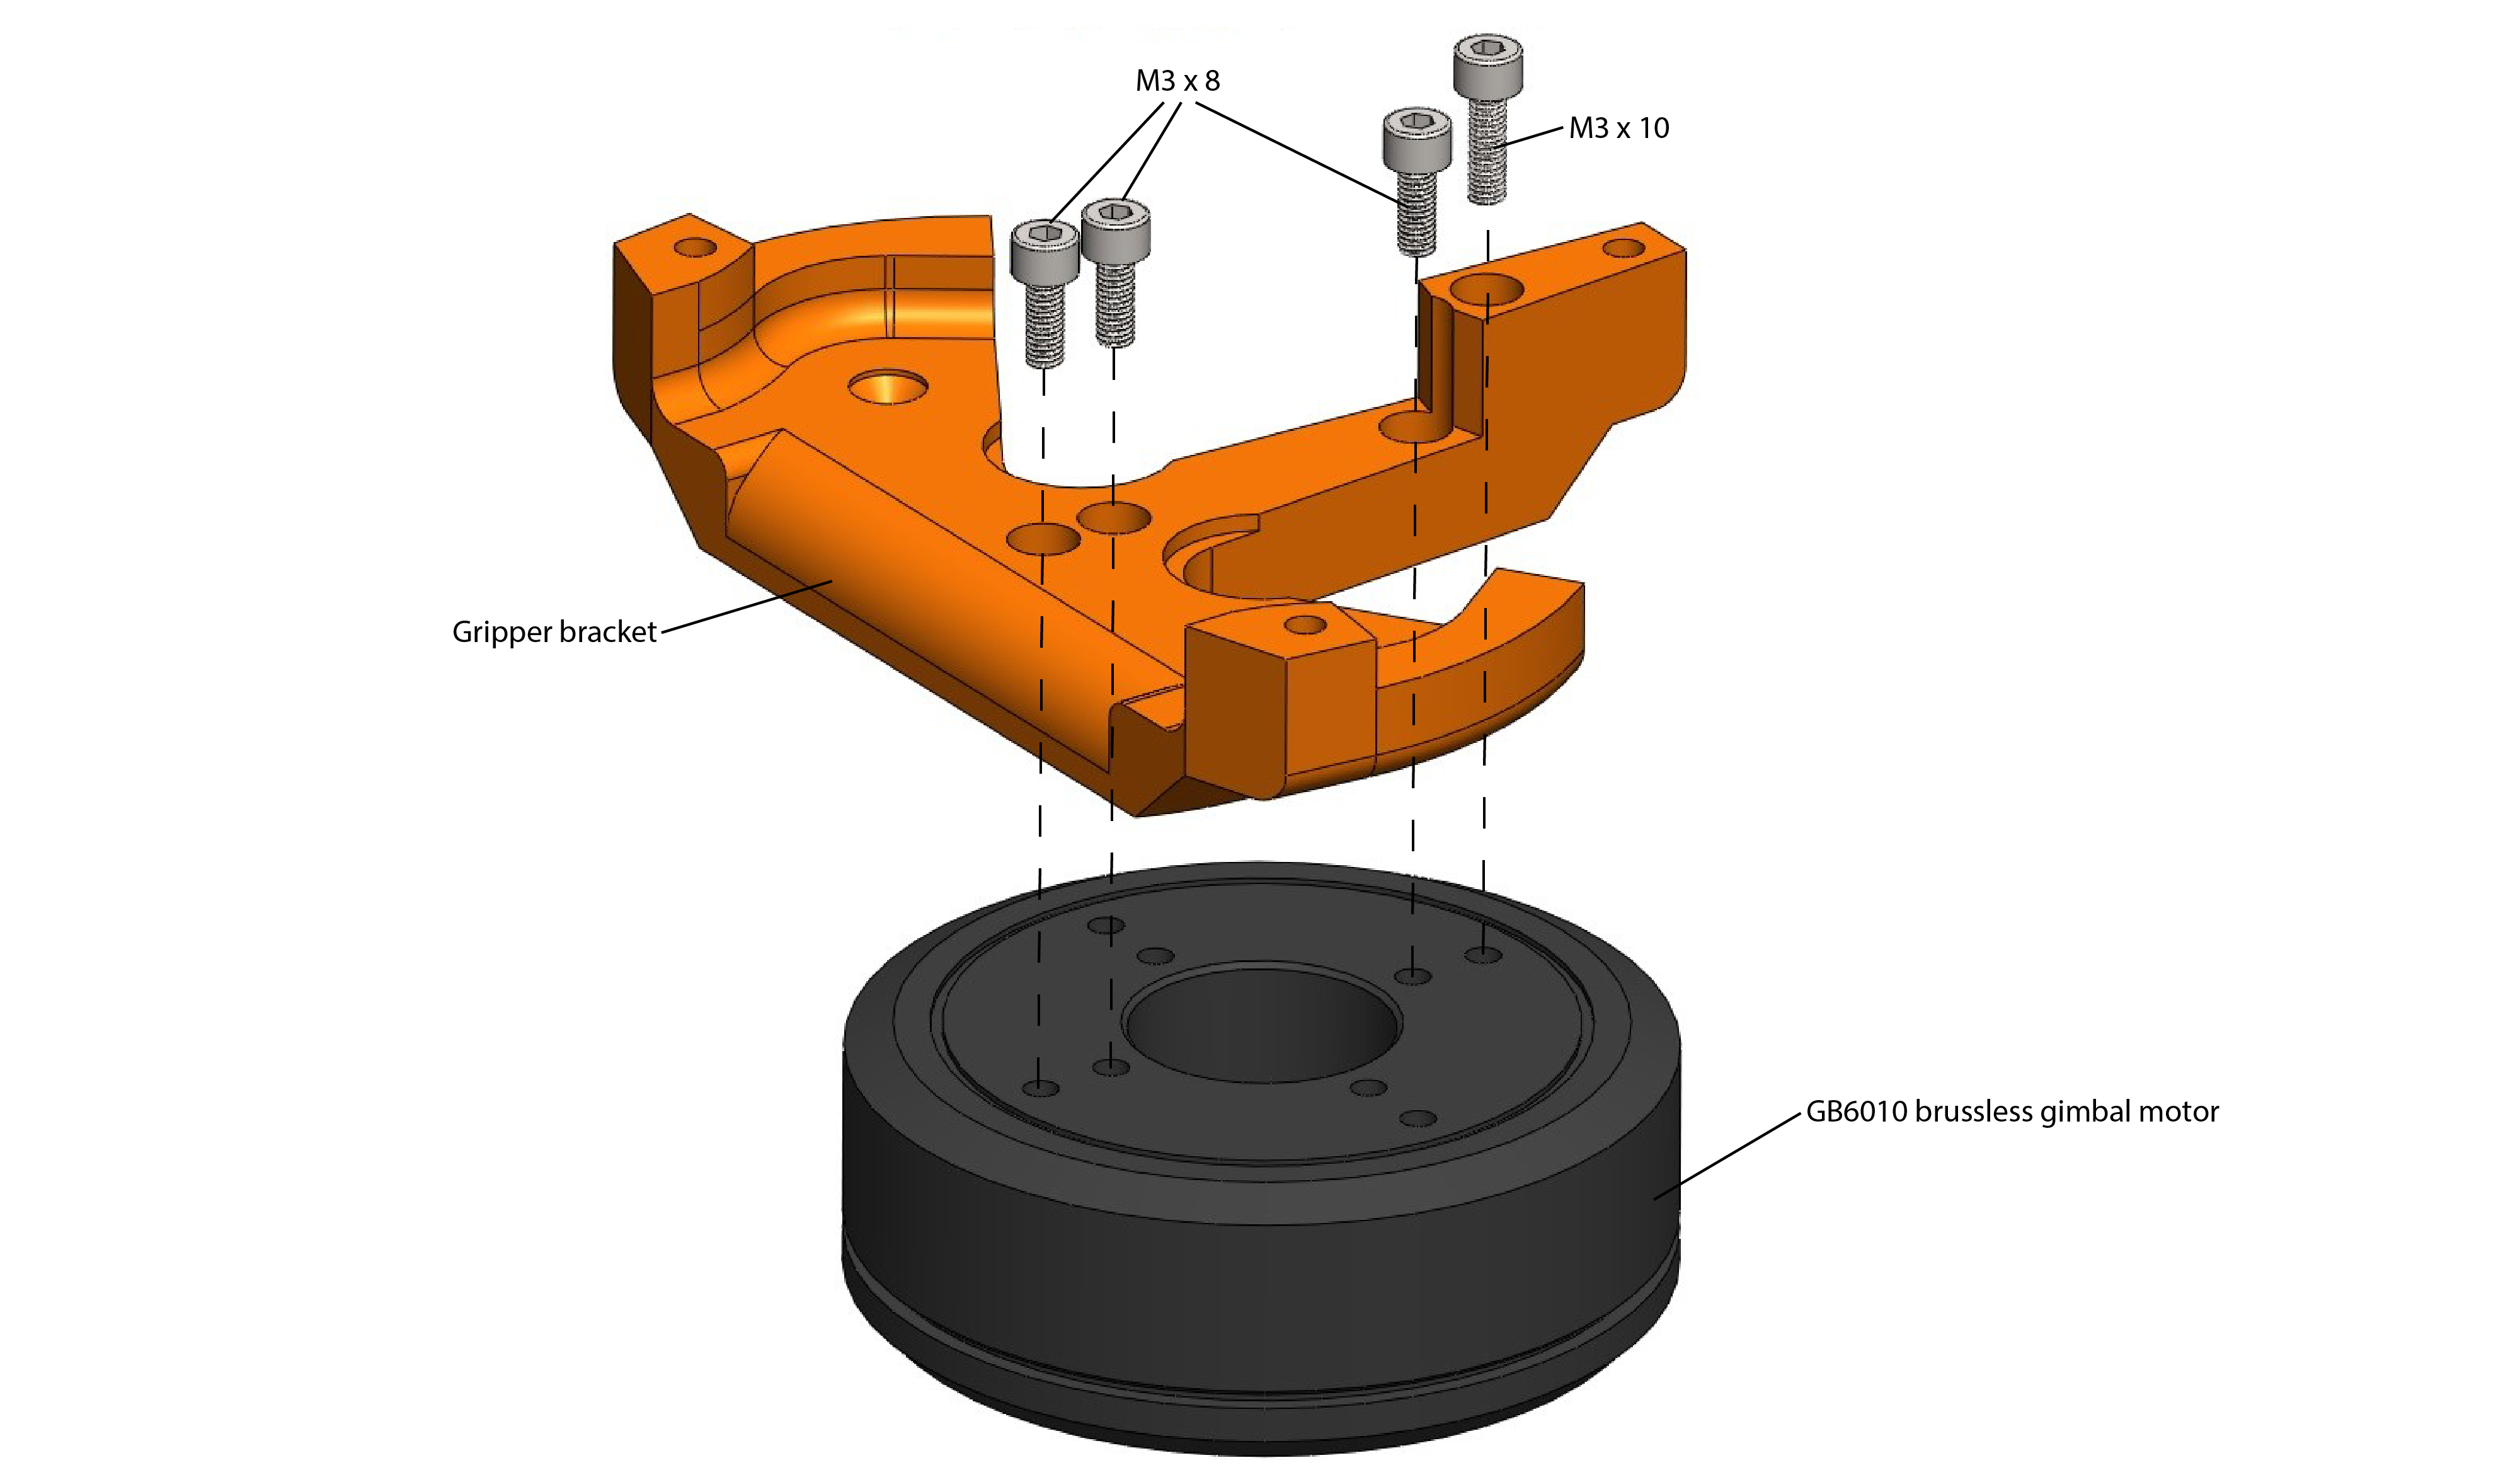
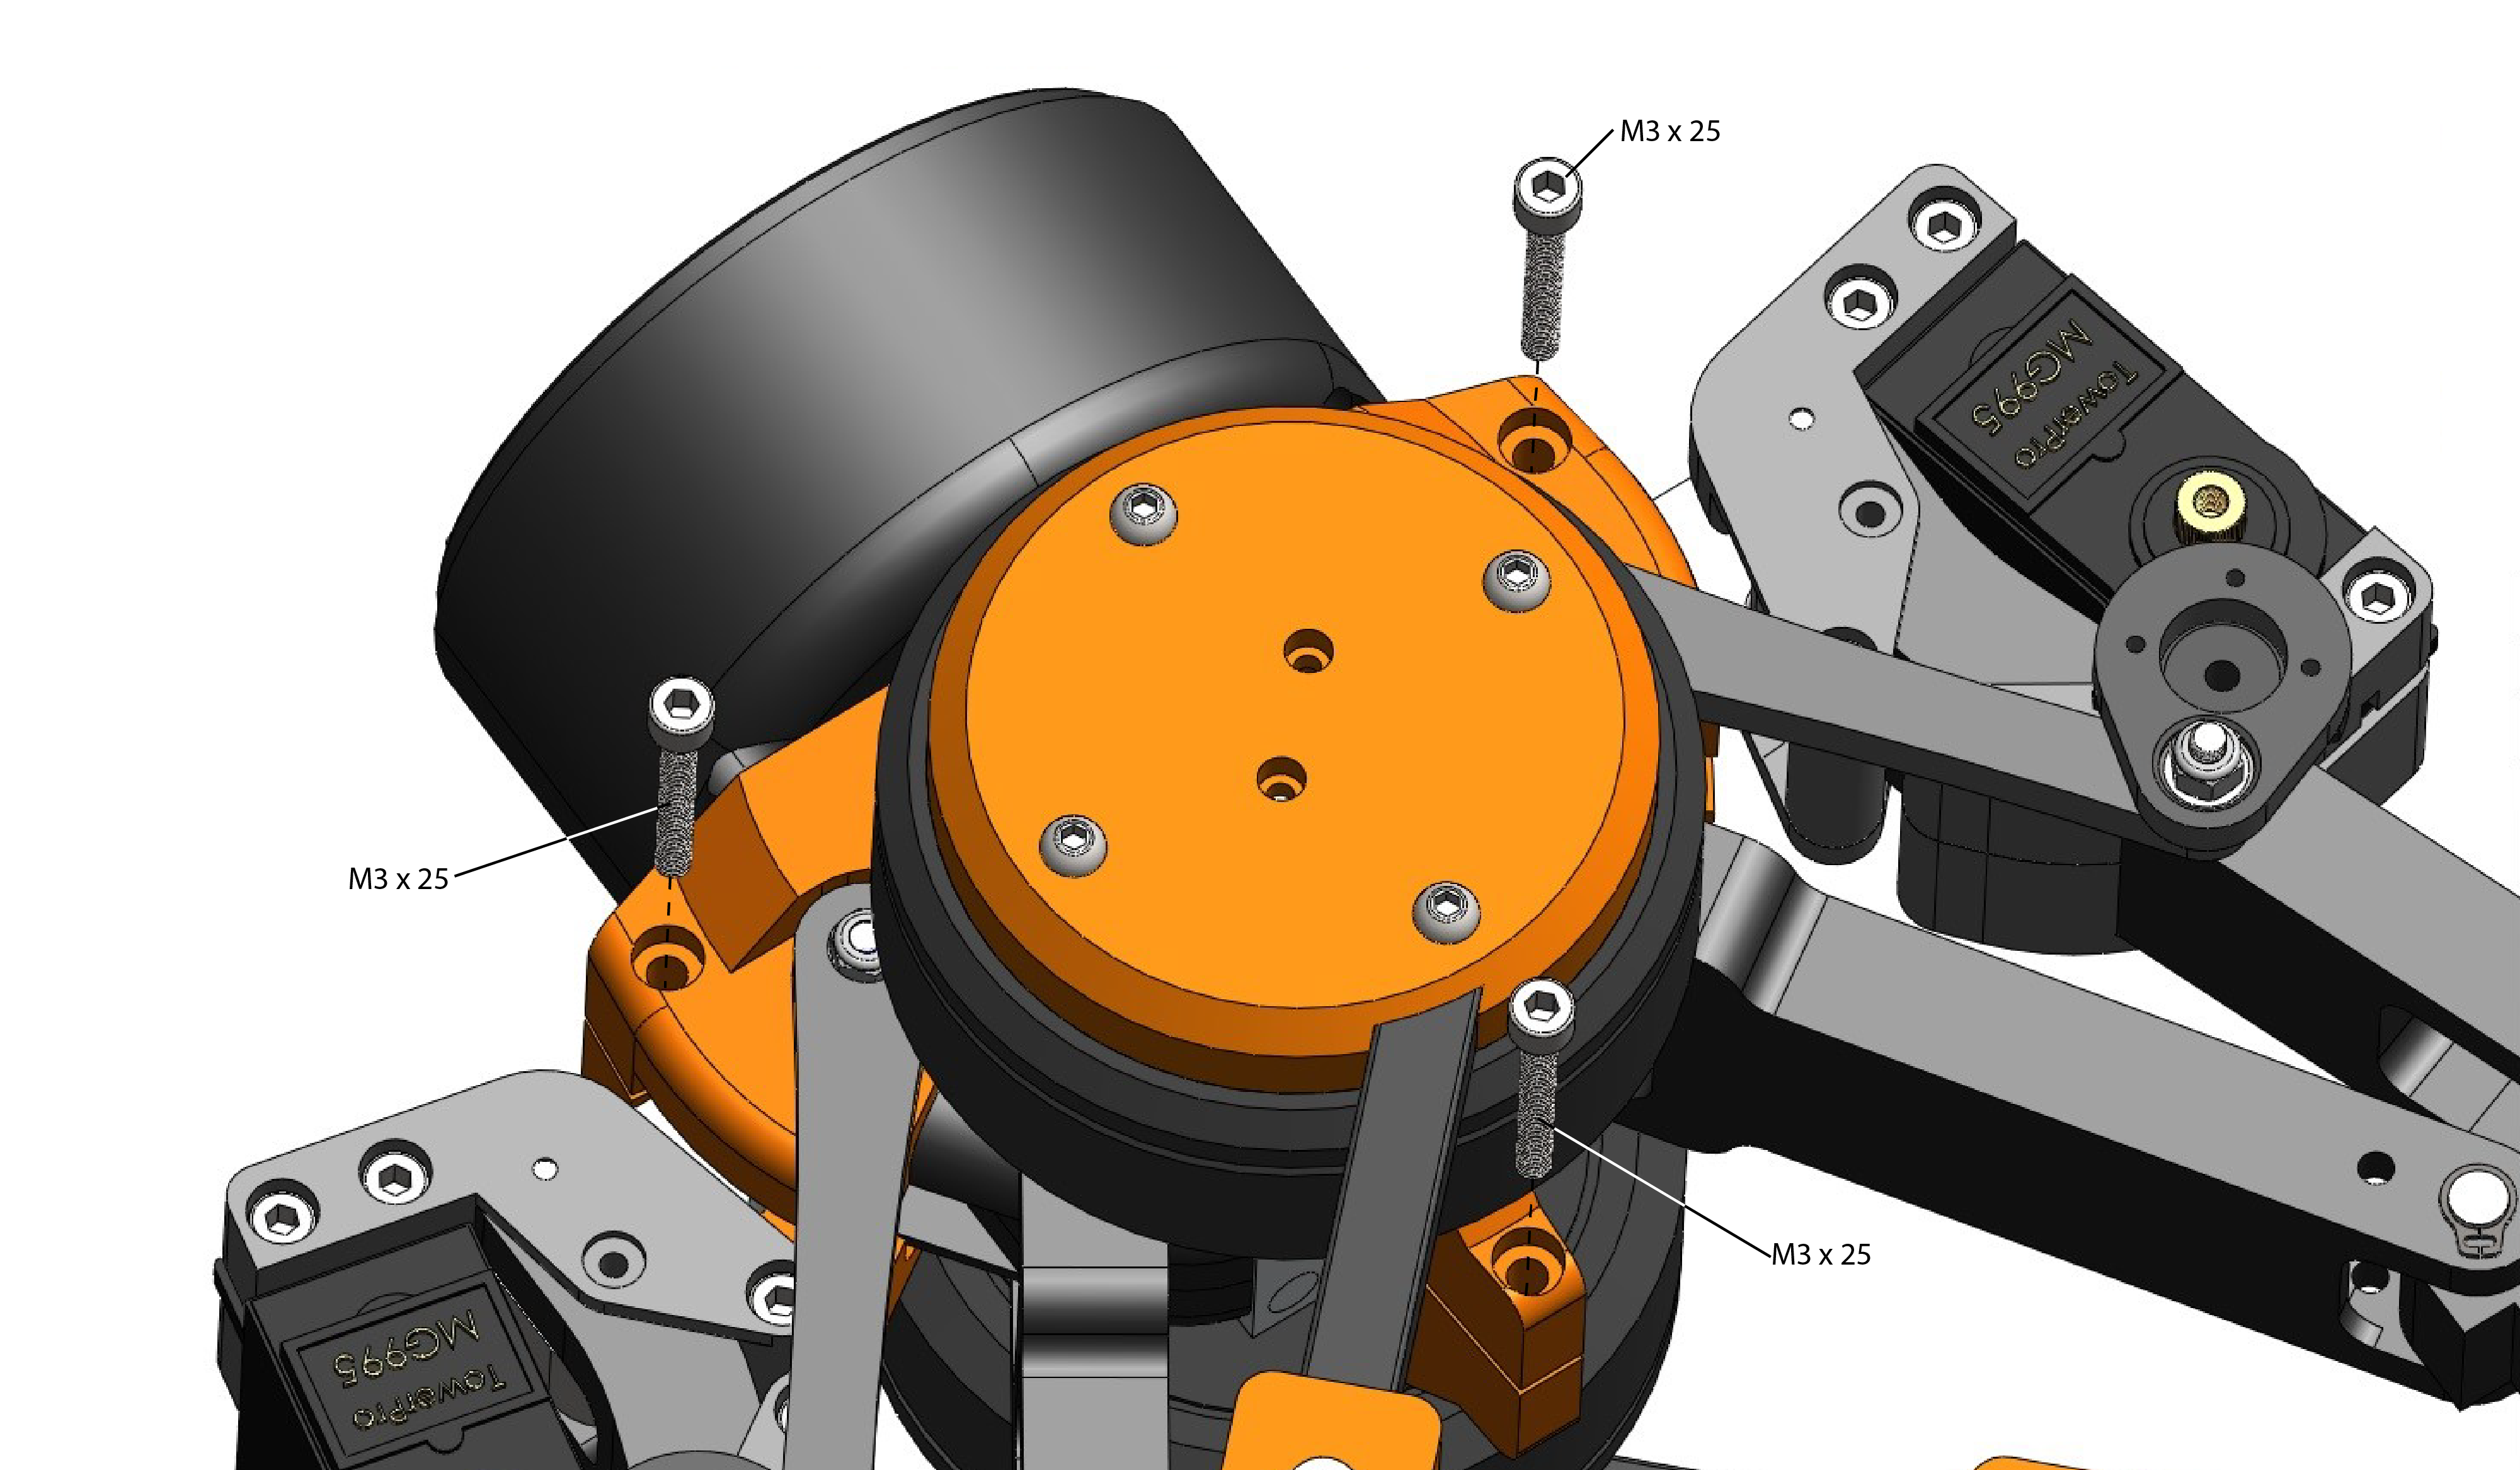
Note: Repeat this step for the other side of the bracket. The M3 x 25 screw should be placed into the hole before attaching the motor.
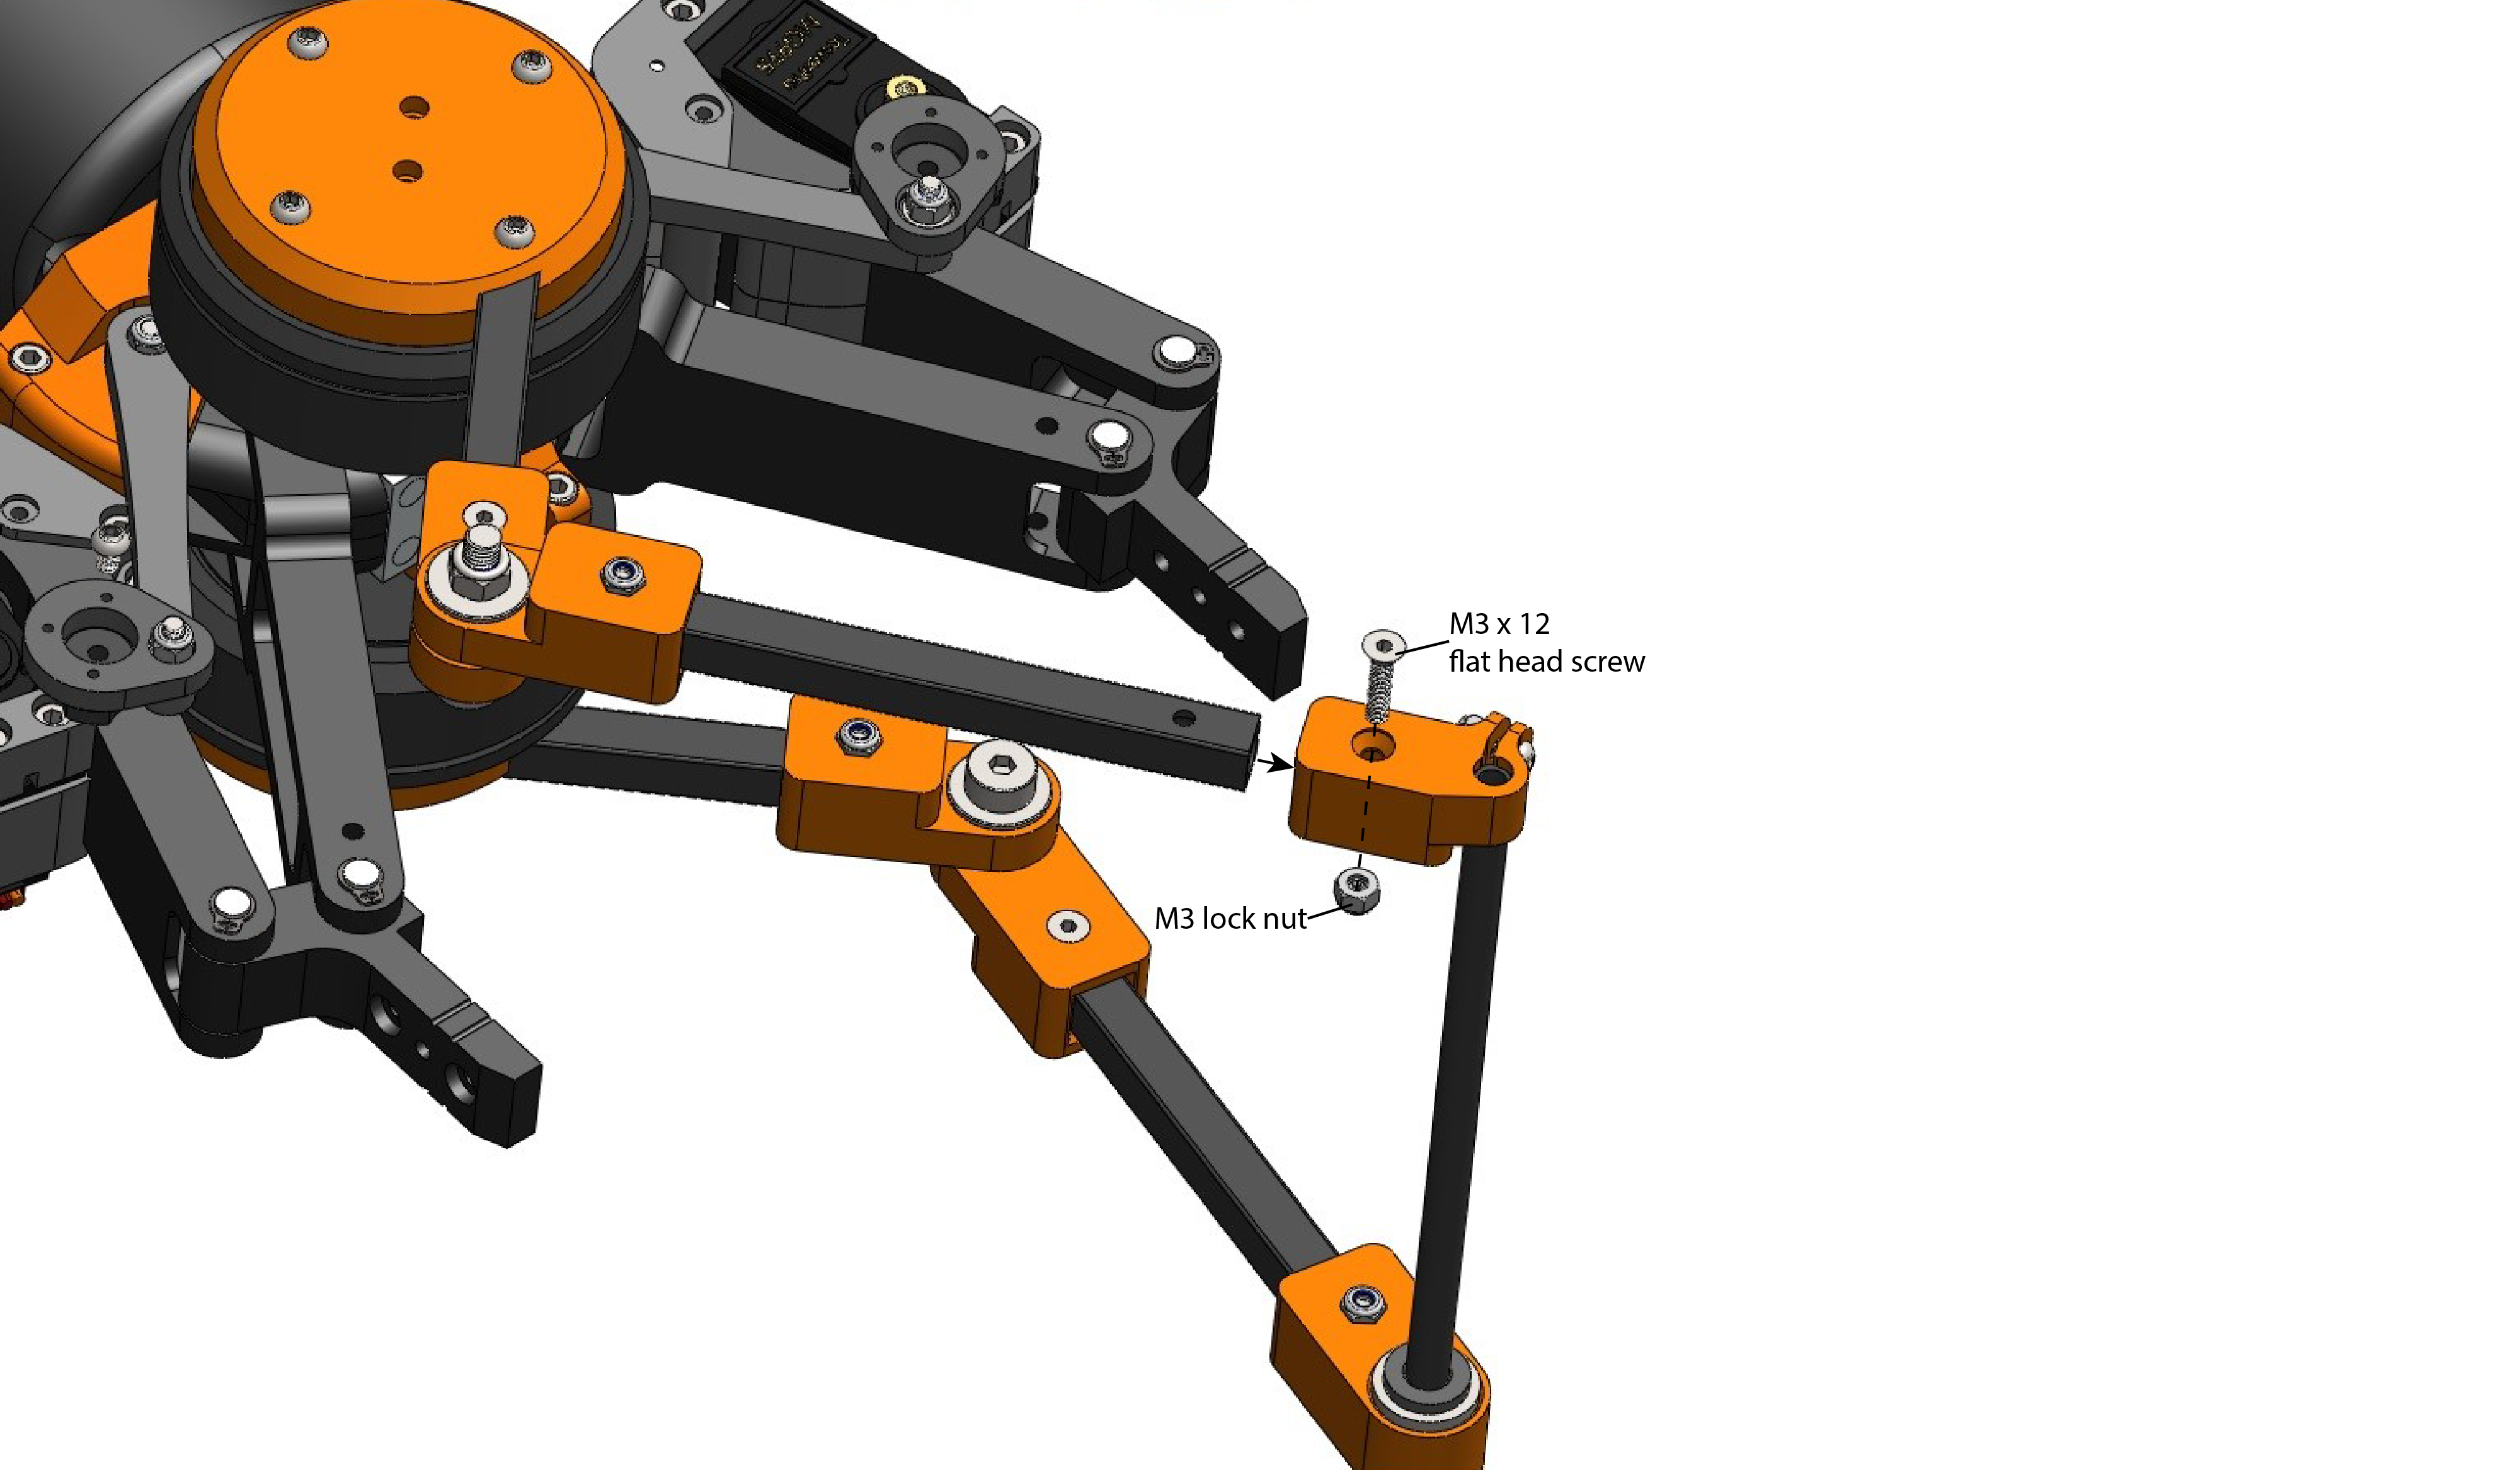
Note: Repeat this step again for another bracket
Note: Repeat this step again for another bracket
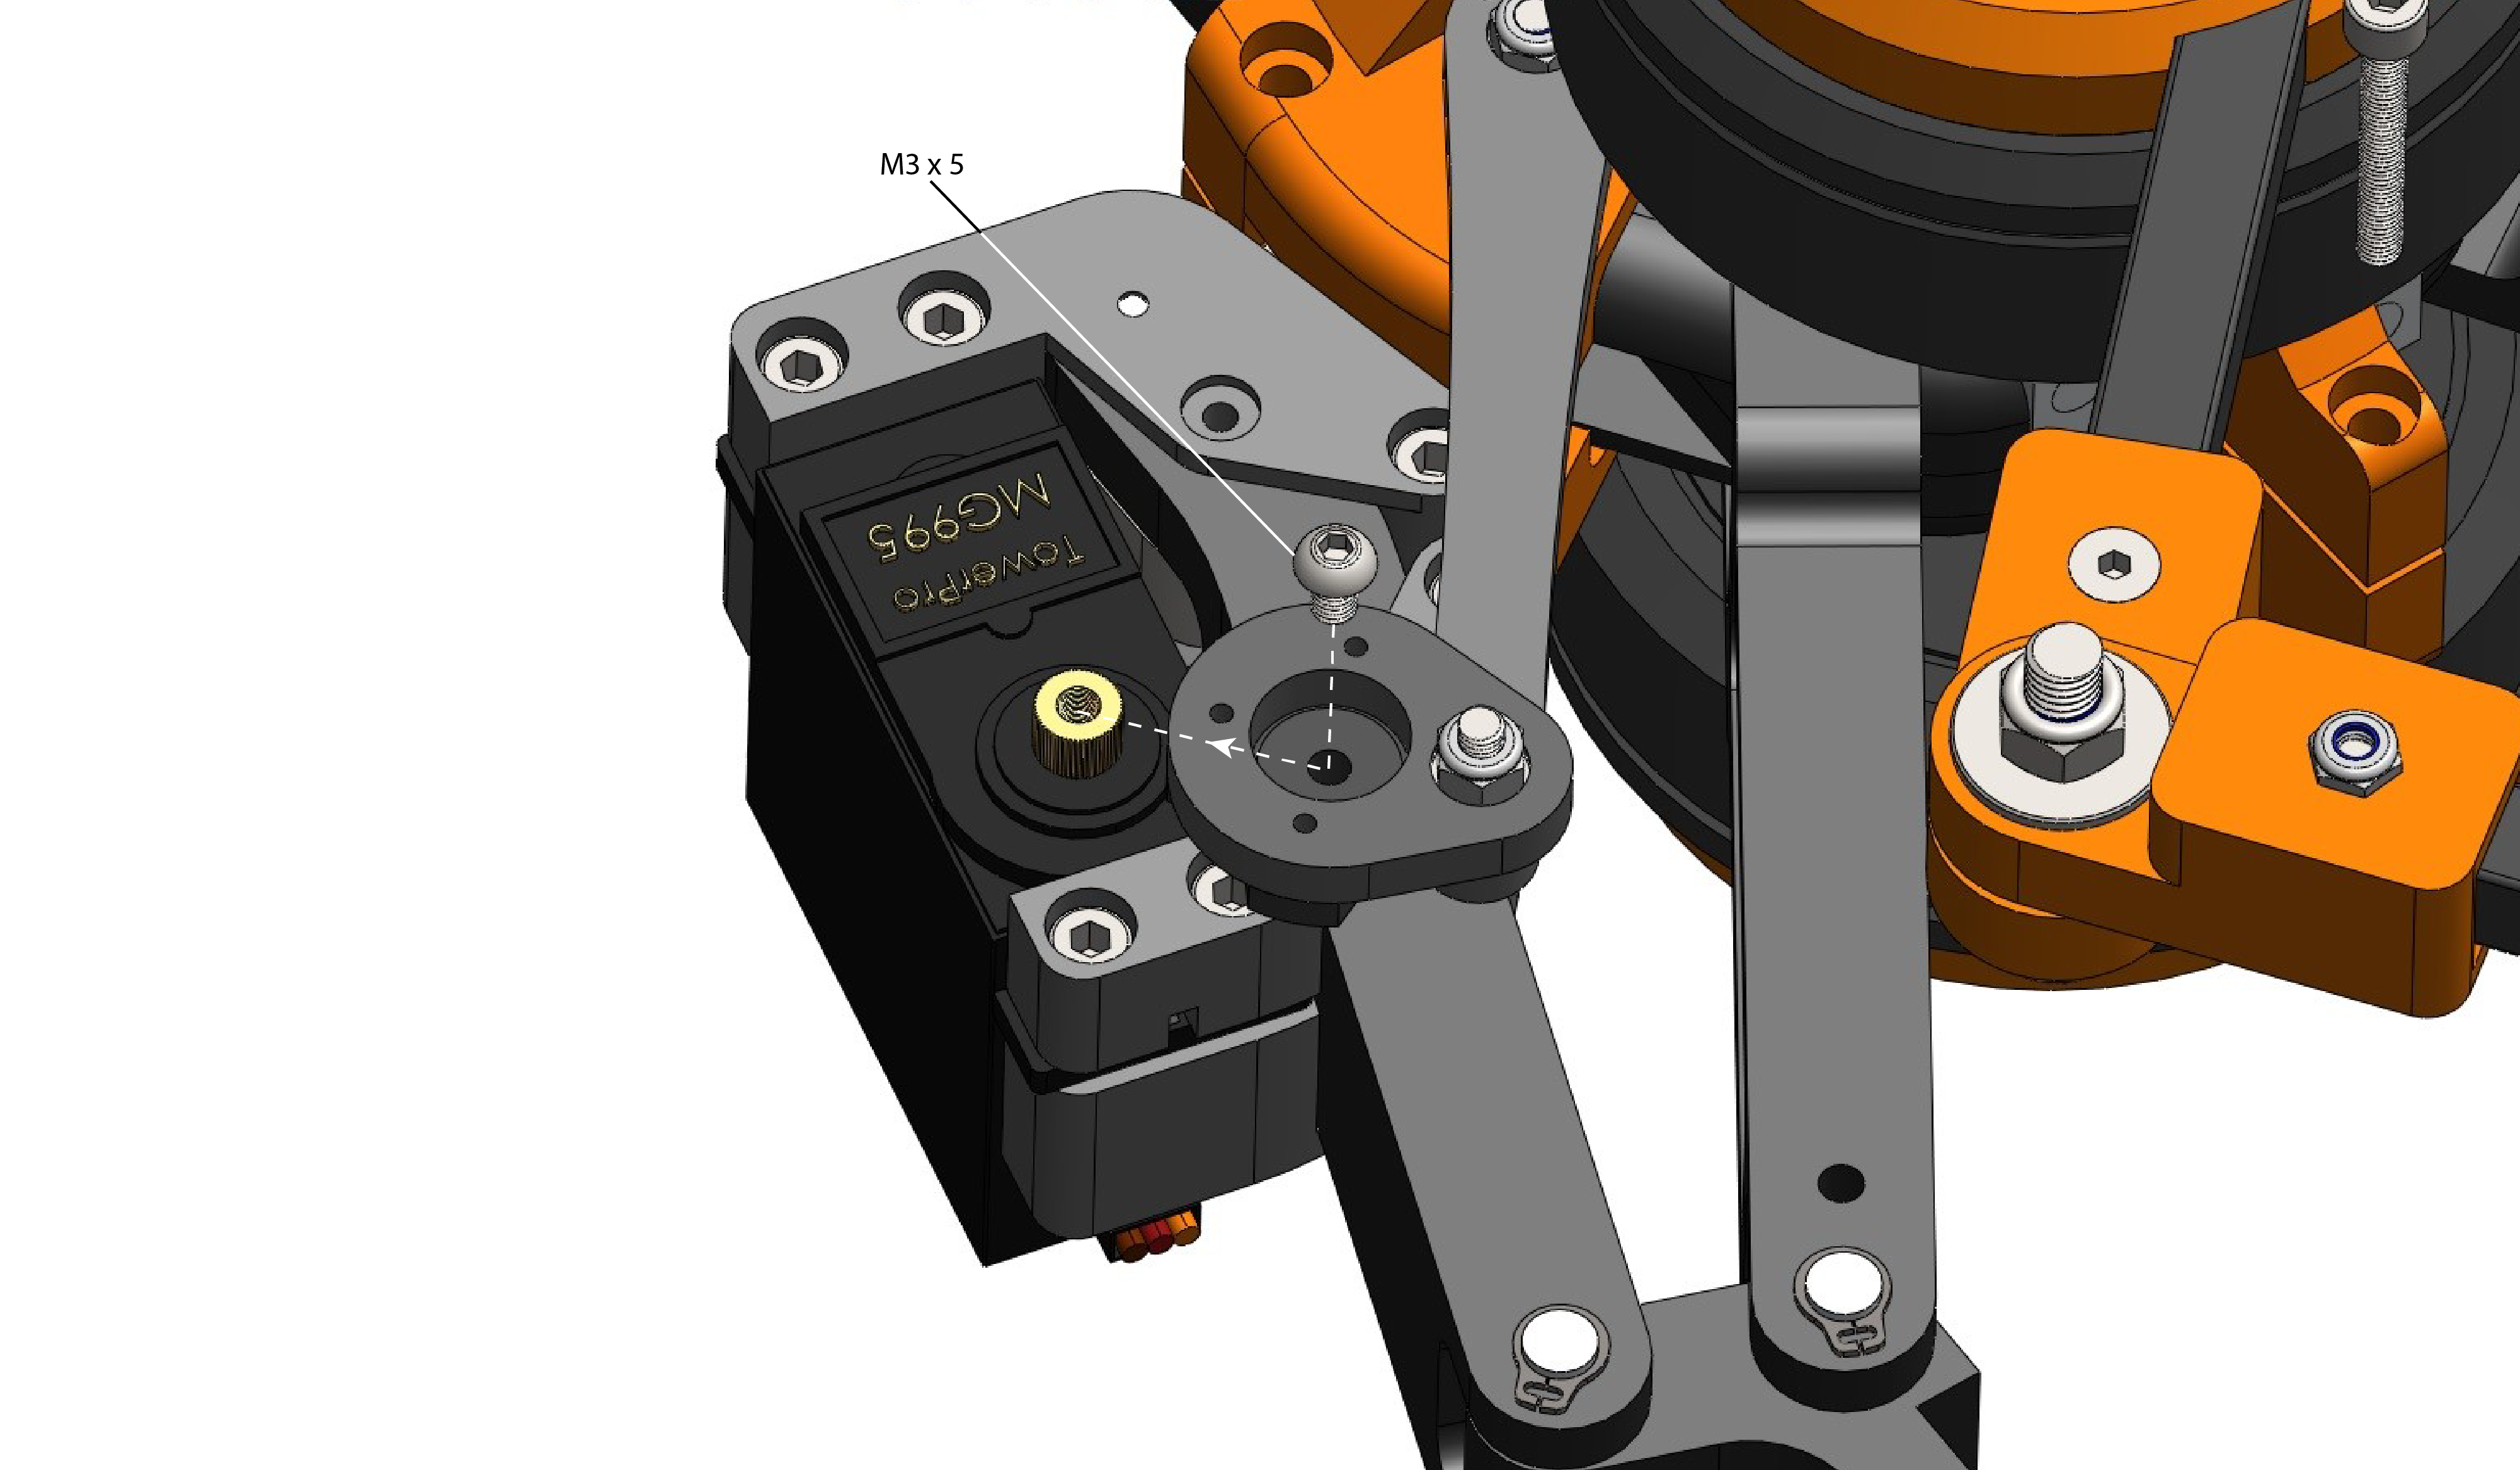
Note: Repeat this step for another finger
Note: Repeat this step for another finger
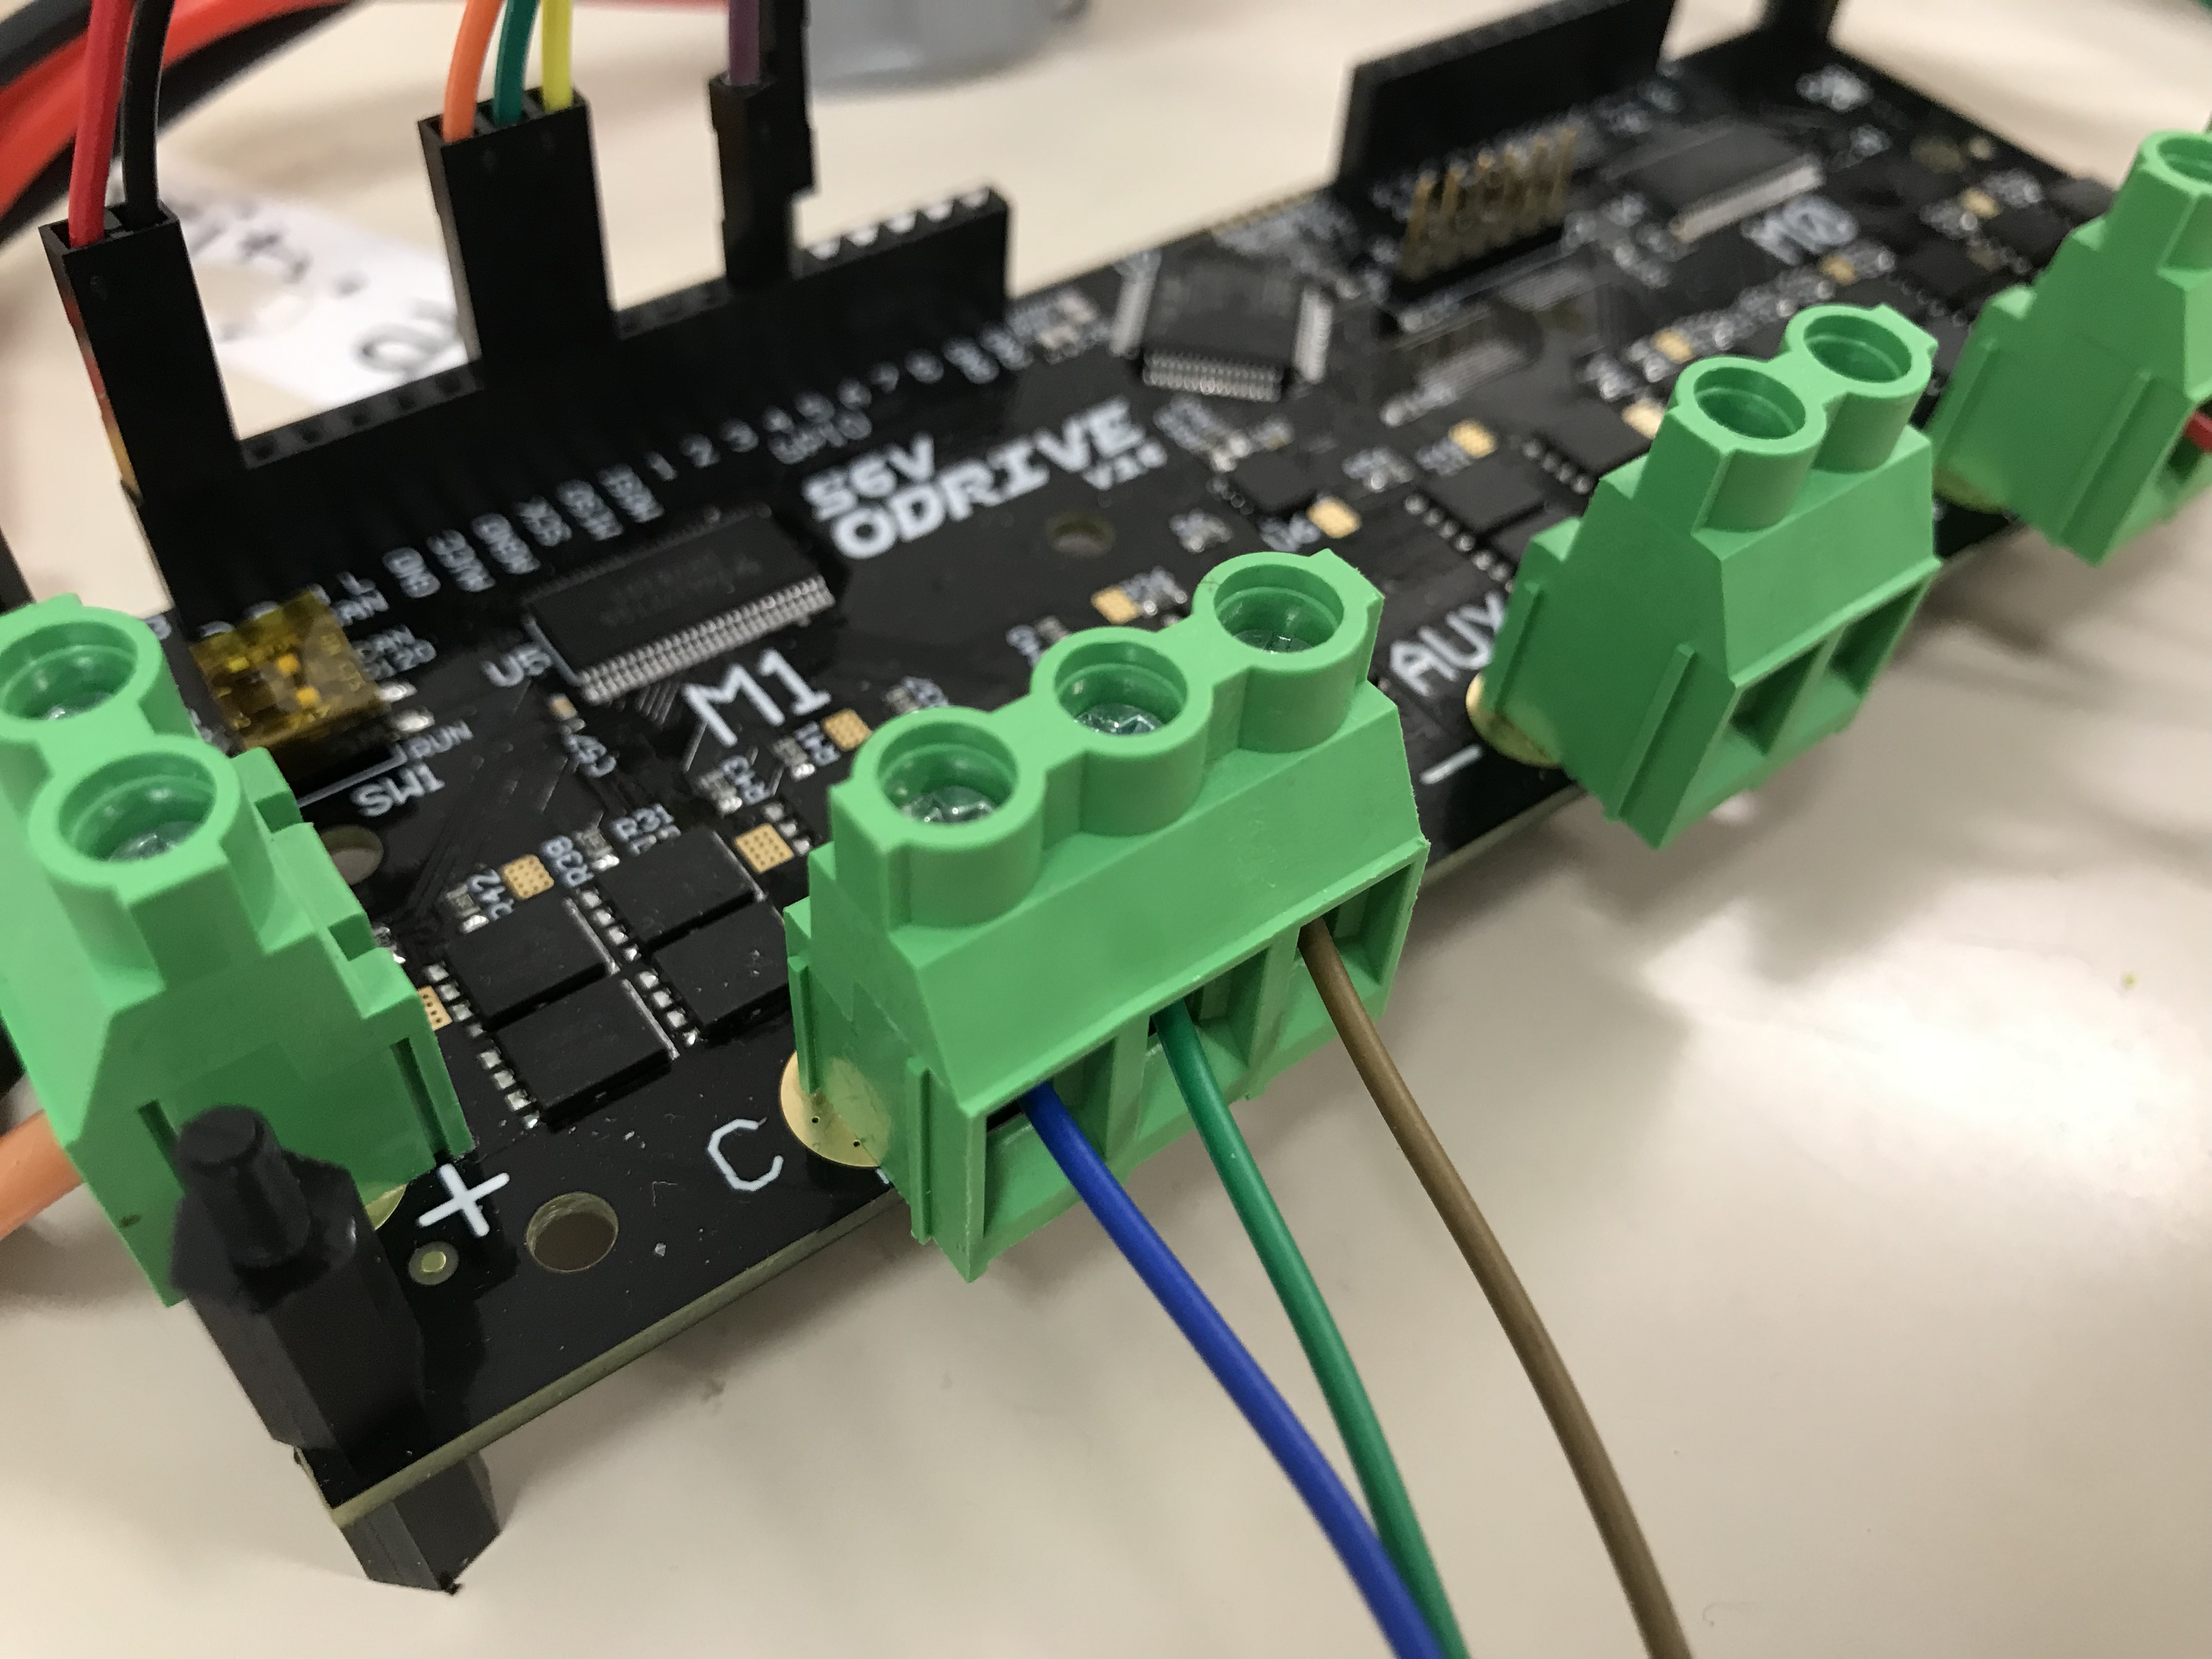
Connecting the motors through the header to the motor terminals
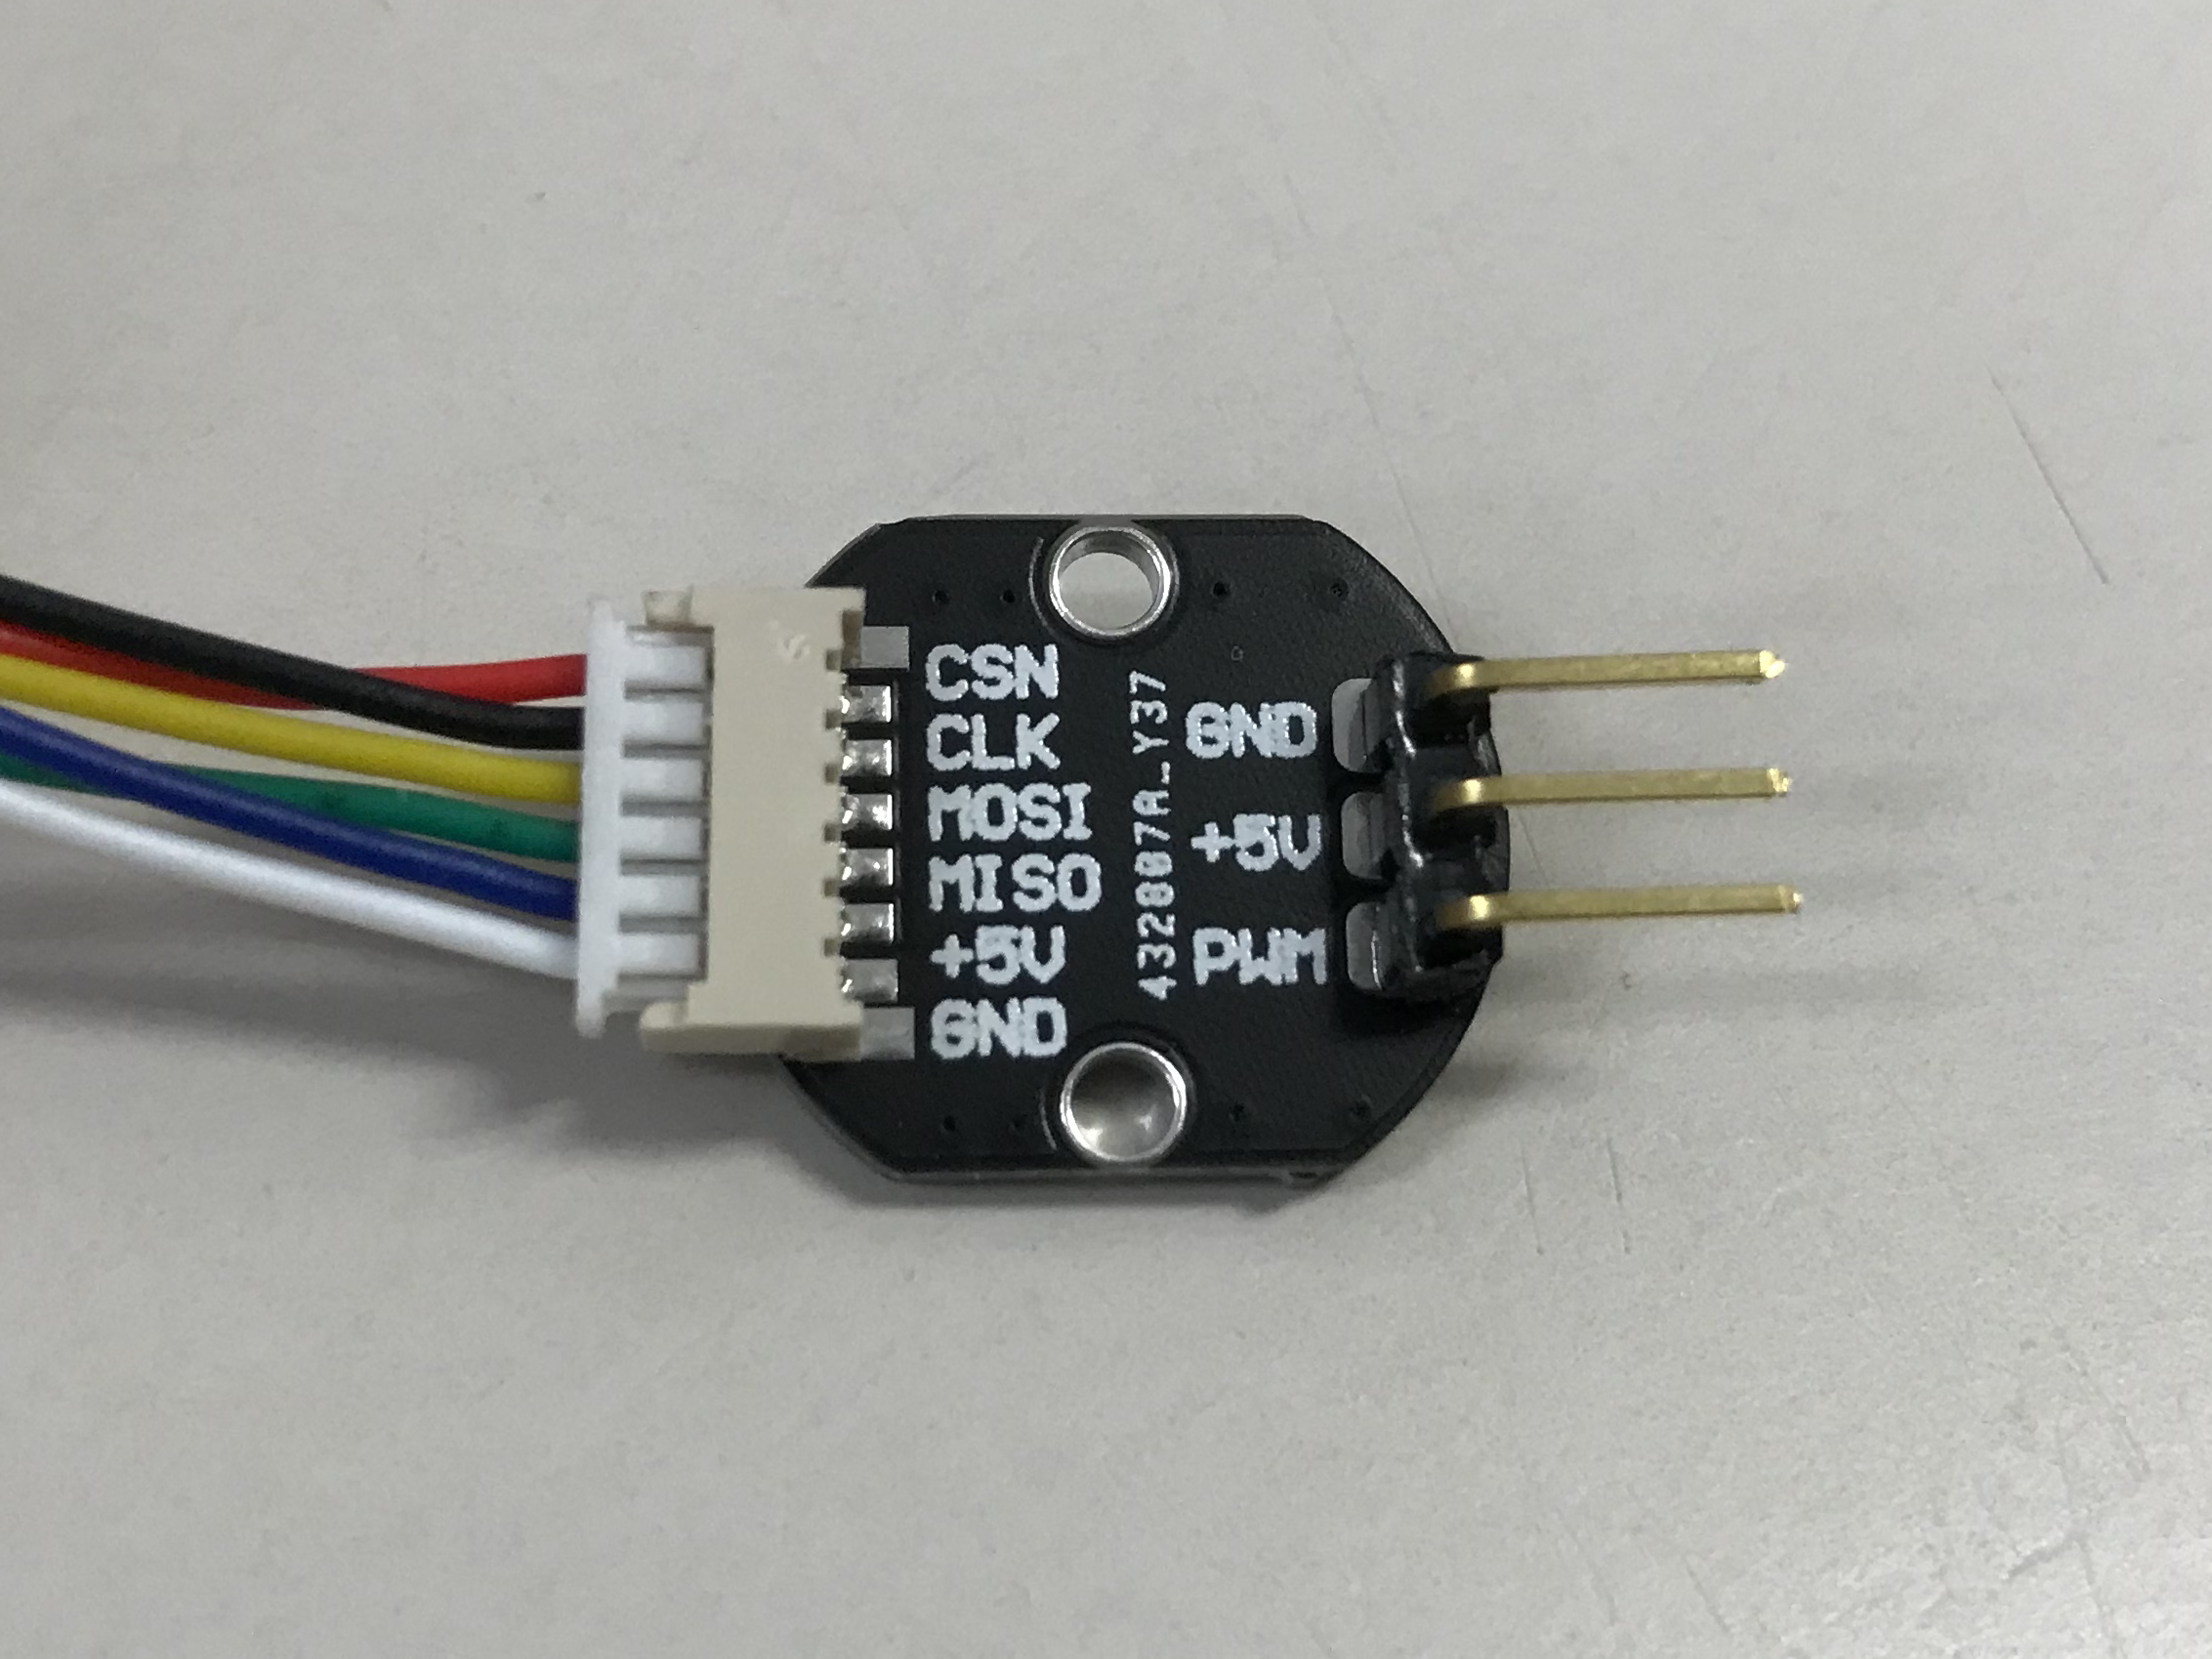
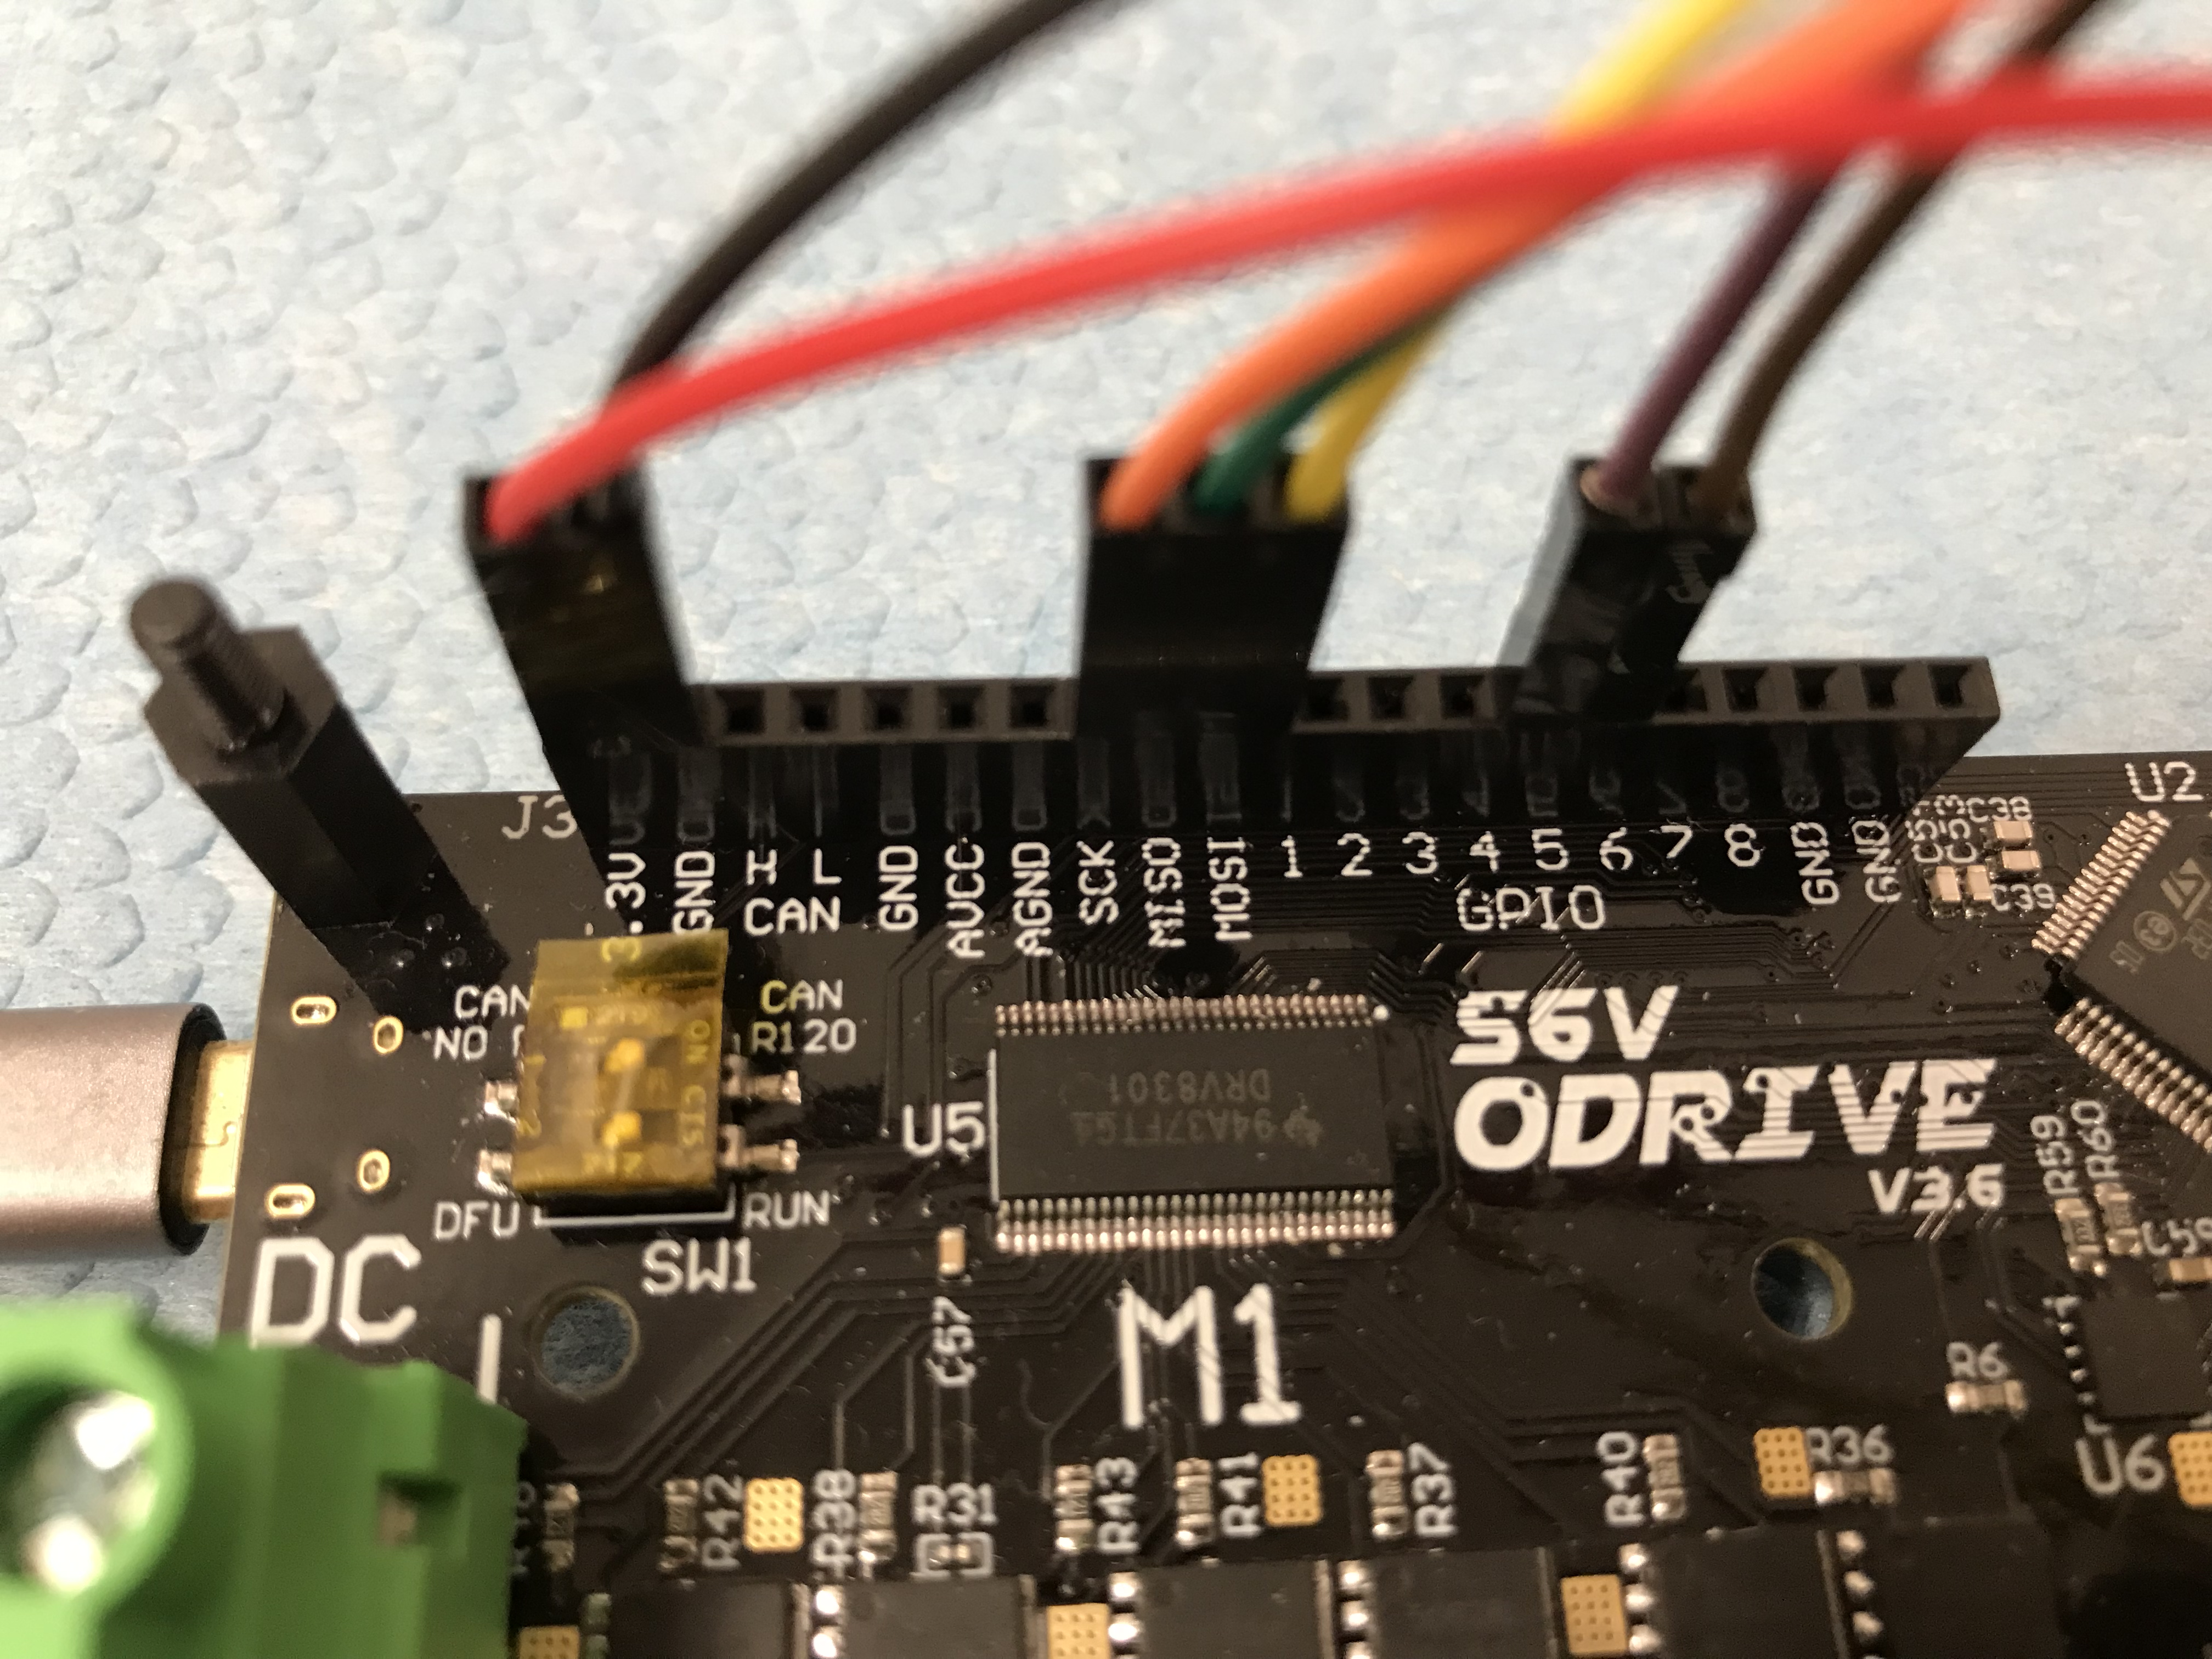
Connecting the encoders to ODrive through SPI interface
Note: The two encoders are identified by the GPIO pin that they connected to. For example, the CSN pin of encoder #1 is connected to GPIO pin 5 and encoder #2 is connection to pin 6.
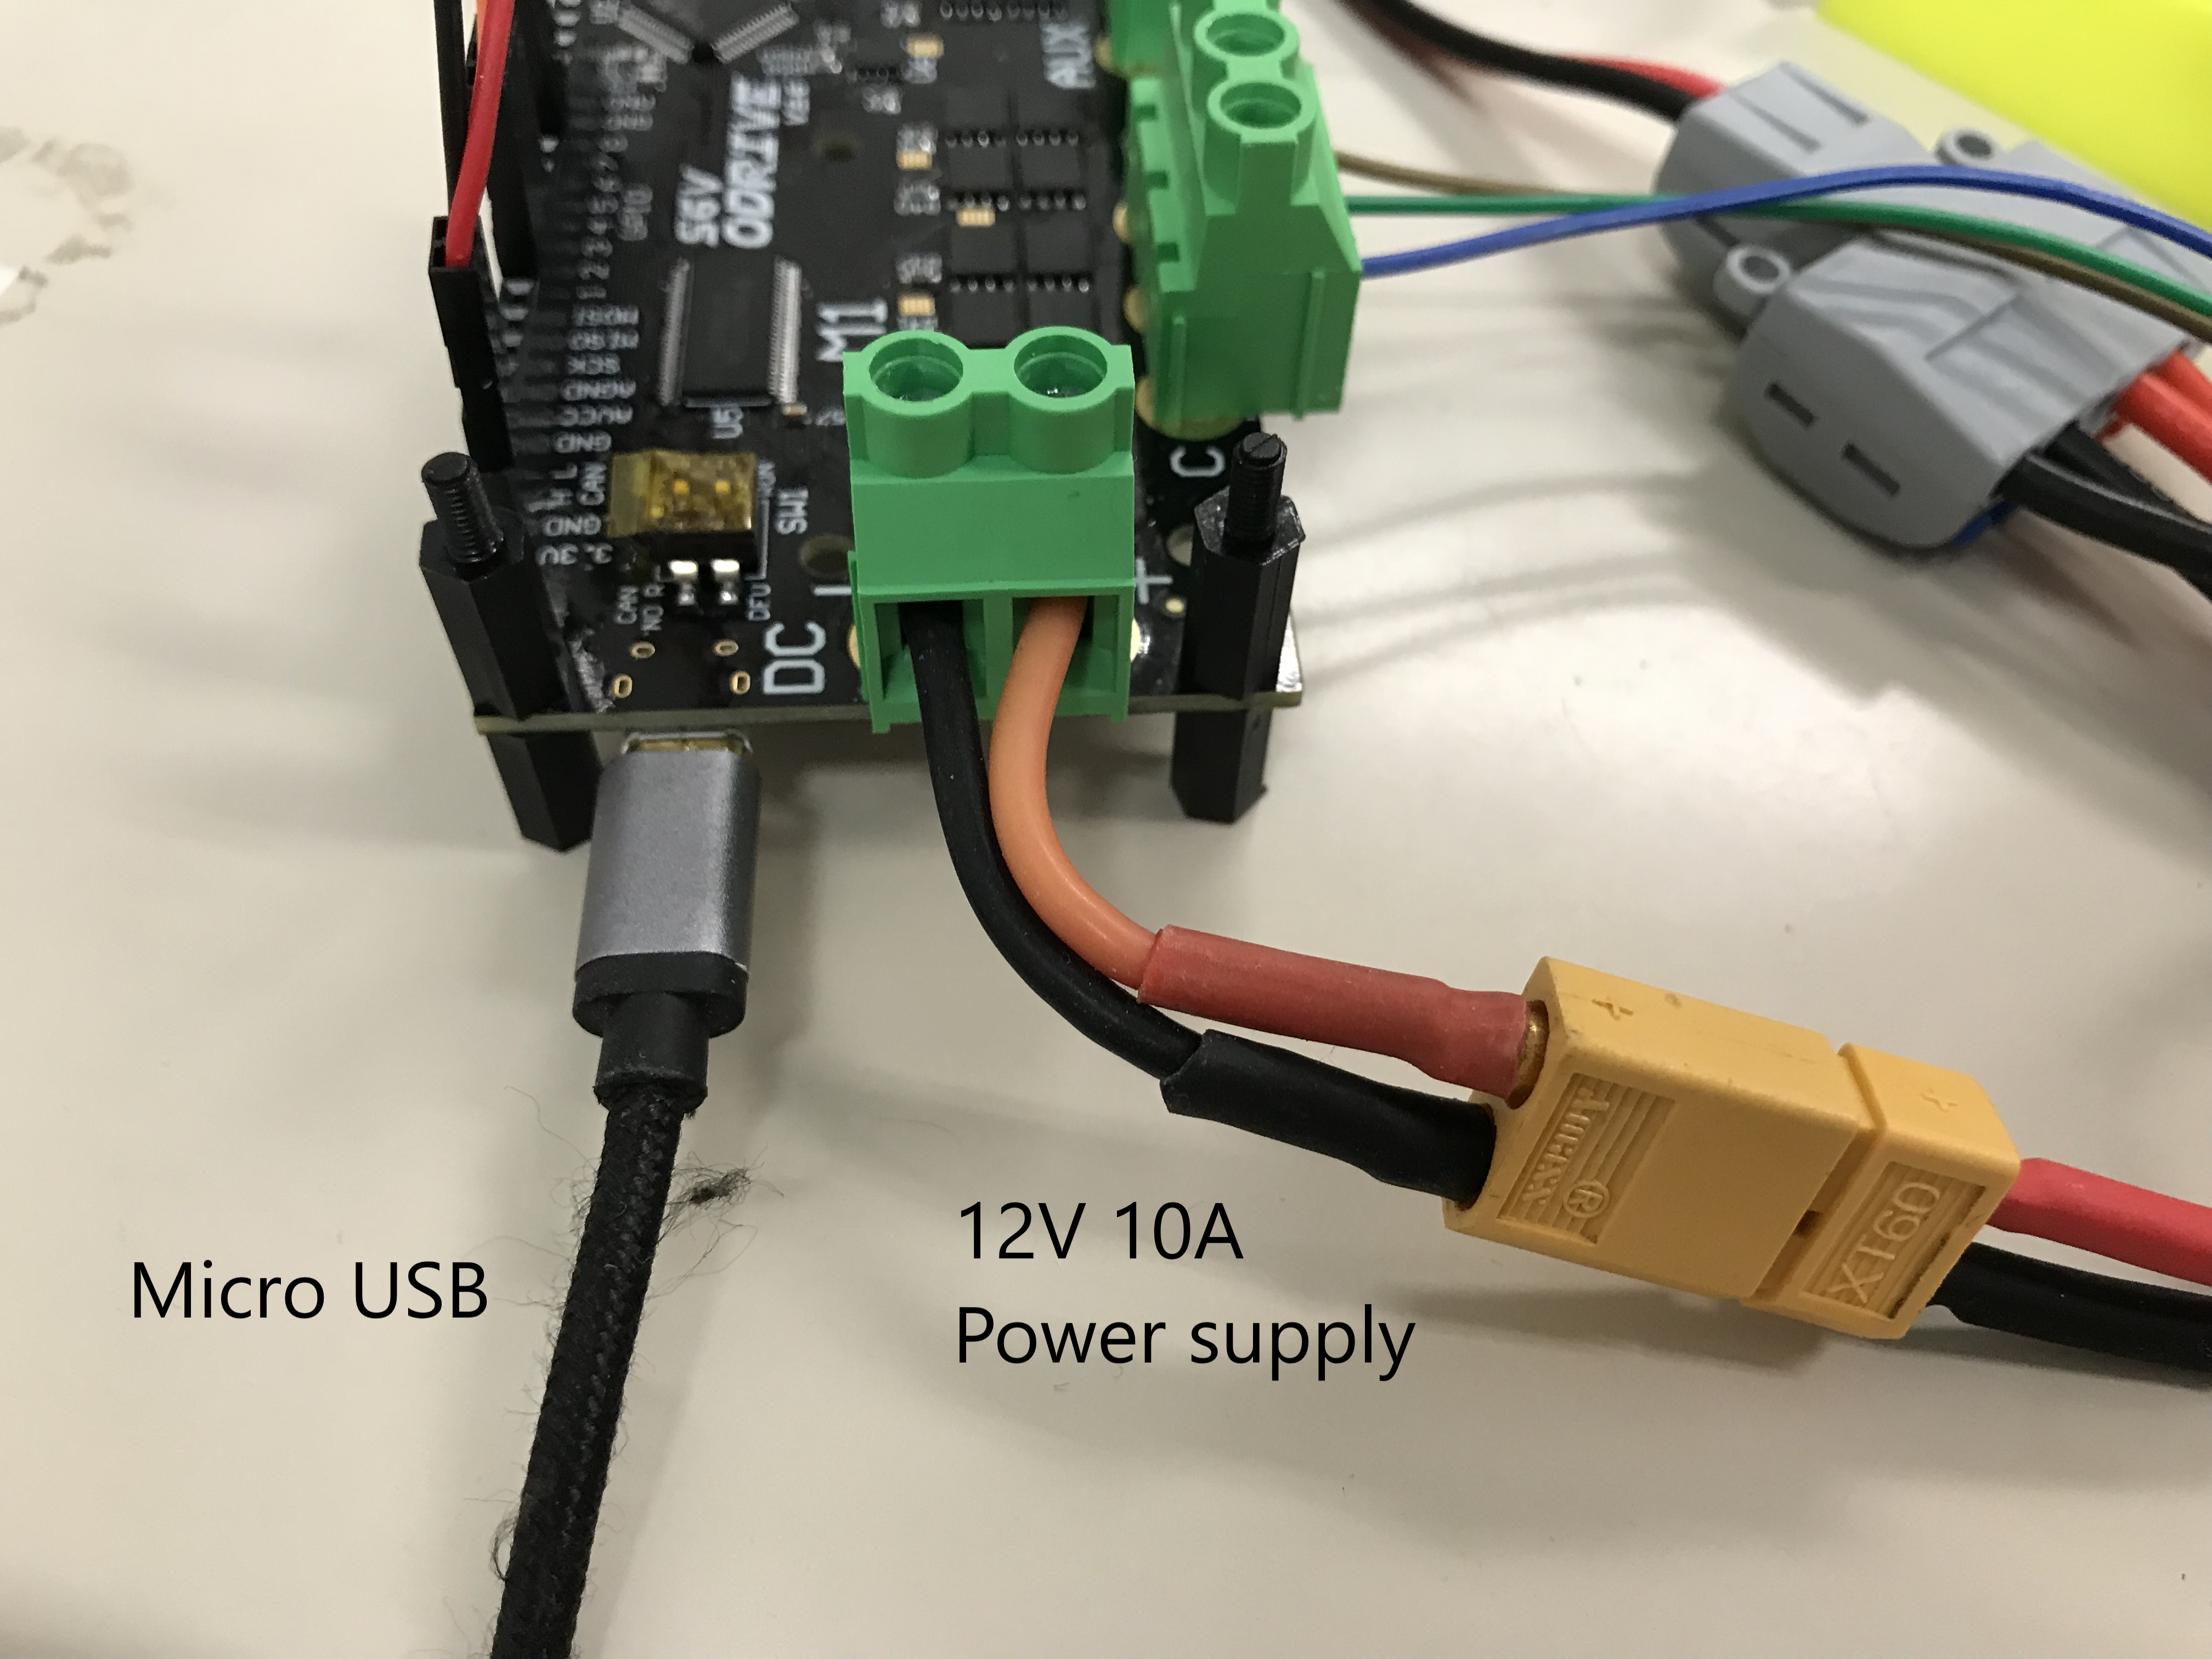
USB and power connection
- Install python3:
sudo apt install python3 python3-pip - Install ODrive tool:
sudo pip3 install --upgrade odrive - Install urx:
sudo pip install urx - Install Jupyter Notebook:
sudo pip3 install jupyter
Configuring ODrive
To configure the ODrive board with the provided config file, run:
cd ~/parrot_gripper/odrive
odrivetool restore-config palm_config.json
Note: If the config file cannot be restored due to mismatched firmware on the ODrive board, you can configure the ODrive by running the commands in the terminal. To set the configs:
- Start ODrive tool in terminal
odrivetool. - Copy the commands in
odrive/palm_config_cmdand execute them in the terminal. - Save the configuration by running
odrv0.save_configuration()before powering off the ODrive board.
Calibrating motors and encoders
After setting the config parameters, the motors and encoders have to be calibrated to measure the motor resistance and encoder offset.
- Start ODrive tool in terminal
odrivetool. - Run
odrv0.<axis>.requested_state = AXIS_STATE_FULL_CALIBRATION_SEQUENCEto start the calibration. Change<axis>toaxis0oraxis1to calibrate the two axes. - Run
odrv0.<axis>.encoder.config.pre_calibrated = Trueandodrv0.<axis>.motor.config.pre_calibrated = Truefor both axes. - Run
odrv0.save_configuration().
Testing the motor control
- Run
odrv0.axis0.requested_state = AXIS_STATE_CLOSED_LOOP_CONTROLto see if the motor is holding its position.
For more details, see ODrive documentation.
The example script of controlling the parrot gripper can be found in /script/example.ipynb. To run the script:
- Start a Jupyter Notebook server in terminal
jupyter notebook. - Run
example.ipynbvia the Jupyter Notebook web interface.
For any technical issues, please contact Ka Hei Mak khmakac@connect.ust.hk
