- Rasterix
- Working Games
- Checkout Repository
- Nexys Video Build
- Simulation Build
- Unit-Tests
- DLL Build
- Port to a new platform
- Missing Features
- Next Steps
Rasterix is a rasterizer implementation for FPGAs written in Verilog. It implements a mostly OpenGL 1.3 compatible fixed function pixel pipeline with a maximum of two TMUs and register combiners in hardware. The vertex pipeline is implemented in software. The renderer is currently able to produce 100MPixel and 200MTexel at a clockspeed of 100MHz.
The current implementations lacks several important features like setting the screen resolution via registers, Mip Mapping and so on. It has more the nature of an prototype.
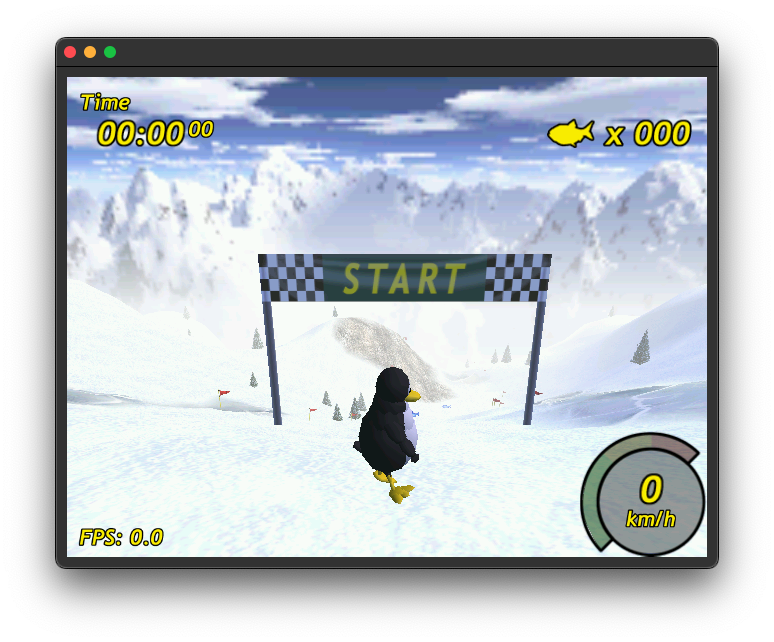
Tested games are tuxracer (please see https://github.com/ToNi3141/tuxracer.git and the Branch RasterixPort)
and under Windows Warcraft 3 (with WGL).
Use the following commands to checkout the repository:
git clone https://github.com/ToNi3141/Rasterix.git
cd Rasterix
git submodule init
git submodule update
The build target is a Nexys Video board with an XC7A200 FPGA. The interface used to connect the FPGA with the PC is an 16bit synchronous FT245 protocol on the Nexys FMC connector.
To build the binaries use the following commands.
cd rtl/top/Xilinx/NexysVideo
/Xilinx/Vivado/2020.1/bin/vivado -mode batch -source build.tcl
You will find rasterix.bin and rasterix.bit in the synth directory. Use Vivado to program the FPGA or to flash the binary into the flash.
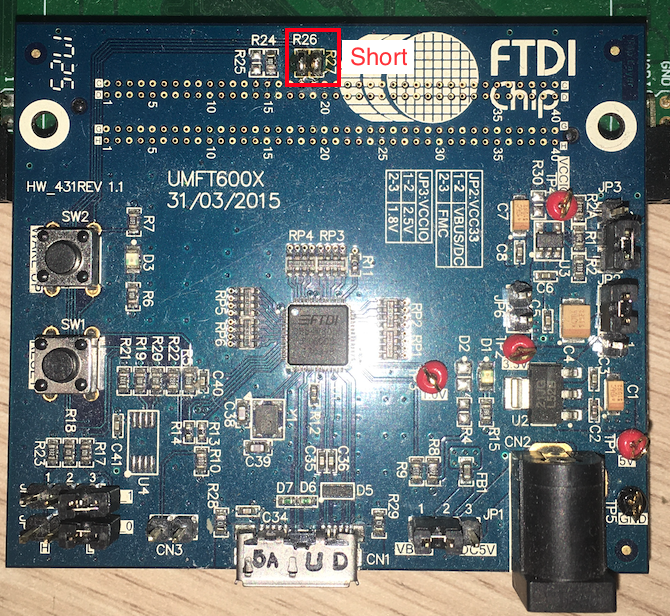
The current implementation uses a UMFT600X-B eval board from FTDI with an FT600 to connect the Nexys with an PC. It offers a USB 3.0 connection and can be connected via the FMC connector.
The UMFT600X-B must be prepared:
- JP1: 1-2 (VBUS)
- JP2: 2-3 (Select powered by FIFO master Board(default))
- JP3: 1-2 (VCCIO=2.5V(default))
- JP4: Open (Multi-Channel FIFO)
- JP5: Open (Multi-Channel FIFO)
- JP6: Open
Also the following solder bridges must be applied:
- R26: Short (GPIO: Triggers the reset line)
- R27: Short (GPIO)
A simulation can be used to easily develop and debug the renderer. The simulation can be found under unittests/qtRasterizer. There is a Qt project which can be opened with the QtCreator. This project supports also the real hardware, and can be selected with the TARGET_BUILD variable in the .pro file.
First generate the C++ code from the Verilog source via Verilator 4.036 2020-06-06 rev v4.034-208-g04c0fc8aa. Use the following commands:
cd rtl/top/Verilator
make
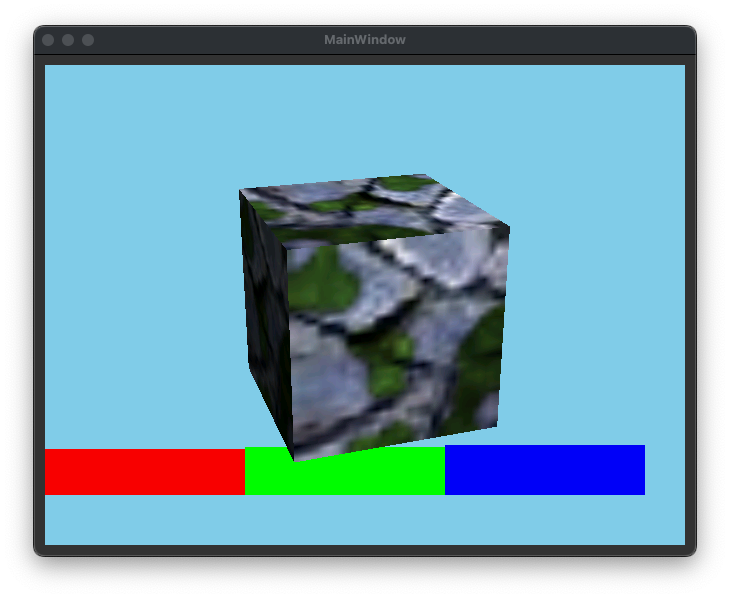
Then build the Qt project. If the build was successful, you will see the following image on the screen, when you have started the application:
You see here a cube with enabled multi texturing and lighting. Below you can see RGB colors testing the scissor.
It is likely, that your verialtor installation has another path than it is configured in the qtRasterizer.pro file. Let the variable VERILATOR_PATH point to your verilator installation and rebuild the project.
Note: Currently the build is only tested on OS X. The .pro file must be adapted for other operating systems.
Unit-tests for the Verilog code can be found under ./unittests.
Just type make in the unit-tests directory. It will run all available tests.
To run games like Warcraft 3 a DLL is required to forward the OpenGL calls to the FPGA. This repository contains a cmake project to build the DLL.
Note: Only WGL is partially supported, therefore only Windows games which using WGL will probably run. Linux and OS X games won't run currently.
Before configuring and starting the build, download from FTDI (https://ftdichip.com/drivers/d3xx-drivers/) the 64bit X64 D3XX driver version 0.5.21. Unzip the archive and copy the osx directory to lib/driver/ft60x/ftd3xx/.
Open cmake-gui to create a makefile project. Use as build directory ./build.
Switch to the build directory and type make to build the project. To test the build, run ./example/minimal/minimal. It should initialize the renderer and draw a rotating cube.
Before starting the build, download from FTDI (https://ftdichip.com/drivers/d3xx-drivers/) the 32bit X86 D3XX driver version 1.3.0.4. Unzip the archive and copy the win directory to lib/driver/ft60x/ftd3xx/.
Open cmake-gui to create a Visual Studio project. Use as build directory ./build.
Go to the build directory, open the Visual Studio project and build it. Afterwards you will find a wgl.dll. The DLL is build for 32bit targets because games from that era are usually 32bit builds. To test the build, run .\example\minimal\Release\minimal.exe. It should initialize the renderer and draw a rotating cube.
Only classic Warcraft 3 will work. Reforged does not.
- Prepare Warcraft 3. Set the resolution to something like 800x600 or below and set the texture quality to low (currently the Renderer supports only textures with a maximum size of 256x256).
- Rename
wgl.dllintoOpenGL32.dlland copy it together with the 32bit version of theFTD3XX.dllin the root directory of your Warcraft 3 installation. - Add a shortcut to the
Frozen Throne.exeorWarcraft III.exeon your desktop. Edit the shortcut and write-openglafter the path of the exe ("C:\path\to\warcraft3\Frozen Throne.exe" -opengl) to start Warcraft 3 in OpenGL mode. - Open Warcraft 3 via the shortcut. You should now see the menu on the screen connected to the FPGA.
Warcraft 3 runs on low settings with around 20-30FPS.
Switching the resolution and videos are currently not working.
Please have a look at lib/driver. There are already a few implementations to get inspired.
To port the driver to a new interface (like SPI, async FT245, or others) use the following steps:
- Create a new class which is derived from the
IBusConnector. Implement the virtual methods. This is also performance critical. Use (if possible) non blocking methods. Otherwise the rendering is slowed down because the data transfer blocks further processing. - Instantiate and use this class for the
Renderer. - Add the whole
lib/gl,lib/3rdPartyandlib/driverdirectory to your build system. - Build
Please use rtl/top/Verilator/topMemory.v as an simple example. Or have a look at the build script and the block diagram from the Nexys Video in rtl/top/Xilinx/NexysVideo to have a real world example.
- Instantiate the
Rasterixand aDmaStreamEnginein your project. When instantiating theRasterixmodule, make sure that the following parameters are equal: From the C++ code:Renderer::CMD_STREAM_WIDTHand from Verilog code:DmaStreamEngine::STREAM_WIDTHandRasterix::CMD_STREAM_WIDTH. From C++ code:Renderer::Y_LINE_RESOLUTIONand from Verilog code:Rasterix::Y_LINE_RESOLUTION. - Connect the command AXIS channel (
s_cmd_axis) from theRasterixto them_cmd_axischannel from theDmaStreamEngine. - Connect the
s_cmd_axischannel from theDmaStreamEngineto your module (the Nexys Video block diagram usesrtl/3rdParty/FPGA-ftdi245fifo), which streams the command stream (basically the output from theIBusConnector). - Connect the
m_mem_axifrom theDmaStreamEngineto a memory. Make sure to adapt the template parameter from C++ codeRenderer::MAX_NUMBER_OF_TEXTURE_PAGESto the size of the connected memory. One page has 4 kB. If you have a connected memory with 512kB, you should setRenderer::MAX_NUMBER_OF_TEXTURE_PAGESto 128. - Connect the AXIS channel from the
Rasterixcolor buffer (m_framebuffer_axis) to an device, which can handle the color buffer stream (a framebuffer for instance). - Connect
nresetto your reset line andaclkto your clock domain. - Add everything in
rtl/Rasterixandrtl/Floatto your build system. - Synthesize.
The following features are currently missing compared to a real OpenGL implementation
- Logic Ops
- Mip Mapping
- ...
- Implement dynamic screen resolutions
- Add the possibility to use more than one render context
- Implement Mip Mapping
- Implement logic ops
- Implement a texture cache to omit the
TextureBuffer - Implement higher texture resolutions
- Port to an Artix XC7A35
- Port to an Zynq board (XC7Z020 for now)
- Make driver usable with microcontrollers
- ...


