For task 5.
- Run
npm installto install the new dependencies - Run
npm run e2eto run the tests
This is a small demo of an Angular & Ionic application containing a few tasks to complete as small coding challenges. You don't need to complete all the tasks, it is completely up to you how many of them you will work on and how much time you'll spend on them.
In case you need help or have any comments feel free to reach out to us at kacan@dynaway.com
Follow the instructions in the next section to get your project set up properly. Creating a commit for each of the tasks is suggested. Get back to us once you're confident with your code and remember - it is the quality of your code and the way you approach the problems that matter the most, not whether you've completed all the tasks and how fast! 😉
You might be familiar with Angular but not Ionic - and this is completely fine. Think of Ionic as a library of UI components for now and don't get confused with other features Ionic can bring. We won't go further than importing some ready-to-use components from the Ionic library in this project.
- Fork the repository
- Make sure you have Node.js (v16+) and npm installed. If not, follow the links and find the installation instructions
- Install the Angular CLI and Ionic CLI globally by executing
npm install -g @angular/cliandnpm install -g @ionic/cliin your terminal - Clone or download your forked project (
git@github.com:<your_username>/dynaway-homework.git) and go to the project folder (cd dynaway-homework) - Install all dependencies with
npm install - Run
npm run start. Your app should be now up and running on localhost:4200!
You've probably noticed that the app is running, yet we can't see any content 😕. It might have happened that a bug sneaked into our code. Can you find it and fix it?
The app essentially consists of two pages:
- The home page, containing a list of assets. Assets are fetched from a server using the asset service (backend communication is mocked though). Some assets might even include a preview image. If you click on an asset card, it'll take you to the detail page.
- The detail page. This is just a dummy page only made to make routing and navigation work. The page only contains a back button, taking you back to the home page.
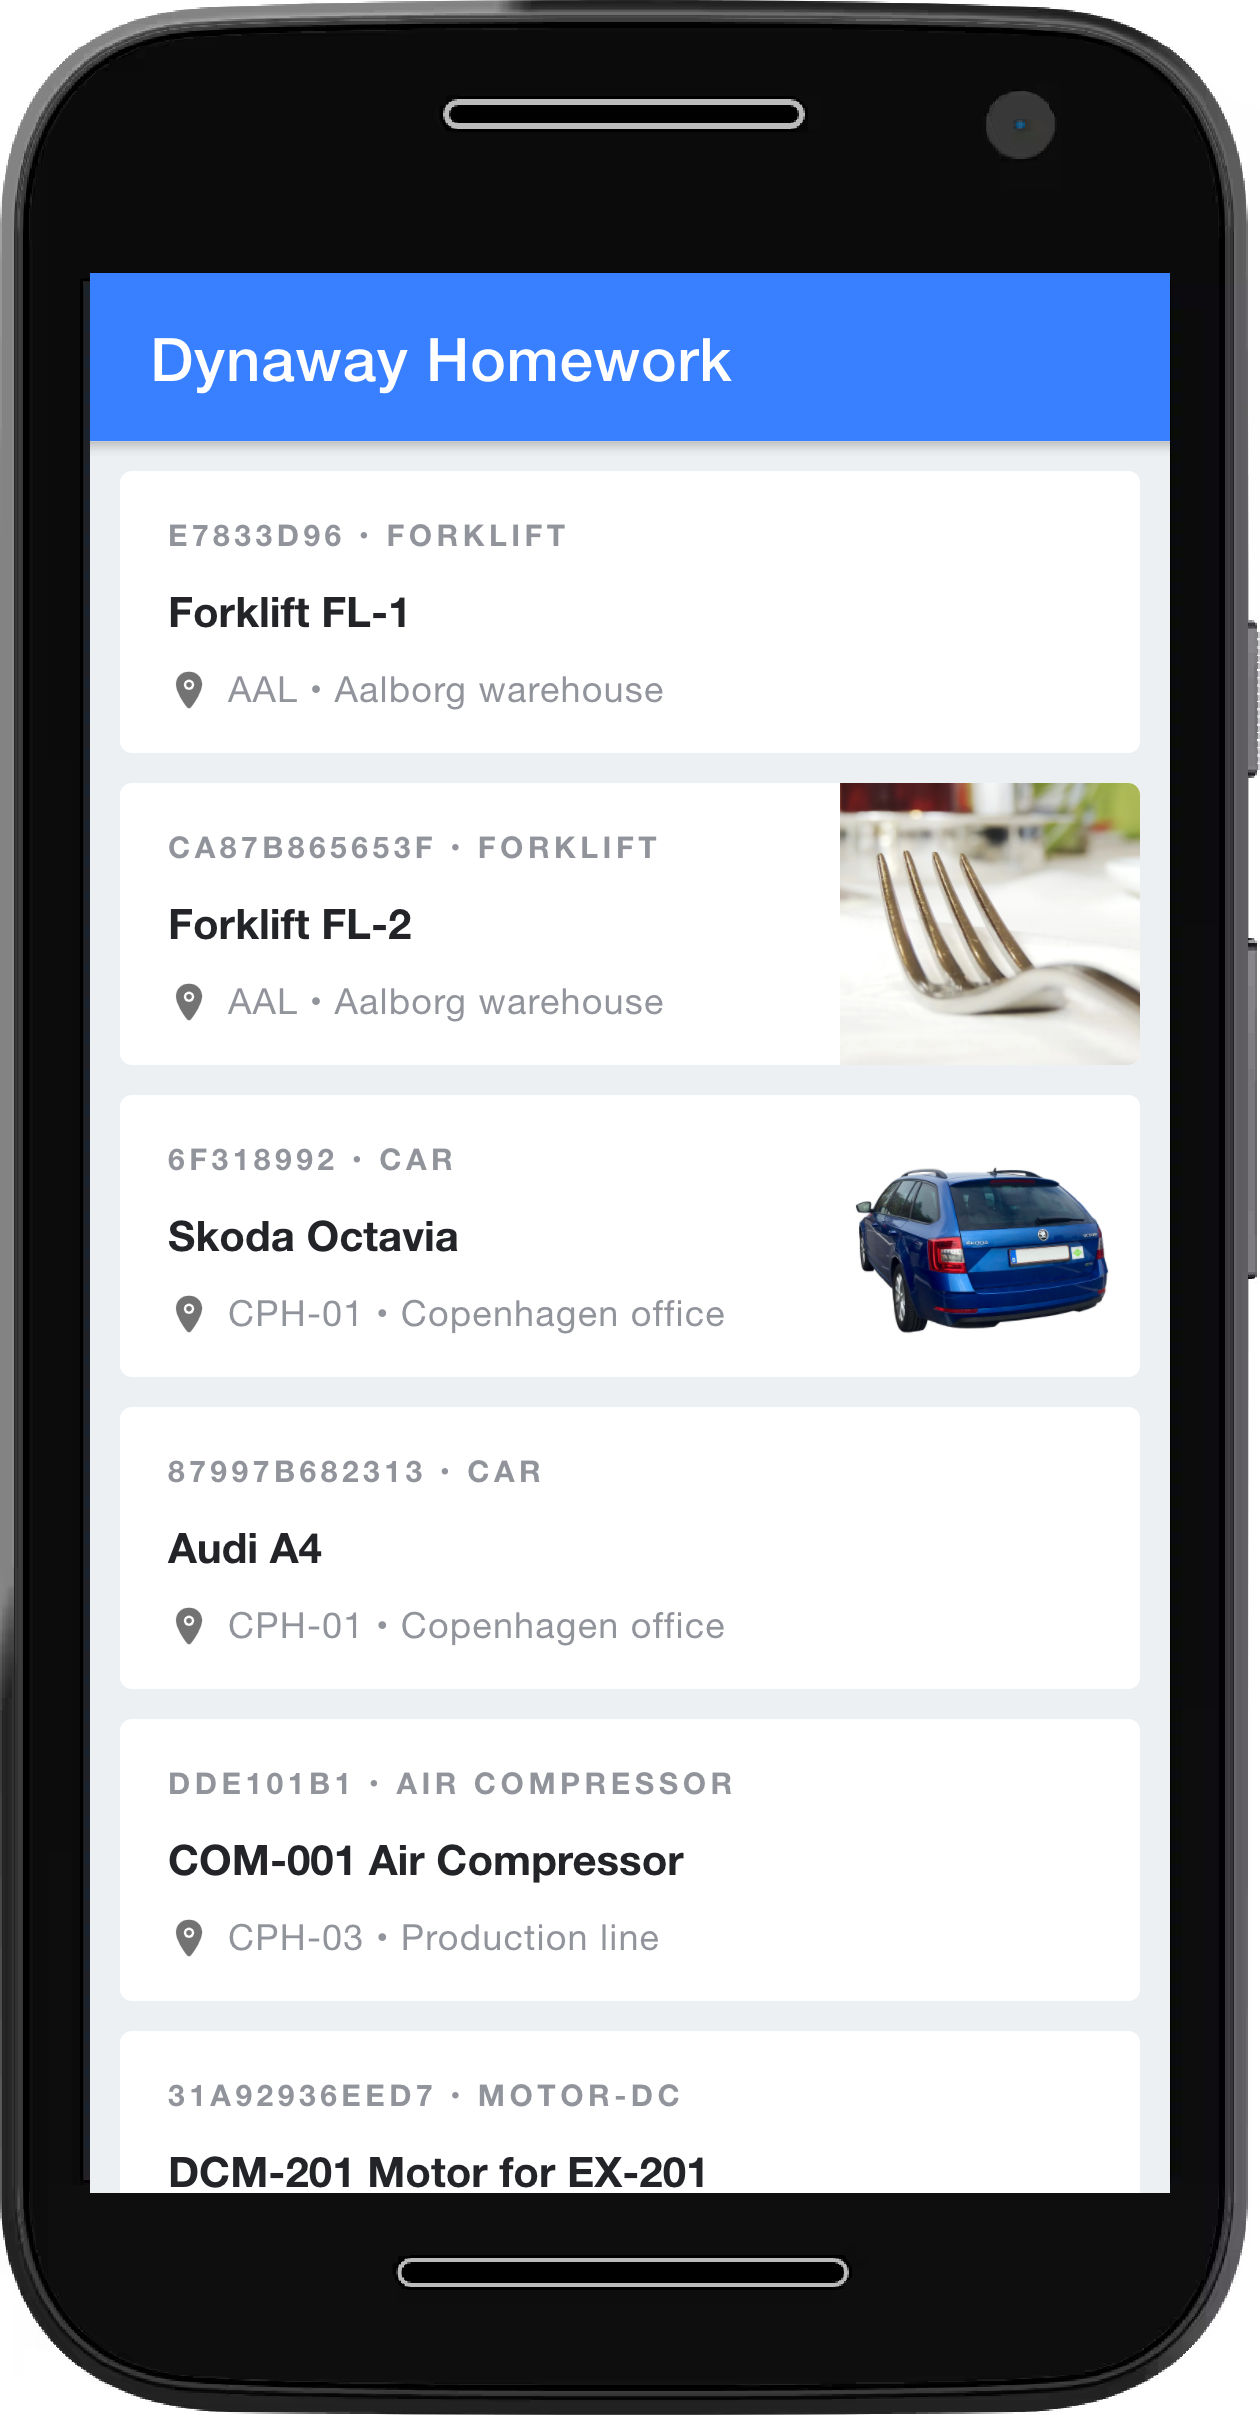
When you complete this task, your list page should show assets like this:
Data are now correctly fetched and displayed, but what if an error happens?
Luckily we use the Ionic framework and this is a perfect chance to use one of its UI components. Just import them to the file, and they are ready to use - as easy as it seems. That way we can easily extend our app to show some kind of message when an error occurs, informing the user about what has just happened.
In this task, pick an Ionic component of your choice (e.g. alert, toast) and use it for displaying an error message if an error occurs.
We can now say that the component does all we needed from it. It fetches data and displays them properly, and if an error occurs, shows a message to the user. We could consider it done for now, and that is correct, although what if we forgot to add something? Or a simple bug appears in a few months time? We would have to recall how the component works to be sure that everything is still working the intended way. Or someone else could be assigned to fix/extend the component so he/she would have to spend some time getting familiar with your code.
Fortunately there is a way how to prevent regression errors in the future and make sure that the component works 100% correctly all the time - unit tests! 🎉 We can imagine our component as a black box with some inputs and outputs, so it is fairly simple to test it, feeding it with data and expecting the correct outputs.
Angular comes with a testing framework bundled with it called Karma. We keep our unit tests in spec files (*.spec.ts) and execute them using npm run test. So in this task, write a unit test(s) for the home component that we have been working on so far.
A few notes:
- Other components and services are already tested. Feel free to get inspired there!
- The execution and usefulness of a test is generally more important than the quality of the code (of the test)
- One way how to measure unit test quality is to measure how much % of the code is covered by it
- A simple, dummy unit test is better than no test
- The tested component typically depends on other components and services but these are not the subject of our testing - typically we mock them
Now that we successfully fetch and display data, and the component's code is covered by unit tests, you can spot that there is a delay between opening the page and rendering the list.
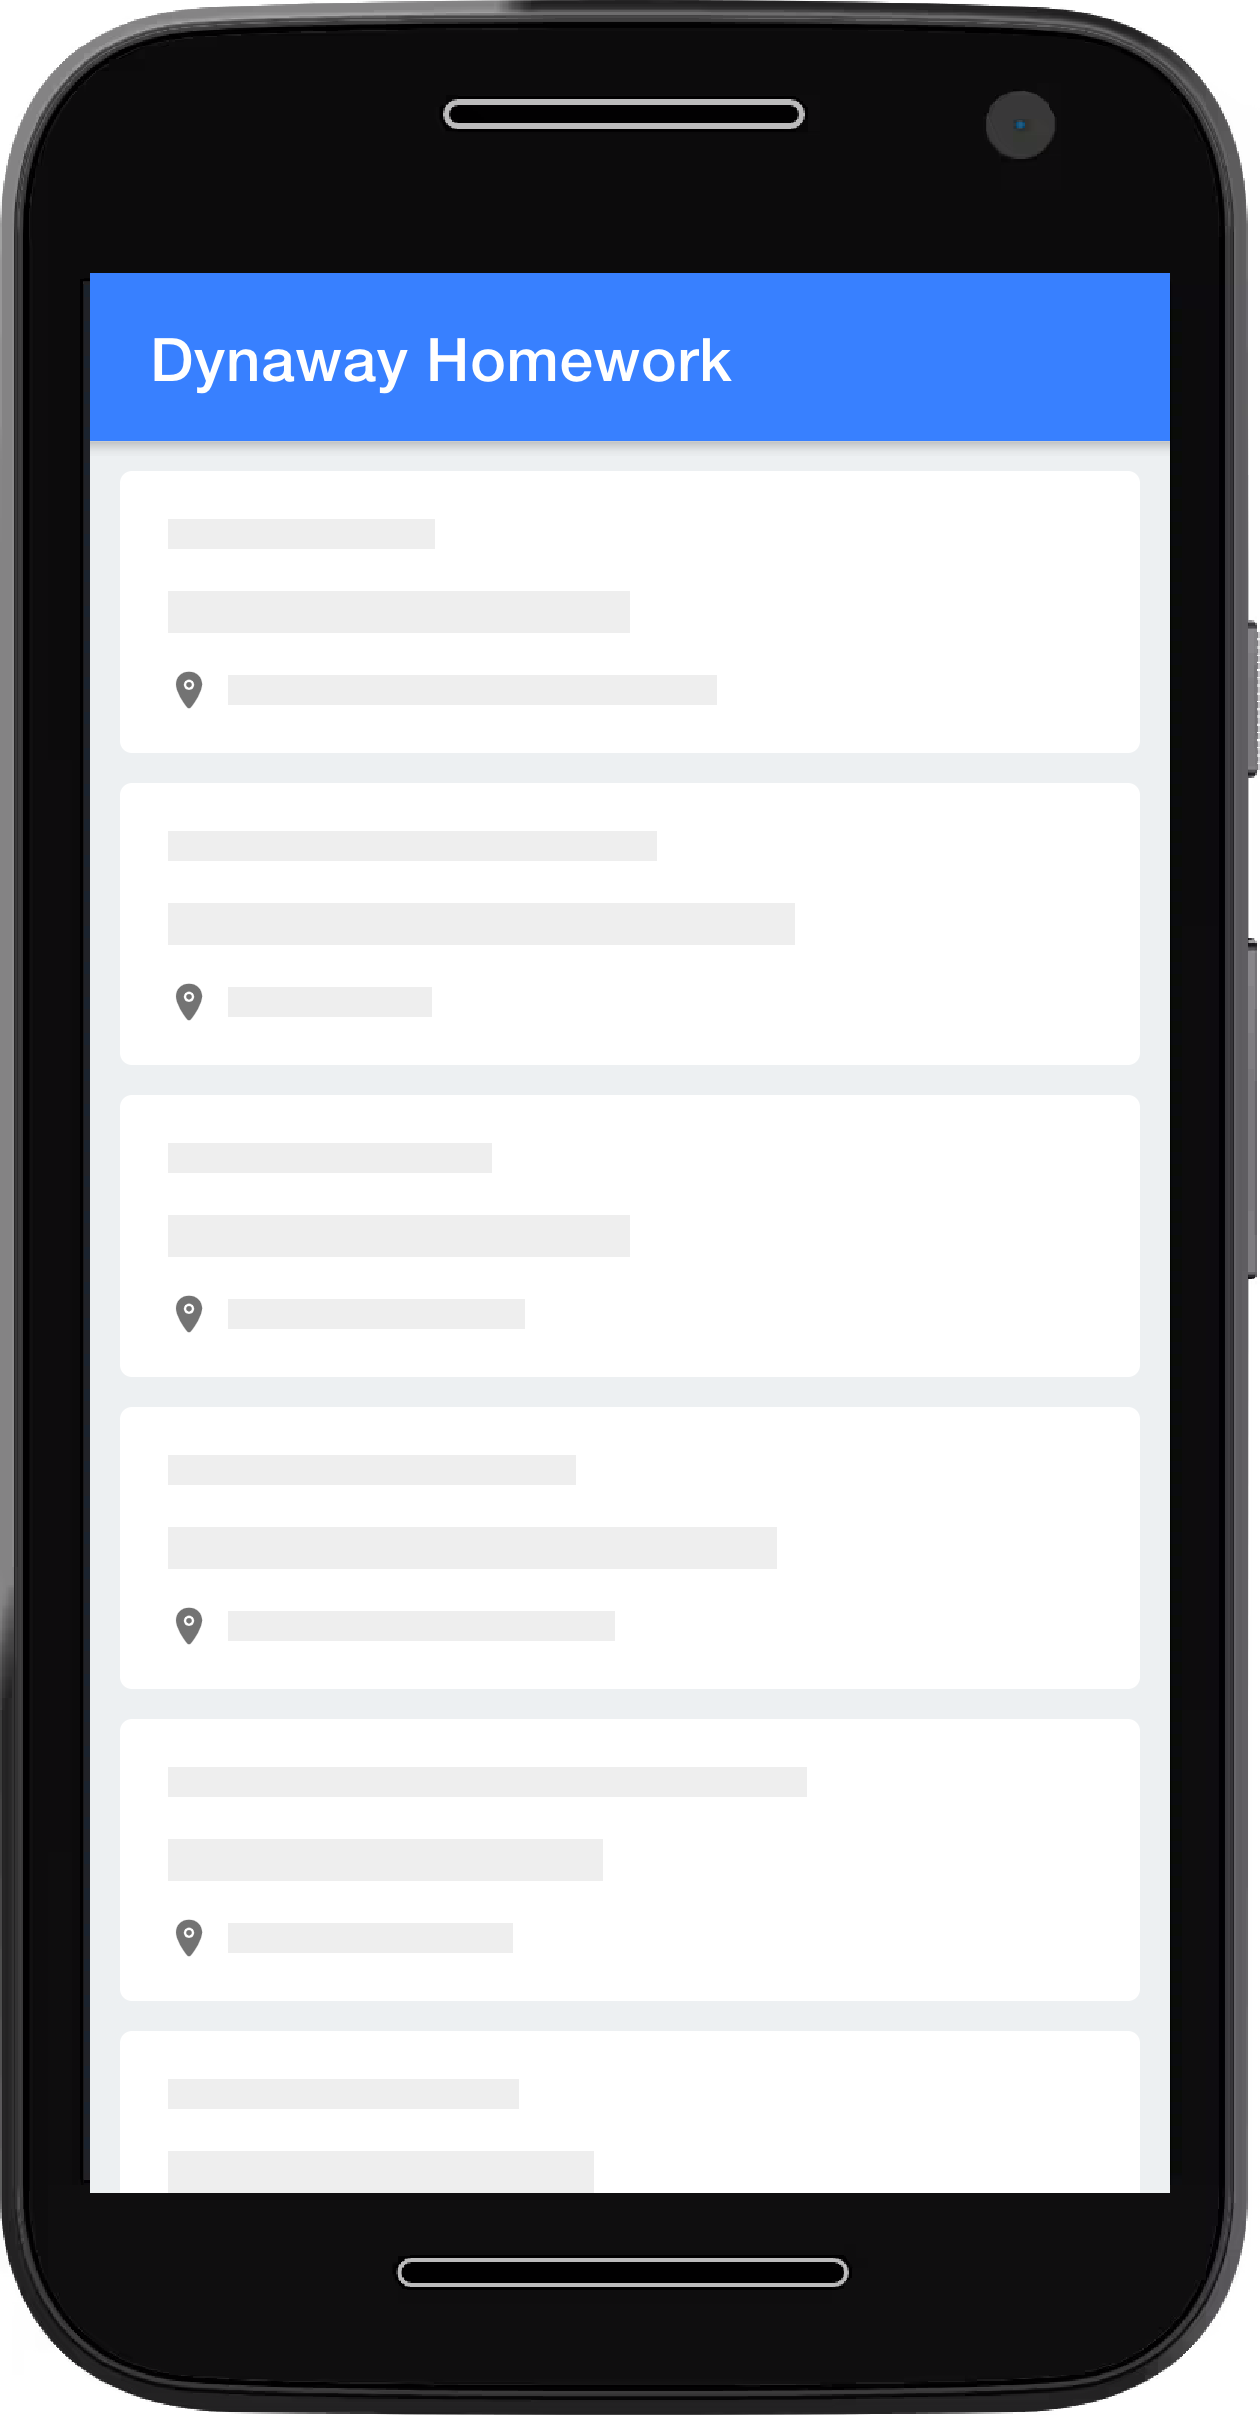
We would like to increase the perceived performance of the app and one of the ways how to achieve that is to use loading skeletons. Luckily, the component responsible for rendering an asset card can already do that - when no asset is given to it, it just displays a skeleton card until the real data arrive.
So if you'd like to make our home component nearly perfect, add those skeletons to the page (as seen on the screenshot) and substitute them with real data once ready.
What if we wanted to communicate the requirements of how this page should work or write a test case covering some core functionality? Here, we discovered a way of doing both by incorporating Behaviour-Driven Development (BDD) into our development workflow. BDD is a way for software teams to work that closes the gap between business people and technical people by producing system documentation that is based the system’s behavior.
What is Gherkin? Gherkin is a type of syntax, used by us to not only document how the system behaves, but also define test cases for automated testing (See What is Gherkin).
After you get familiar with BDD and The Gherkin syntax through the links provided, create one or more scenarios that would describe what you think could be the core functionalities in the app.
Use the syntax provided in the Gherkin reference, and do not forget the keywords. For example:
Feature: Assets
   Scenario: User displays the list of assets
      Given the user is on the home page
      Then a list of all assets is displayed
Since the current functionality of our dummy app is rather limited, you can also try defining new functionality that does not yet exist.

