UCLA CS 35L Project, Spring 2021, under the supervision of Professor Paul Eggert and our lovely TAs.
A brief introductory presentation can be found here. Note that you need to be signed in with your Google Apps for UCLA Account to be able to view.
Here is a demo video showcasing the features of our project.
- Alan Yao
- Annie Liu
- Sumith Nalabolu
- Daniel Liu
- Jonathan Xu
- Leonard Chen
With the proliferation of big companies and corporate chains, it can be difficult for local farmers, hobbyists, bakers, etc. to have a reliable way to reach an audience of consumers interested in purchasing their homemade or home-grown goods. This project, a novel web application built using the MERN Stack, aims to alleviate this issue. We aim to connect these local producers with everyday members of the community around them, so that customers can buy locally and support small/home businesses instead of relying on big corporations.
The Home Page:
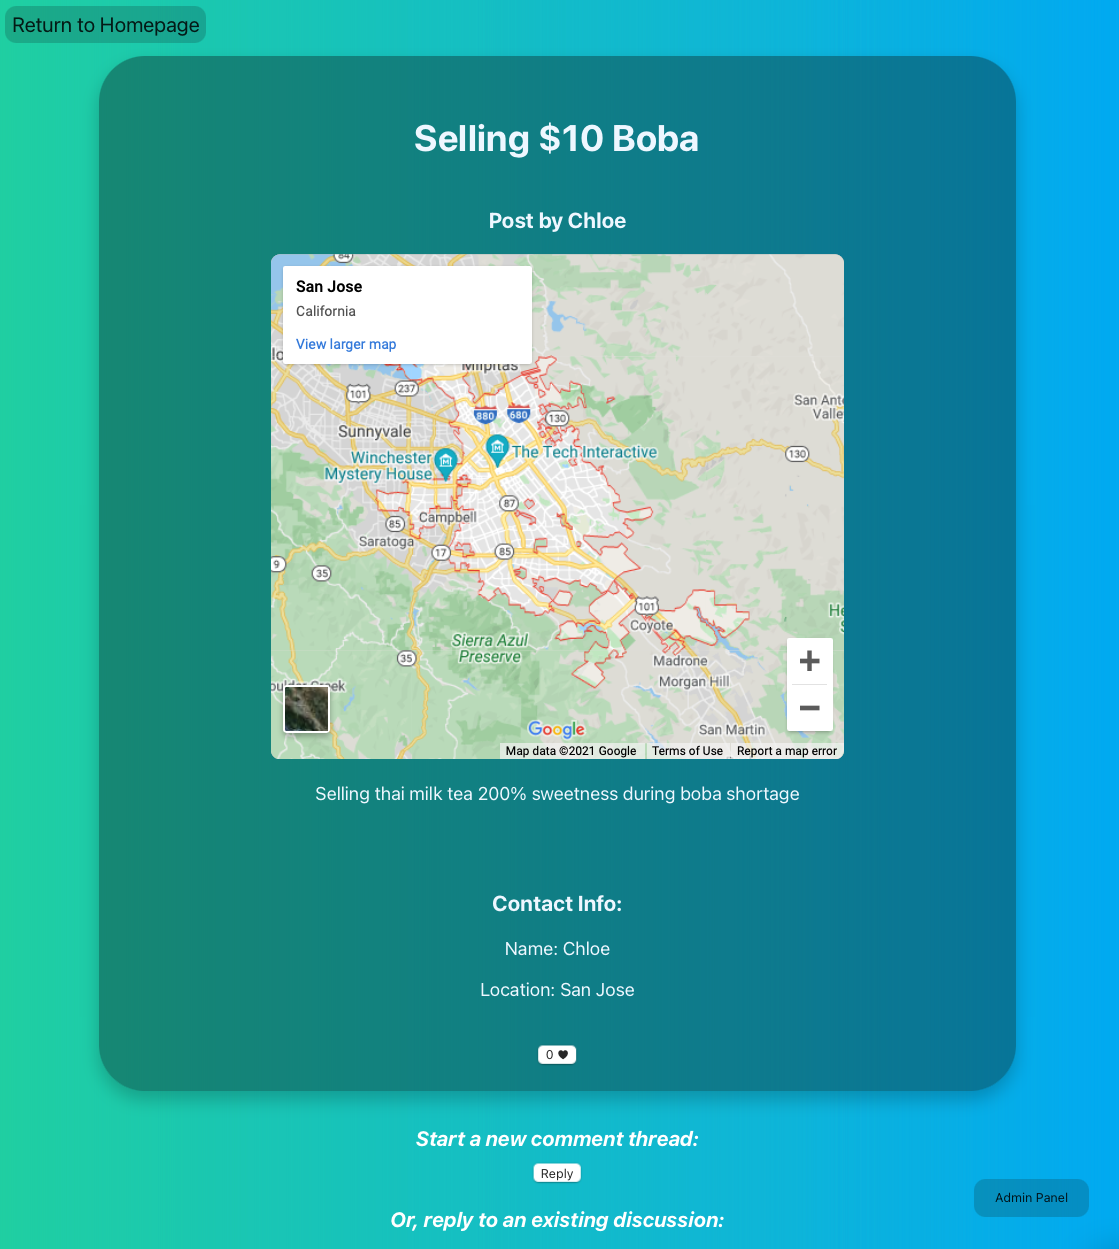
 A individual post's page:
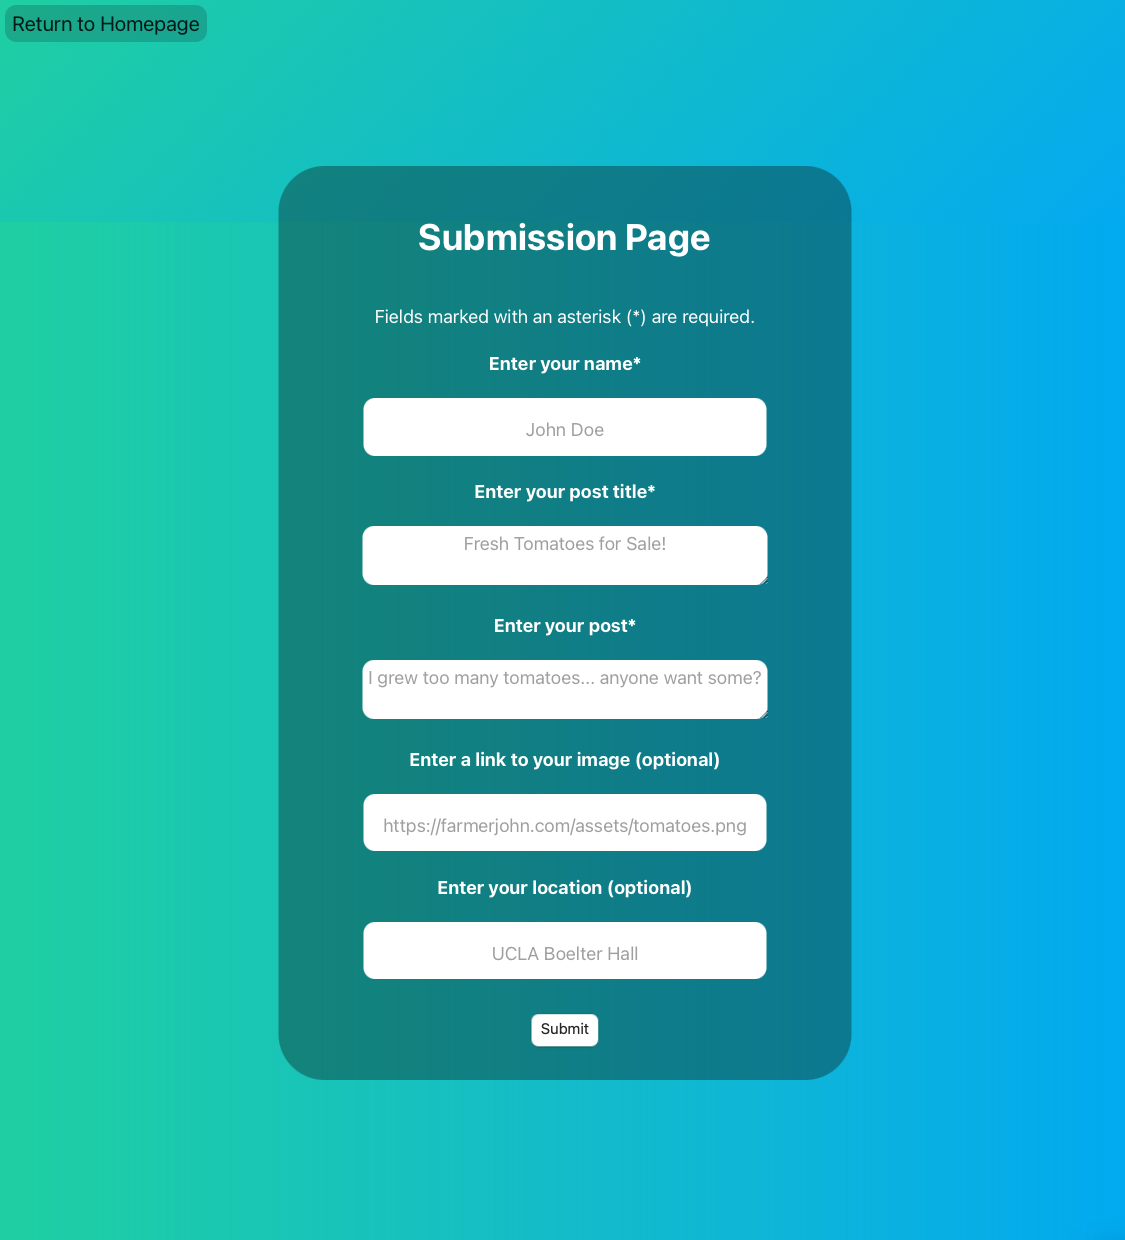
 The submission page to create a posting:
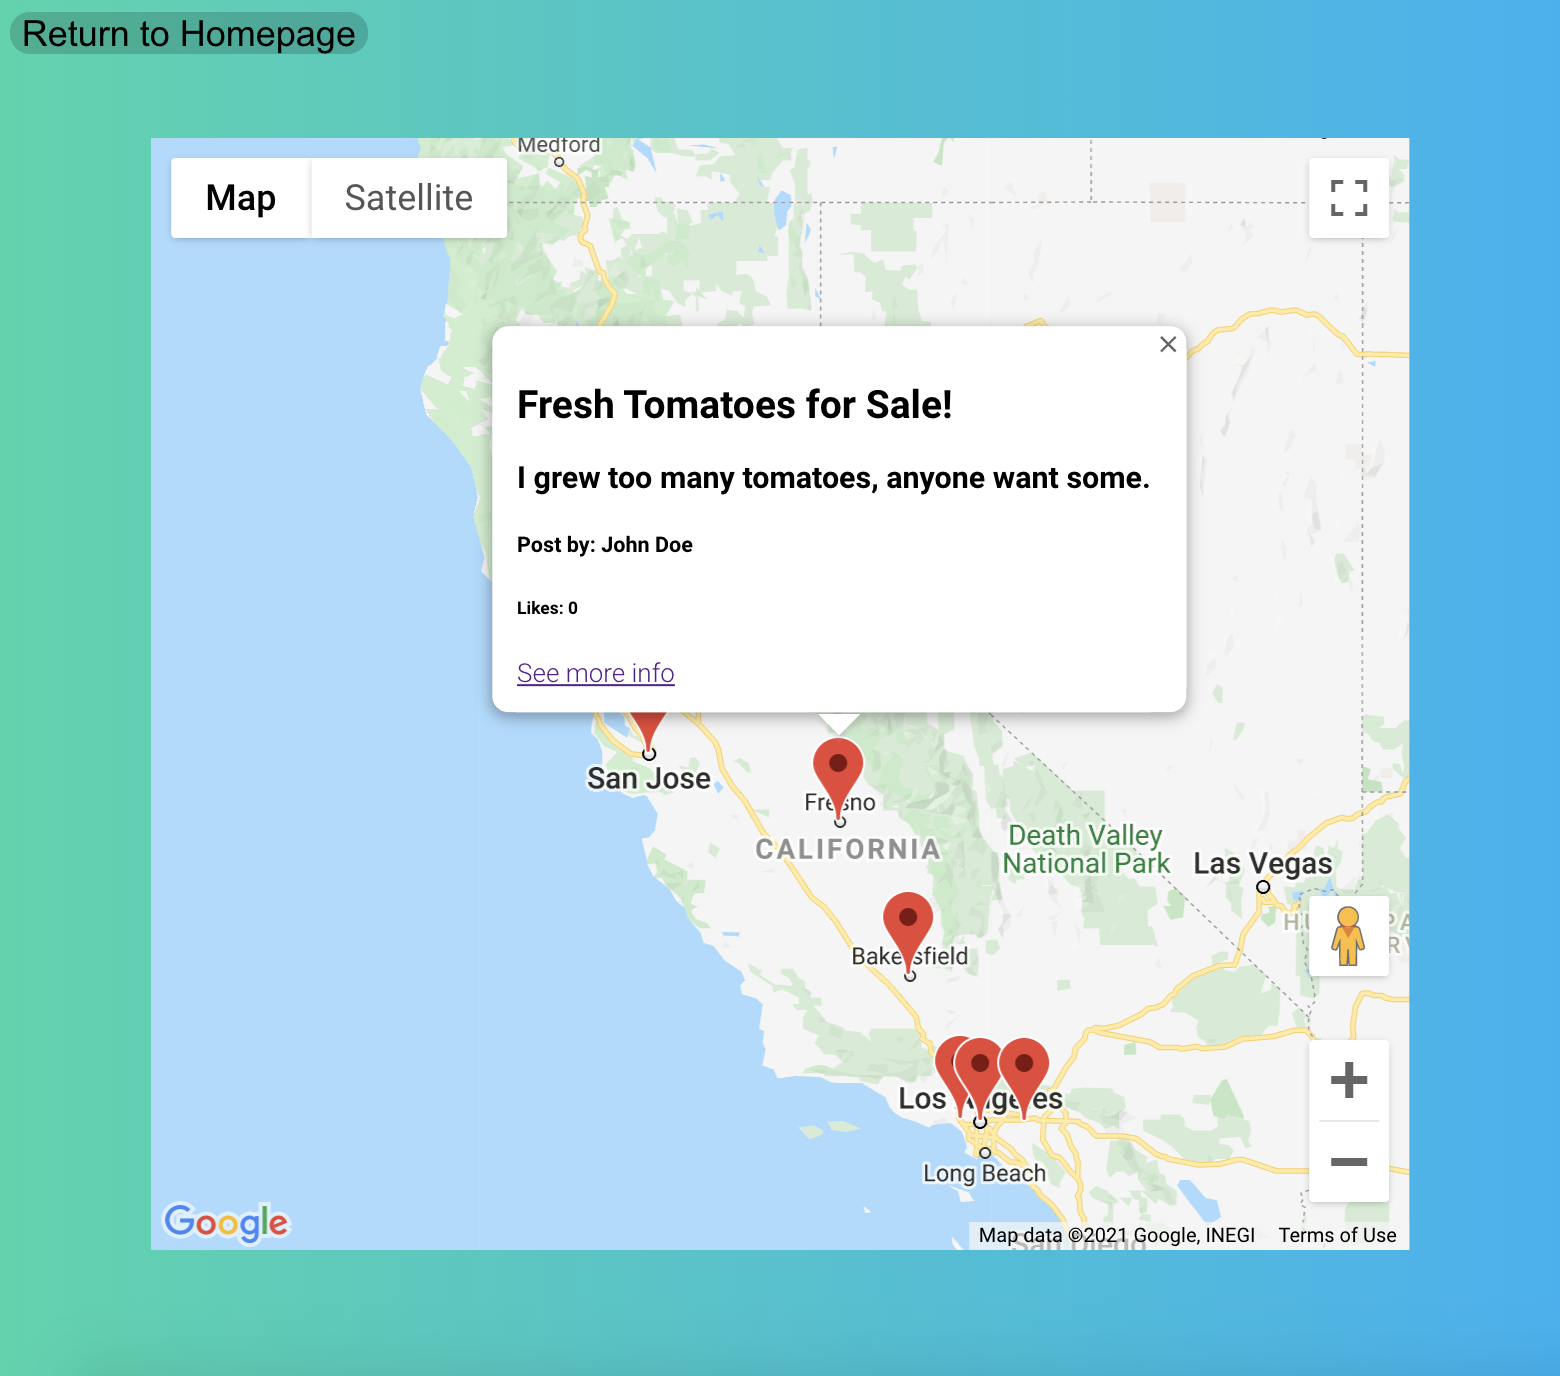
 The page aggregating all posts, so that you can see which listings are closest to you.

- Clone this repo by running
git clone https://github.com/ViciousCupcake/CS35L-Project.git - Create the
.envfile with all of our secrets, and place it into./backend/. You may have to source the .env file with. .env.- For more info on creating the environment file, see the Environment Variables section
- Install dependencies for the backend:
cd backend; npm install - Install dependencies for the frontend:
cd frontend; npm install - If installing fails due to dependency conflicts, pass
--force. - Start the backend:
cd ../backend; npm start - Start the frontend:
cd ../frontend; npm start - Insert Google Maps API key in GoogleMapsLinker.js
- Visit the website at localhost:3000
- Backend by default is hosted at localhost:8000
- Frontend by default is hosted at localhost:3000
The environment variables should be stored into ./backend/.env. This file should contain 8 entries:
| Environment Variable Name | Example | Description | Where you can generate the key |
|---|---|---|---|
USERNAME |
MongoUser1 |
The Username used by the backend to log into MongoDB | Follow the instructions at https://docs.mongodb.com/guides/cloud/account/ |
PASSWORD |
MongoPswd1 |
The Password used by the backend to log into MongoDB | Follow the instructions at https://docs.mongodb.com/guides/cloud/account/ |
DB_LOCATION |
cluster5.abcde.mongodb.net |
The address that your database is hosted at | Follow the instructions at https://docs.mongodb.com/guides/cloud/account/ |
API_PORT |
8000 |
The port that the backend will be hosted on | Choose a port number that doesn't conflict with an pre-existing process on your machine |
GOOGLE_MAPS_API_KEY |
aBcDeFgH12345 |
The API Key used for Google Maps | Follow the instructions at https://developers.google.com/maps/documentation/javascript/get-api-key |
GOOGLE_CLIENT_ID |
asdfq273450652393adf;lfasdfkwer.apps.googleusercontent.com |
App identifier used in OAuth flow | Set up OAuth in a Google Cloud project |
GOOGLE_CLIENT_SECRET |
LasdouHgsfgTasdf |
Identifier used in OAuth flow to make sure app isn't being impersonated | Set up OAuth in a Google Cloud project |
COOKIE_KEY |
asdfgkjhsdlkgf;sd |
The cookie sent back on requests | Type anything you want |
Put these 8 entries into ./backend/.env in the format ENVIRONMENT_VARIABLE=ENVIRONMENT_KEY
For example,
USERNAME=MongoUser1
PASSWORD=MongoPswd1
DB_LOCATION=cluster5.abcde.mongodb.net
API_PORT=8000
GOOGLE_MAPS_API_KEY=aBcDeFgH12345
GOOGLE_CLIENT_ID=asdfq273450652393adf;lfasdfkwer.apps.googleusercontent.com
GOOGLE_CLIENT_SECRET=LasdouHgsfgTasdf
COOKIE_KEY=asdfgkjhsdlkgf;sd
cdinto the folder you want to clone (aka download) this repo to- Run the command
git clone https://github.com/ViciousCupcake/CS35L-Project.git(Note that you will need git installed on your machine)
- Make a branch. To make a branch, run
git branch [NAME OF THE BRANCH] - Type your code/contributions
- Once your done, you want to
stageyour changes, by runninggit add [FILES THAT YOU WANT TO ADD] - Make a commit:
git commit -m [DESCRIPTION OF YOUR CHANGES] - Push these changes to the server:
git push origin HEAD - Go to GitHub and open a Pull Request.
- Wait for a code review, and if everything looks good, we'll see your contributions onto the main branch!
Thanks for the help!
- Add every file:
git add -A - Switch between branches:
git checkout [NAME OF THE BRANCH] - Get updates from the server:
git pull - List branches:
git branch - For other commands, reference here
- Nur Islam's The MERN stack: A complete tutorial (2020) is a well-written tutorial about getting started with the MERN Stack.
- Google's Analytics Platform provides useful tools on collecting real-time analytical data from your users.
- Google's Maps Embed API Documentation provides guidence on how to efficiently get started with the Google Maps API.
- Jan Bodnar's dotenv Tutorial (2020) is a brief tutorial going over what dotenv does and how you can use it in your own applications
- The OpenJS Foundation's Node is a useful JavaScript runtime that powers both the frontend and the backend of this project.
- Rachael Njeri's How to Integrate the Google Maps API into React Applications (2020) is a tutorial going over the basics of using the Google Maps React API.
- Stephen Grider's Node with React: Fullstack Web Development (2021) goes over how to use Passport.js to integrate OAuth login.
- The Mongoose Docs is an essential tool that we used, when trying to tie our backend to communicate to MongoDB.