SecurityQTPi is a security retro fitted system that provides methods to communicate via the MQTT protocol, with a Raspberry Pi connected to your old security system's wiring.
My home was already wired up with a very elaborate security system. Unfortunately that system is heavily outdated (late 90's). But all the wiring is still in place and has low current, so I put it back in use! With a lot of help from my father (the electrical master) and my programmatic skills, we setup a breadboard connected to the old security system's wiring and listen for changes on the pins. When an entity (or access point) changes state, a MQTT message is sent out which is integrated for Home-Assistant!
- Test Folder - for help testing GPIO's
- There is a guide in the test folder on how to use the testing programs and what they do. Click here to go there now. - Root folder
main.py<- SecurityQTPi, jump to Setup
- Raspberry pi 3
- Python 2.7.x
- pip (python 2 pip)
- Knowing which GPIO mode to use! And other things about RPi.GPIO
- HomeAssistant MQTT Setup
- Bruh Automation
- More MQTT stuff
For simplicity - lets setup MQTT Broker on the same pi where securityqtpi will be running
-
Install - In terminal:
sudo apt-get update
sudo apt-get upgrade

sudo apt-get install mosquitto
sudo apt-get install mosquitto-clients
-
Setup mosquitto configuration file.
sudo nano /etc/mosquitto/mosquitto.conf- add the following contents into this file:
allow_anonymous false
password_file /etc/mosquitto/pwfile
listener 1883
-
Set MQTT Broker username and password - In terminal:
sudo mosquitto_passwd -c /etc/mosquitto/pwfile USERNAME_GOES_HERE
-
Start the MQTT Broker!
sudo mosquitto -c /etc/mosquitto/mosquitto.conf -v -d
- flag c: tells masquitto where to load it's configuration from
- flag v: verbose mode - enable all logging types. This overrides any logging options given in the config file.
- flag d: put the broker into the background after starting.
-
If you need to make updates to your mosquitto.conf reboot it with:
sudo systemctl restart mosquitto -
MQTT is already set to boot on startup because of the mosquitto.conf file!
-
Test MQTT broker
- We're making sure the broker can subscribe and publish to a test topic. You will need 2 terminals open. For examples sake I set my username to username and password to password. I can't stress enough how important it is to set a strong password and good username.
terminal 1:
mosquitto_sub -d -u username -P password -t "homeassistant/cover/Zone1"terminal 2:
mosquitto_pub -d -u username -P password -t "homeassistant/cover/Zone1" -m "Hello world"
NOTE
I set the topic in the example "homeassistant/cover/Zone1" to match what is currently in the config.template.yaml
More on this config file is coming up soon!
On your raspberrypi machine:
git clone https://github.com/aeckard87/DoorQTPi.gitor download zipcd DoorQTPior unzip and then cd intopip install -r requirements.txt- Copy the config.template.yaml into a new file called
config.yaml. Modify it accordingly, there are lots of comments in there to help.
-
Sample config.yaml:
mqtt:
    host: 127.0.0.1 #ip of where MQTT Broker is running, maintain 127.0.0.1 if running broker in the same place as security app
    port: 1883 #required MQTT port is 1883
    user: username #change username to what you setup when you ran "sudo mosquitto_passwd -c /etc/mosquitto/pwfile [YOUR USER NAME HERE]"
    password: password #change password to what you setup when you ran "sudo mosquitto_passwd -c /etc/mosquitto/pwfile [username]"
    discovery: true #defaults to false, comment to disable home-assistant discovery
    discovery_prefix: homeassistant #maintain homeassistant as discovery_prefix if you want home-assistant to discover this service
accesspoints:
    -
        id: Zone1 #Descriptive text, this will be used as TOPIC
        name: test # Not required, if empty it defaults to an unsanitized version of the id paramater
        pin: 15 #PIN_NUM
        state_mode: normally_closed #defaults to normally open, comment this line to switch
        #invert_relay: true #defaults to false, uncomment to turn relay pin on by default

        # If you'd like to use your own topics, set discovery to false and update fields with format: "[discover_prefix]/cover/[topic]" and "[discover_prefix]/cover/[topic]/set"
        state_topic: "homeassistant/cover/Zone1"
        command_topic: "homeassistant/cover/Zone1/set"
    -
        id: Zone2
        name:
        pin: 17
        state_mode: normally_closed
        #invert_relay: true #defaults to false, uncomment to turn relay pin on by default
        state_topic: "homeassistant/cover/Zone2"
        command_topic: "homeassistant/cover/Zone2/set"
-
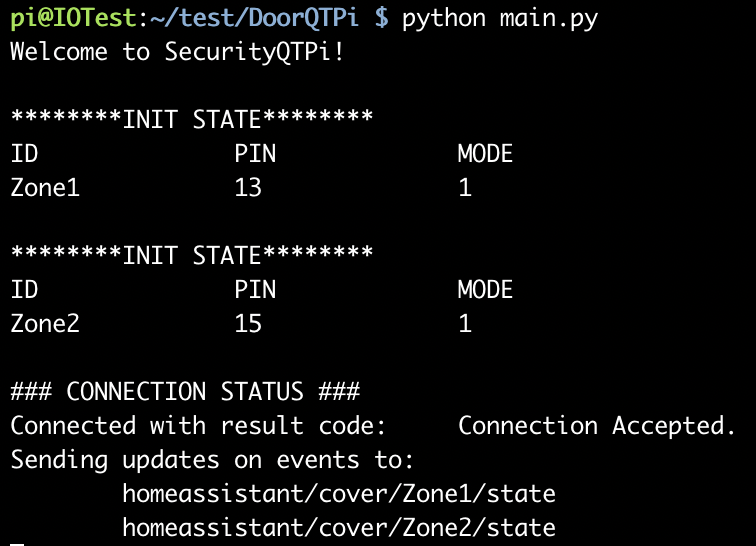
Make sure SecurityQTPi is running as intended.
-
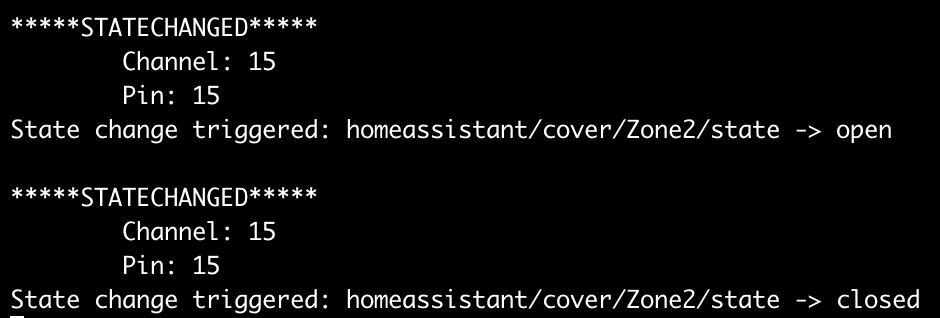
Lets also make sure SecurityQTPi is sending messages to the topics it listed:
Sending updates on events to: homeassistant/cover/Zone1/state homeassistant/cover/Zone2/state -
You're ready to run!
- To start the app on boot, run:
sudo ./autostart_systemd.sh- you may need to
chmod +x autostart_systemd.sh
- you may need to
- To start the app on boot, run:


