This project allows you to seamlessly integrate your Autonomous SmartDesk 2 with Home Assistant via ESPHome, giving you fine-grained control over its functions while still retaining use of the controller keypad.

- Nudge Desk Up/Down: Incrementally move desk using buttons on Home Assistant
- Move Desk to User-defined Height: Change desk height using a slider
- Read Height of Desk in Inches: Implemented as an ESPHome text sensor
- Jump to Memory Preset 1-4: Switch to one of four predefined height presets using a dropdown.
- Set Current Height to Memory Preset 1-4: Save the current desk height to one of the four memory presets, also with a dropdown.

This project was built with reference and inspiration from vipial1, developit, and Stefichen5. After failing to get the Espruino server running on my esp32, I adapted the communication logic for ESPHome. This had the benefit of making the Home Assistant integration trivial. I also added support for new features, like setting memory presets and reading the desk height in inches.
- It is your responsibility to ensure the desk doesn't collide with anything vertically as it moves, which can cause injury or damage. Only use this integration when you are physically present to intervene.
- Pressing UP/DOWN on the controller keypad should interrupt any command from this integration.
- Some low-voltage electronics work is needed. Apply caution when using equipment like soldering irons and heat guns.
- After pressing the UP/DOWN buttons on the keypad controller, certain integration features (moving to a user-defined height, memory preset save) fail until at least 30 seconds elapse. My hypothesis is that the keypad controller sending continuous instructions for that duration, which conflicts with the programmed sequence from the wireless controller.
- Moving the desk to a user-defined height is functional but imperfect. E.g. the desk is at height 80 (internal units, not inches), and you set the slider to 90: The desk will move up until it is at 90 +/- 3 units. It will then attempt to slowly nudge up/down until it reaches 90 exactly. Compared to smoothly moving to a preset, this can feel more janky.
-
ESP32 WROOM 3D Development Board
-
10P10C Cable: I used the 1.5M version of the SinLoon RJ50 cable
-
Soldering Kit, Wires (24 AWG) and Wire Stripper
-
1N4148 Diode: If you want to continue using the keypad alongside the Home Assistant integration, a 1N4148 diode is needed.
-
Heat-Shrink Tubes, Electrical Tape, Hot Glue For electrical insulation and for securing cable to housing
-
Access to a 3D printer: To print and use the same housing as in the project
- Strip outer insulation of 10P10C cable.
- If using the provided 3D printable case, do not strip more than 35mm of insulation to allow for a secure fit with zipties.
- Identify the GND, RX, TX and 5V wires in the 10P10C cable. We will be tapping into these wires.
- Refer to the table below to help find which pin numbers relate to which function.
| Pin # | SinLoon RJ50 | SmartDesk 2 Cable | Function |
|---|---|---|---|
| 1 | Black | ||
| 2 | Brown | ||
| 3 | Red | ||
| 4 | Orange | Red | Sleep |
| 5 | Yellow | ||
| 6 | Green | ||
| 7 | Blue | Orange | GND |
| 8 | Purple | Yellow | RX |
| 9 | Gray | Green | TX |
| 10 | White | Blue | 5V |
- Check if your cable's pin color layout matches the layout for the SinLoon RJ50 cable. If so, simply use its layout to identify the relevant colors.

- Strip insulation off the 4 relevant inner wires and solder wires to them, making 3-way taps.
- I labelled the wire ends with their respective functions because there were only red/black wires on hand.
- (Recommended) Create breadboard prototype with cable attached to ESP32 to verify the whole system works. Jump ahead to ESPHome and Home Assistant sections for testing.
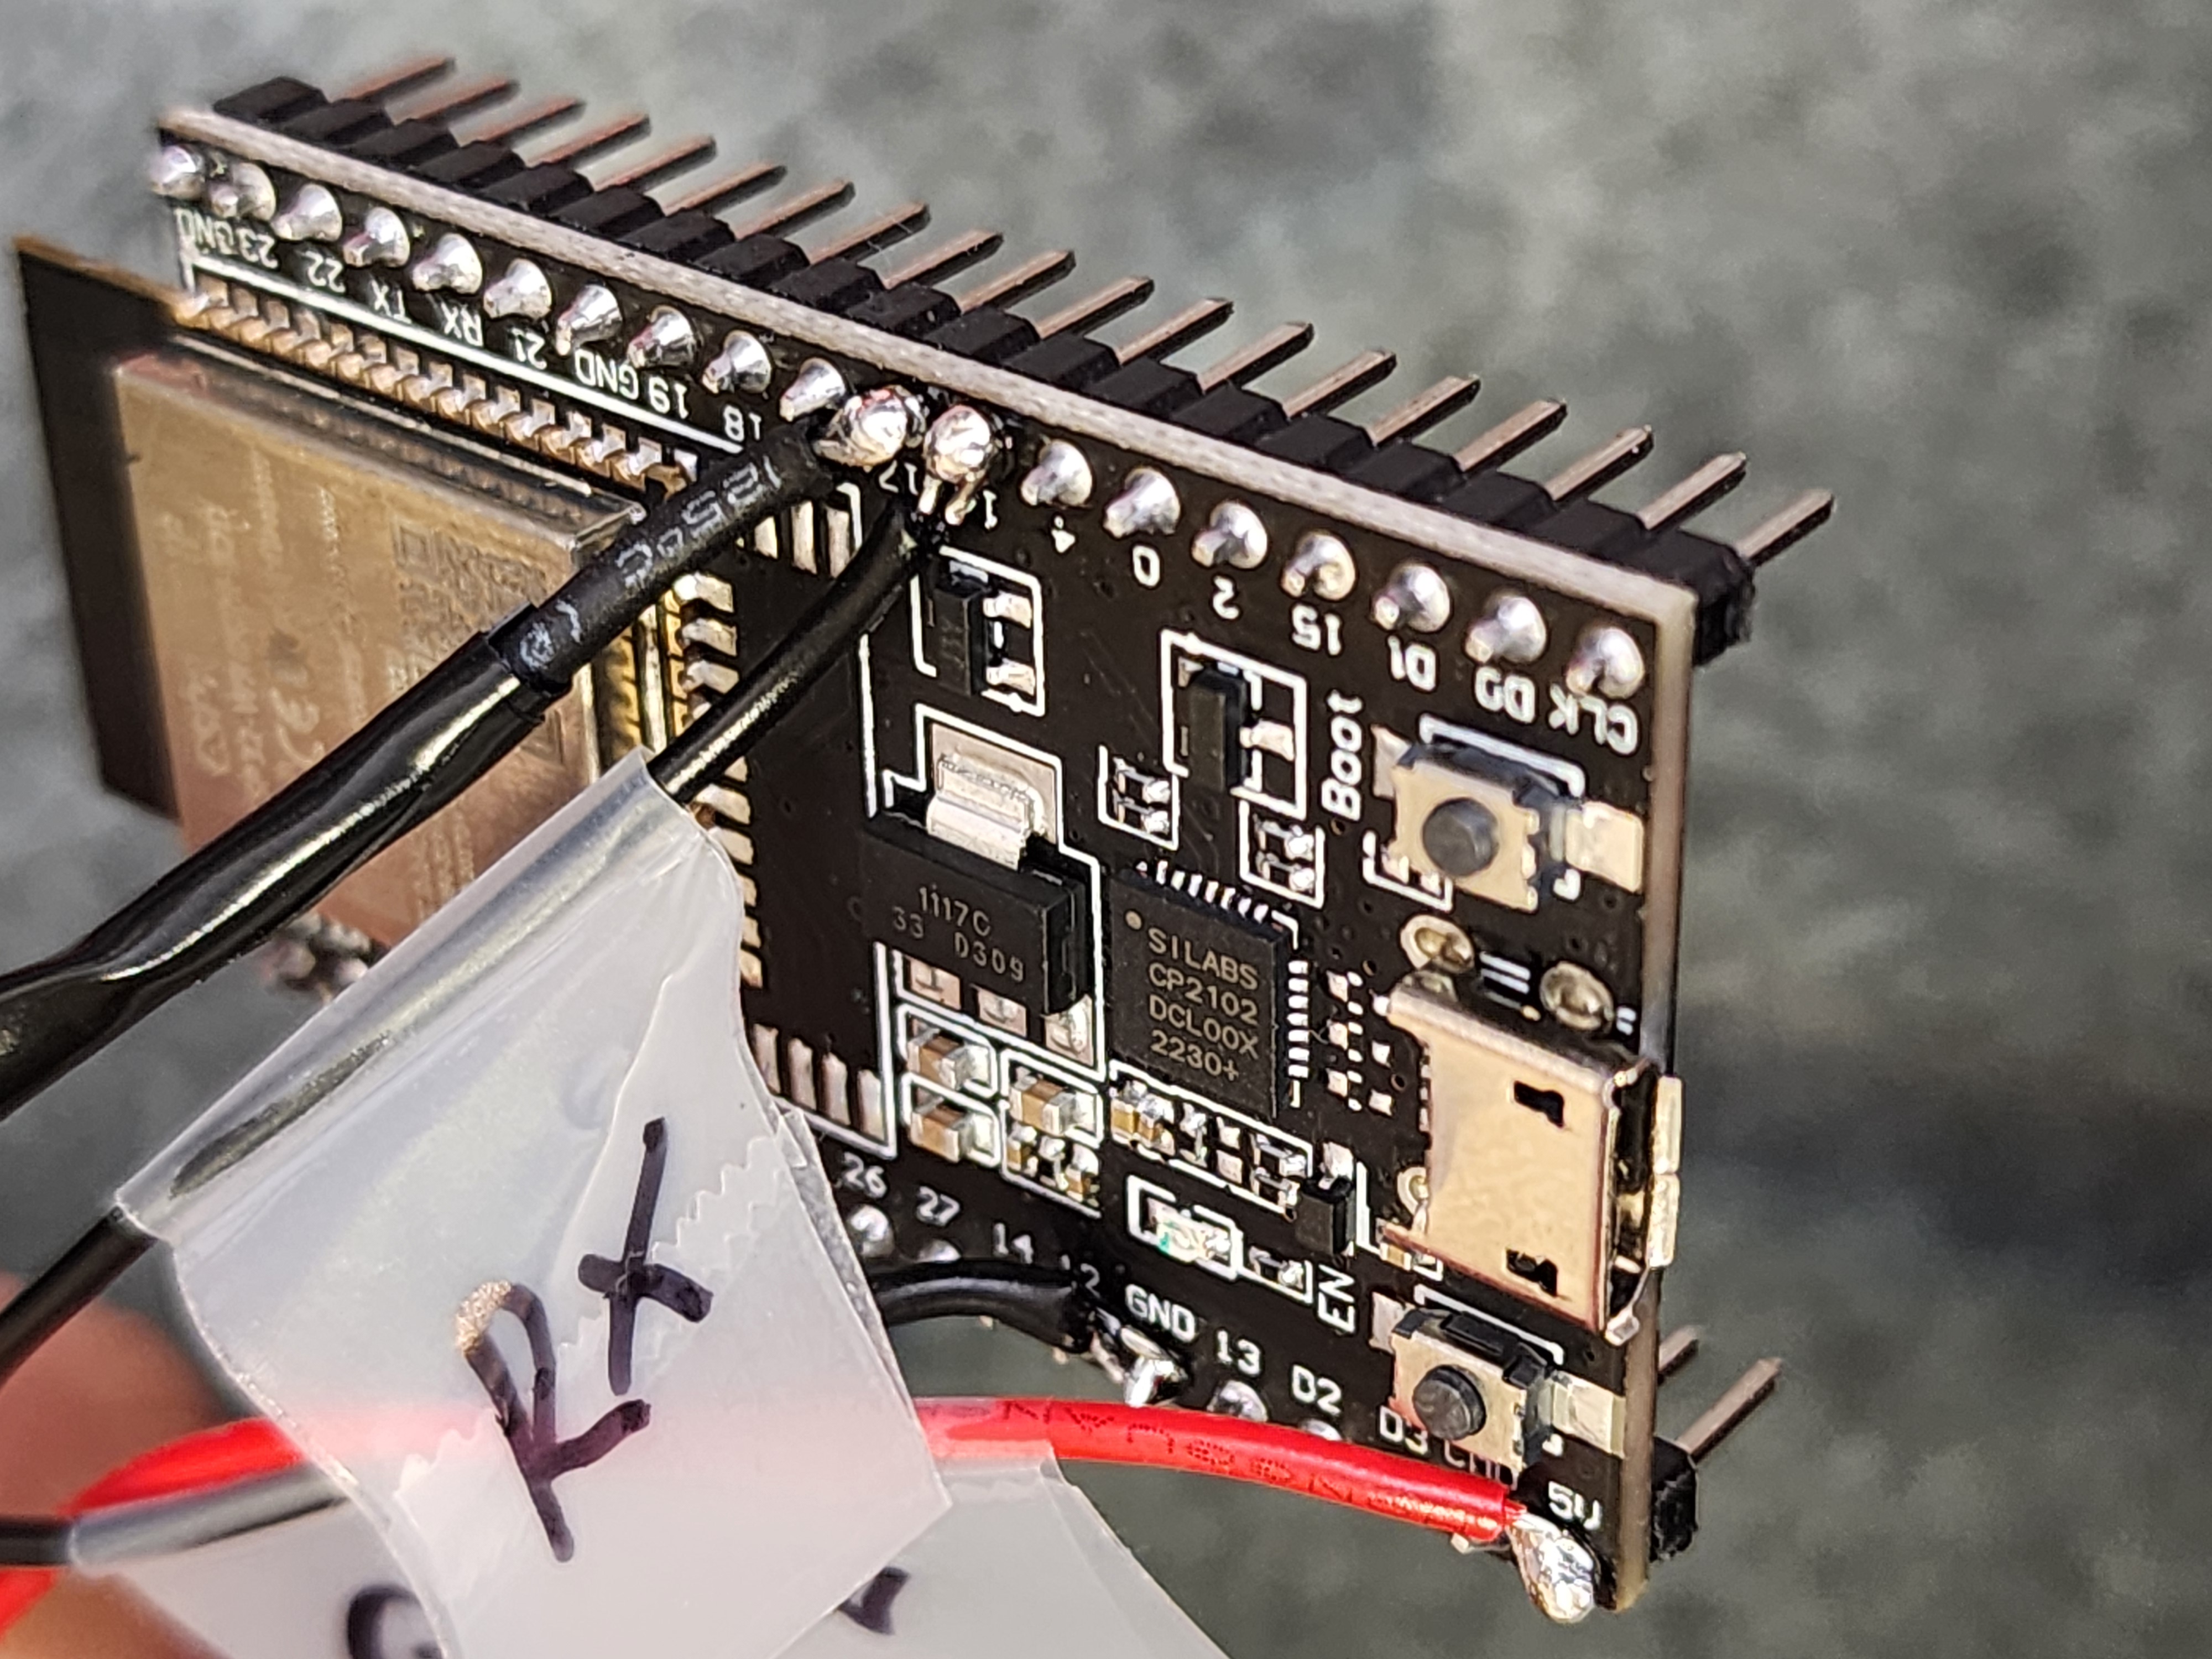
- Pin 16 (RX) of ESP32 is connected by green wire to tapped wire for RX.
- Pin 17 (TX) is connected by purple wire to the 1N4148 diode, with the darker end (cathode) pointed towards the ESP32 side. Other end of diode connects to TX wire.
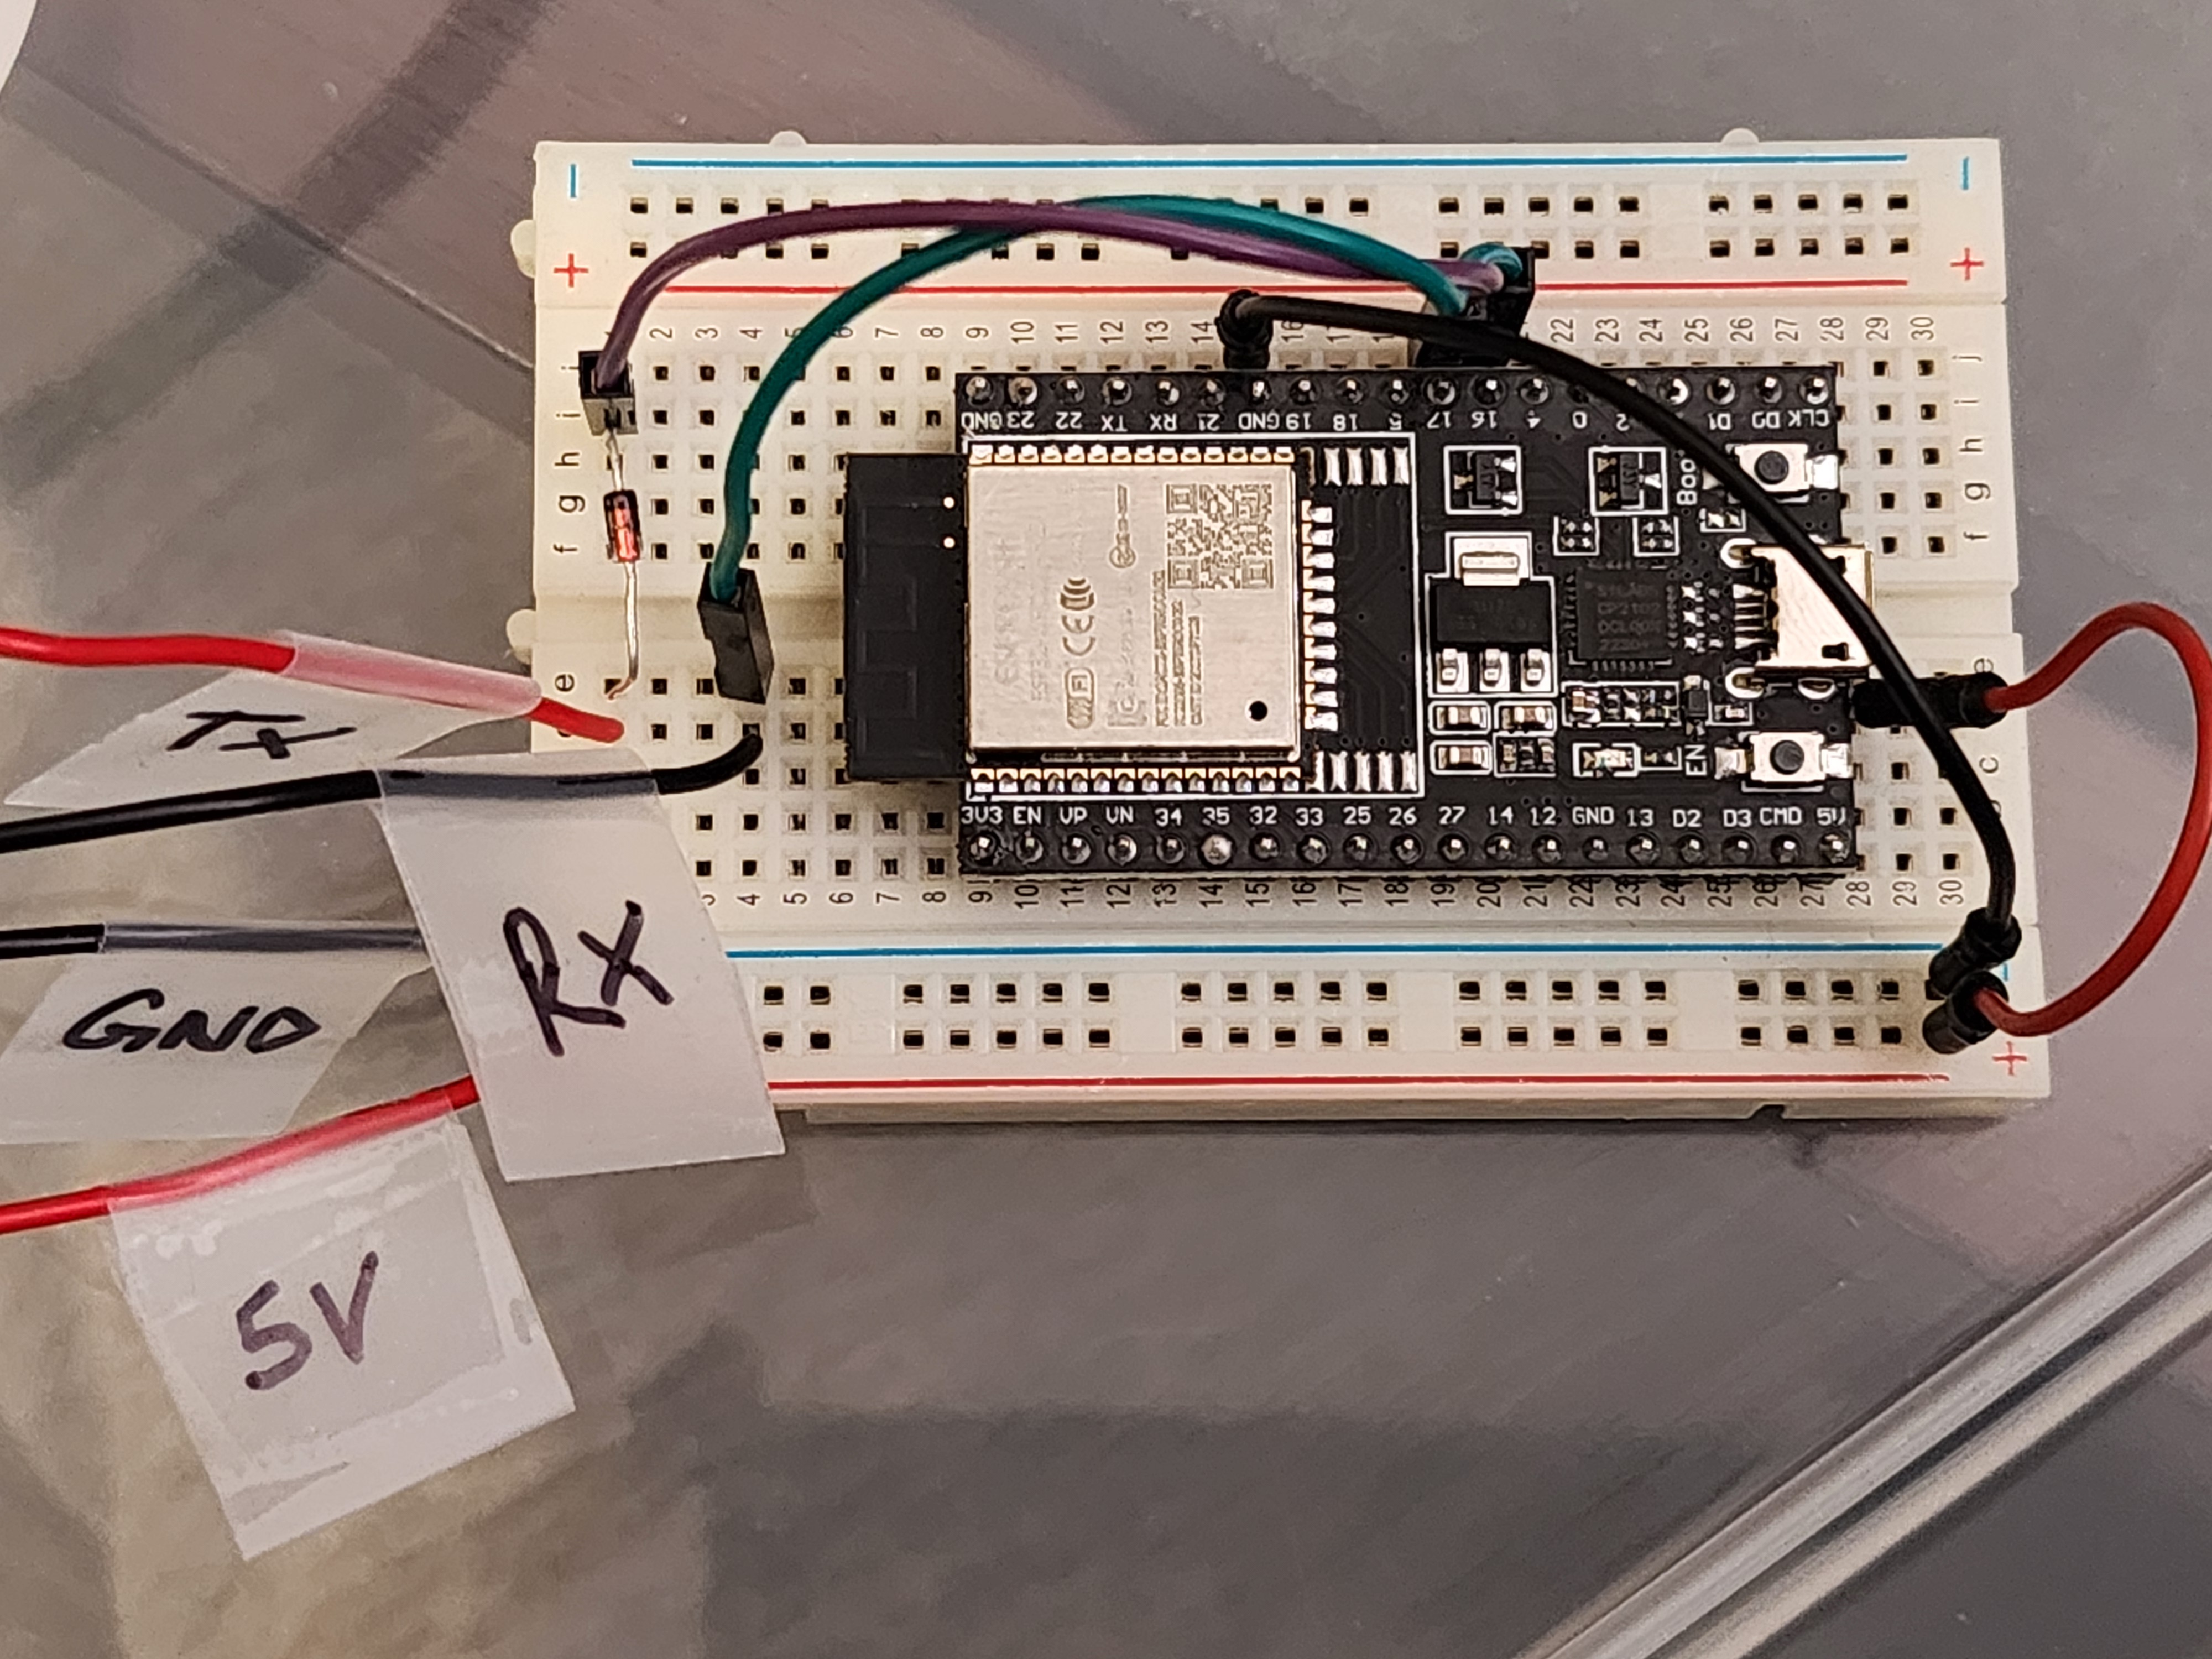
- Add shrink tubes before soldering the parts and wires to the top of the ESP32 board.
- (Optional) Print 3D casing using the included files and assemble.
- When assembling, use a ziptie on either end of the stripped section, before fitting it into the case. This will help the cable from coming loose.
- I used hot glue to secure the cable into the case.


- Create a new device in ESPHome dashboard, and configure name, static ip address etc, as needed.
- Set the remote package and substitutions by adding the following snippet. Also refer to example.yml for more info.
- Note: the min/max height is based on the extended model of the SmartDesk 2. If you have the regular model, the range is probably 75-123 based on this project.
packages:
  Autonomous_Desk: github://at-karan-sharma/autonomous-desk-esphome/config/desky.yml@main

substitutions:
  uart_tx_pin: "17"
  uart_rx_pin: "16"
  desk_min_height: "66"
desk_max_height: "131"- Install config to the ESP32 over wireless/serial connection.
- Look for the new ESPHome device in Home Assistant > Settings > "Devices & services" under the "Discovered" section.
- Click on "Configure" and add the encryption key (if configured in ESPHome) to finalize setup.
Feel free to contribute to this project by submitting issues or pull requests. Feedback and suggestions are also welcomed.