A simple Google Apps Script that help you organize mails according to email addresses.
This project is inspired by 0x4447/0x4447_product_s3_email.
The script labels emails accoding to the address the email was sent to. This requires you to own a domain name to proceed.
For example, you own the domain name example.com, and you set up an email forwarding service such as Forward Email or ImprovMX to relay all emails sent to *@relay.example.com to your Gmail account.
The script will label your emails according to a set of rules. For example:
| Sent to address | labels |
|---|---|
hello@relay.example.com |
hello |
hello-world@relay.example.com |
hello and world |
hello.world@relay.example.com |
hello/world (world as a sublabel of hello) |
hello.world-yo.wassup@relay.example.com |
hello/world and yo/wassup |
And, of course, you can easily customize the label separator (-) and the level separator (.).
-
Set up your email forwarding service (i.e. Forward Email or ImprovMX). Suppose the email forwarding domain of your choice is
relay.example.com. You should set up a catch-all rule that forwards all emails sent to any@relay.example.comaddresses to your Gmail. -
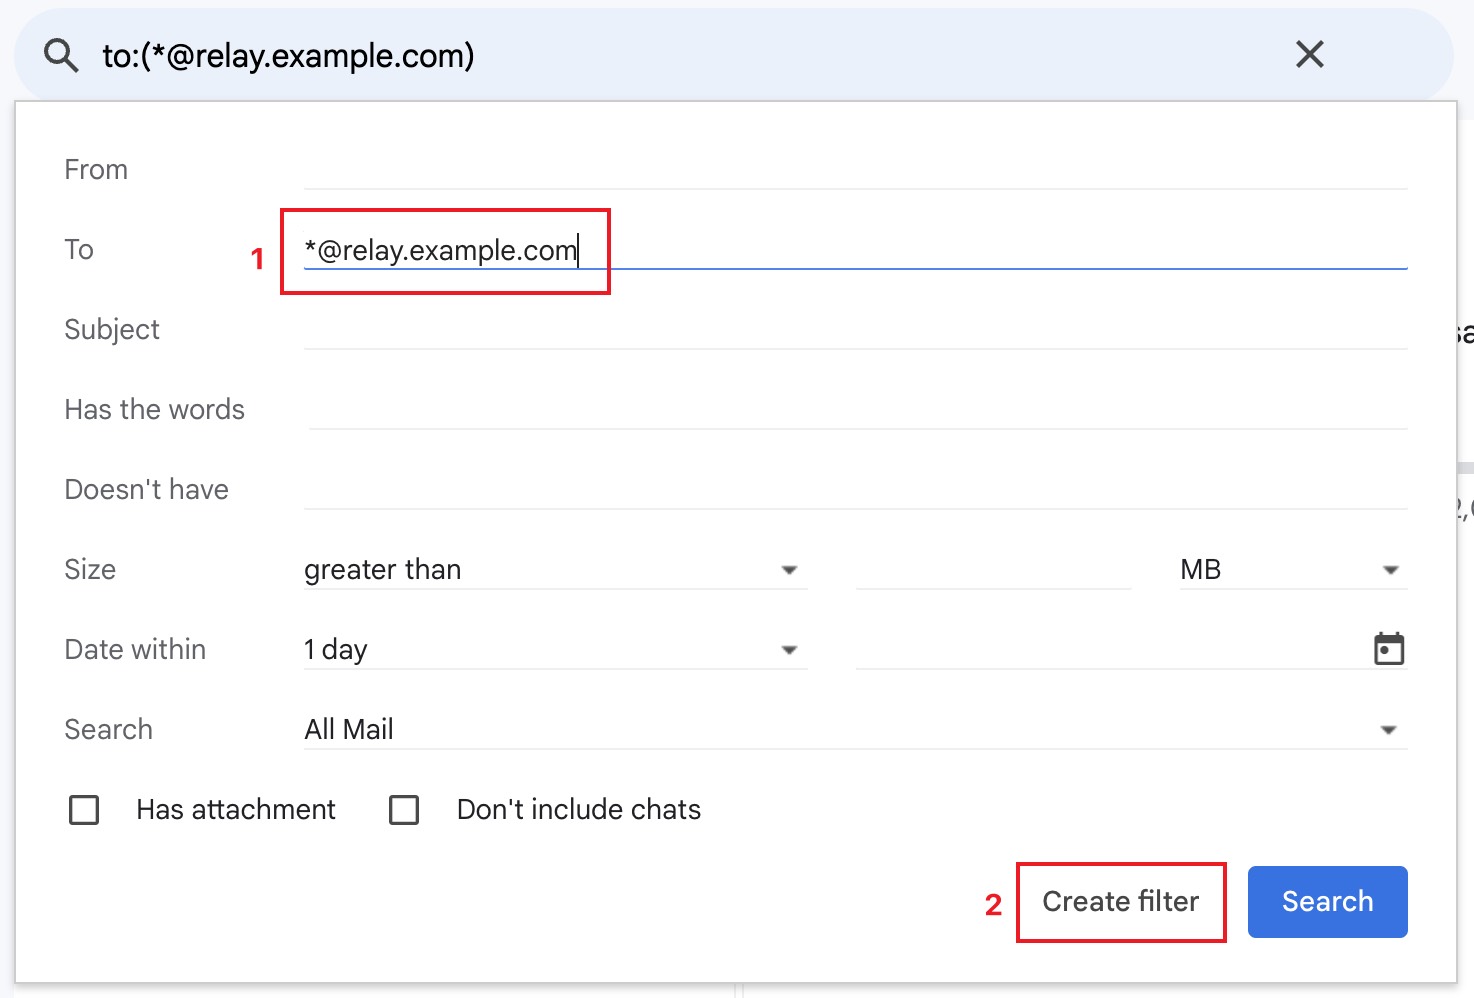
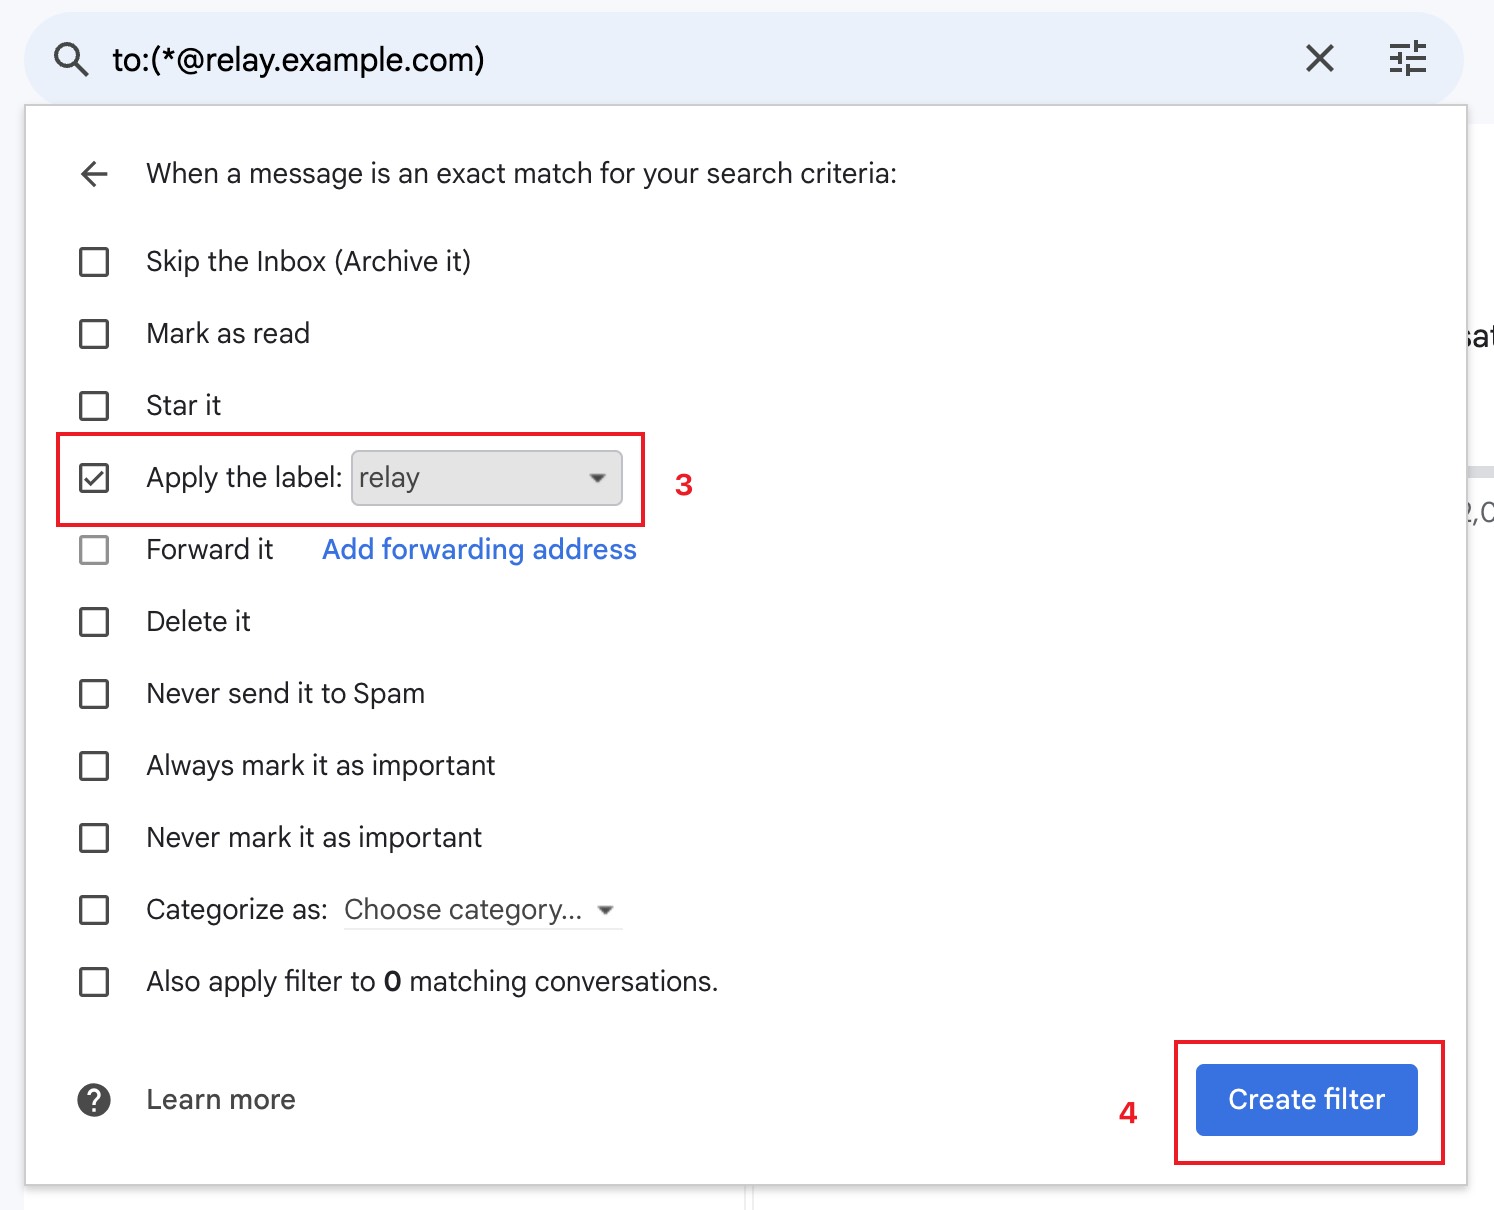
Create a Gmail filter. Go to your Gmail settings →
Filter and Blocked Addresses→Create a new filter. Create a filter that applies emails sent to*@relay.example.comwith a label of your choice. (Default label name:relay) -
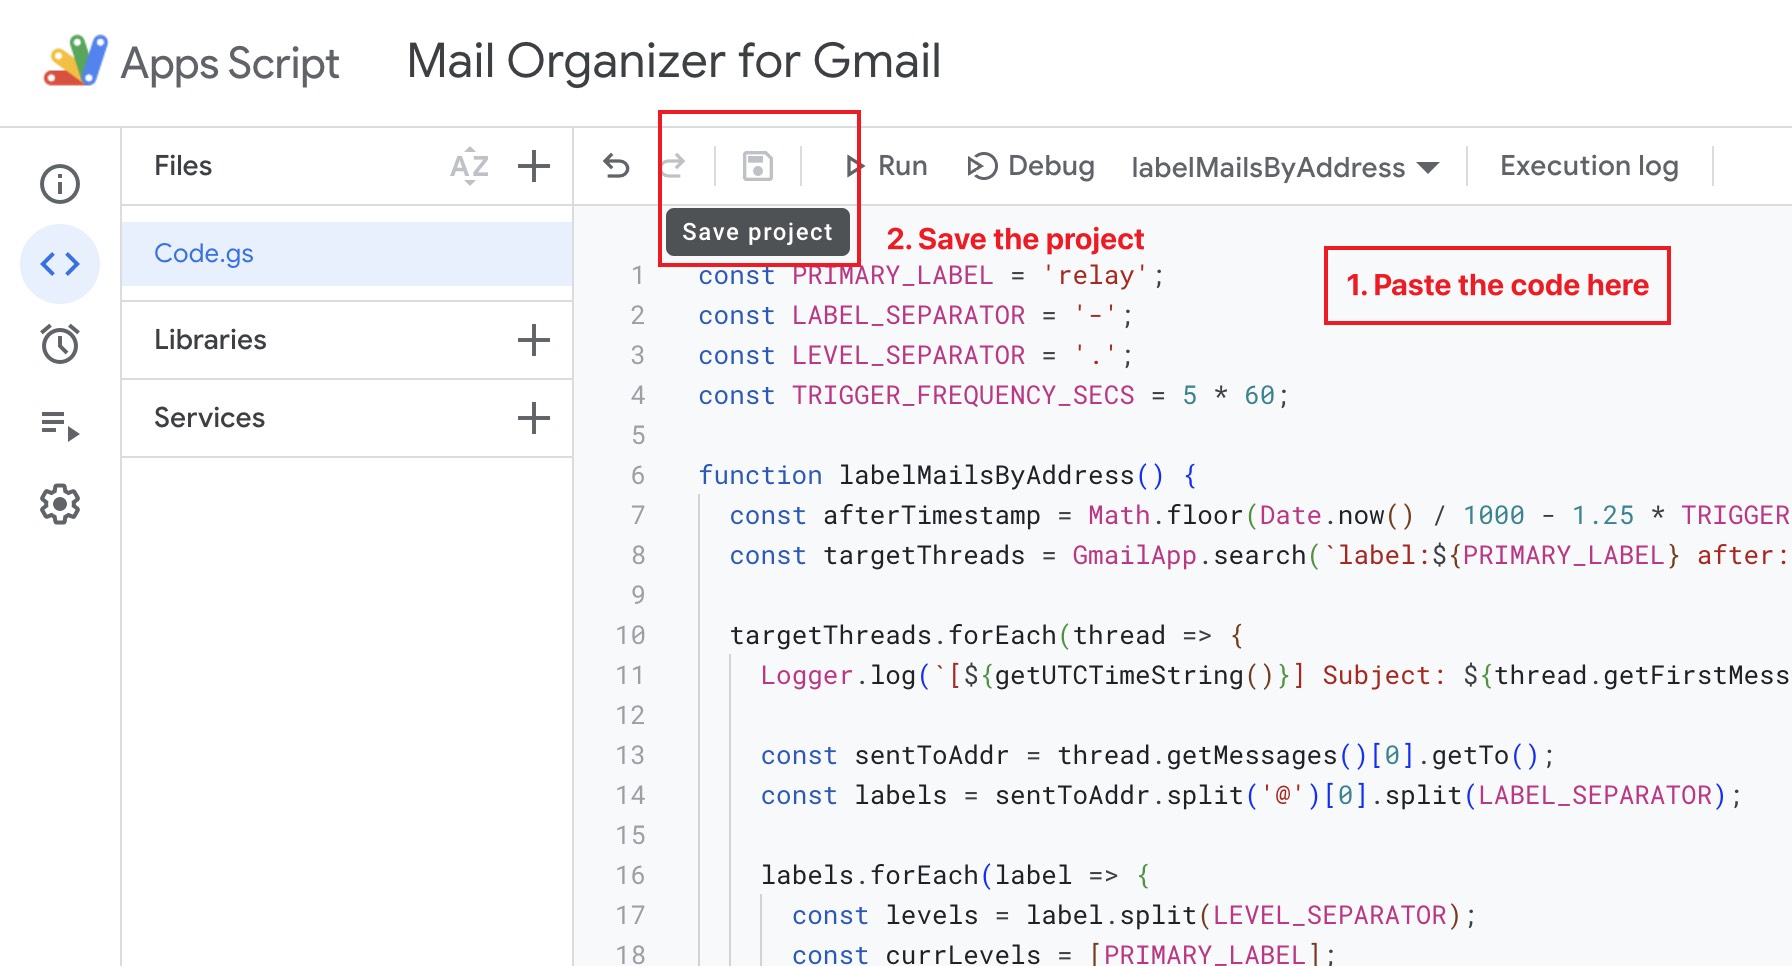
Create a Google Apps Script project at https://script.google.com/. Copy all contents from ./Code.gs of this project and paste to
Code.gsof your Google Apps Script project, and then save the project.After saving, you should run the project at least once manually by clicking the "Run" button, so that you can authorize the script to access your account.
-
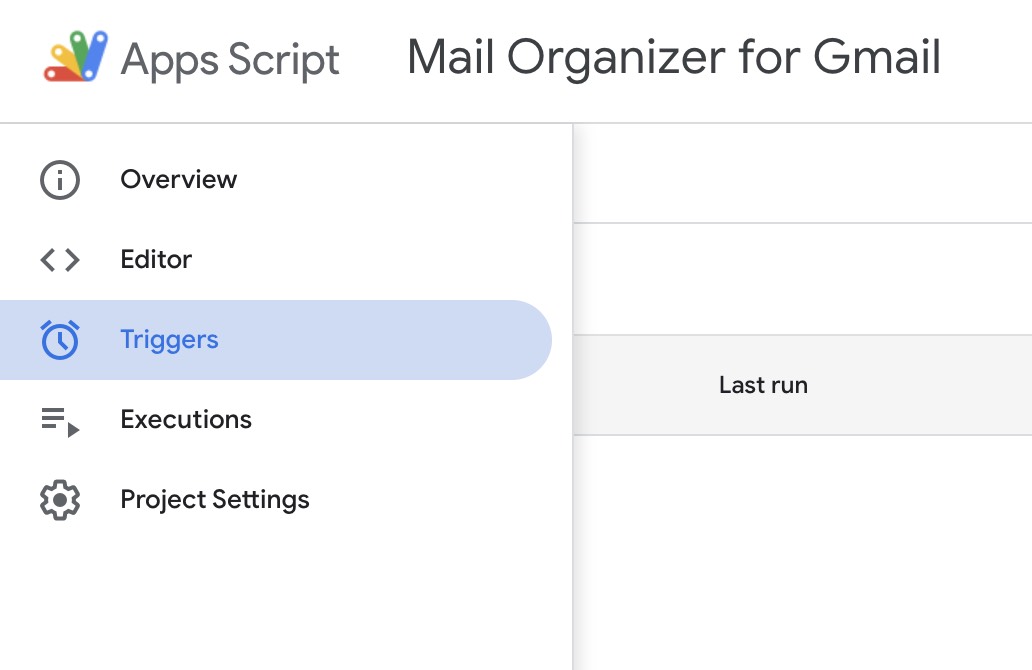
Create 2 triggers in the
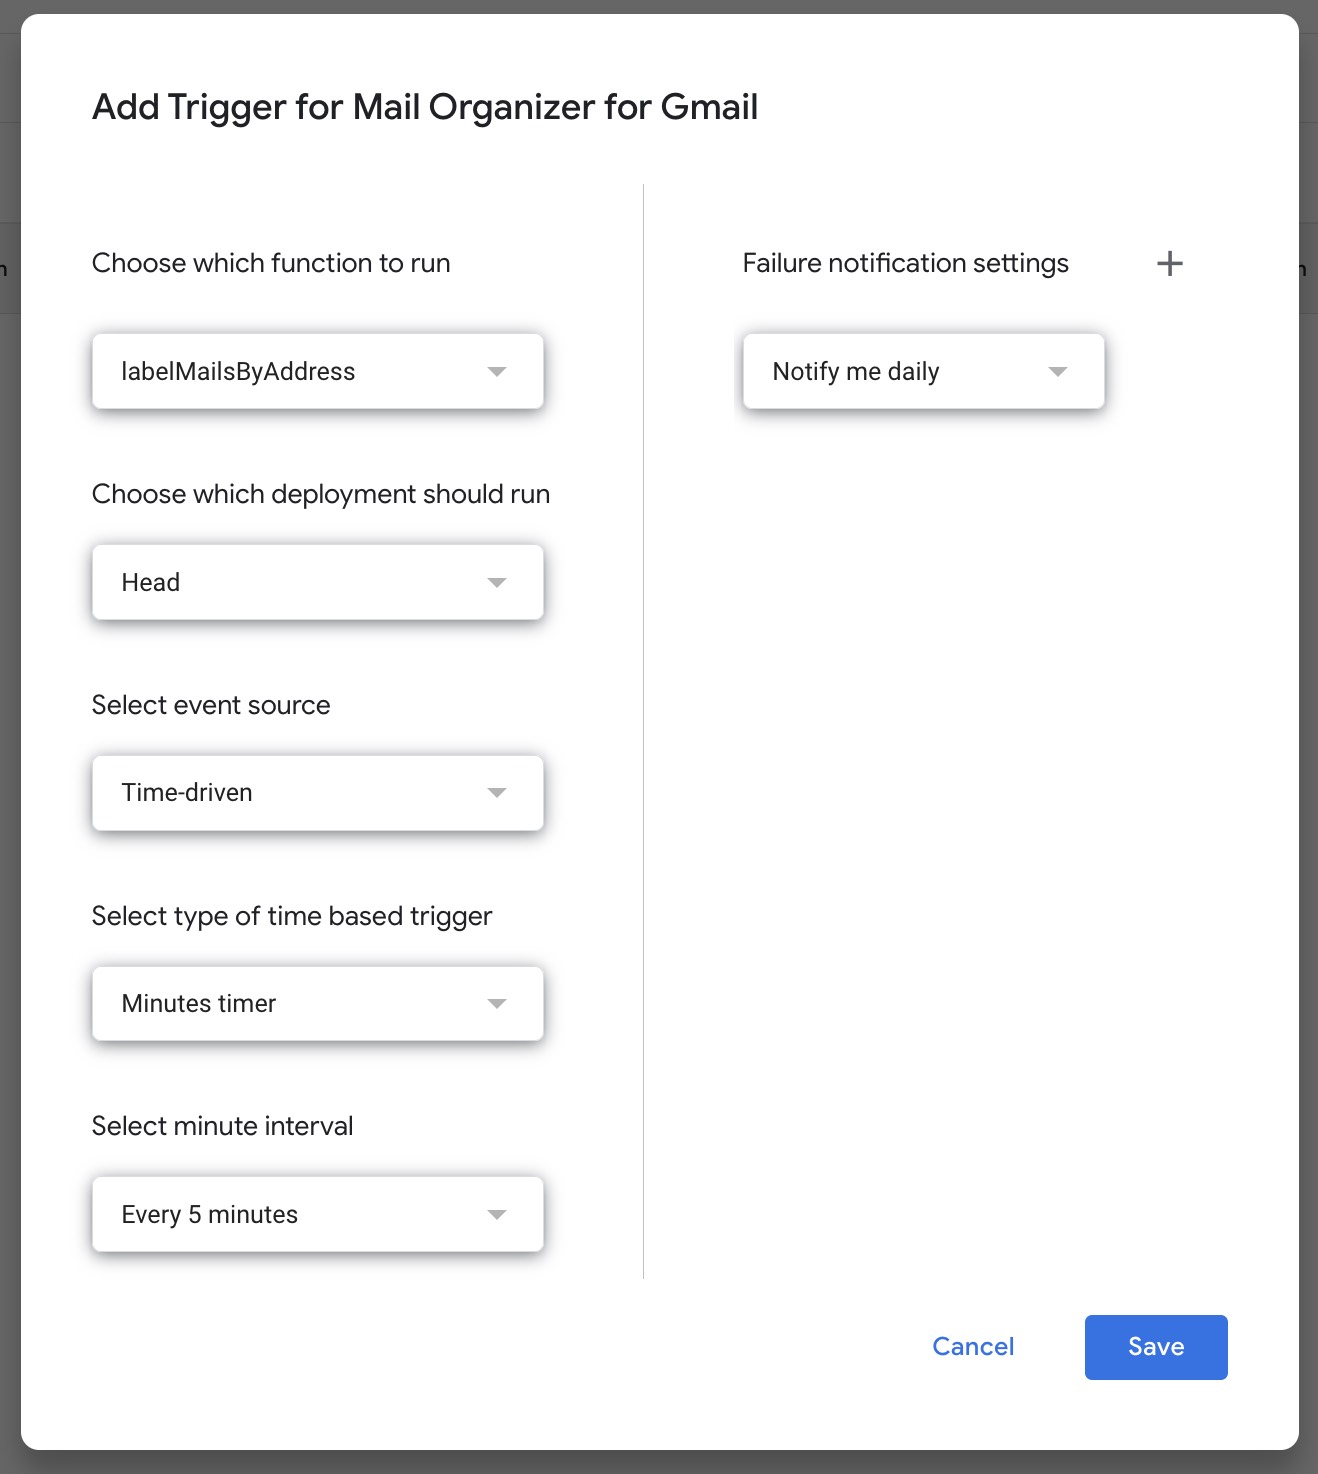
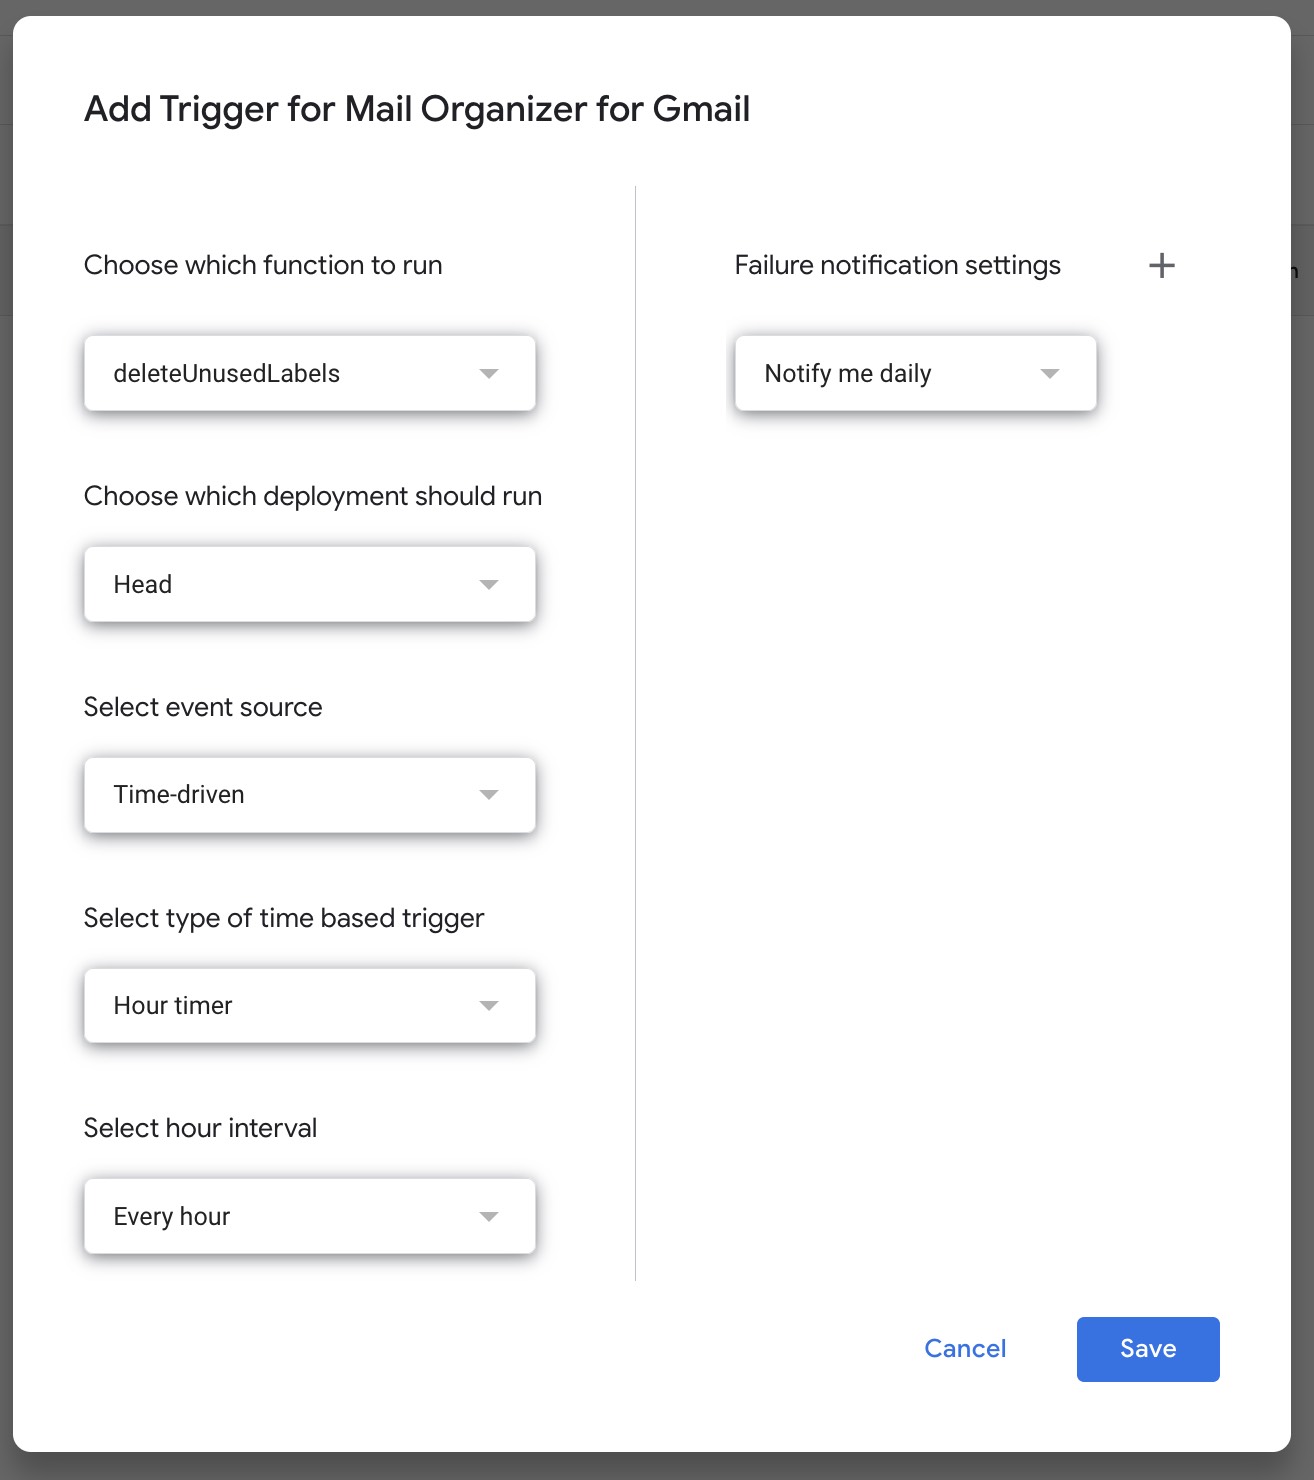
Triggerstab. To add a trigger, clickAdd Triggerbutton in the bottom-right corner of the page. Here's a configuration of the two triggers for the two functions respectively (you can also reference the screenshots provided):Choose which function to run labelMailsByAddressdeleteUnusedLabelsChoose which deployment should run Head Head Select event source Time-driven Time-driven Select type of time based trigger Minutes Timer Hour Timer Select interval Every 5 minutes (if you wanna customize this, see Customization) Every hour [!NOTE] For Apps Scripts, Google has set a time limit. As of now, the limit is 6 mins per execution and 90 mins per day (source). This script has been optimized to avoid running over time limit. Adjust the time interval accordingly if you have a lot of emails and got errors like "User-rate limit exceeded", or if you feel like the interval is too long for you.
-
Done! Enjoy using the script!
You can simply customize the script by modifying the 4 constants at the very top of the script.
PRIMARY_LABEL: if you name your label differently in step 2 (notrelay), change the value accordingly.LABEL_SEPARATORandLEVEL_SEPARATOR: if you want to use different symbols to separate the labels or sublabels in your email address, change the values according. Remember to only choose from allowed symbols for the local part of an email address.TRIGGER_FREQUENCY_SECS: if you set a different trigger interval for functionlabelMailsByAddress, change it accordingly. Note that the unit here is second.
MIT © Ning Kuang, 2023.
