This repo walks through the basics of using a python buildpack to build and maintain your docker containers.
This app leverages buildpack.io and the Cisco DevNet ACI Always On Sandbox to gather the FabricOverallHealth and also verify Tenants in ACI.
To sign up for DevNet: Start Now
Special thanks to DaShaun from Redis Labs for introducing me to this awesome tool!
Building and maintaining a Dockerfile can be a pain. Most network engineers just want to get their app up and running without worrying about the things they don't need to know.
This is where buildpacks come in because they remove the pain of building a container like:
- Finding the right images
- Security risks do to patching
- Time it takes to build a
Dockerfile
They give you the ability to containerize your entire app in as little as 1 command. The buildpack will handle the version of python that will be used along with installing all of the dependencies from the requirements.txt file.
NOW THATS SWEET!
I must state that there is value in understanding what is going on under the hood of a docker container. Especially if you are serious about DevOps! Here's a great 3 part series on Understanding Container Images
-
The first thing we need to do is clone the
StartNow - Intro to Python Buildpacksrepo and then change in it's directory to build our python app.git clone https://github.com/CiscoDevNet/startnow-Intro-to-Python-buildpacks.git && cd startnow-Intro-to-Python-buildpacks
Here is the app directory structure.
➜  startnow-Intro-to-Python-buildpacks git:(main) ✗ tree -L 2
.
├── LICENSE
├── Procfile
├── README.md
├── __init__.py
├── app
│   ├── __init__.py
│   ├── aci_conn.py
│   └── aci_webex.py
├── cards
│   └── card.json
├── images
│   ├── devi.jpeg
│   ├── image.png
│   └── results.png
├── main.py
├── requirements.txt
├── tenant_log.txt
NOTE: In this repo we have all the files needed to containerize our python app. Although here we are using Python buildpack supports several other languages including Ruby, Python, Node.js, PHP, Go, Java, Scala, and Clojure. You also have ability to create your own custom buildpacks.
-
Install docker: This is needed to run your app once its containerized.
-
Once docker is installed we have to then install the
pack CLItool to build our containers from buildpack.A link has been provided for you to follow the steps for your specific host.
https://buildpacks.io/docs/tools/pack/
NOTE: Pack is maintained by the Cloud Native Buildpacks project to support the use of buildpack.
-
After installation verify the installed
pack CLIversion.pack --version
-
Create the default builder that will be used for packeto. A builder includes the buildpacks and everything we need like our environment for building our python app.
pack config default-builder paketobuildpacks/builder:full
You can use the command
pack builder suggestto view a list of suggested builders. -
Before we containerize our app we need to create a file in our root directory called
Procfile. This file will be used to tell buildpack which command to execute when our app is run.web: python main.py
For more information on the Procfile
-
Now lets build the app using the latest python build pack.
pack build myaciapp --buildpack paketo-community/python@0.4.1
To find build packs: https://registry.buildpacks.io/searches/python
-
We can now verify that our app image has been built by executing:
docker images myaciapp
Notice that docker is still used to manage our app and images after they are built.
-
It's time to run our app:
docker run myaciapp
-
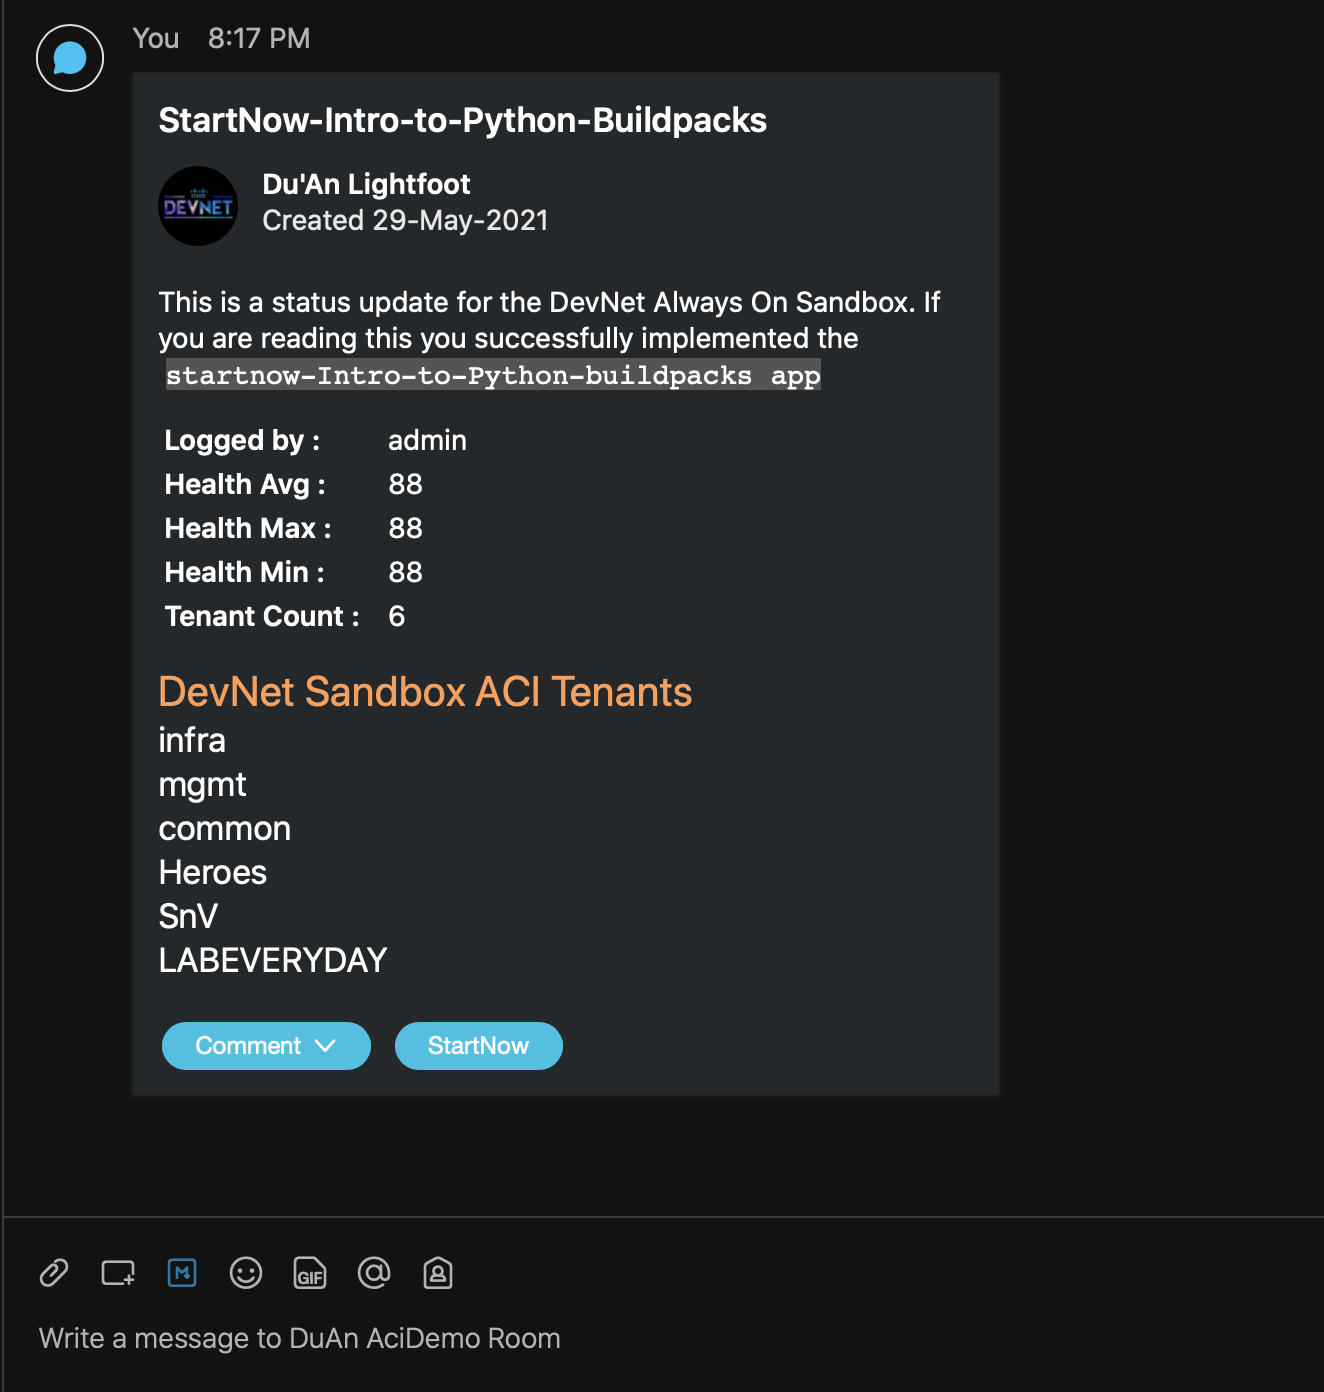
BONUS: This app has the ability to pass in command line arguments when we run our docker container. There are several arguments that are accepted like ACI login params as well as we can provide our
webex_tokenand the name of awebex_roomto send a webex adaptive card update to. Check out the example below:NOTE: To obtain a valid Webex Token: https://developer.webex.com/docs/api/getting-started
➜  startnow-Intro-to-Python-buildpacks git:(main) ✗ docker run \
> -e webex_token="OWNlMjFhNGMtOG2cae0e10f" \
> -e webex_room="DuAn AciDemo Room" \
> myaciapp
(venv) ➜  startnow-Intro-to-Python-buildpacks git:(main) ✗ python main.py --help
usage: main.py [-h] [--url URL] [--username USERNAME] [--password PASSWORD]
            [--webex_token WEBEX_TOKEN] [--webex_room WEBEX_ROOM]

Arguments: url, username, password, webex_token, webex_room

optional arguments:
-h, --help            show this help message and exit
--url URL             Optional argument to pass url or ip of APIC Default:
                        'https://sandboxapicdc.cisco.com'
--username USERNAME   Optional argument to pass username for APIC user
                        Default: 'admin'
--password PASSWORD   Optional argument to pass password for FMC user
                        Default: 'ciscopsdt'
--webex_token WEBEX_TOKEN
                        Optional argument to pass webex api token
--webex_room WEBEX_ROOM
                        Optional argument to pass webex room name ***NOTE***
                        arg must be passed with token
To learn more about using Adaptive Cards in webex: https://developer.webex.com/docs/api/guides/cards
Buildpacks were introduced by Heroku, in 2011, and adopted by Cloud Foundry, Gitlab, Knative and others.
Cloud Native Buildpacks began with Heroku and Pivotal in early 2018.
Cloud Native Buildpacks joined the CNCF in October 2018.
By using the Python Buildpack you don't have to worry about building the dockerfile configuration
The build pack will automatically grab the Procfile, buildpack.yml, requirements.txt
Introverted Network Automation Engineer that is changing lives as a Developer Advocate for Cisco DevNet. Pythons scripts are delicious. Especially at 2am on a Saturday night.
Contact Me:


