Pattern for making 2-layer laser cut player boards for the Terraforming Mars board game. This repo contains two sets of two files:
-
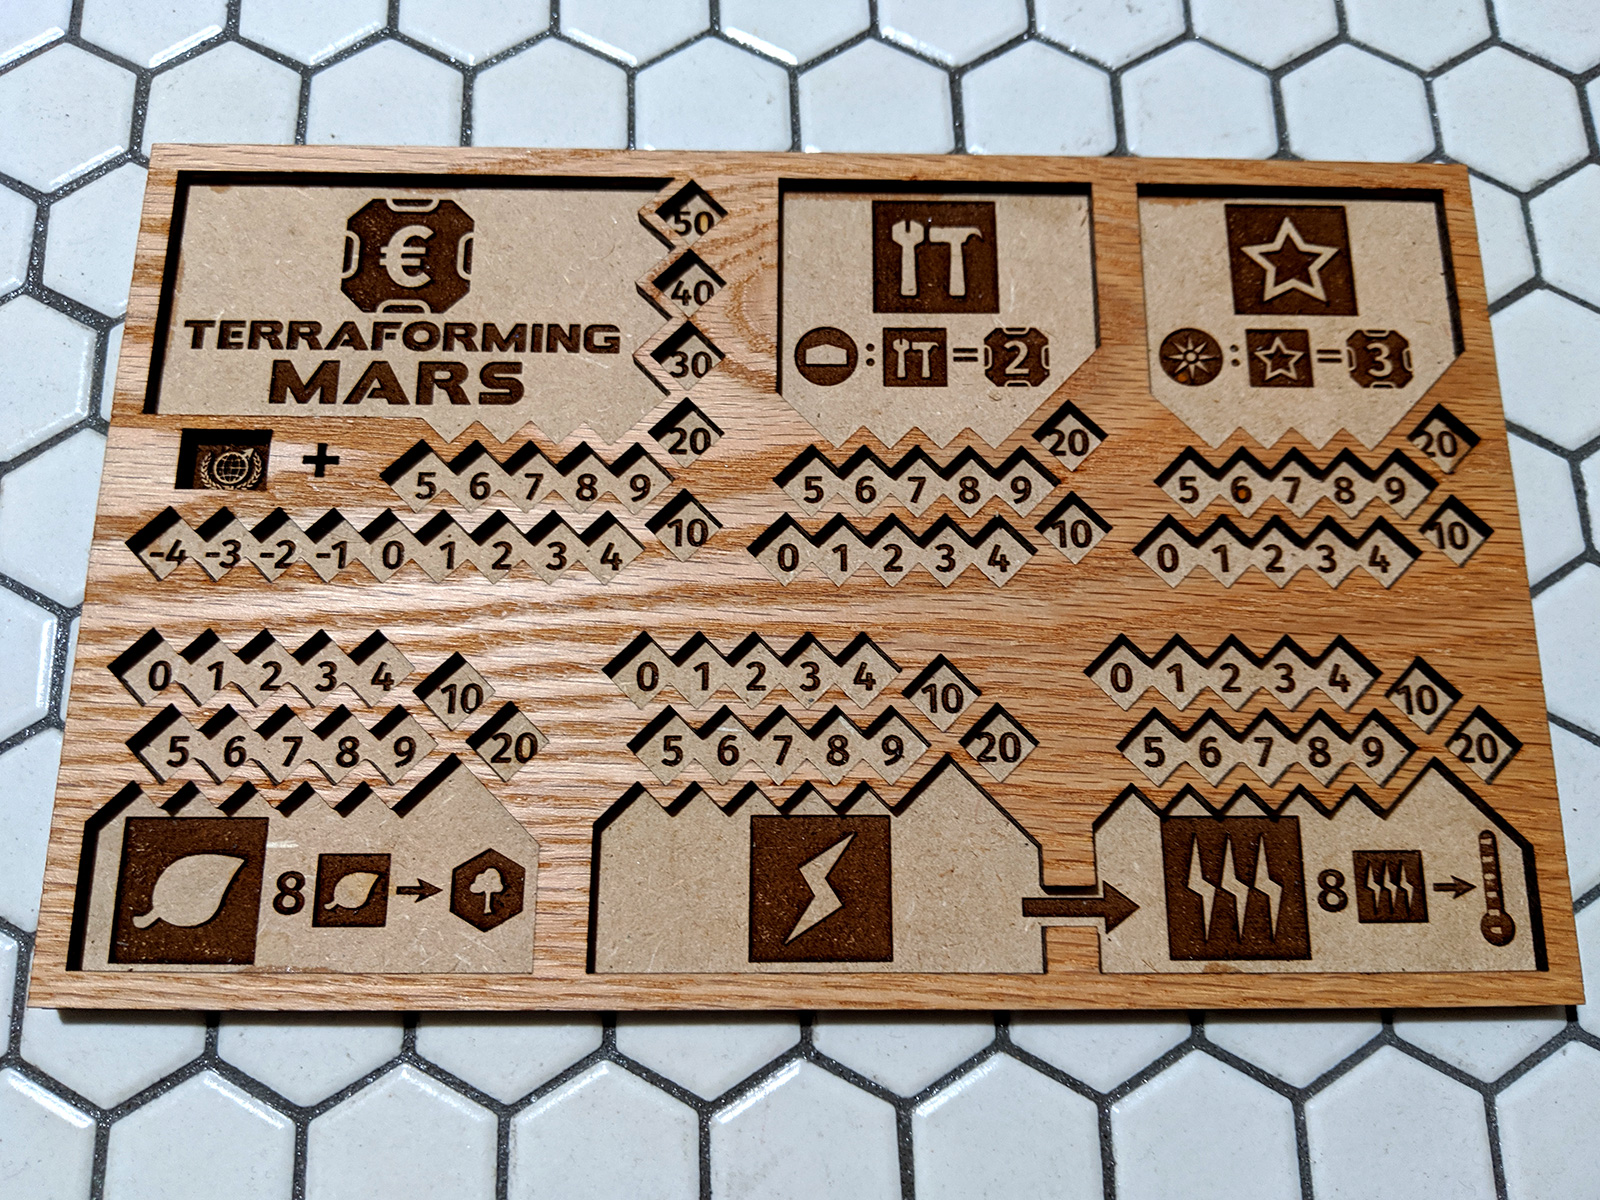
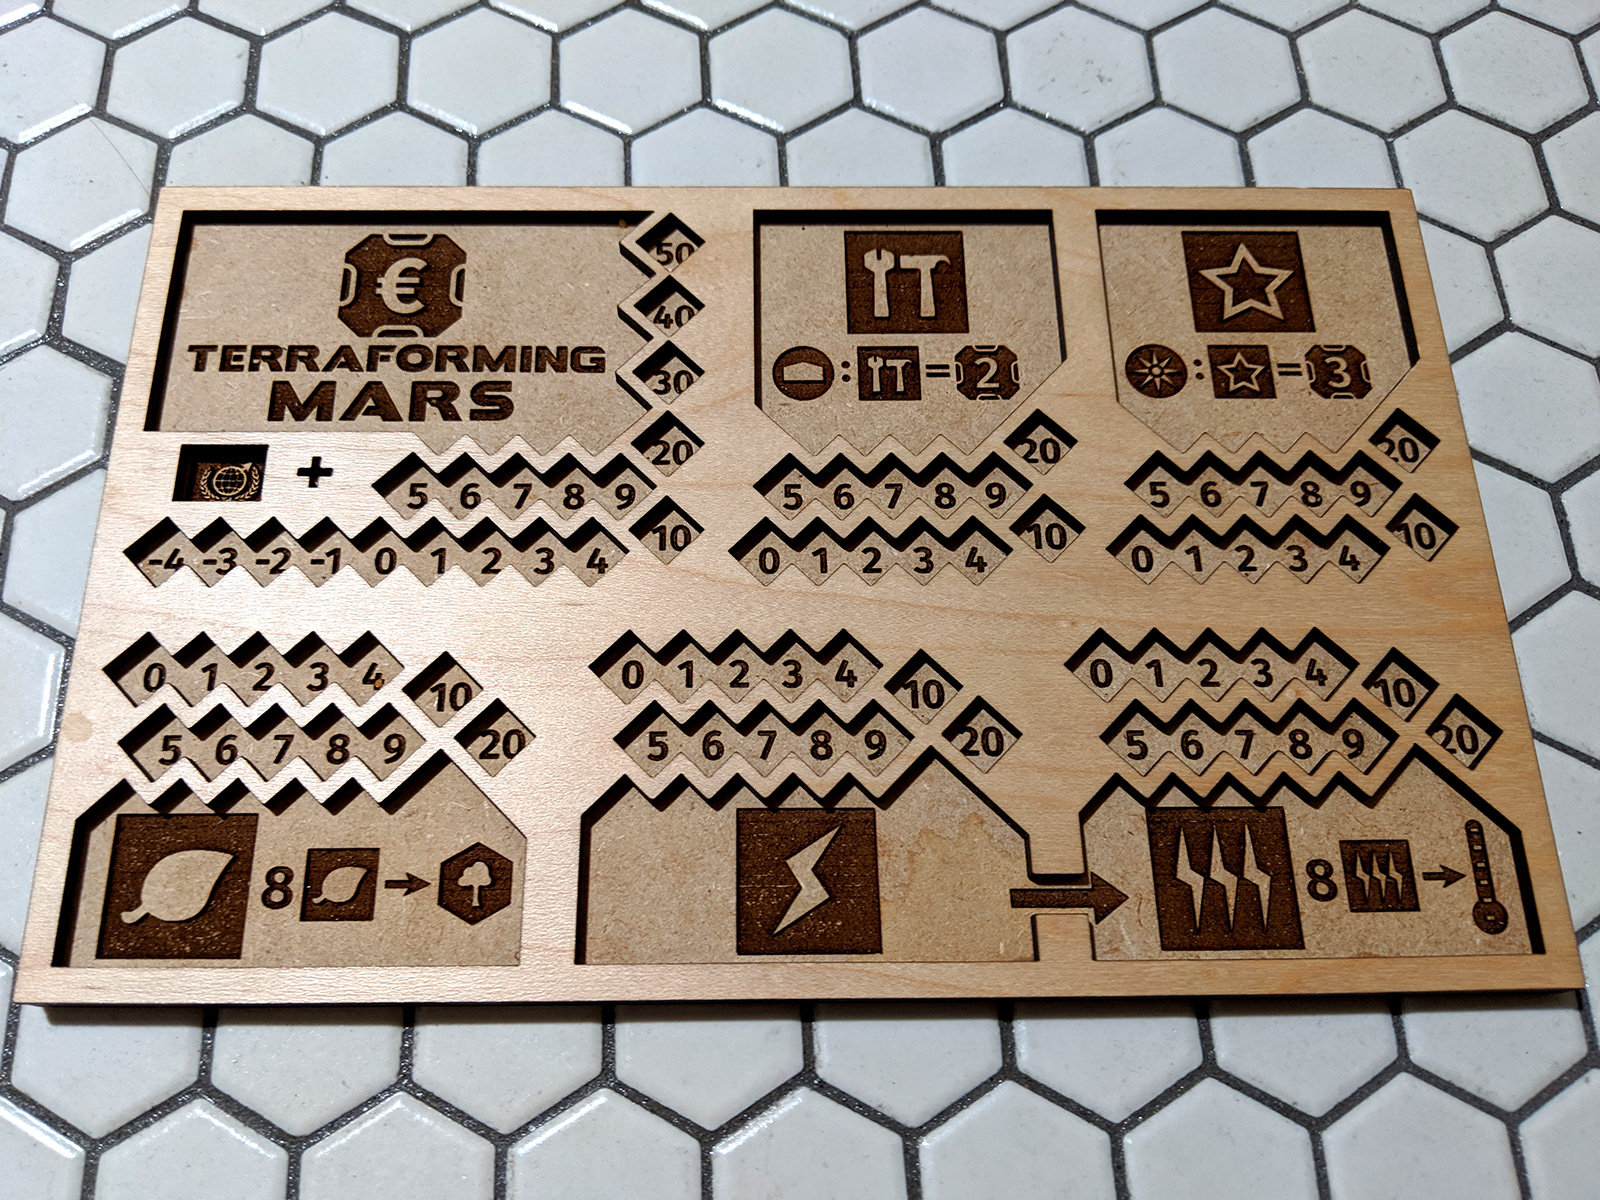
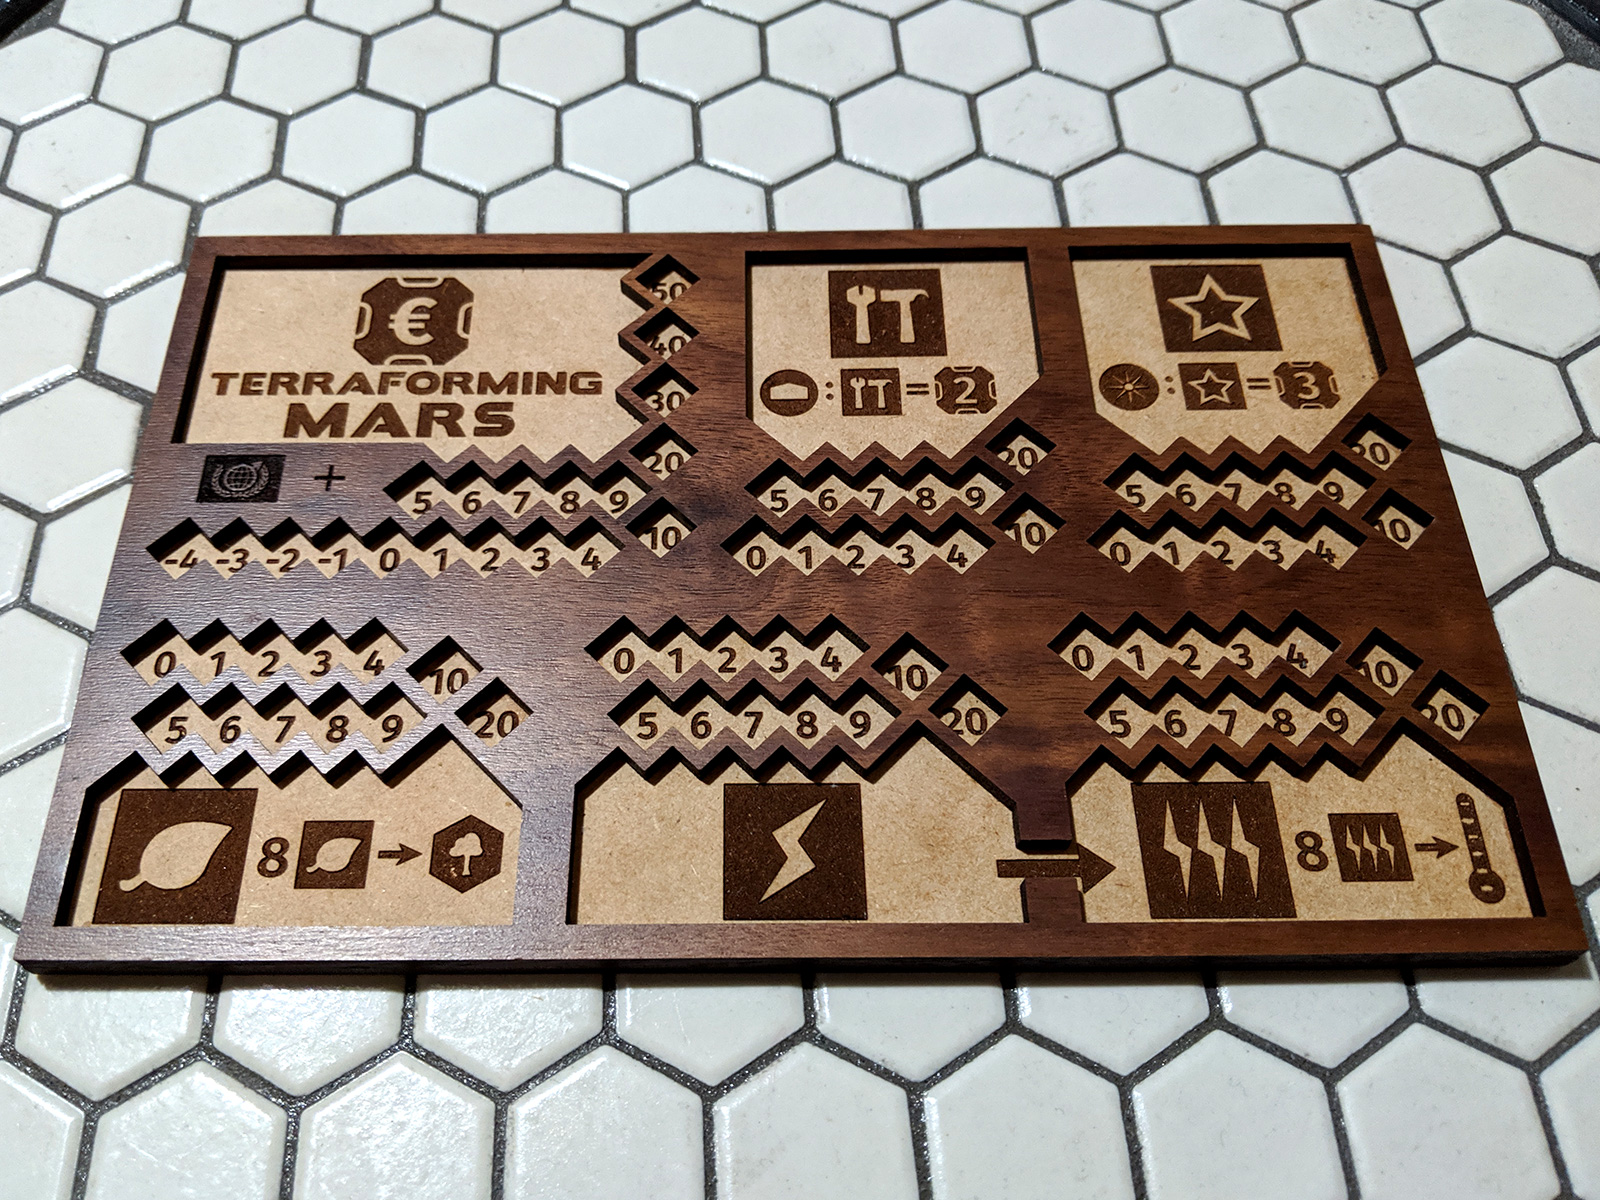
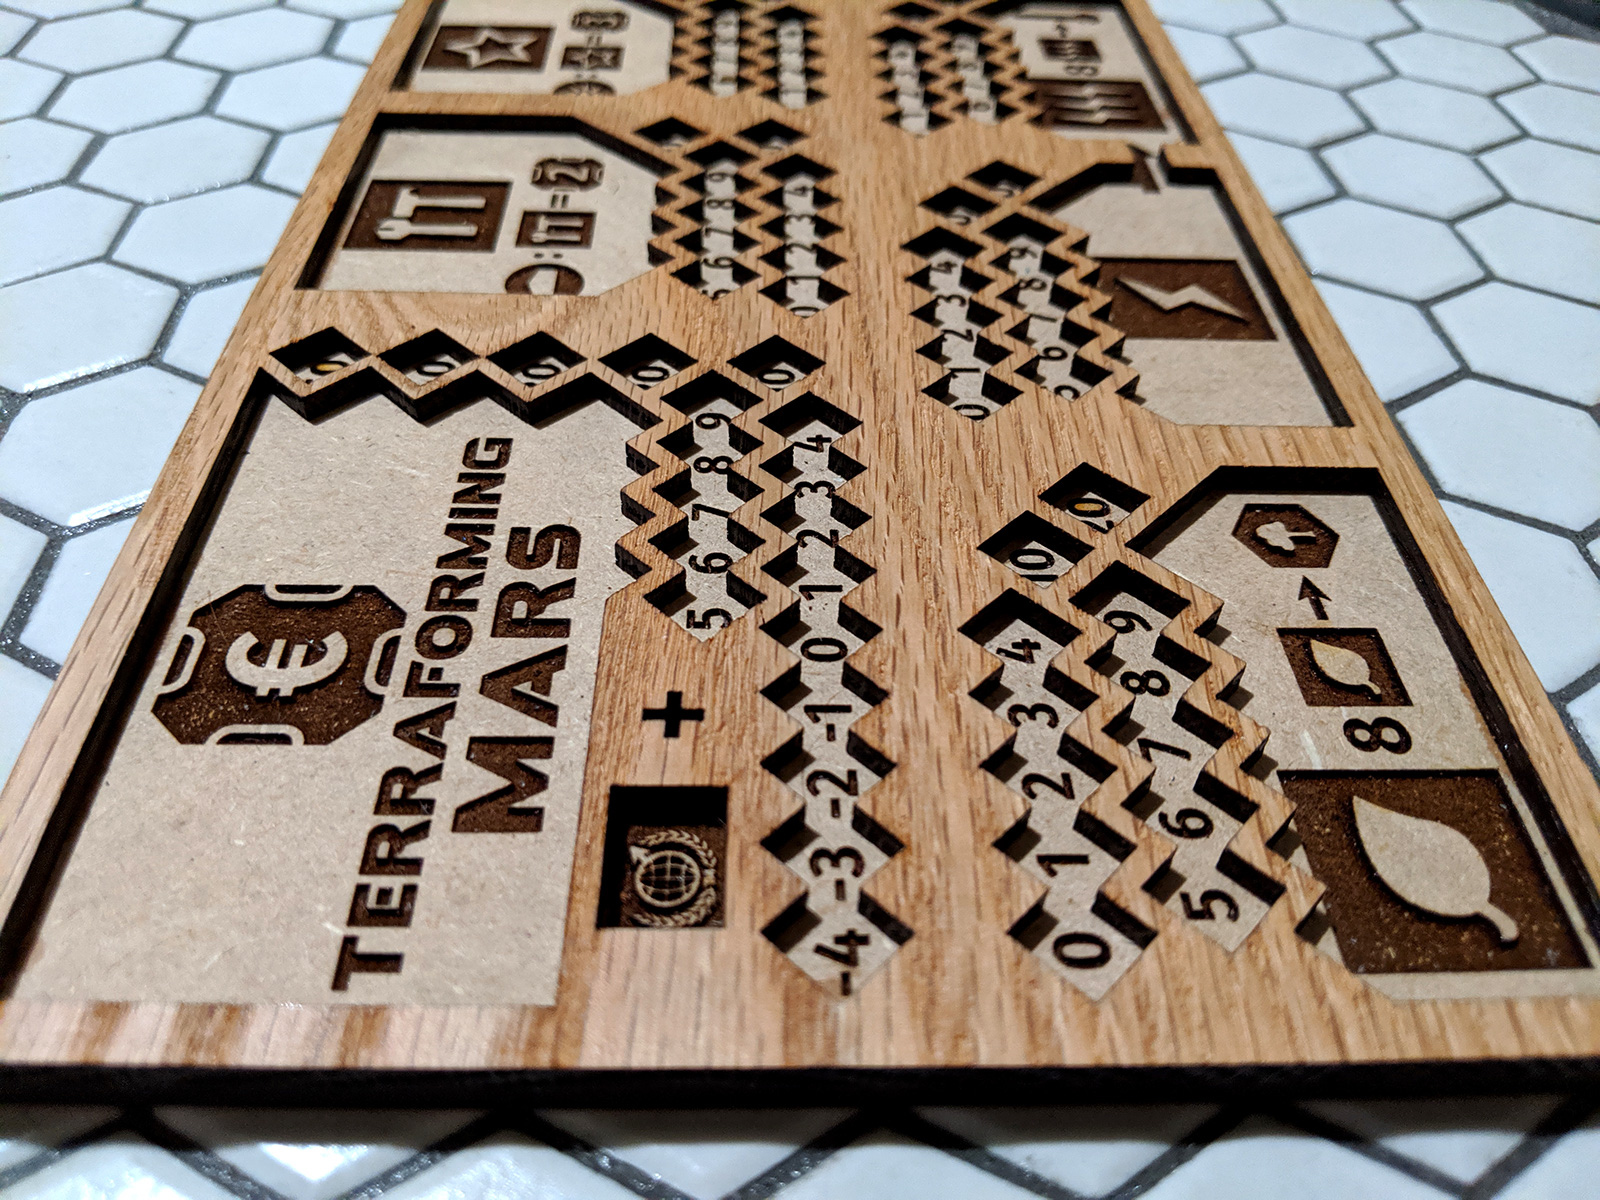
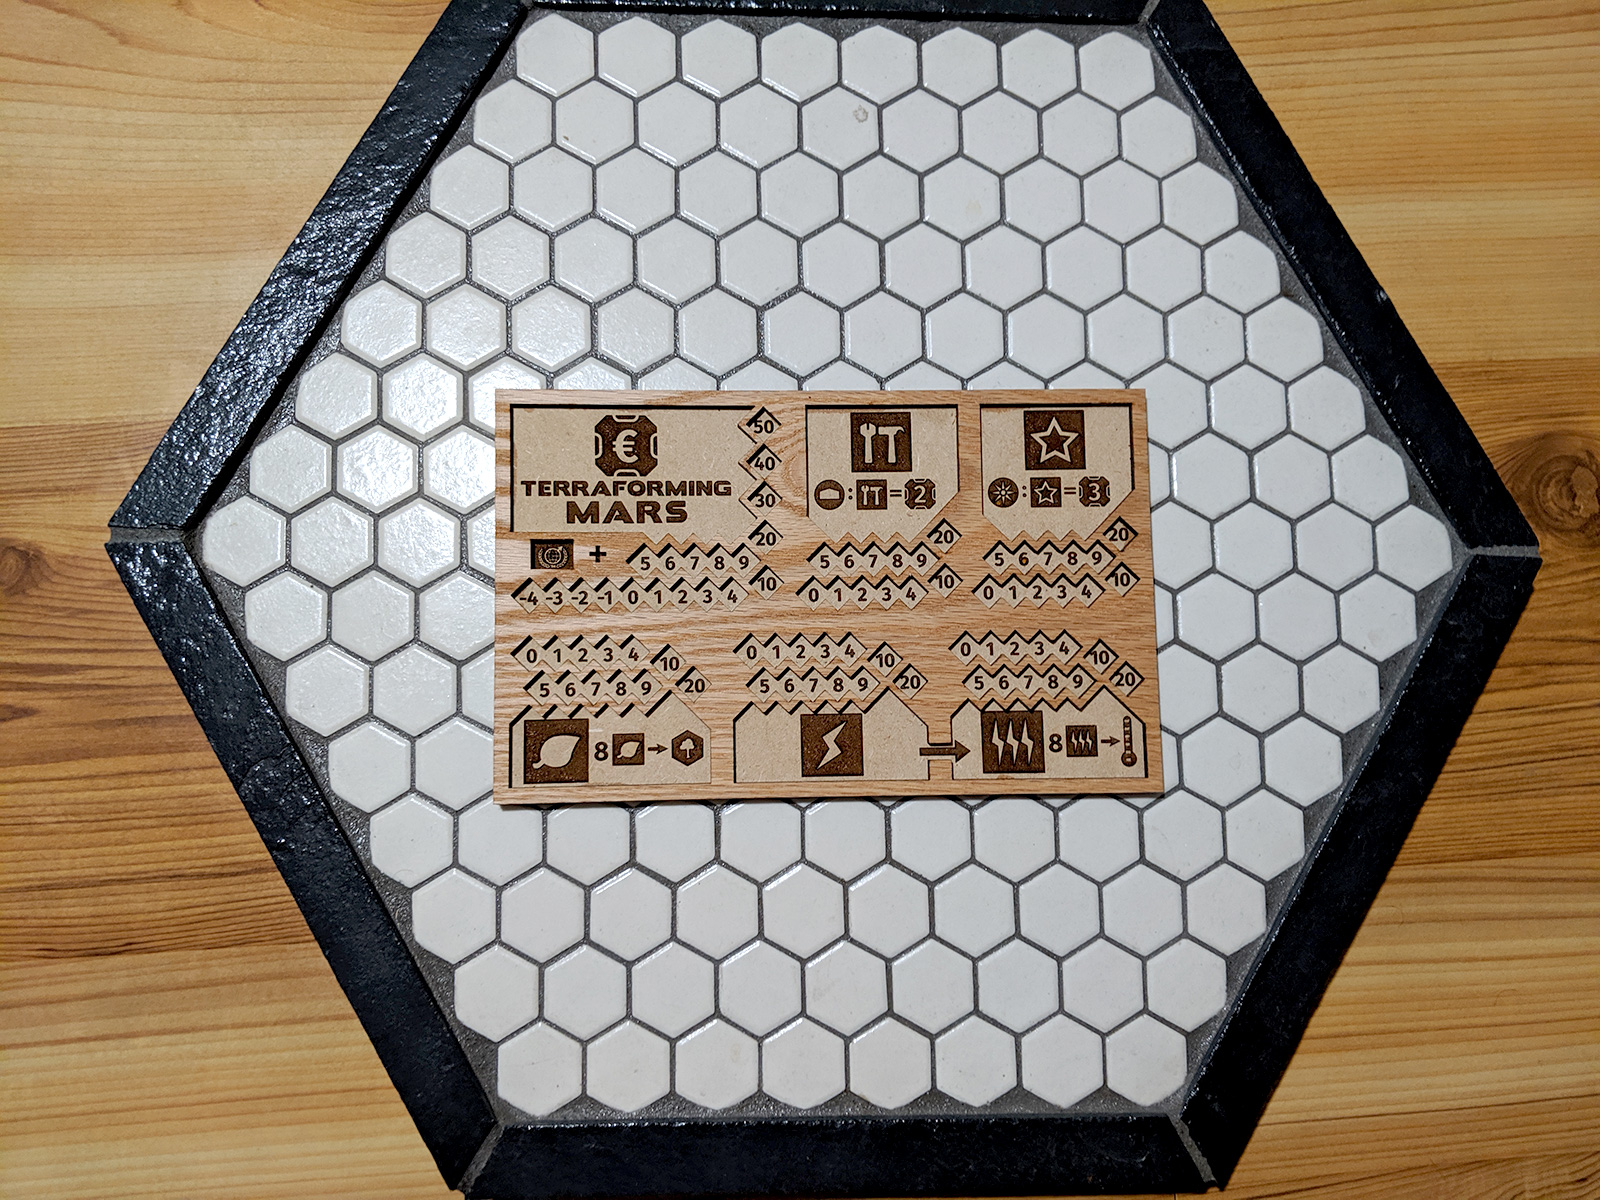
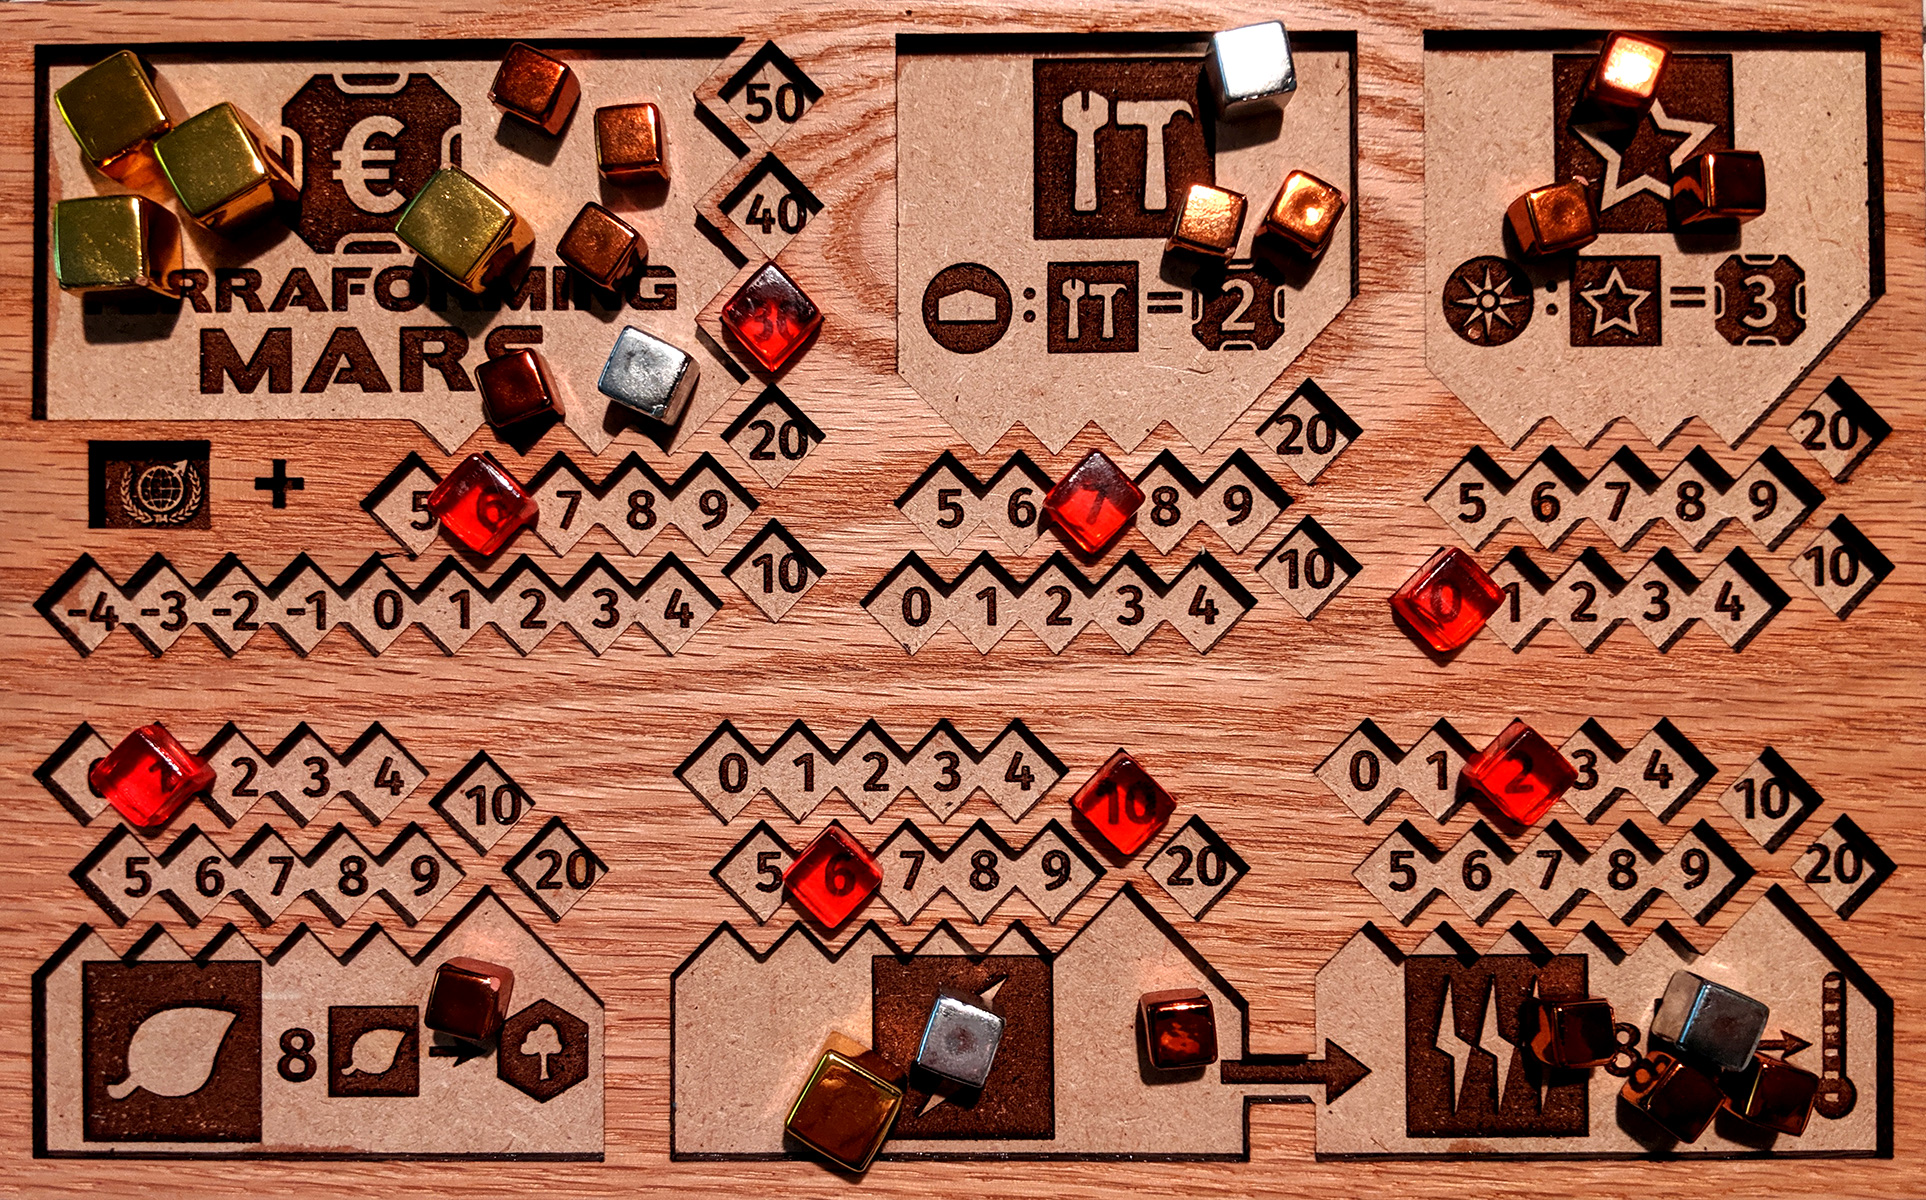
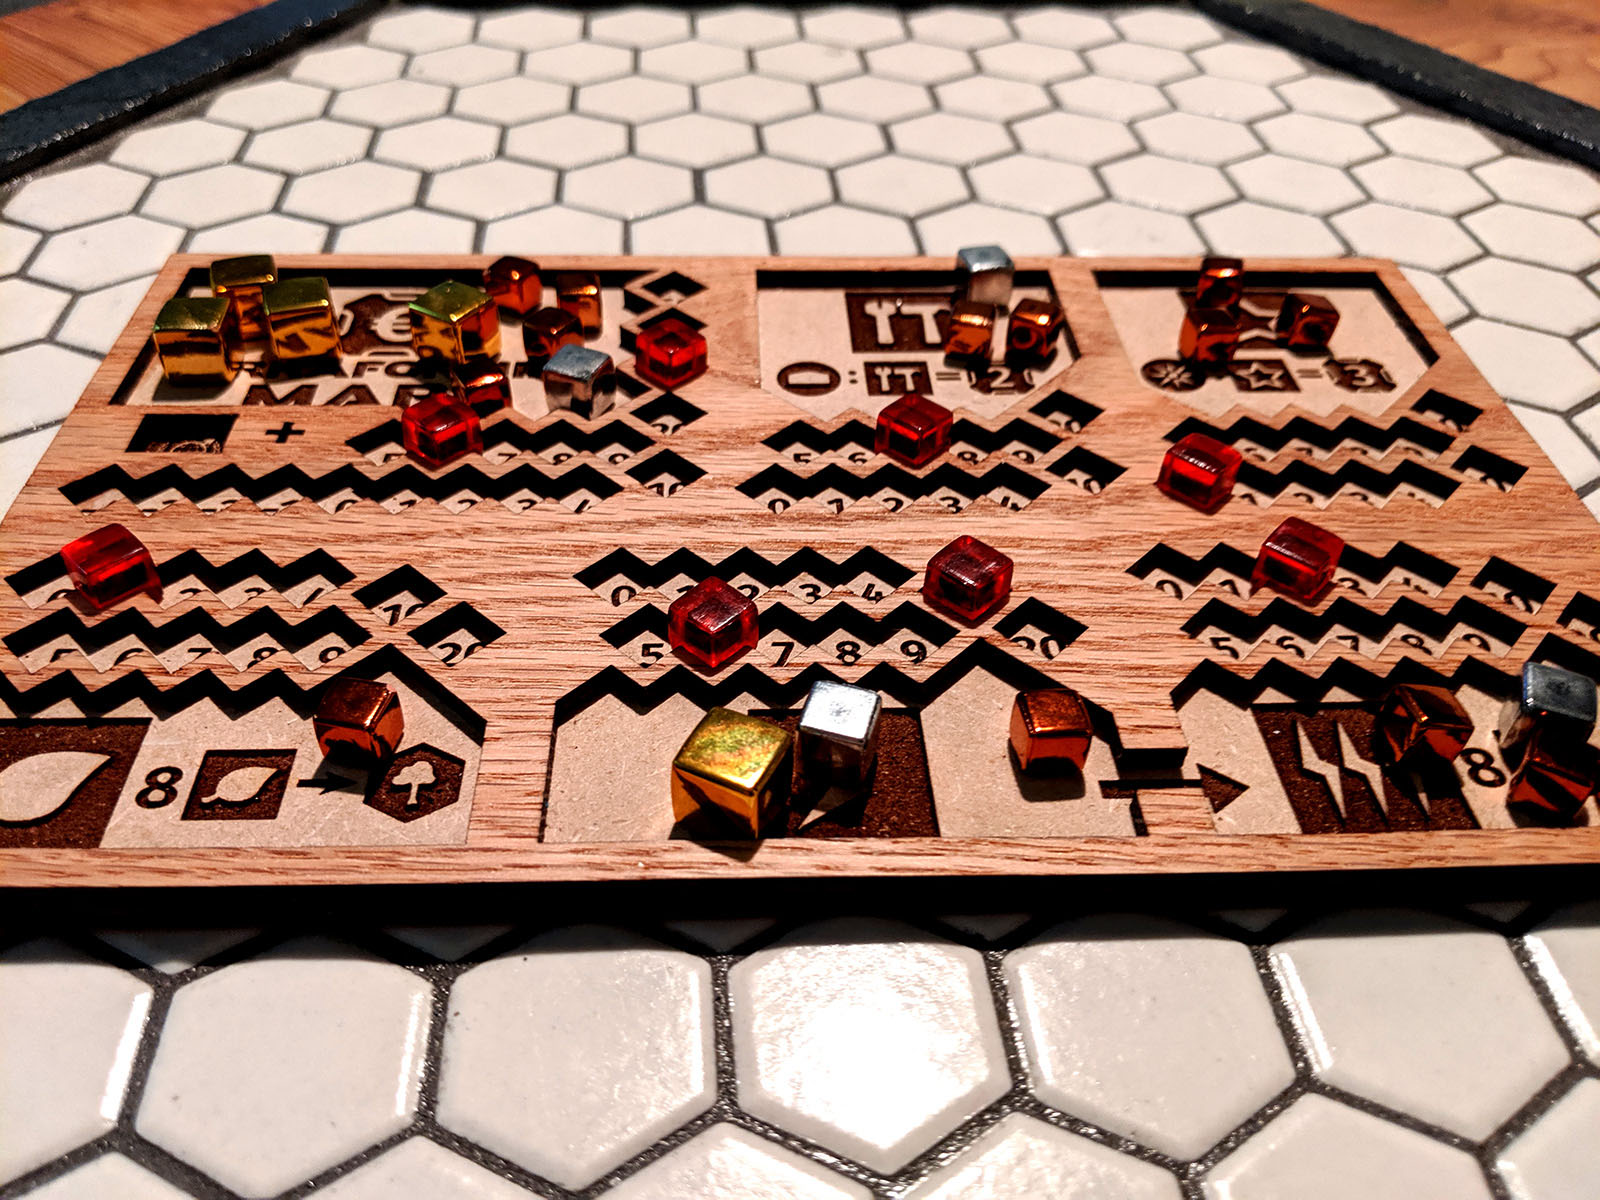
MarsPlayerBoard_v3p1_bottom.pdf - This file contains the artwork in each resource panel as the green vector objects. The board boundary is a black line object, which when cut will precisely match the top board.
-
MarsPlayerBoard_v3p1_top.pdf - This file contains the cutting layer which will hold both the resource and player tokens. Note that depending on the laser settings, this layer can hold the pieces more loosely or tightly - adjust your kerf settings accordingly.
-
MarsPlayerBoard_v3p1_bottom.svg - Same as pdf, but all texts converted to paths for LaserGRBL to understand. Adds distinct colours for resource-shapes, numbers, and outline-cut.
-
MarsPlayerBoard_v3p1_top.svg - Same as pdf, except energy -> heat shove-over window is larger.
This repository holds the design for a laser cut, 2-layer player board for the board game Terraforming Mars. This design incorporates various features I've seen in other laser cut boards, and re-drawn art assets from the player mats included with the board game.
I printed the above boards using my GlowForge laser printer. Here are the steps I followed:
- Print the bottom board on draftboard (I like the texture of it for holding pieces). I typically use either SD or draft engraving settings for the green artwork layer, and Glowforge automagic cutting for the boundary black layer.
- Print the top board on wood with a nice finish. I use the appropriate GlowForge automagic cutting settings.
- Peel off the printing stickers (if using GlowForge proofgrade materials).
- Apply wood glue to the underside of the top board.
- Carefully align the boards and glue them together.
- Allow the glue to set before using.