Android Transition Framework can be used for three main things:
- Animate activity layout content when transitioning from one activity to another.
- Animate shared elements (Hero views) in transitions between activities.
- Animate view changes within same activity.
Animate existing activity layout content
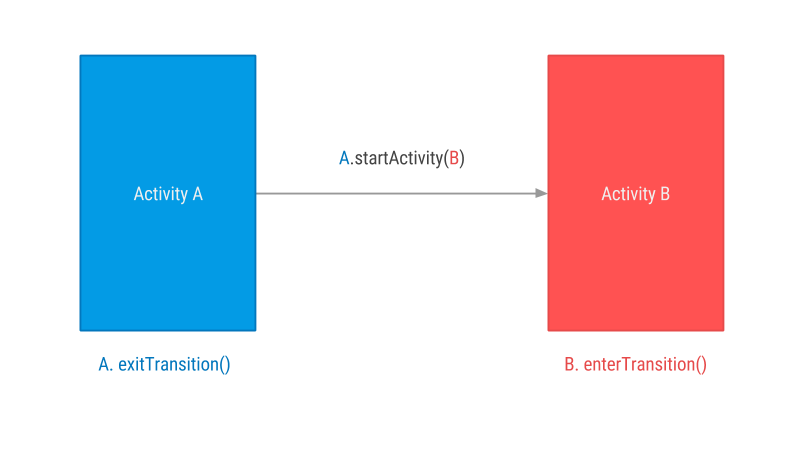
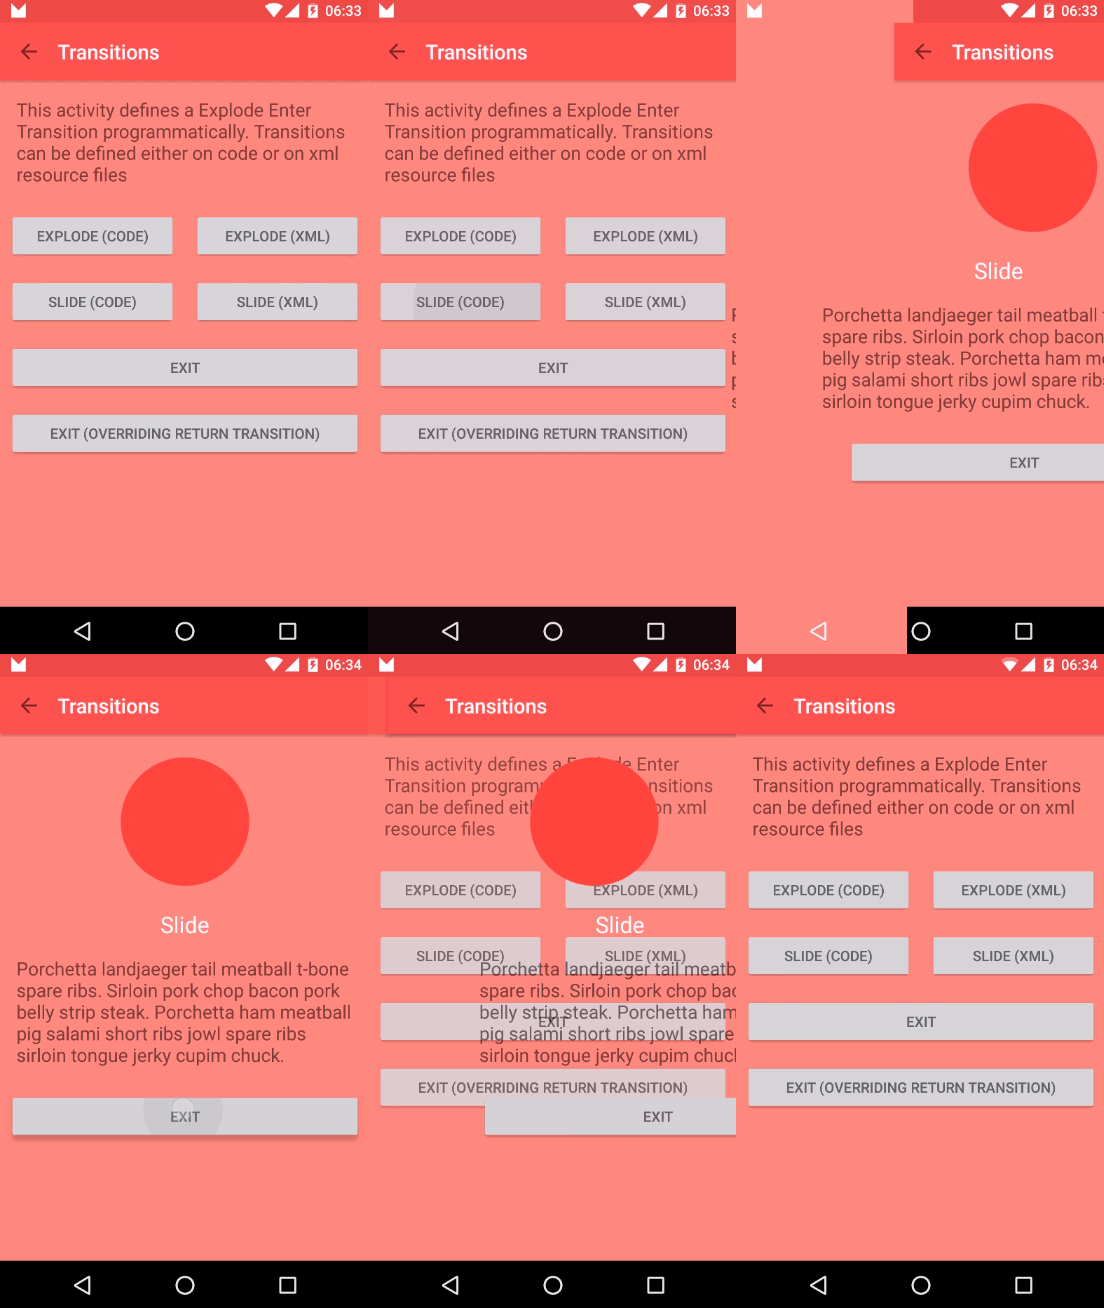
When transitioning from Activity A to Activity B content layout is animated according to defined transition. There are three predefined transitions available on android.transition.Transition you can use: Explode, Slide and Fade.
All these transitions track changes to the visibility of target views in activity layout and animate those views to follow transition rules.
| Explode | Slide | Fade |
|---|---|---|
 |
 |
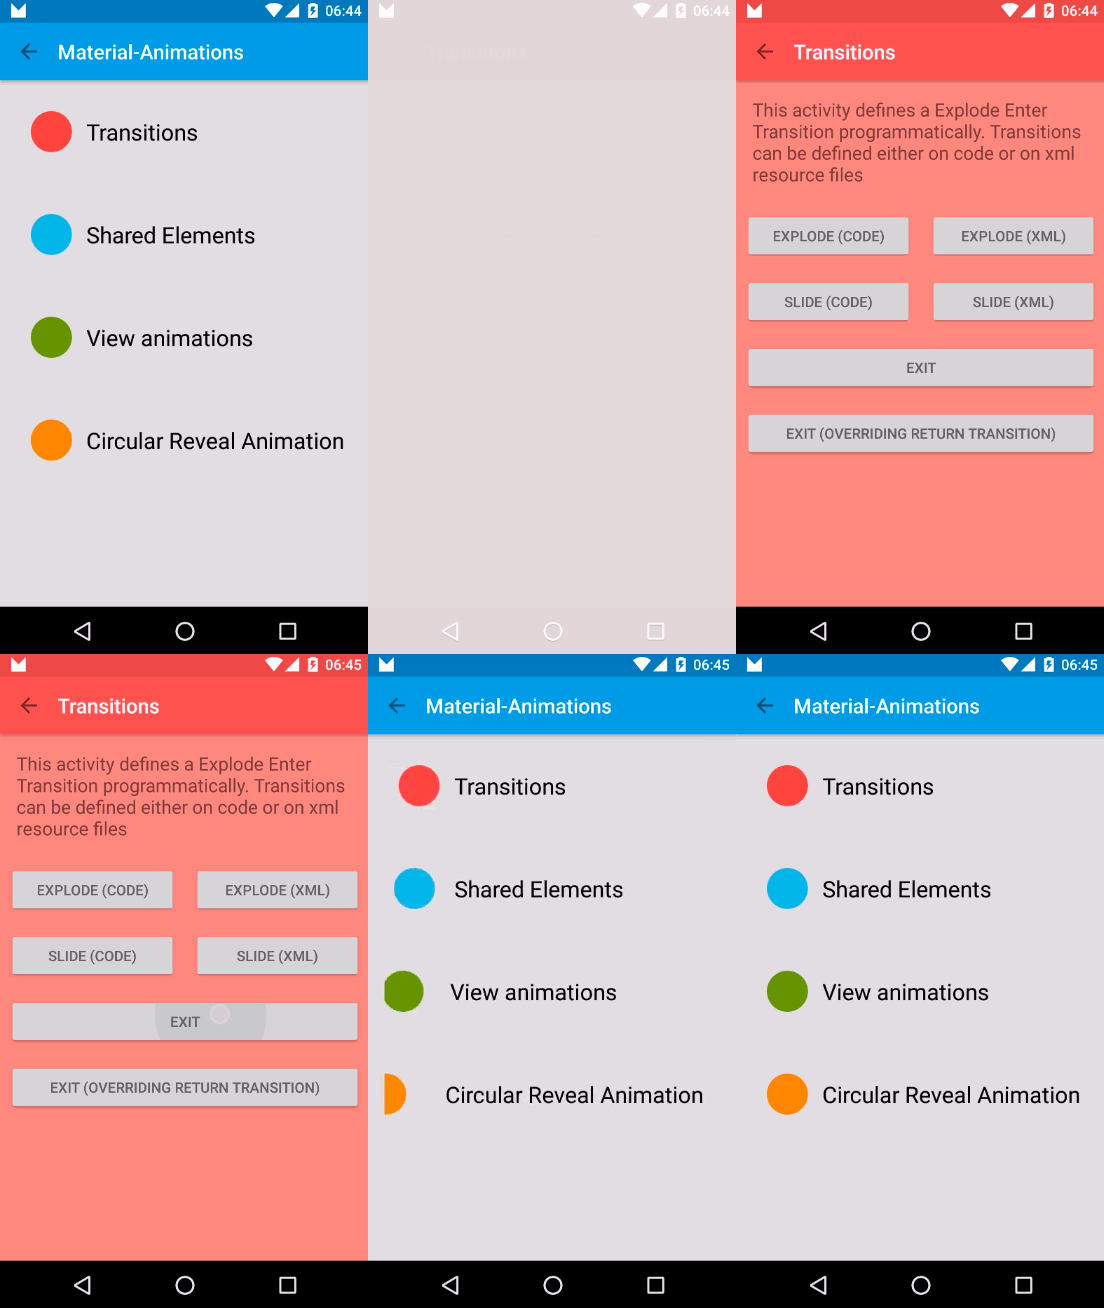 |
You can define these transitions declarative using XML or programmatically. For the Fade Transition sample, it would look like this:
Transitions are defined on XML files in res/transition
res/transition/activity_fade.xml
<?xml version="1.0" encoding="utf-8"?>
<fade xmlns:android="http://schemas.android.com/apk/res/"
    android:duration="1000"/>
res/transition/activity_slide.xml
<?xml version="1.0" encoding="utf-8"?>
<slide xmlns:android="http://schemas.android.com/apk/res/"
    android:duration="1000"/>
To use these transitions you need to inflate them using TransitionInflater
MainActivity.java
	@Override
    protected void onCreate(Bundle savedInstanceState) {
        super.onCreate(savedInstanceState);
        setContentView(R.layout.activity_transition);
        setupWindowAnimations();
    }

    private void setupWindowAnimations() {
        Slide slide = TransitionInflater.from(this).inflateTransition(R.transition.activity_slide);
        getWindow().setExitTransition(slide);
    }
TransitionActivity.java
	@Override
    protected void onCreate(Bundle savedInstanceState) {
        super.onCreate(savedInstanceState);
        setContentView(R.layout.activity_transition);
        setupWindowAnimations();
    }

    private void setupWindowAnimations() {
        Fade fade = TransitionInflater.from(this).inflateTransition(R.transition.activity_fade);
        getWindow().setEnterTransition(fade);
}MainActivity.java
	@Override
    protected void onCreate(Bundle savedInstanceState) {
        super.onCreate(savedInstanceState);
        setContentView(R.layout.activity_transition);
        setupWindowAnimations();
    }

    private void setupWindowAnimations() {
        Slide slide = new Slide();
        slide.setDuration(1000);
        getWindow().setExitTransition(slide);
    }
TransitionActivity.java
	@Override
    protected void onCreate(Bundle savedInstanceState) {
        super.onCreate(savedInstanceState);
        setContentView(R.layout.activity_transition);
        setupWindowAnimations();
    }

    private void setupWindowAnimations() {
        Fade fade = new Fade();
        fade.setDuration(1000);
        getWindow().setEnterTransition(fade);
}-
Activity A starts Activity B
-
Transition Framework finds A Exit Transition (slide) and apply it to all visible views.
-
Transition Framework finds B Enter Transition (fade) and apply it to all visible views.
-
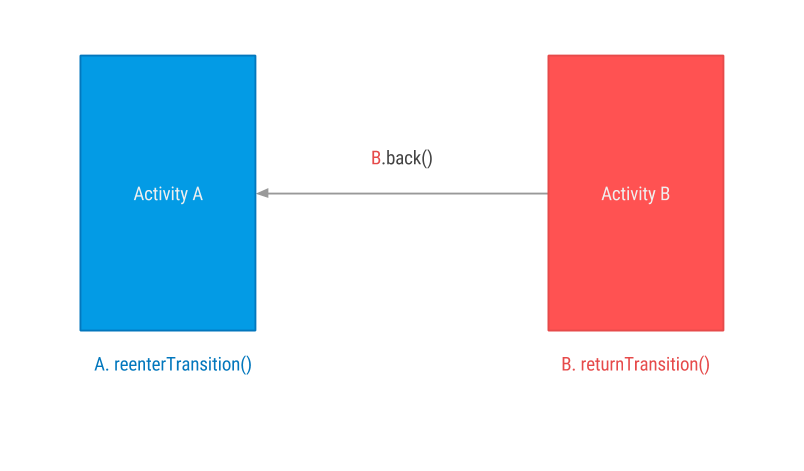
On Back Pressed Transition Framework executes Enter and Exit reverse animations respectively (If we had defined output
returnTransitionandreenterTransition, these have been executed instead)
Return and Reenter Transitions are the reverse animations for Enter and Exit respectively.
- EnterTransition <--> ReturnTransition
- ExitTransition <--> ReenterTransition
If Return or Reenter are not defined, Android will execute a reversed version of Enter and Exit Transitions. But if you do define them, you can have different transitions for entering and exiting an activity.
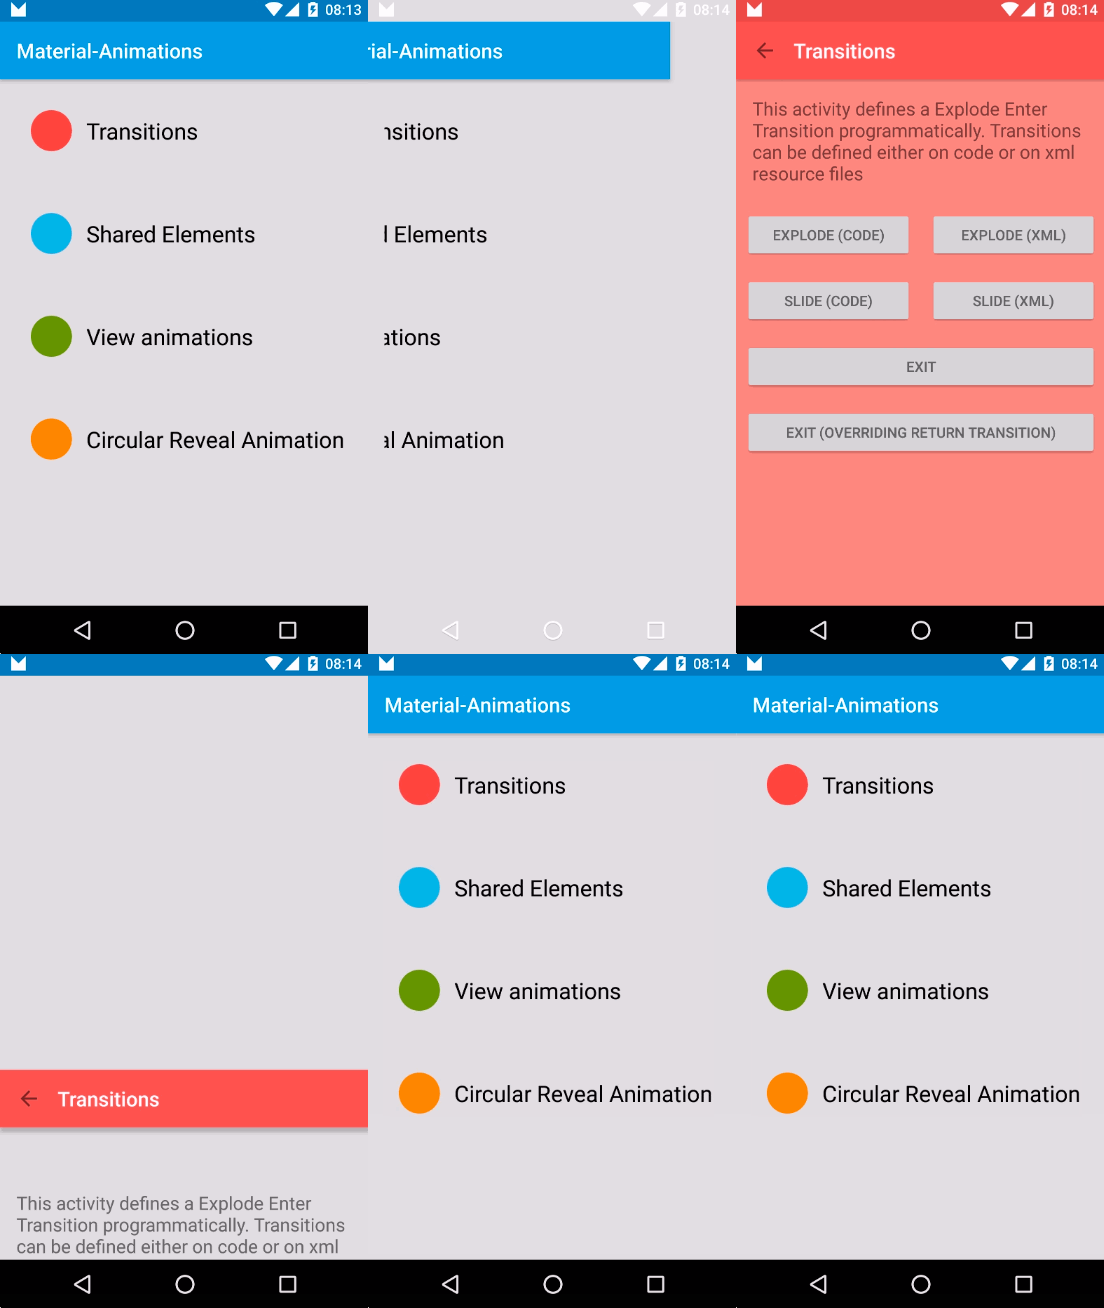
We can modify previous Fade sample and define a ReturnTransition for TransitionActivity, in this case, a Slide transition. This way, when returning from B to A, instead of seeing a Fade out (reversed Enter Transition) we will see a Slide out transition
TransitionActivity.java
	@Override
    protected void onCreate(Bundle savedInstanceState) {
        super.onCreate(savedInstanceState);
        setContentView(R.layout.activity_transition);
        setupWindowAnimations();
    }

    private void setupWindowAnimations() {
        Fade fade = new Fade();
        fade.setDuration(1000);
        getWindow().setEnterTransition(fade);

        Slide slide = new Slide();
        slide.setDuration(1000);
        getWindow().setReturnTransition(slide);
    }
Observe that if no Return Transition is defined then a reversed Enter Transition is executed. If a Return Transition is defined that one is executed instead.
| Without Return Transition | With Return Transition |
|---|---|
Enter: Fade In |
Enter: Fade In |
Exit: Fade Out |
Exit: Slide out |
 |
 |
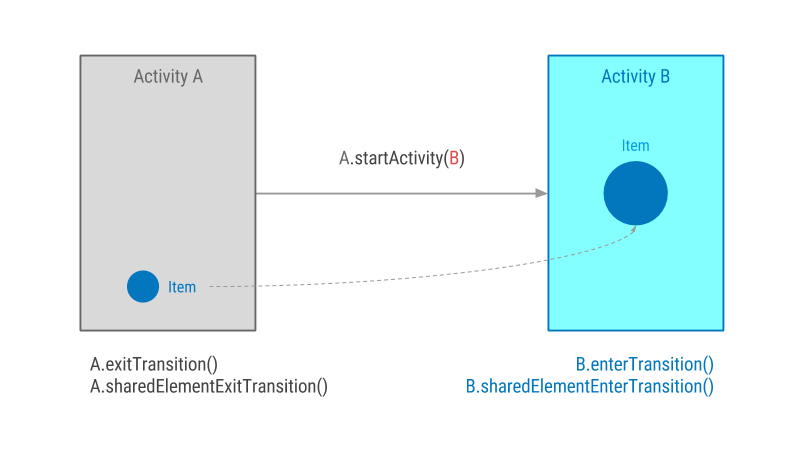
The idea behind this is having two different views in two different layouts and link them somehow with an animation.
Transition framework will then do whatever animations it consider necessary to show the user a transition from one view to another.
Keep this always in mind: the view is not really moving from one layout to another. They are two independent views.
This is something you need to set up once on your app styles.xml.
values/styles.xml
<style name="MaterialAnimations" parent="@style/Theme.AppCompat.Light.NoActionBar">
    ...
    <item name="android:windowContentTransitions">true</item
    ...
</style>
Here you can also specify default enter, exit and shared element transitions for the whole app if you want
<style name="MaterialAnimations" parent="@style/Theme.AppCompat.Light.NoActionBar">
    ...
    <!-- specify enter and exit transitions -->
    <item name="android:windowEnterTransition">@transition/explode</item>
    <item name="android:windowExitTransition">@transition/explode</item>

    <!-- specify shared element transitions -->
    <item name="android:windowSharedElementEnterTransition">@transition/changebounds</item>
    <item name="android:windowSharedElementExitTransition">@transition/changebounds</item>
    ...
</style>To make the trick you need to give both, origin and target views, the same android:transitionName. They may have different ids or properties, but android:transitionName must be the same.
layout/activity_a.xml
<ImageView
        android:id="@+id/small_blue_icon"
        style="@style/MaterialAnimations.Icon.Small"
        android:src="@drawable/circle"
        android:transitionName="@string/blue_name" />
layout/activity_b.xml
<ImageView
        android:id="@+id/big_blue_icon"
        style="@style/MaterialAnimations.Icon.Big"
        android:src="@drawable/circle"
android:transitionName="@string/blue_name" />Use the ActivityOptions.makeSceneTransitionAnimation() method to define shared element origin view and transition name.
MainActivity.java
blueIconImageView.setOnClickListener(new View.OnClickListener() {
    @Override
    public void onClick(View v) {
        Intent i = new Intent(MainActivity.this, SharedElementActivity.class);

        View sharedView = blueIconImageView;
        String transitionName = getString(R.string.blue_name);

        ActivityOptions transitionActivityOptions = ActivityOptions.makeSceneTransitionAnimation(MainActivity.this, sharedView, transitionName);
        startActivity(i, transitionActivityOptions.toBundle());
    }
});
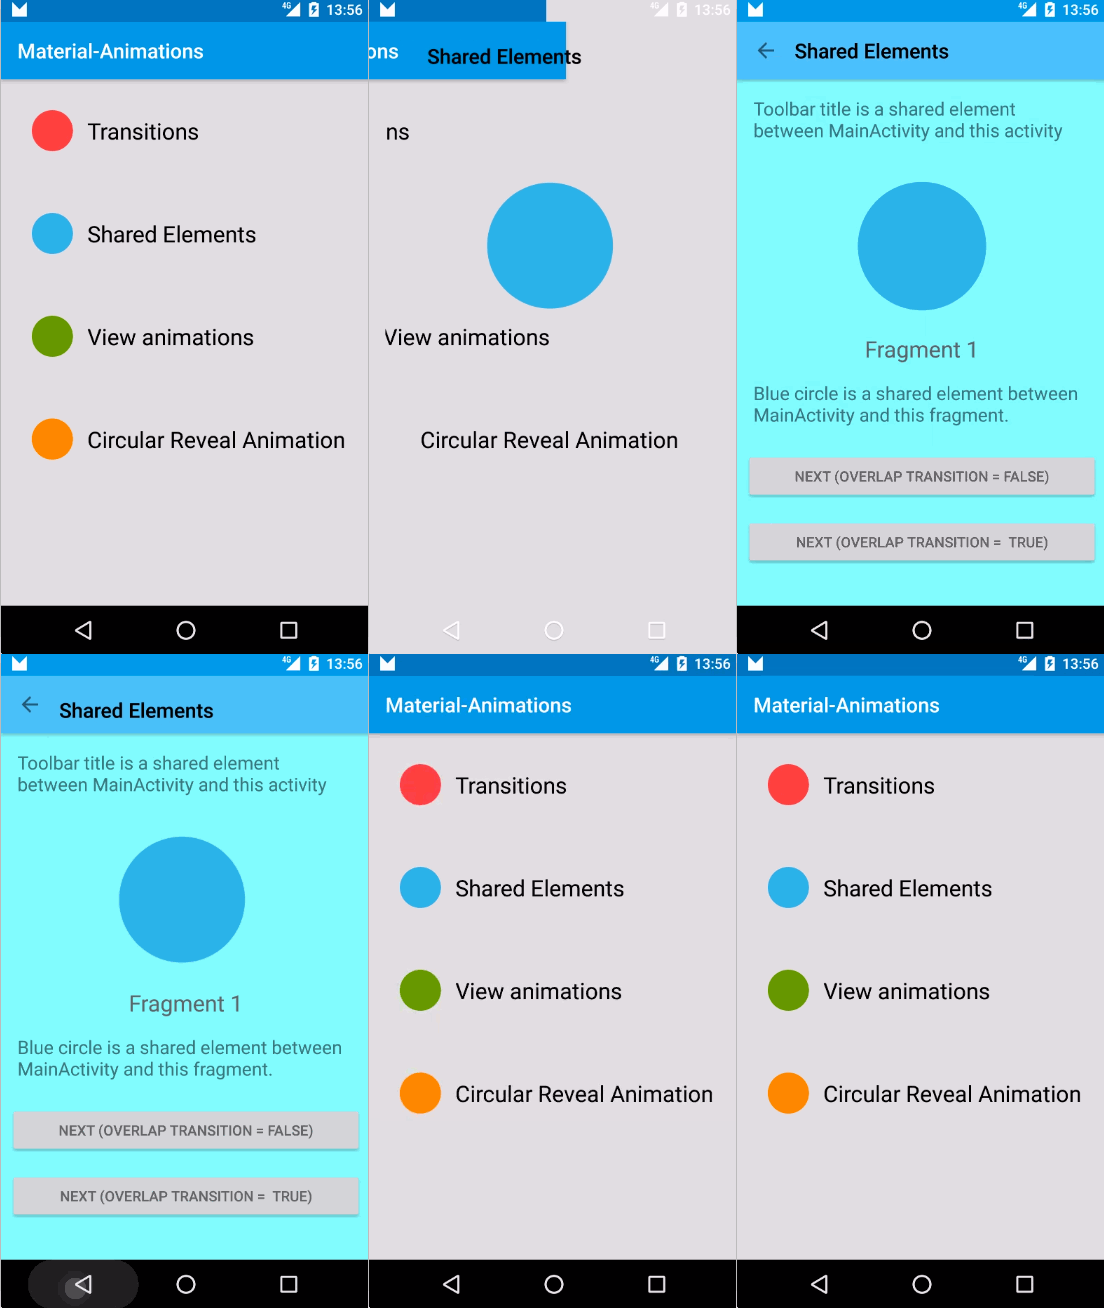
Just that code will produce this beautiful transition animation:
As you can see, Transition framework is creating and executing an animation to create the illusion that views are moving and changing shape from one activity to the other
Shared element transition works with Fragments in a very similar way as it does with activities.
Steps a) and b) are exactly the same. Only c) changes
values/styles.xml
<style name="MaterialAnimations" parent="@style/Theme.AppCompat.Light.NoActionBar">
    ...
    <item name="android:windowContentTransitions">true</item
    ...
</style>layout/fragment_a.xml
<ImageView
        android:id="@+id/small_blue_icon"
        style="@style/MaterialAnimations.Icon.Small"
        android:src="@drawable/circle"
        android:transitionName="@string/blue_name" />
layout/fragment_b.xml
<ImageView
        android:id="@+id/big_blue_icon"
        style="@style/MaterialAnimations.Icon.Big"
        android:src="@drawable/circle"
android:transitionName="@string/blue_name" />To do this you need to include shared element transition information as part of the FragmentTransaction process.
FragmentB fragmentB = FragmentB.newInstance(sample);

// Defines enter transition for all fragment views
Slide slideTransition = new Slide(Gravity.RIGHT);
slideTransition.setDuration(1000);
sharedElementFragment2.setEnterTransition(slideTransition);

// Defines enter transition only for shared element
ChangeBounds changeBoundsTransition = TransitionInflater.from(this).inflateTransition(R.transition.change_bounds);
fragmentB.setSharedElementEnterTransition(changeBoundsTransition);

getFragmentManager().beginTransaction()
        .replace(R.id.content, fragmentB)
        .addSharedElement(blueView, getString(R.string.blue_name))
        .commit();
And this is the final result:
You can define if enter and exit transitions can overlap each other.
From Android documentation:
When true, the enter transition will start as soon as possible.
When false, the enter transition will wait until the exit transition completes before starting.
This works for both Fragments and Activities shared element transitions.
FragmentB fragmentB = FragmentB.newInstance(sample);

// Defines enter transition for all fragment views
Slide slideTransition = new Slide(Gravity.RIGHT);
slideTransition.setDuration(1000);
sharedElementFragment2.setEnterTransition(slideTransition);

// Defines enter transition only for shared element
ChangeBounds changeBoundsTransition = TransitionInflater.from(this).inflateTransition(R.transition.change_bounds);
fragmentB.setSharedElementEnterTransition(changeBoundsTransition);

// Prevent transitions for overlapping
fragmentB.setAllowEnterTransitionOverlap(overlap);
fragmentB.setAllowReturnTransitionOverlap(overlap);

getFragmentManager().beginTransaction()
        .replace(R.id.content, fragmentB)
        .addSharedElement(blueView, getString(R.string.blue_name))
        .commit();
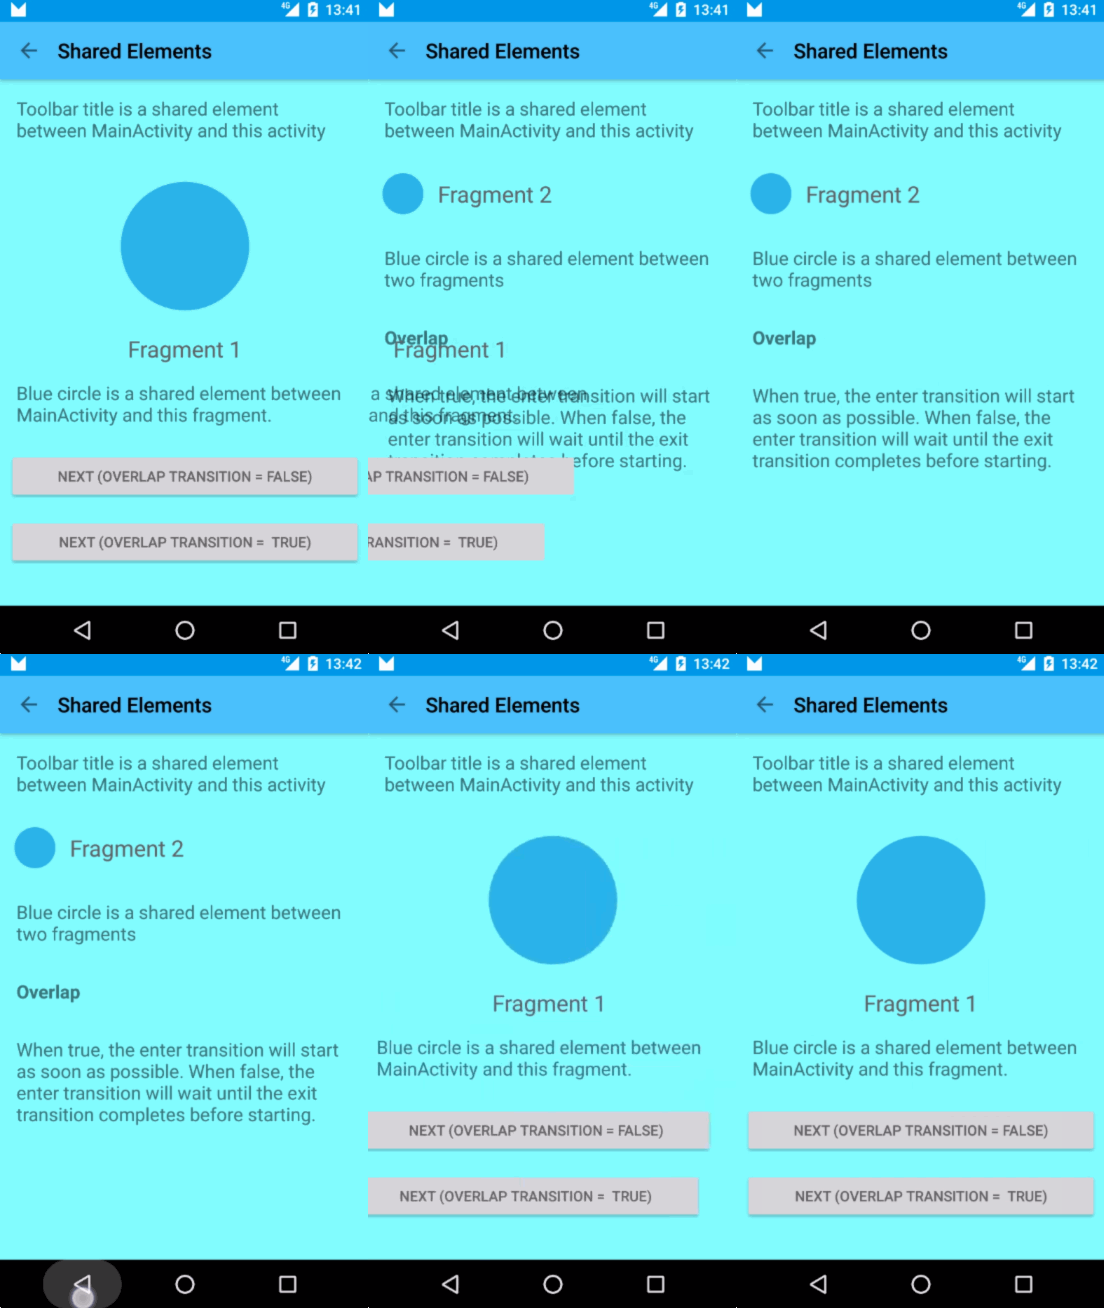
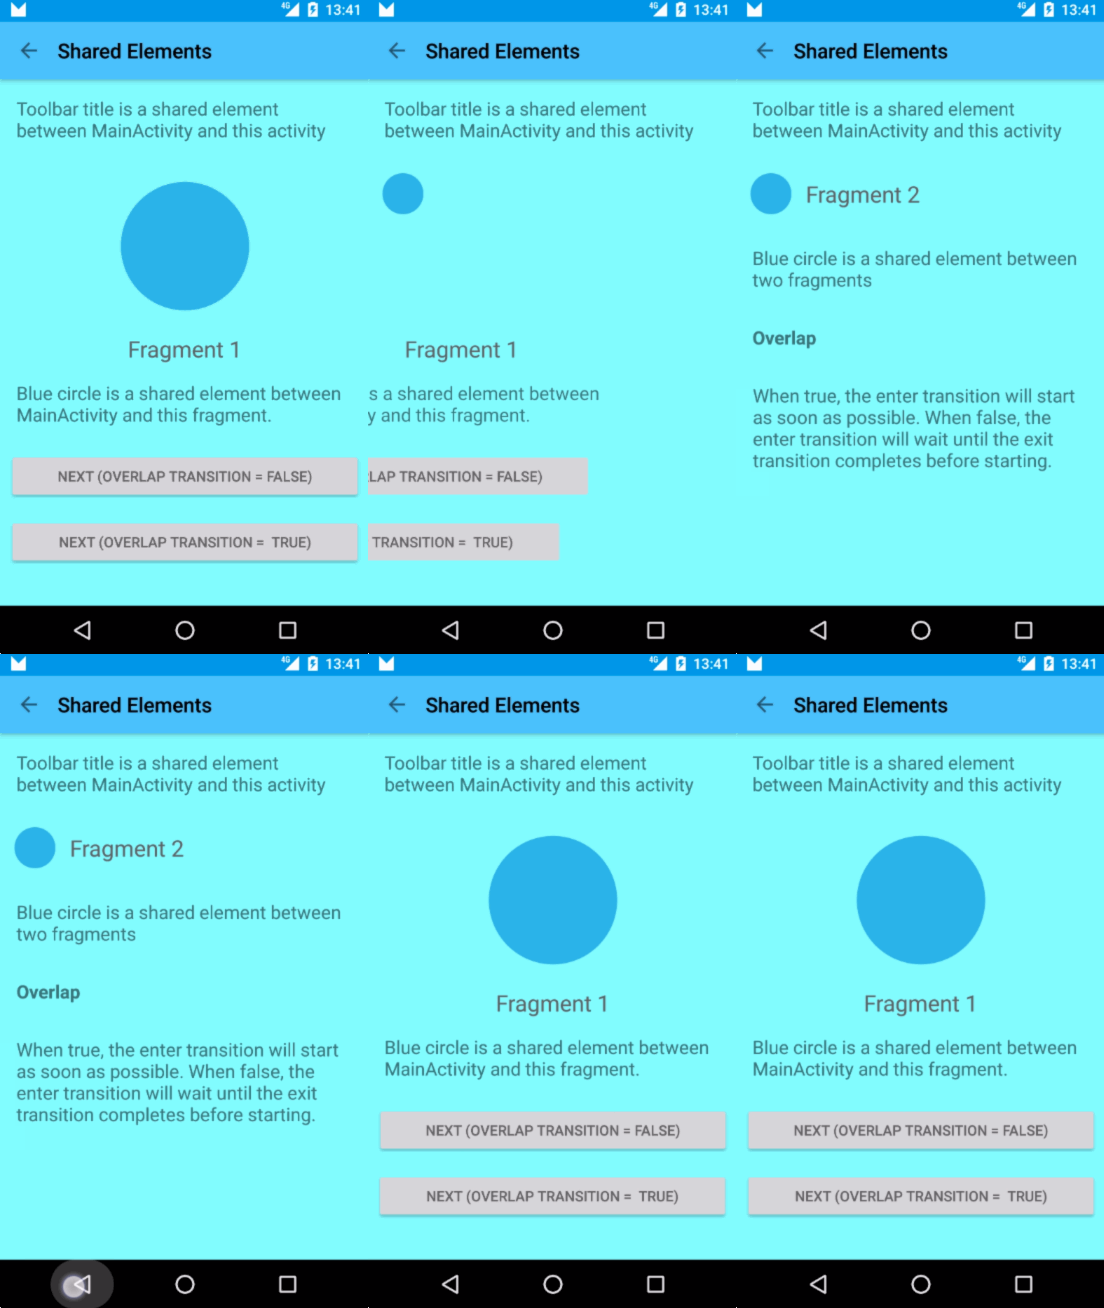
It is very easy to spot the difference in this example:
| Overlap True | Overlap False |
|---|---|
| Fragment_2 appears on top of Fragment_1 | Fragment_2 waits until Fragment_1 is gone |
 |
 |
Transition Framework can also be used to animate element changes within current activity layout.
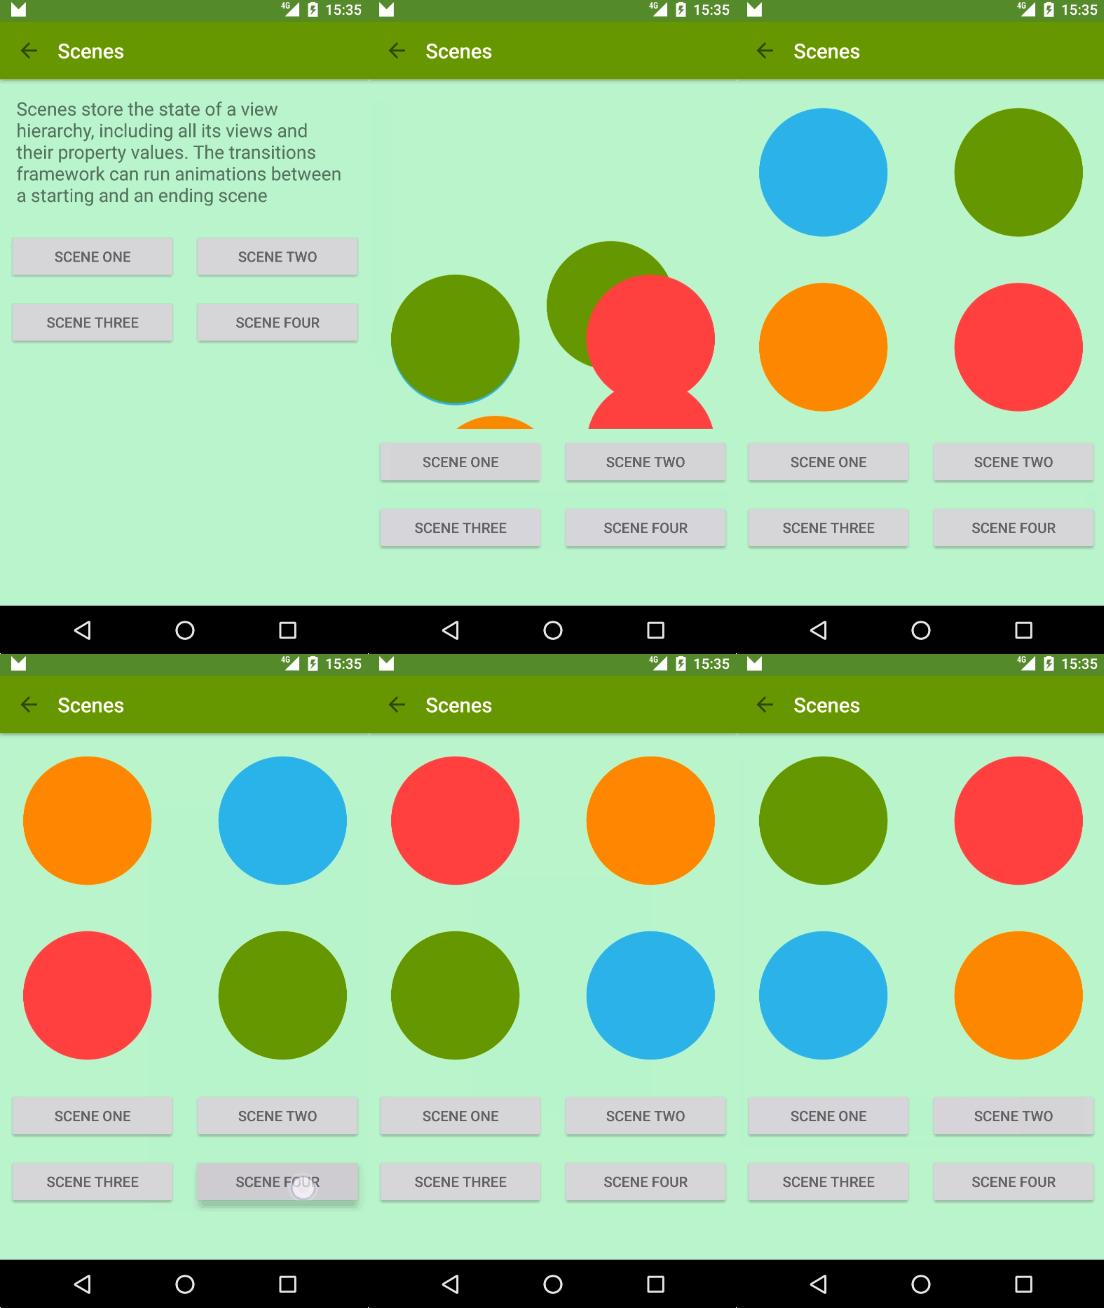
Transitions happen between scenes. A scene is just a regular layout which defines a static state of our UI. You can transition from one scene to another and Transition Framework will animate views in between.
scene1 = Scene.getSceneForLayout(sceneRoot, R.layout.activity_animations_scene1, this);
scene2 = Scene.getSceneForLayout(sceneRoot, R.layout.activity_animations_scene2, this);
scene3 = Scene.getSceneForLayout(sceneRoot, R.layout.activity_animations_scene3, this);
scene4 = Scene.getSceneForLayout(sceneRoot, R.layout.activity_animations_scene4, this);

(...)

@Override
public void onClick(View v) {
    switch (v.getId()) {
        case R.id.button1:
            TransitionManager.go(scene1, new ChangeBounds());
            break;
        case R.id.button2:
            TransitionManager.go(scene2, TransitionInflater.from(this).inflateTransition(R.transition.slide_and_changebounds));
            break;
        case R.id.button3:
            TransitionManager.go(scene3, TransitionInflater.from(this).inflateTransition(R.transition.slide_and_changebounds_sequential));
            break;
        case R.id.button4:
            TransitionManager.go(scene4, TransitionInflater.from(this).inflateTransition(R.transition.slide_and_changebounds_sequential_with_interpolators));
            break;
    }
}
That code would produce transition between four scenes in the same activity. Each transition has a different animation defined.
Transition Framework will take all visible views in current scene and calculate whatever necessary animations are needed to arrange those views according to next scene.
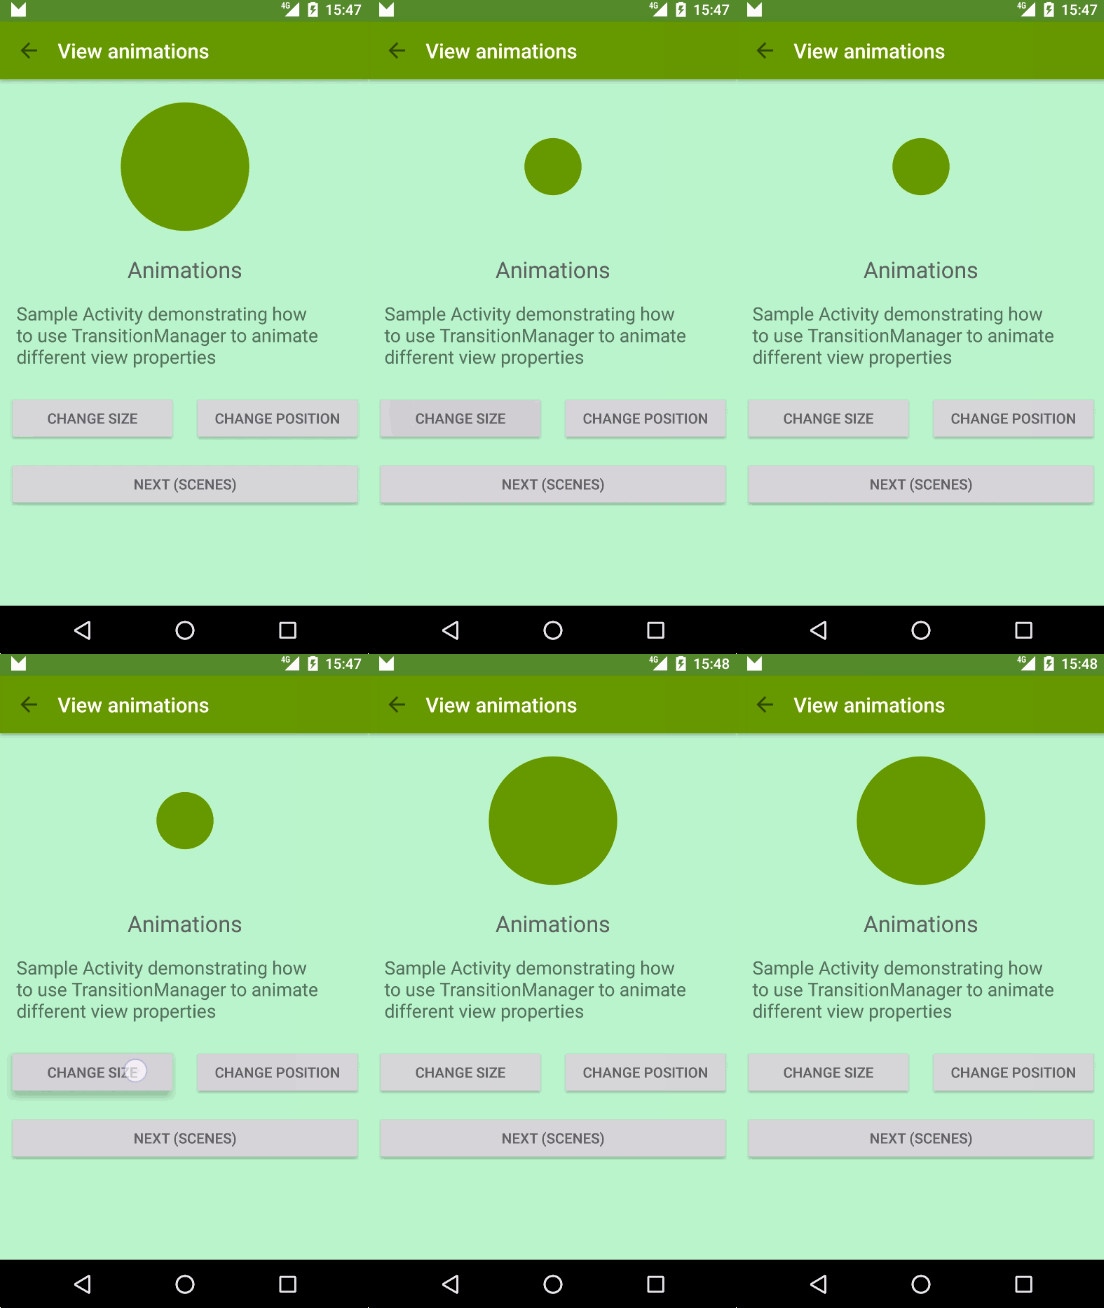
Transition Framework can also be used to animate layout property changes in a view. You just need to make whatever changes you want and it will perform necessary animations for you
With just this line of code we are telling the framework we are going to perform some UI changes that it will need to animate.
TransitionManager.beginDelayedTransition(sceneRoot);ViewGroup.LayoutParams params = greenIconView.getLayoutParams();
params.width = 200;
greenIconView.setLayoutParams(params);Changing view width attribute to make it smaller will trigger a layoutMeasure. At that point the Transition framework will record start and ending values and will create an animation to transition from one to another.
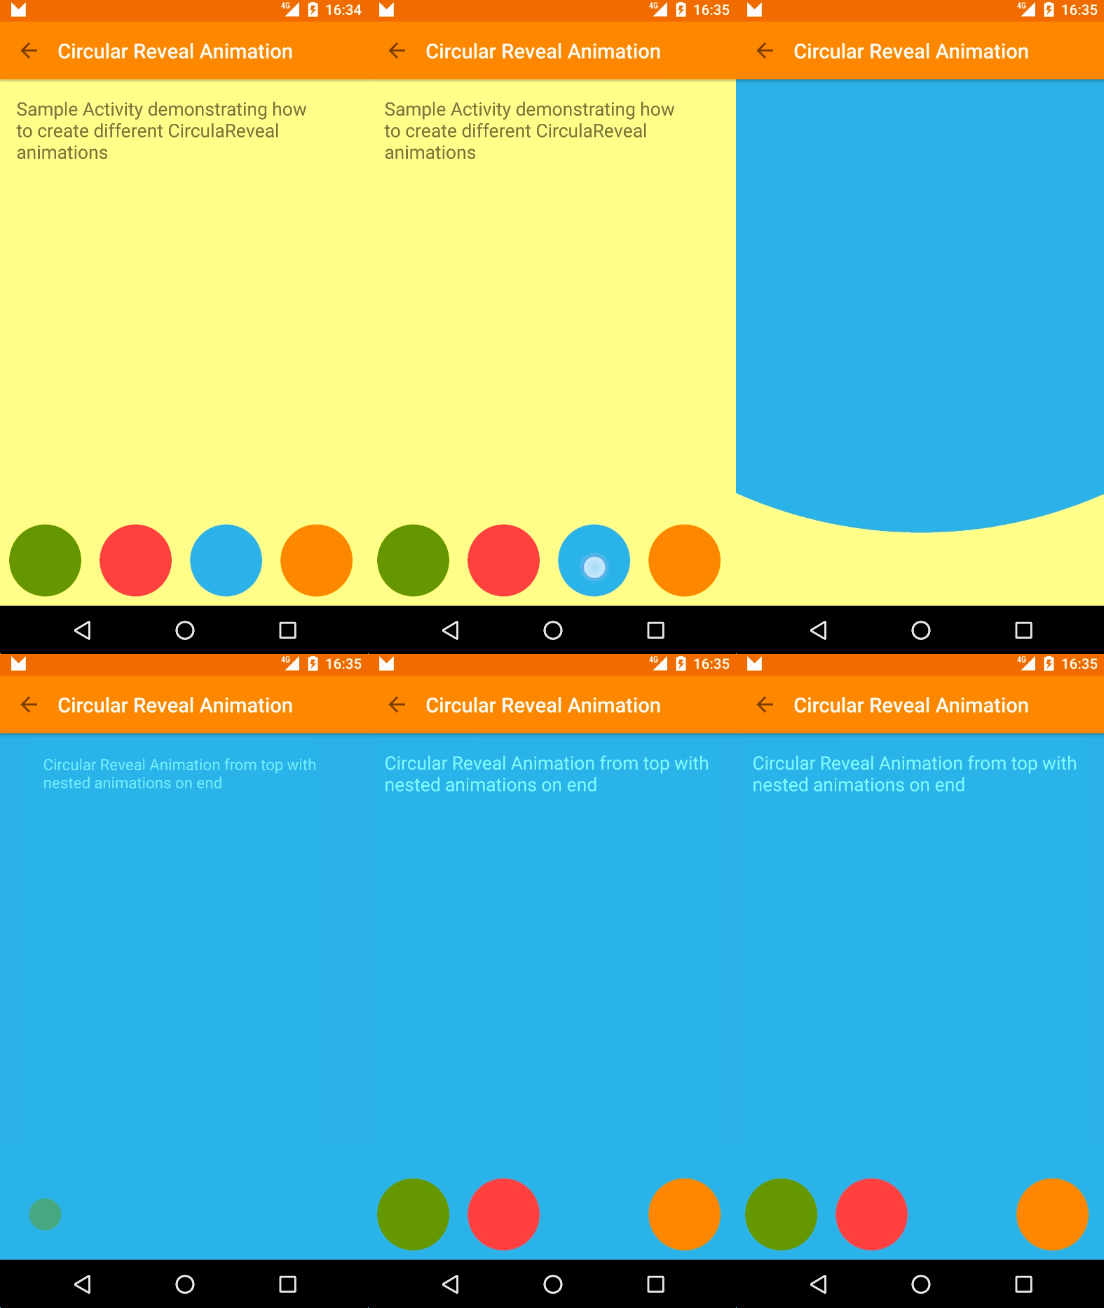
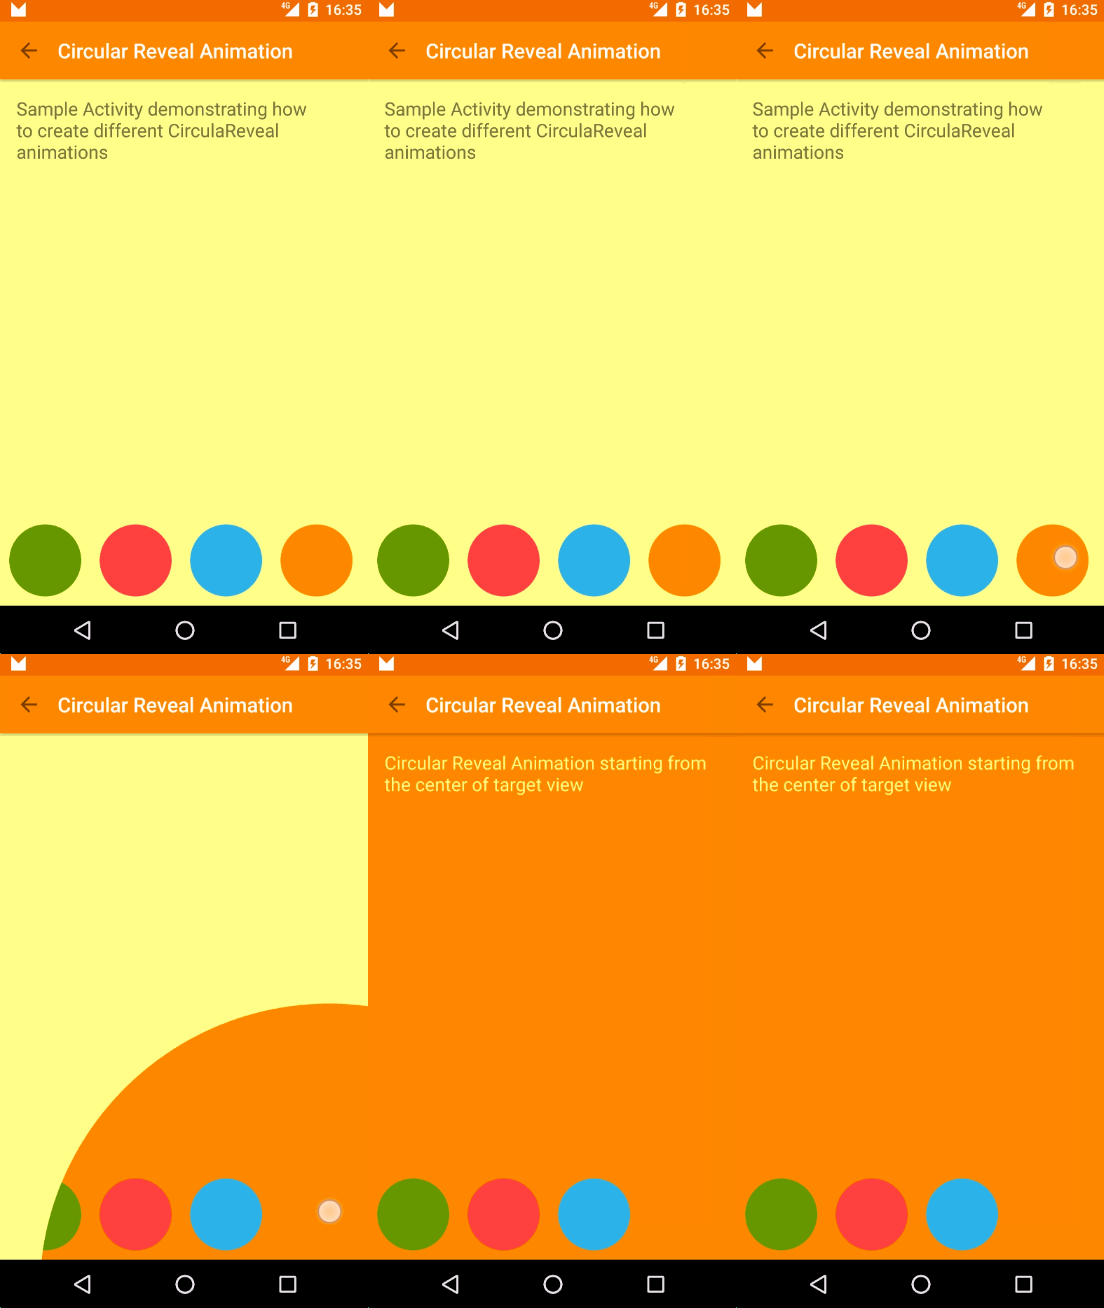
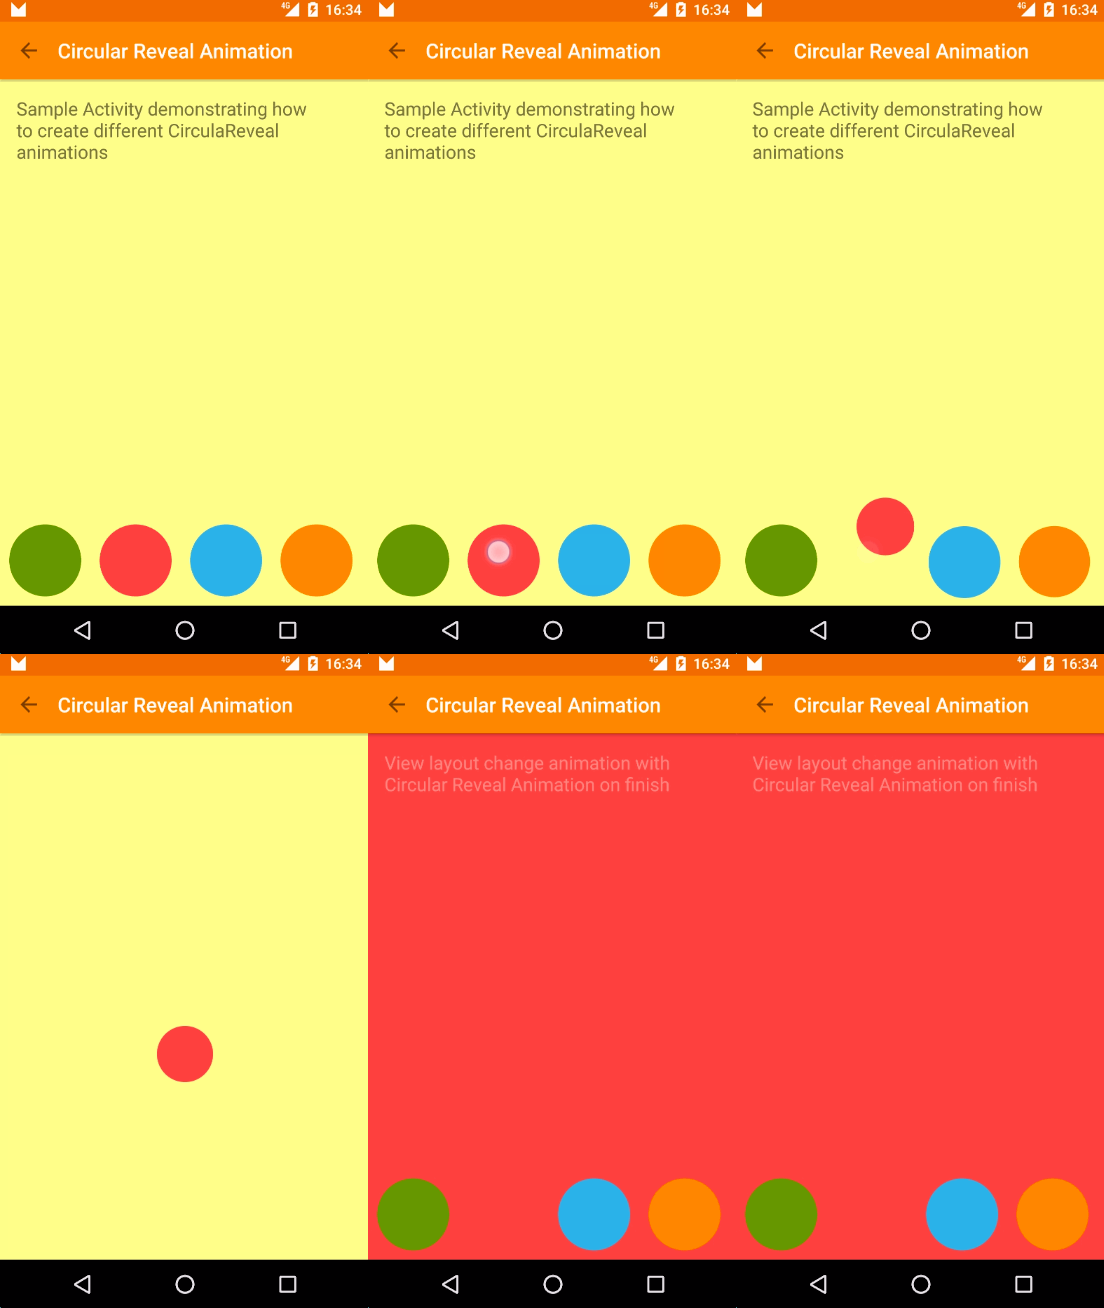
Circular Reveal is just an animation to show or hide a group of UI elements. It is available since API 21 in ViewAnimationUtils class.
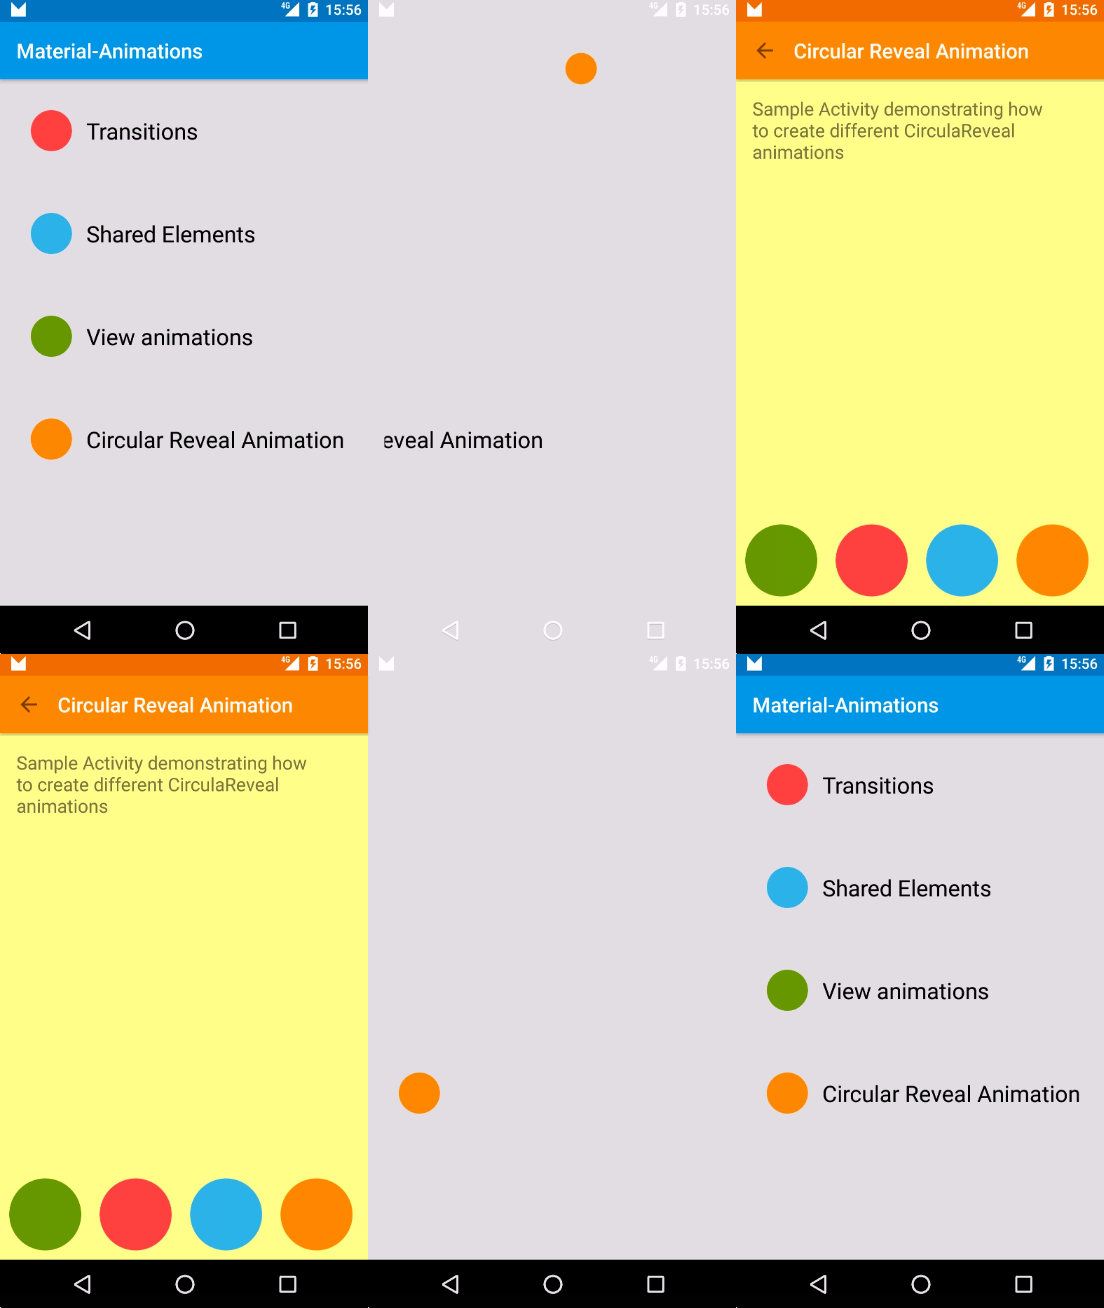
Circular Reveal animation can be used in combination of Shared Element Transition to create meaningful animations that smoothly teach the user what is happening in the app.
What is happening in this example step by step is:
- Orange circle is a shared element transitioning from
MainActivitytoRevealActivity. - On
RevealActivitythere is a listener to listen for shared element transition end. When that happens it does two things:- Execute a Circular Reveal animation for the Toolbar
- Execute a scale up animation on
RevealActivityviews using plain oldViewPropertyAnimator
Listen to shared element enter transition end
Transition transition = TransitionInflater.from(this).inflateTransition(R.transition.changebounds_with_arcmotion);
getWindow().setSharedElementEnterTransition(transition);
transition.addListener(new Transition.TransitionListener() {
    @Override
    public void onTransitionEnd(Transition transition) {
        animateRevealShow(toolbar);
        animateButtonsIn();
    }

    (...)

});
Reveal Toolbar
private void animateRevealShow(View viewRoot) {
    int cx = (viewRoot.getLeft() + viewRoot.getRight()) / 2;
    int cy = (viewRoot.getTop() + viewRoot.getBottom()) / 2;
    int finalRadius = Math.max(viewRoot.getWidth(), viewRoot.getHeight());

    Animator anim = ViewAnimationUtils.createCircularReveal(viewRoot, cx, cy, 0, finalRadius);
    viewRoot.setVisibility(View.VISIBLE);
    anim.setDuration(1000);
    anim.setInterpolator(new AccelerateInterpolator());
    anim.start();
}
Scale up activity layout views
private void animateButtonsIn() {
    for (int i = 0; i < bgViewGroup.getChildCount(); i++) {
        View child = bgViewGroup.getChildAt(i);
        child.animate()
                .setStartDelay(100 + i * DELAY)
                .setInterpolator(interpolator)
                .alpha(1)
                .scaleX(1)
                .scaleY(1);
    }
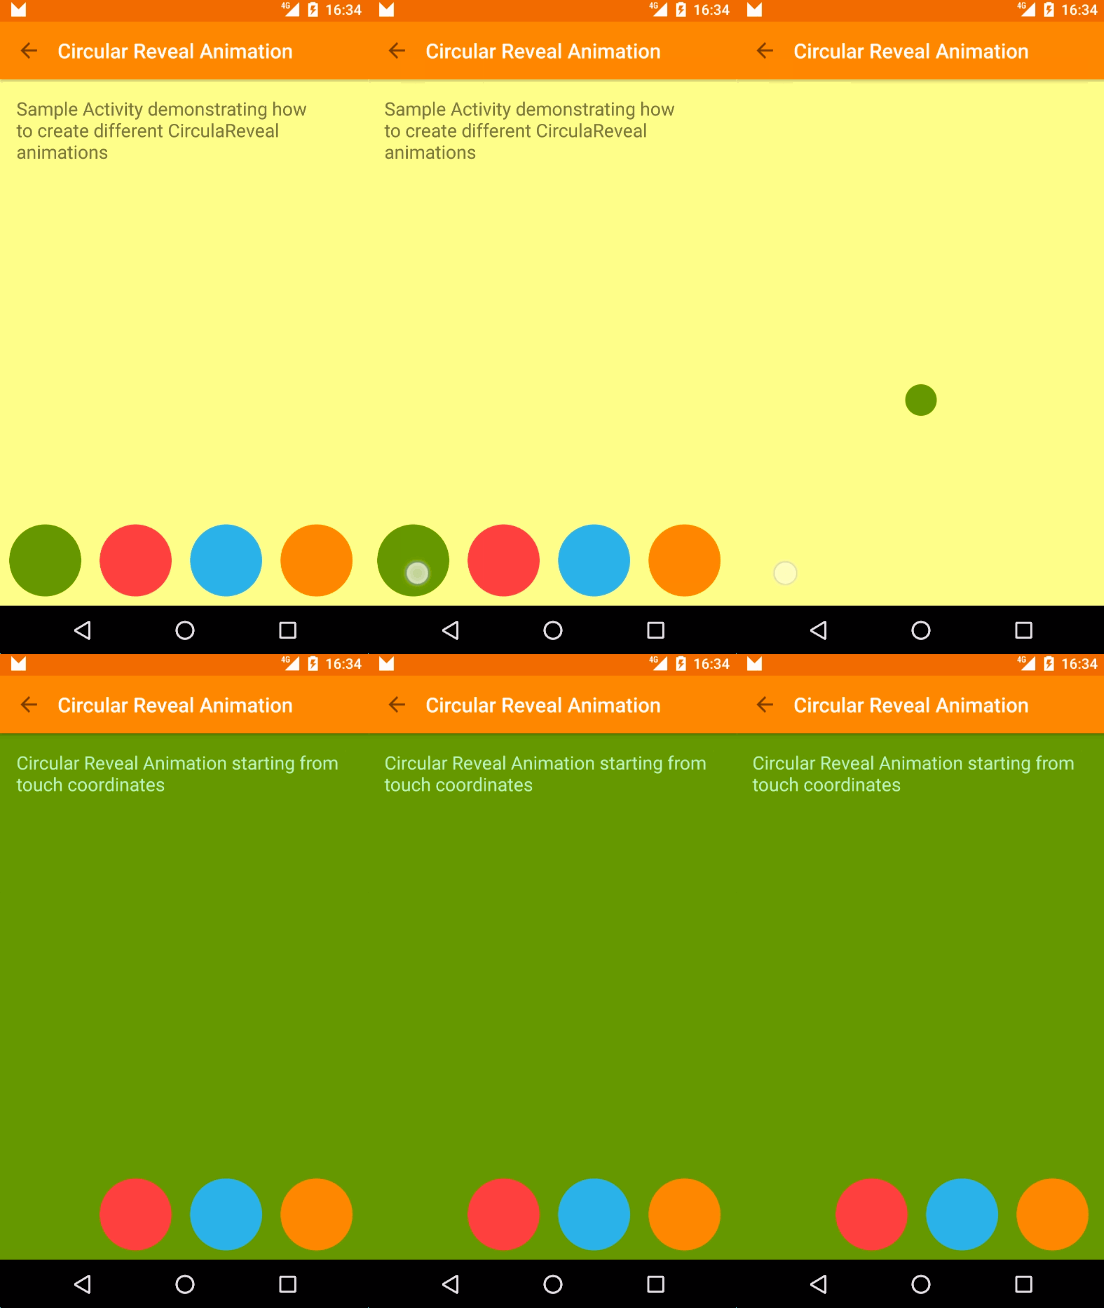
}There are many different ways you can create a reveal animation. The important thing is to use the animation to help the user understand what is happening in the app.
int cx = (viewRoot.getLeft() + viewRoot.getRight()) / 2;
int cy = viewRoot.getTop();
int finalRadius = Math.max(viewRoot.getWidth(), viewRoot.getHeight());

Animator anim = ViewAnimationUtils.createCircularReveal(viewRoot, cx, cy, 0, finalRadius);
viewRoot.setBackgroundColor(color);
anim.start();int cx = (viewRoot.getLeft() + viewRoot.getRight()) / 2;
int cy = (viewRoot.getTop() + viewRoot.getBottom()) / 2;
int finalRadius = Math.max(viewRoot.getWidth(), viewRoot.getHeight());
Animator anim = ViewAnimationUtils.createCircularReveal(viewRoot, cx, cy, 0, finalRadius);
viewRoot.setBackgroundColor(color);
anim.addListener(new AnimatorListenerAdapter() {
@Override
public void onAnimationEnd(Animator animation) {
animateButtonsIn();
}
});
anim.start();@Override
public boolean onTouch(View view, MotionEvent motionEvent) {
if (motionEvent.getAction() == MotionEvent.ACTION_DOWN) {
if (view.getId() == R.id.square_yellow) {
revealFromCoordinates(motionEvent.getRawX(), motionEvent.getRawY());
}
}
return false;
}private Animator animateRevealColorFromCoordinates(int x, int y) {
float finalRadius = (float) Math.hypot(viewRoot.getWidth(), viewRoot.getHeight());
Animator anim = ViewAnimationUtils.createCircularReveal(viewRoot, x, y, 0, finalRadius);
viewRoot.setBackgroundColor(color);
anim.start();
}Transition transition = TransitionInflater.from(this).inflateTransition(R.transition.changebounds_with_arcmotion);
transition.addListener(new Transition.TransitionListener() {
@Override
public void onTransitionEnd(Transition transition) {
animateRevealColor(bgViewGroup, R.color.red);
}
(...)
});
TransitionManager.beginDelayedTransition(bgViewGroup, transition);
RelativeLayout.LayoutParams layoutParams = new RelativeLayout.LayoutParams(RelativeLayout.LayoutParams.WRAP_CONTENT, RelativeLayout.LayoutParams.WRAP_CONTENT);
layoutParams.addRule(RelativeLayout.CENTER_IN_PARENT);
btnRed.setLayoutParams(layoutParams);https://github.com/lgvalle/Material-Animations
- Alex Lockwood posts about Transition Framework. A great in deep into this topic: http://www.androiddesignpatterns.com/2014/12/activity-fragment-transitions-in-android-lollipop-part1.html
- Amazing repository with lot of Material Design samples by Saul Molinero: https://github.com/saulmm/Android-Material-Examples
- Chet Hasse video explaining Transition framework: https://www.youtube.com/watch?v=S3H7nJ4QaD8

