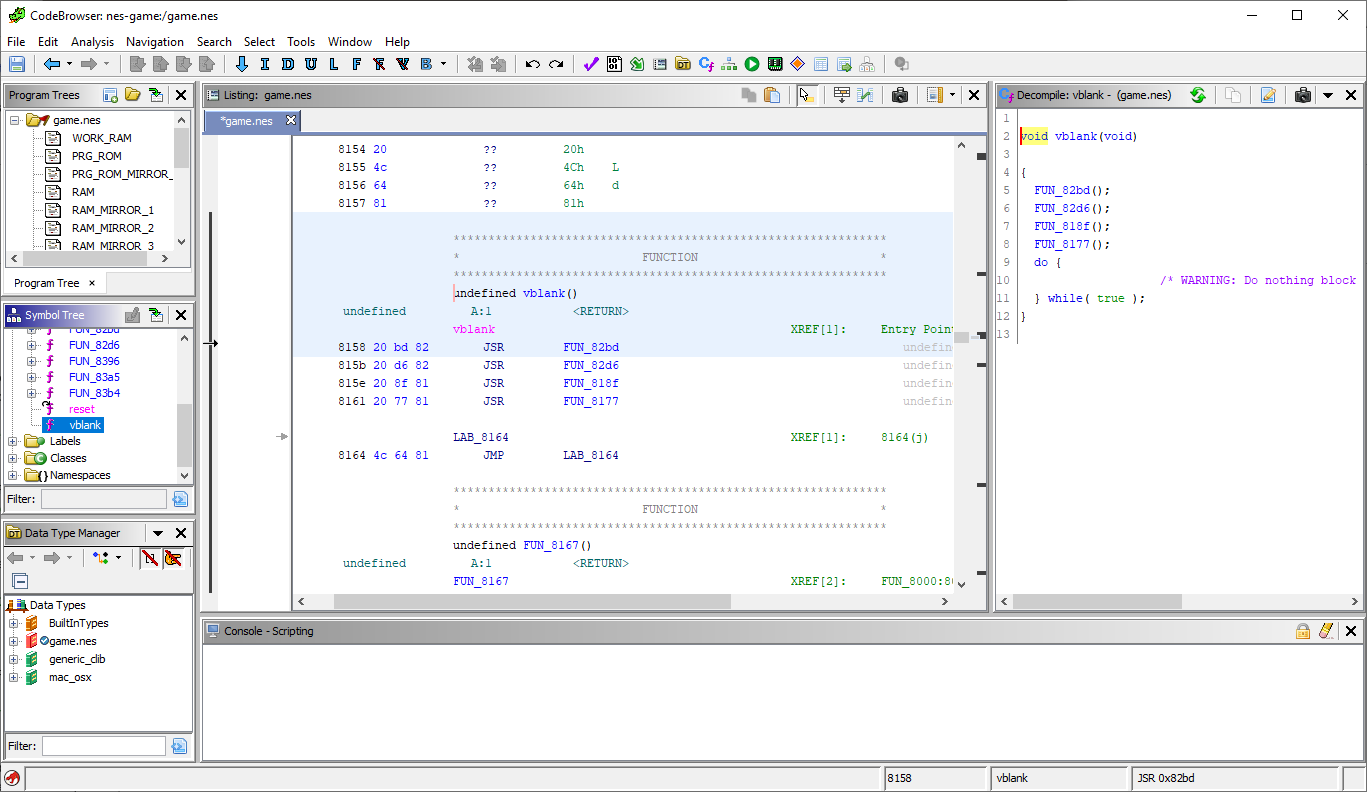
A Ghidra extension to support disassembling and analyzing NES ROMs.
-
Import NES ROMs in the iNES format. The following mappers are supported:
- NROM (mapper 0)
- MMC1 (mapper 1)
- AxROM (mapper 7)
- Namco 129/163 (mapper 19)
-
Add labels and memory blocks in disassembly, making it easier to jump around a disassembled ROM!
GhidraNes maps each bank of the ROM to its own memory block, but there is no control-flow analysis implemented that handles bank switching automatically. Instead, handling bank switching in the disassembly is a manual process. Take this function for example:
This disassembled function is doing a bank switch: the write to DAT_8000 switches the PRG ROM to bank 0 in this case. Cases like this can be fixed in Ghidra using the following steps:
- Right click the
JMPinstruction - Click "References > Add/Edit (R)"
- Double click the destination operand
- For the "To Address" field, change the left-hand dropdown from "RAM:" to the appropriate memory bank ("PRG0::" for this example)
- Click "Update"
The disassembly should now show a jump to the correct bank:
Note: The
STA,STX, andSTYfunction can also cause control flow to change if the bank containing the currently-executing code is switched out. It would be good to document a workflow for how to handle this with Ghidra (possibly using the "Fallthrough" mechanism?)
- Install a Compatible version of Java and Ghidra (Java 11+, tested with Ghidra 10.3).
- Download the latest GhidraNes release.
- Go to "File" > "Install Extensions...". Click "+" in the top-right corner and choose the GhidraNes Zip. Click "OK" to install the extension.
- Restart Ghidra.
- In Ghidra, create a new project by following the wizard under "File" > "New Project...".
- Drag-and-drop an iNES
.nesROM onto the project. Set the format to "NES ROM" and click "OK". - Double-click the ROM in the project to open Ghidra's CodeBrowser.
- Analyze the file when prompted (or go to "Analysis" > "Auto Analyze..."). Leave the settings as default and click "Analyze".
- Done, the game will be disassembled! On the left-hand side, under "Symbol Tree" > "Functions", open
resetto jump to the reset vector (where execution starts), orvblankto jump to the NMI vector (where execution goes during VBlank).
- Install Java and Ghidra.
- install Eclipse.
- Install the GhidraDev Eclipse plugin. Instructions can be found in your Ghidra install directory, under
Extensions/Eclipse/GhidraDev/GhidraDev_README.html. - In Eclipse, open the GhidraNes repo by going to "File" > "Open Projects from File System...". Click "Directory", then choose this repo (the top-level folder containing this
README.mdfile and theGhidraNessubdirectory). Finally, click "Finish". - Open "GhidraDev" > "Link Ghidra...". Add your Ghidra installation, click "Next >", then select the "GhidraNes" as the Java project. Click "Finish".
- Go to "Run" > "Run As" > "Ghidra" to run Ghidra with the GhidraNes extension.
NOTE: Ensure the GhidraNes Eclipse project is set up with the earliest version of Java that should be targeted. Using a later version of Java can cause compatibility issues!
- Install Gradle (with SDKMAN, this can be done with
sdk install gradle). - In Eclipse, open "GhidraDev" > "Export" > "Ghidra Module Extension...". Choose "GhidraNes" as the project, click "Next >", then choose "Local installation directory:" and browse to your Gradle installation dir (with SDKMAN, this will be at
~/.sdkman/candidates/gradle/$GRADLE_VERSION). Click "Finish". - The built zip file will be saved in the
GhidraNes/dist/directory. See the "Installation" section for details on installing the built zip.
- Install Java and Ghidra.
- Configure the JDK settings in your editor.
- For VSCode: Follow the official "Getting Started with Java in VS Code" guide.
- Copy the
GhidraNes/gradle.properties.examplefile toGhidraNes/gradle.propertiesand configure Ghirda's installation directory as needed. - Import the GhidraNes repo as a Java project (the top-level folder containing this
README.mdfile and theGhidraNessubdirectory).
- Move to the inner
GhidraNessubdirectory:cd GhidraNes/GhidraNes - Run
gradle buildExtension- If the
gradle.propertiesfile hasn't been set up, properties can be passed to Gradle directly, e.g.gradle buildExtension -PGHIDRA_INSTALL_DIR=/home/user/ghidra_10.2.2_PUBLIC
- If the
- The built zip file will be saved in the
GhidraNes/dist/directory. See the "Installation" section for details on installing the built zip.


