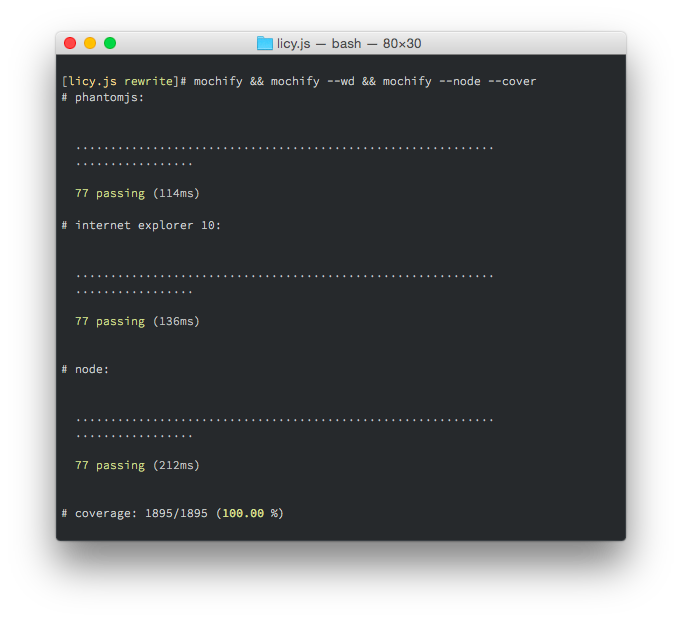
TDD with Browserify, Mocha, PhantomJS and WebDriver
- Fast roundtrip
- No test HTML page
- No server
- Selenium WebDriver & SauceLabs support
- Code coverage with coverify
- Code coverage with istanbul using mochify-istanbul plugin
- Short stack traces with relative paths
- Works with most Mocha reporters
This will install Mochify in your current project and add it to the
devDependencies:
npm install mochify --save-dev
- Install Phantom.JS:
npm install phantomjs -gor download from http://phantomjs.org/ - Make sure that the
phantomjsexecutable is in yourPATHor use--phantomjs <path>
Configure "scripts" in your package.json so that your project ships with the
testing infrastructure:
"devDependencies" : {
  "mochify"       : "*"
},
"scripts"         : {
  "start"         : "mochify --watch",
  "phantom"       : "mochify",
  "wd"            : "mochify --wd",
  "cover"         : "mochify --cover",
  "test"          : "npm run phantom && npm run wd && npm run cover"
}
To run from the command line, either run npm install mochify -g to have
mochify available globally, or from within your project directory run:
node_modules/.bin/mochify
Browserifies ./test/*.js, decorated with a Mocha test runner, runs it in
PhantomJS with phantomic and pass the output back to your console. Cleans
up your stack traces by mapping back to the original sources and throws out all
the lines from the test framework.
Run mochify --help to see all available options.
--watchor-wuse watchify to watch your files and run the tests on change.--reporteror-Rchanges the Mocha reporter (see further down).--grepsets the Mocha grep option.--invertsets the Mocha grepinvertflag.--recursiveinclude sub directories.--uior-Uchanges the Mocha UI. Defaults to'bdd'.--timeoutor-tchanges the Mocha timeout. Defaults to2000.--requireor-rrequires the given module.--debuglaunches the WebKit debugger.--portuses a specific port for the PhantomJS server.--phantomjsuses a specific PhantomJS executable. If not specified,phantomjsis expected on the$PATH.--web-securityenables PhantomJS web security and forbids cross-domain XHR (default is true)--coverchecks code coverage with coverify.--noderuns test cases on node (useful with--cover).--wduse min-webdriver to run the tests in multiple real browsers.--url(only with--wd) runs the tests in the context of the given URL.--consolify output.htmlgenerate a standalone HTML page with consolify.--transformspecifies a Browserify transform to add. Can be specified multiple times. Options can be passed with subargs.--pluginspecifies a Browserify plugin to add. Can be specified multiple times. Options can be passed with subargs.--extensionsearch for files with the extension in "require" statements.--yieldsor-ychanges the yield interval to allow pending I/O to happen.--versionor-vshows the Mochify version number.--helpor-hshows usage and all available options.
- Download the «Selenium Server Standalone» JAR from here: https://code.google.com/p/selenium/downloads/list
- Except for Firefox, you will also need drivers for each browser.
- The driver for Google Chrome can be found here: http://chromedriver.storage.googleapis.com/index.html
- Put the drivers in the same directory as the JAR file and run:
java -jar selenium-server-standalone-2.39.0.jar
Create .min-wd in your project root:
{
  "hostname"  : "localhost",
  "port"      : 4444,
  "browsers"  : [{
    "name"    : "internet explorer",
    "version" : "9"
  }, {
    "name"    : "chrome"
  }, {
    "name"    : "firefox"
  }]
}
That's it! Now mochify --wd will run your Mocha test cases in the configured
browsers simultaniously. If you installed mochify without -g, you will have
to run node_modules/.bin/mochify --wd.
Export your SauceLabs credentials:
export SAUCE_USERNAME="your-user-name"
export SAUCE_ACCESS_KEY="your-access-key"
Enable SauceLabs in your .min-wd file:
{
  "sauceLabs": true
}
For more information about Selenium WebDriver and SourceLabs support can be found on the min-webdriver project page.
Mocha reporters known to work:
- min
- dot (default)
- list
- spec
- tap
- json
- doc
- xunit
- markdown
- landing
Note: Consuming the output of a machine readable reporter may not work as
expected with --wd.
var mochify = require('mochify');

mochify('./test/*.js', {
  reporter : 'tap',
  cover    : true
}).bundle();mochify()uses default settings and runs tests in./test/*.jsmochify(paths)specifies the paths, a space delimited list of globsmochify(opts)configures options as described belowmochify(paths, opts)combines custom paths and options
All long form command line options can be used. E.g. --node can be configured
as { node : true }, --reporter tab as { reporter : 'tab' } and so on.
Additional API options:
outputa stream that receives the test output (e.g. through2)
Install the mochify-istanbul plugin:
$ npm install mochify-istanbul --save-devUsing a package.json script that can be run with npm run cover:
"scripts" : {
  "cover" : "mochify --plugin [ mochify-istanbul --report cobertura ]"
}
Using the API:
var mochify = require('mochify');
var istanbul = require('mochify-istanbul');

mochify().plugin(istanbul, {
  report: ['text', 'html', 'text-summary']
}).bundle();- Node 0.10, 0.12
- v2.5+
- Browserify 9.x
- v2.4
- Browserify 8.x
- v2.3
- Browserify 7.x
- v2.0, v2.1, v2.2
- Browserify 6.x
- Mocha 2.x
- v1.x
- Browserify 5.x
- Mocha 1.x
- v0.x
- Browserify 4.x
MIT


