
Helps you quickly deploy a live updated Changelog page based on a CHANGELOG.md file, inspired by headwayapp.co, LogLive.
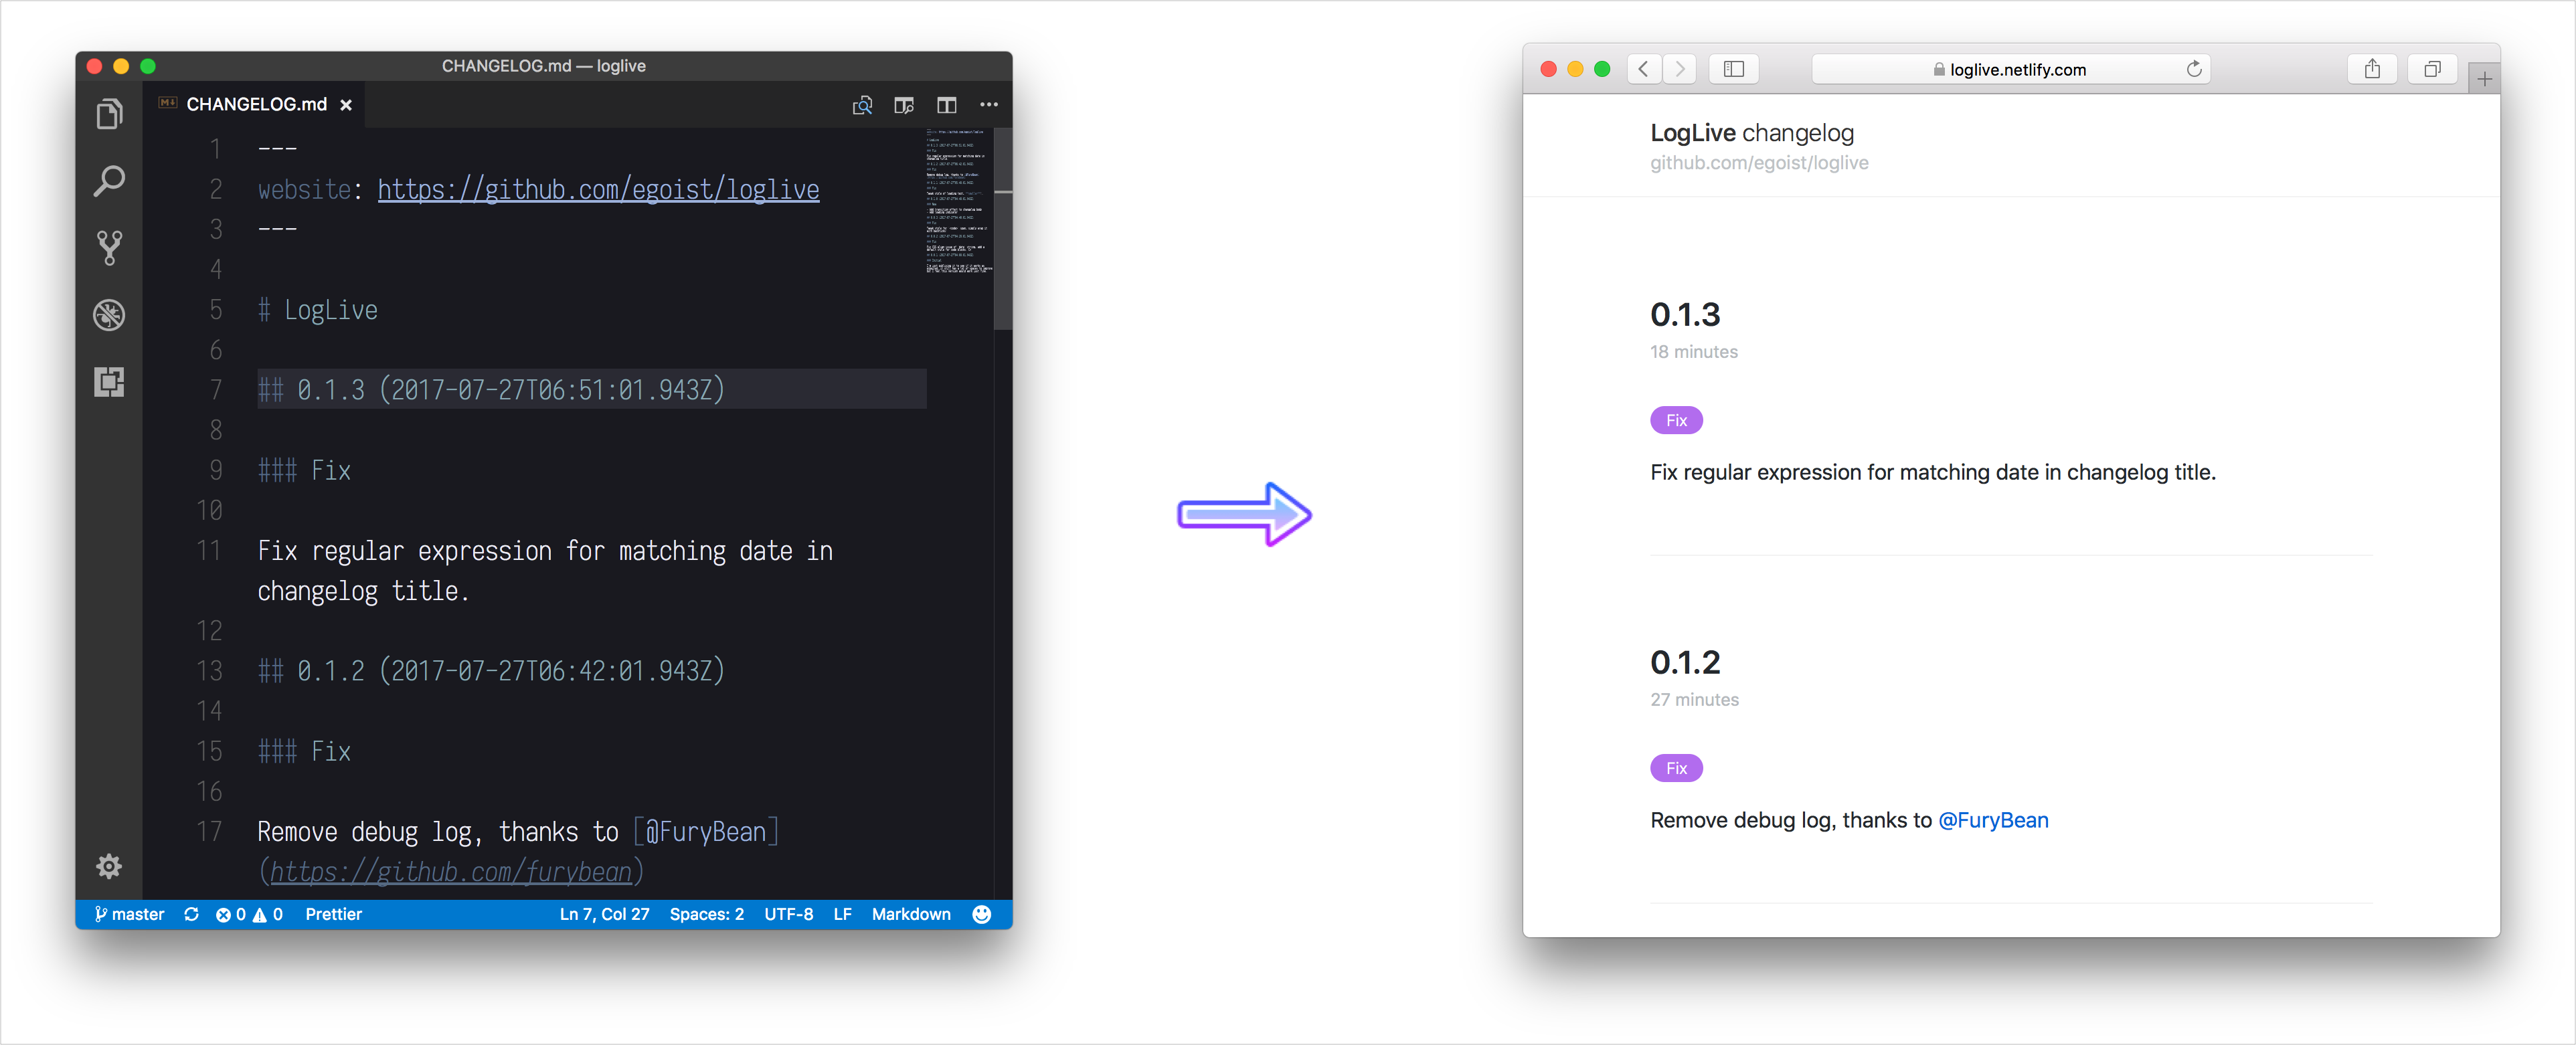
Live Demo: https://logp.netlify.app
You can simply create an index.html and include logpage there:
<html>

<head>
    <title>LogPage Example</title>
    <link rel="stylesheet" href="https://unpkg.com/logpage/dist/style.css" />
</head>

<body>
    <div id="app"></div>
    <script type="module">
        import LogPage from 'https://unpkg.com/logpage';
        new LogPage({
            target: document.getElementById('app')
        });
    </script>
</body>

</html>
Then you can start to write a CHANGELOG.md, by default LogPage will read from http://your-website/CHANGELOG.md, however you can use a custom path:
new LogPage({
  target: document.getElementById('app'),
  props: {}
});
showHeader(boolean): Show the header or not
# My Website

## Add TypeScript support (2016-07-23)

### New

- Now added Typescript support.
- Some other new stuffs.

### Fix

Fixed some babel problems.The value of h1 heading will be used as website name:
# My WebsiteChangelog title is an h2 heading which consists of two parts, title and date and date is totally optional.
## changelog title (date)Sometime you just want to use semantic version as the changelog title:
## 1.0.0 (2023-06-12)Change type is an h3 heading which describes the type of the change, eg: Fix. And it shows up like:
By default we have pre-defined colors for specific types which include: Fix Breaking New, other types will get a random color.
You can also set color for custom change type:
new LogPage({
    target: document.getElementById('app'),
    props: {
        colors: {
            'Bug fixes': '#342343'
        }
    }
});You changelog is born for your product, so adding a link to your actual product is necessary:
---
website: http://my-fantastic-app.com
---