Make sure you've downloaded and installed Anaconda. Unfortunately, this can't be installed with pip, as I've had issues installing PySide2 from pip.
git clone https://github.com/jbohnslav/video_cropper.gitcd video_cropperconda env create -f environment.ymlconda activate cropperpython setup.py install
To encode videos using libx264, please install ffmpeg on your system: link here
Note: to install into your own anaconda environment, you'll have to install the dependencies yourself. The most important one is PySide2, which you must install with Anaconda (for some reason): conda install -c conda-forge pyside2. the other packages can be installed as normal with pip: pip install PACKAGENAME.
Now that it's installed, run the command line anywhere and make sure that the cropper env is activated.
Run python -m video_cropper
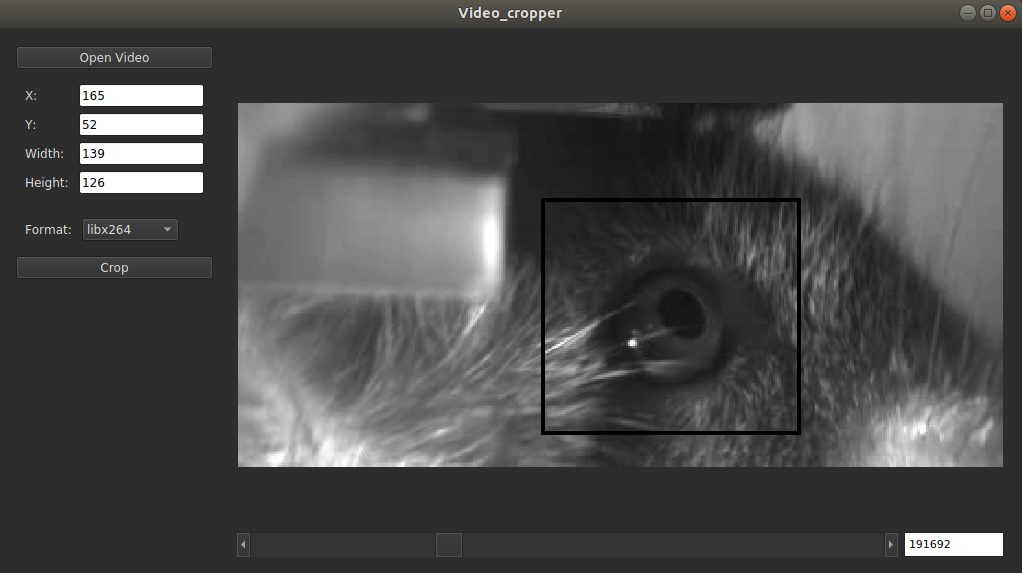
- Open videos with the button in the top-left
- Click and drag on the image to create a rectangle. This will be the cropping area
- The current X, Y, width, and height will be displayed in the top-left. To set these to a specific value, edit the text
and then hit
enter. It will update the cropping area, if possible - Navigate the video using the scroll bar or the frame number editor
- Change the video format with the drop-down menu. Current supported formats:
- libx264: .mp4 using the libx264 encoder, using ffmpeg
- mjpg: mjpg-encoded .avi using OpenCV
- HDF5: an HDF5 database of jpeg-encoded bytestrings. Much better random reads than video formats
- jpeg folder: each image is saved as a .jpg in its own directory. Best random reads, large filesize, and hard to move around
