OpenVision is the Framework for processing video from the OpenVision Traffic Camera module. With the OpenVision Camera this project can achieve 95%+ accuracy. You of course can use any video source you like, but accuracy is not guaranteed.
Vehicle Detection and Tracking for Traffic Counts and Analytics.
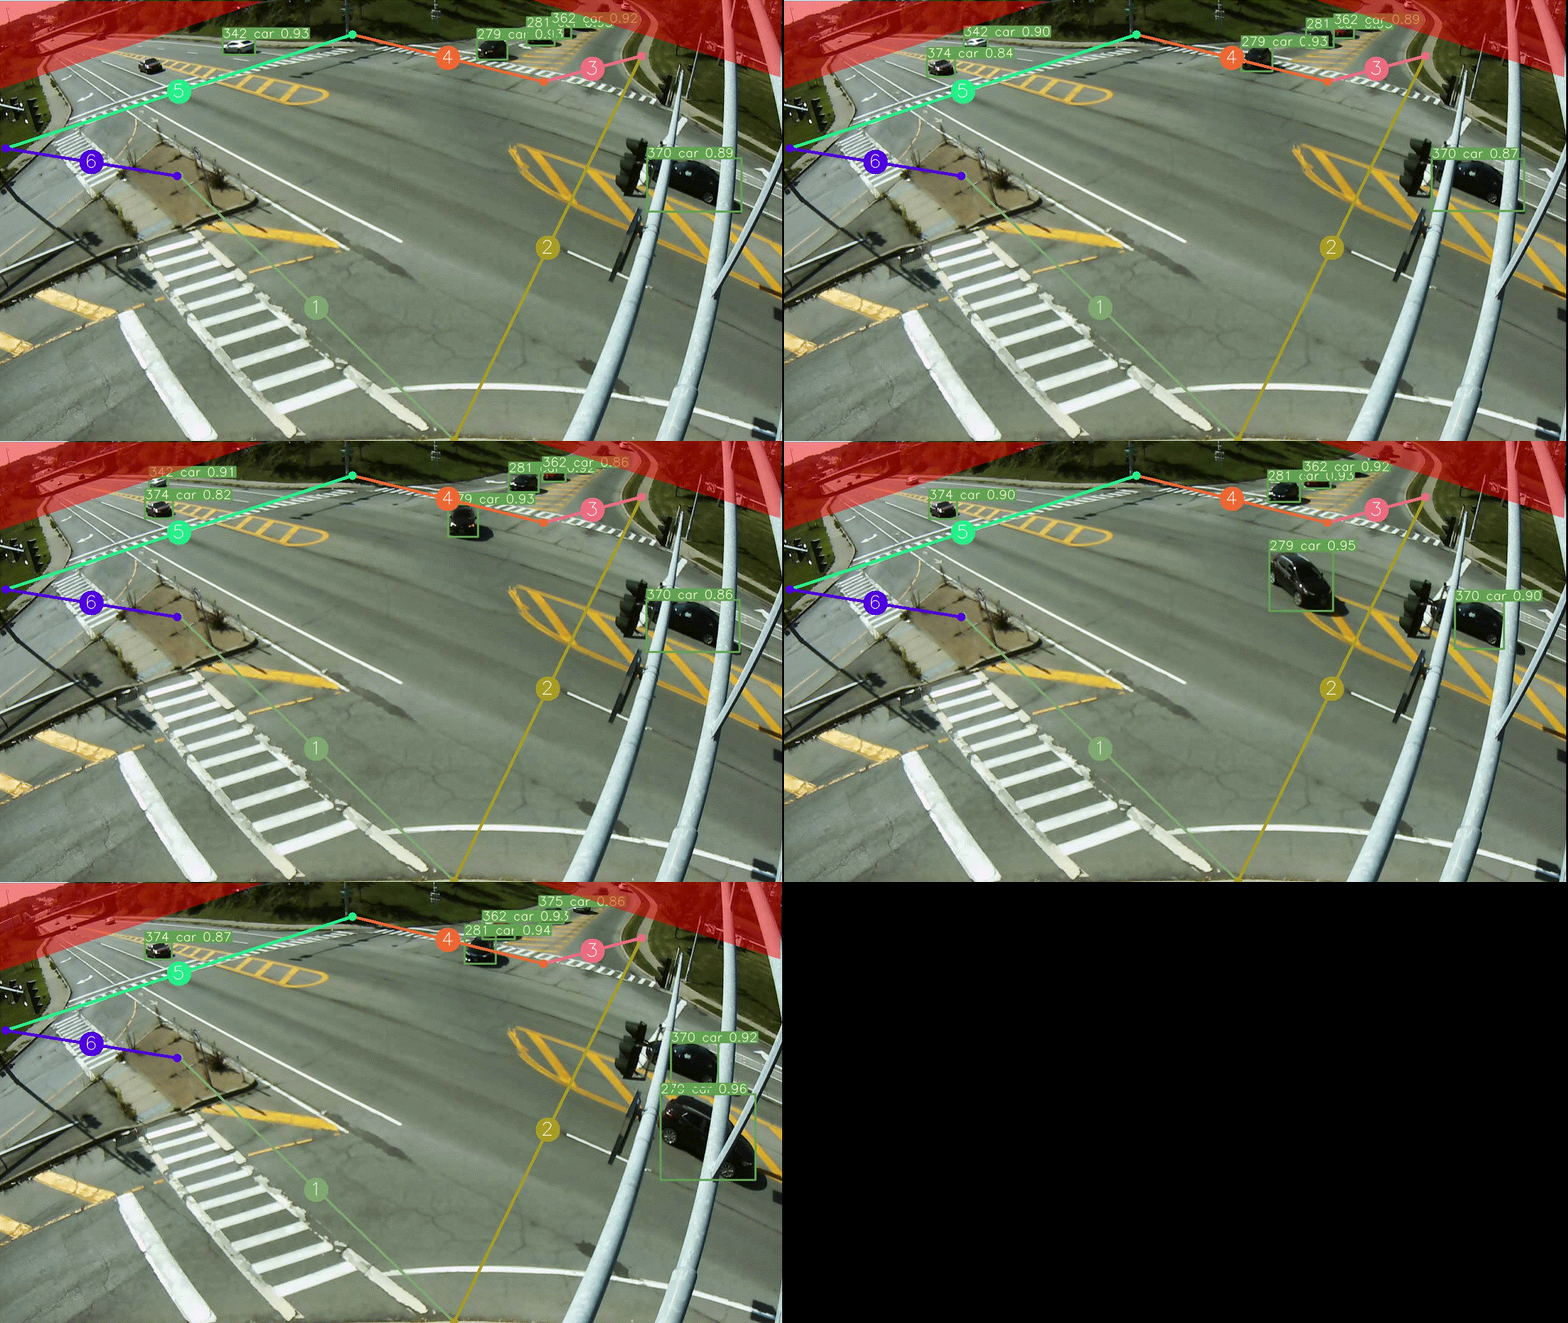
This repository leverages the powerful capabilities of the Yolov7_StrongSORT_OSNet framework. Included in this project is an intuitive web application that enables users to effortlessly define vehicle movements and conduct traffic studies. A simple algorithm is employed to count vehicles in 15-minute intervals, while object detection is achieved through the use of Yolov7 and tracking is implemented using StongSORT, a method that integrates both motion and appearance information based on OSNet. As a result, this approach offers increased accuracy, particularly in scenarios involving occlusions, though it does come at the expense of processing time. It is advisable to employ GPU acceleration for this project due to its high increase in speed compared to CPU-only processing.
Turning movement counts are a fundamental tool in traffic engineering. By leveraging this data, traffic engineers can implement targeted strategies to enhance safety, optimize traffic flow, and ensure that transportation systems effectively meet the evolving needs of communities.
The objective of this project is to empower Traffic Engineers by reducing barriers to entry into the field of machine learning. We aim to make these advanced technologies accessible even for individuals without coding expertise, fostering inclusivity in the adoption of machine learning within the domain of Traffic Engineering.
For More detailed instructions see NVIDIA Docs
- NVIDIA CUDA Toolkit: CUDA(v11.3)
- NVIDIA Graphic Driver for your GPU.NVIDIA Drivers
- cuDNN:cuDNN, Need to be registered for the NVIDIA Developer Program.
- This project has only been tested with cuDNN v8.2.1 and Cuda v11.3. If you use a different version, update requirements_gpu.txt.
git clone https://github.com/joshkuminski/OpenVision.gitOR (recommended)
download the .zip file and extract contents to your Documents folder.
There are a few things we need to do locally before we jump into the cloud.
Run the 'install_colab.bat' file located in the root directory
- This will install Python 3.8.10, create a virtual environment and install project requirements_colab.txt
This Project leverages Google Colaboratory- an online platform for *free access to a gpu * The *free tier has many limitations. To actaully use this it is recommended to purchase the Pay As You Go plan and upgrade when necessary.
Run the 'install.bat' file as Administrator located in the root directory This will install the submodules for this project along with, Python 3.8.10, and Git. It will also create a virtual environment and install project requirements.txt
- If you have a supported NVIDIA GPU, also run the 'install_gpu.bat' file. This will install requirements_gpu.txt
Not tested.
If you are going to run the tracker on your local machine, place the video files you wish to analyze in the directory ./Open-Vision/video.
If you wish to run the tracker on a cloud GPU using Google Colab, upload the video files to your Google Drive in a directory called Open-Vision/video as well as the local directory described above. This method is best for anyone that does not have acceleration hardware and costs ~$0.80 per hour of video using their pay as you go tier.
- Then run the 'Set_Img.bat' file located in the root directory. This will create an image for each video you placed in ./Open-Vision/video in case the video dosen't want to load during the zone definition process.
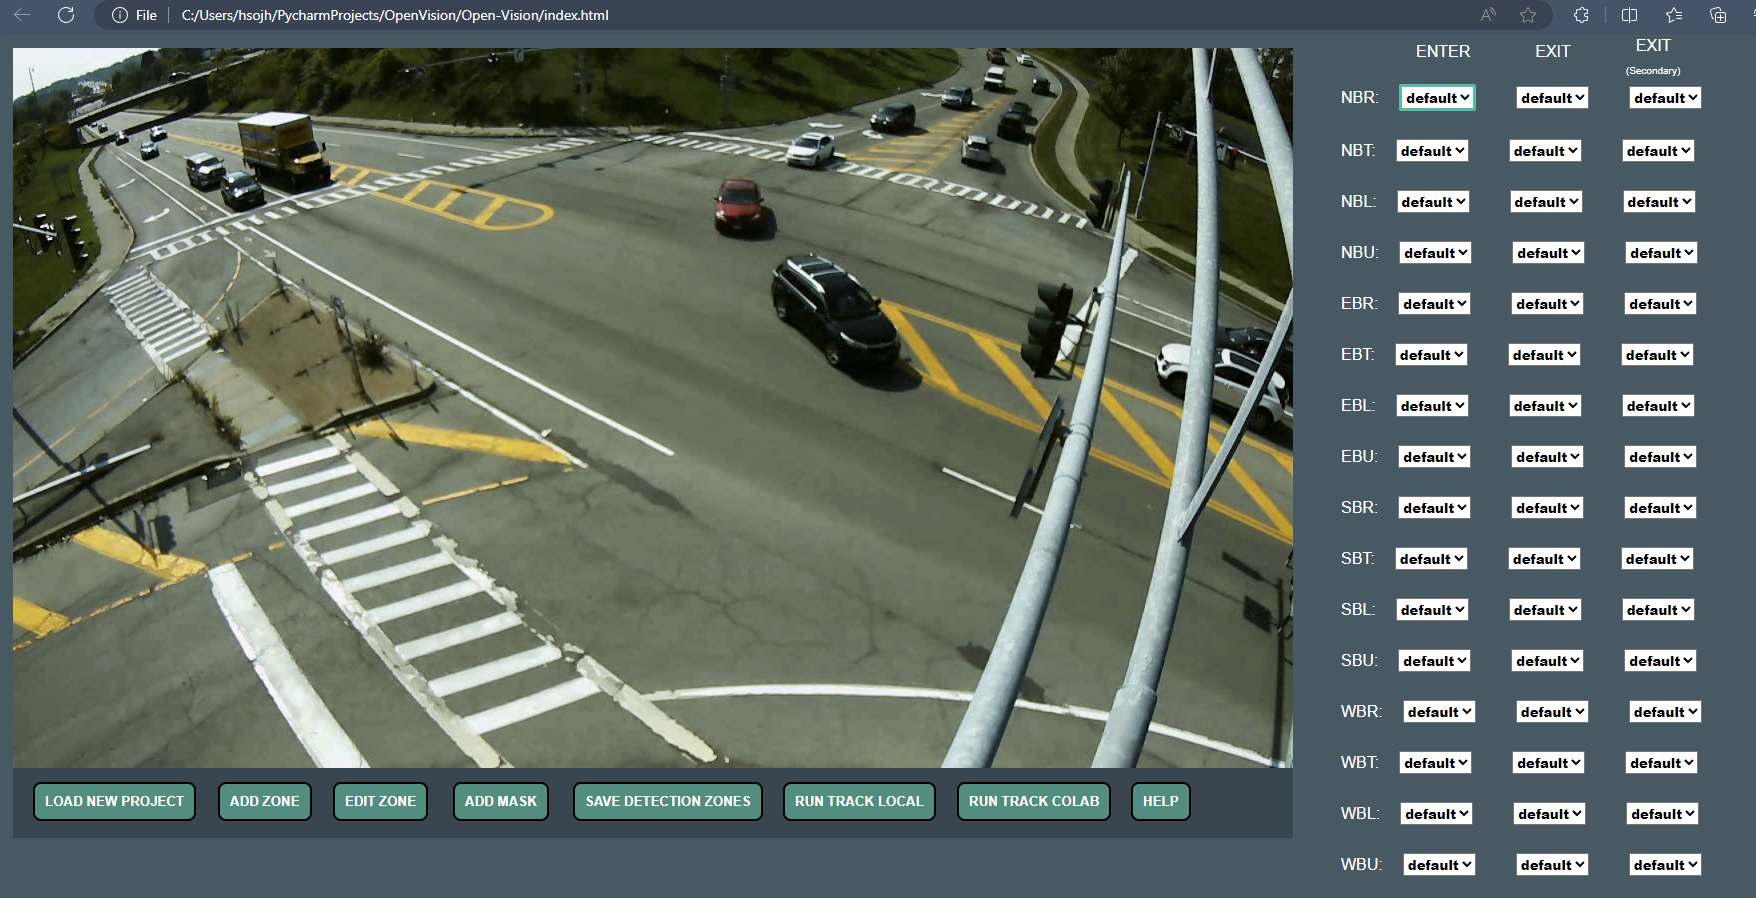
Open the file 'index.html' located in the Open-Vision directory. (Tested on Microsoft Edge, Google Chrome, and Firefox). Following the instructions on the Help page for directions on how to use. This will walk you through the steps to define the zones in order to get Turning Movement Counts.
There are instructions there on how to use or look at Step 5 Demo
Run the 'OV-track.bat' file as Administrator located in the root directory This will run the tracker. Select the video you wish to process when the file dialog appears. Make sure the Video Filename is formatted correctly (Output_YYYY-MM-DD_HH-MM-SS.mp4)
Custom weight files can be created using OpenVision-Label (Coming Soon)
For questions please email joshuakuminski.github@gmail.com For bugs and feature requests please visit GitHub Issues.


