EzCopy is a tiny utility that allows you to quickly copy files to Azure Blob Storage and Azure Files via context menu on Windows. Try EzCopy Web install.
You can configure up to three entries in context menu as default file upload paths. You just need to provide the upload path and its SAS token during initial setup. EzCopy saves the upload path(s) in plain text and the encrypted SAS token(s) on your computer. Under the hood, EzCopy invokes AzCopy to copy the file.
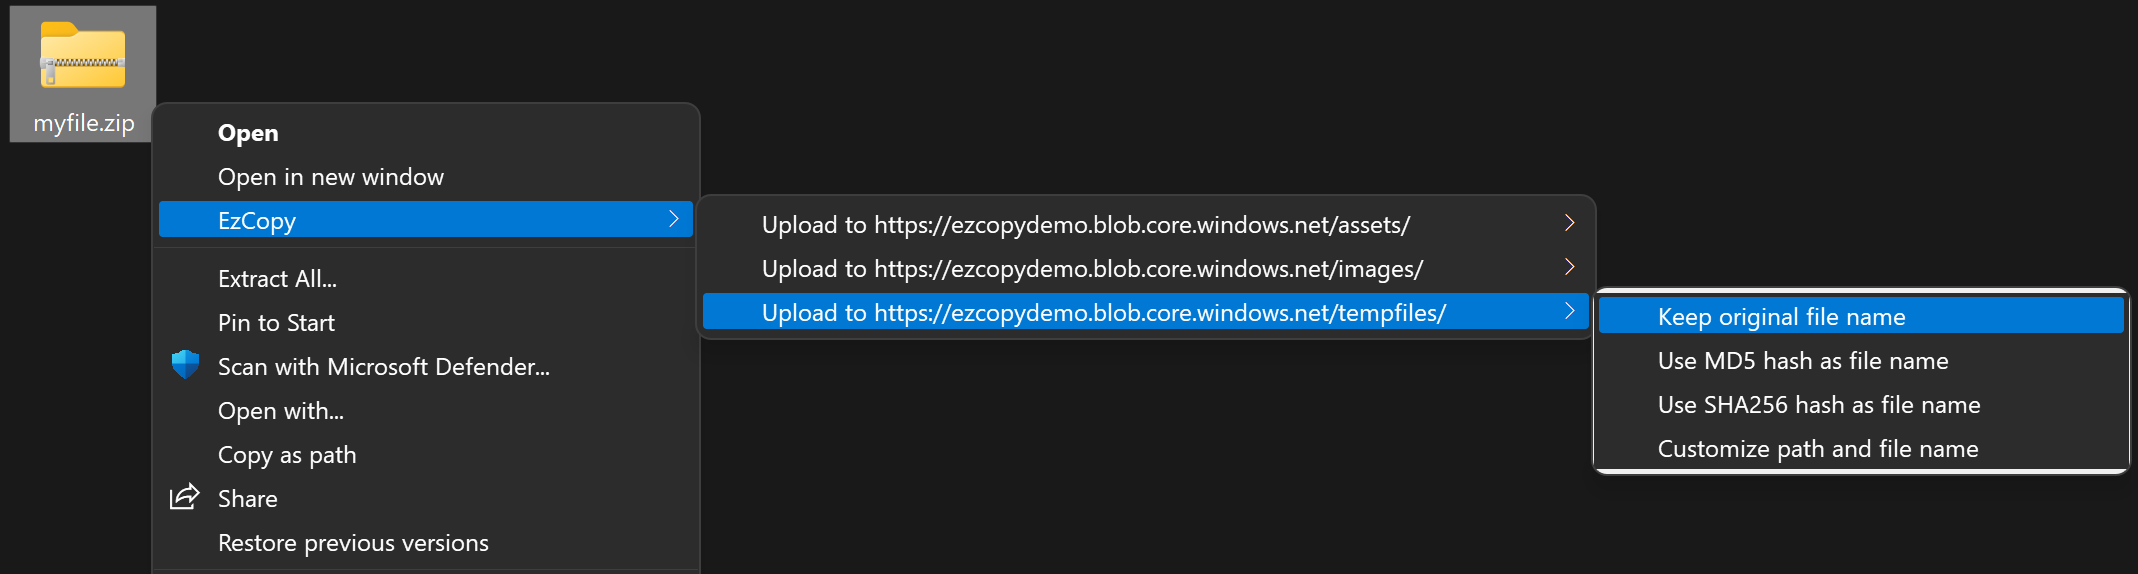

EzCopy also supports customized upload path and file name:

-
EzCopy supports following Windows versions.
- Windows 7
- Windows 8
- Windows 8.1
- Windows 10
- Windows 11
-
Azure Blob Storage or Azure Files is created.
-
You need to get an SAS token that has the Write permission to the blob URL or the file share URL. See Appendix: How to obtain the SAS token from Azure Portal? for details.
The easiest way to install EzCopy is via web: https://ezcopy.joji.me/#install. You just need to input the upload path(s) and SAS token(s), then the website will generate the setup script. The upload path(s) and SAS token(s) will not be sent to backend server, they are just used by the script running in your browser to generate the setup script.
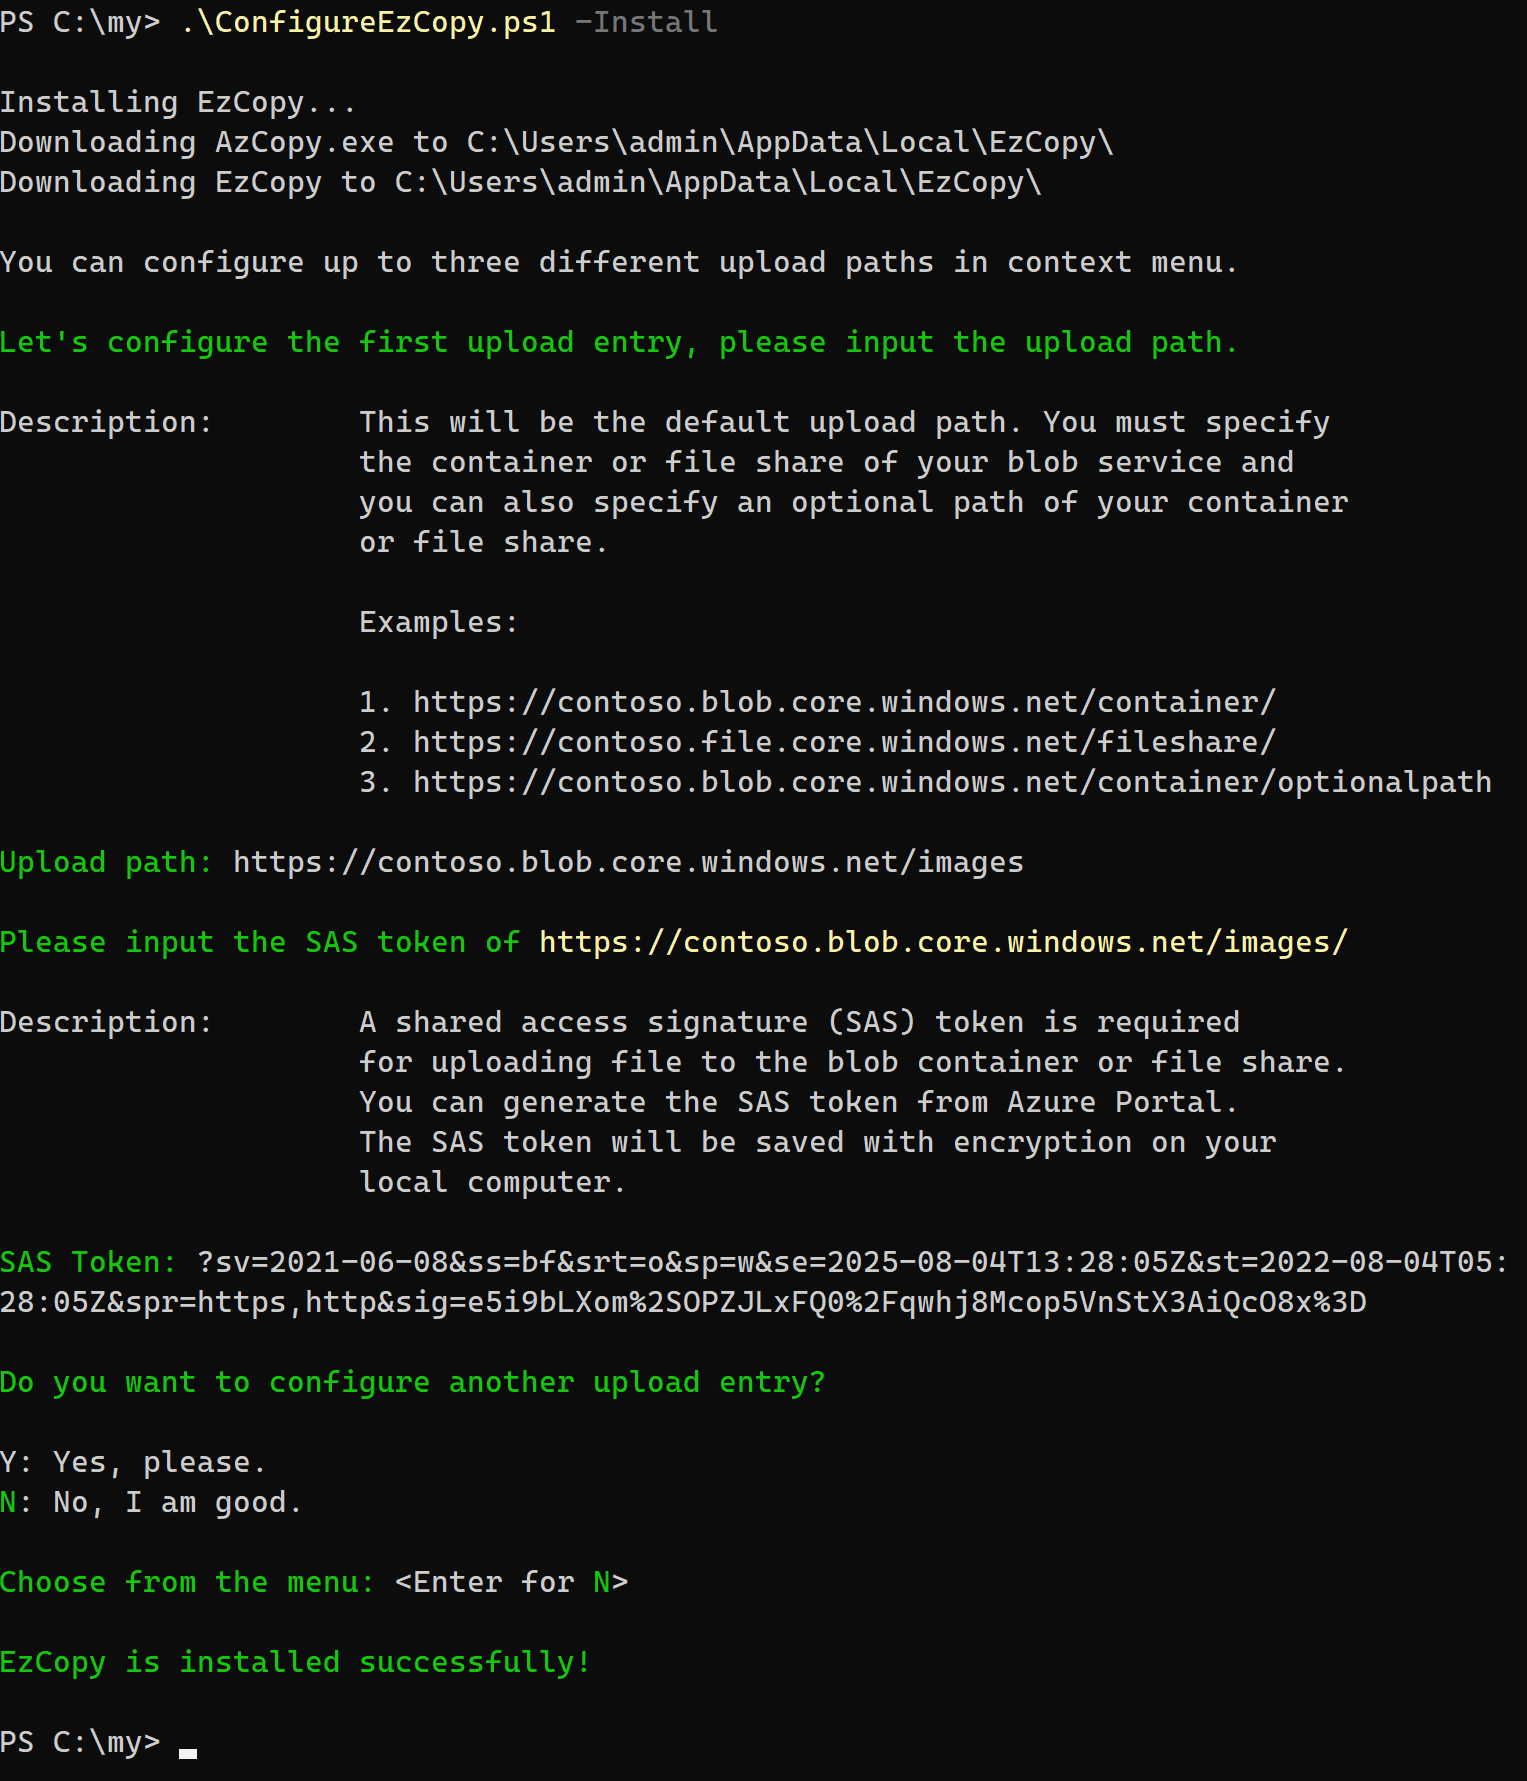
Download ConfigureEzCopy.ps1 and run following command from a Run dialog or Command Prompt:
If you want to use the Windows built-in PowerShell to run EzCopy, run:
powershell -command "try{Set-ExecutionPolicy -Force -Scope Process Bypass}catch{}; & %userprofile%\Downloads\ConfigureEzCopy.ps1 -Install"
If you want to use the cross-platform PowerShell to run EzCopy, run:
pwsh -command "try{Set-ExecutionPolicy -Force -Scope Process Bypass}catch{}; & %userprofile%\Downloads\ConfigureEzCopy.ps1 -Install"
NOTE: If your default download path isn't %userprofile%\Downloads, then you need to replace it with the actual download path.
Then follow the instruction to finish installation.
To update EzCopy, please run:
powershell -command "try{Set-ExecutionPolicy -Force -Scope Process Bypass}catch{}; & %localappdata%\EzCopy\ConfigureEzCopy.ps1 -Update"
or
pwsh -command "try{Set-ExecutionPolicy -Force -Scope Process Bypass}catch{}; & %localappdata%\EzCopy\ConfigureEzCopy.ps1 -Update"
If you want to re-configure the EzCopy upload entries, please run:
powershell -command "try{Set-ExecutionPolicy -Force -Scope Process Bypass}catch{}; & %localappdata%\EzCopy\ConfigureEzCopy.ps1 -Configure"
or
pwsh -command "try{Set-ExecutionPolicy -Force -Scope Process Bypass}catch{}; & %localappdata%\EzCopy\ConfigureEzCopy.ps1 -Configure"
If you want to remove EzCopy, please run:
powershell -command "try{Set-ExecutionPolicy -Force -Scope Process Bypass}catch{}; & %localappdata%\EzCopy\ConfigureEzCopy.ps1 -Uninstall"
or
pwsh -command "try{Set-ExecutionPolicy -Force -Scope Process Bypass}catch{}; & %localappdata%\EzCopy\ConfigureEzCopy.ps1 -Uninstall"
-
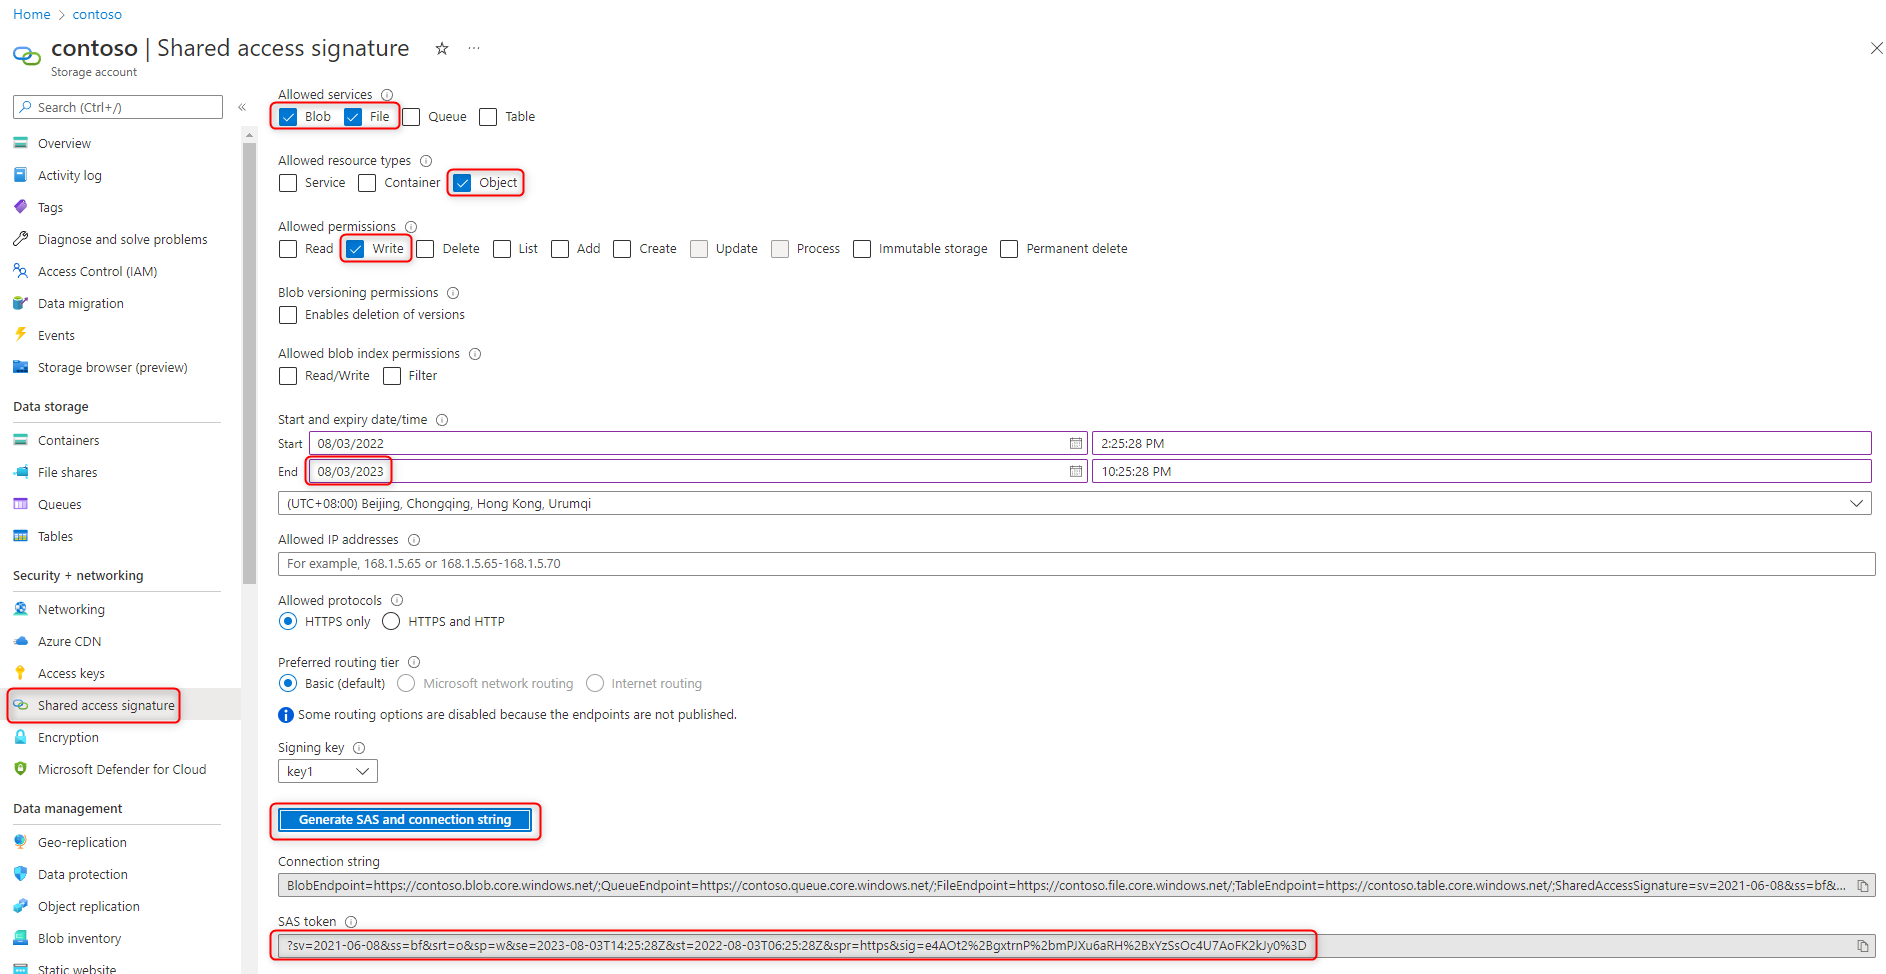
For Azure Blob Storage and Azure Files, you can go to the Shared access signature page of your storage account and follow the tips below to obtain an SAS token.
- Allowed services: choose Blob for Blob Storage, choose File for File Shares
- Allowed resource types: Object must be selected
- Allowed permissions: Write must be selected
- Input the desired token expiry date/time
Then please click the Generate SAS and connection string button and you will get the SAS token.
-
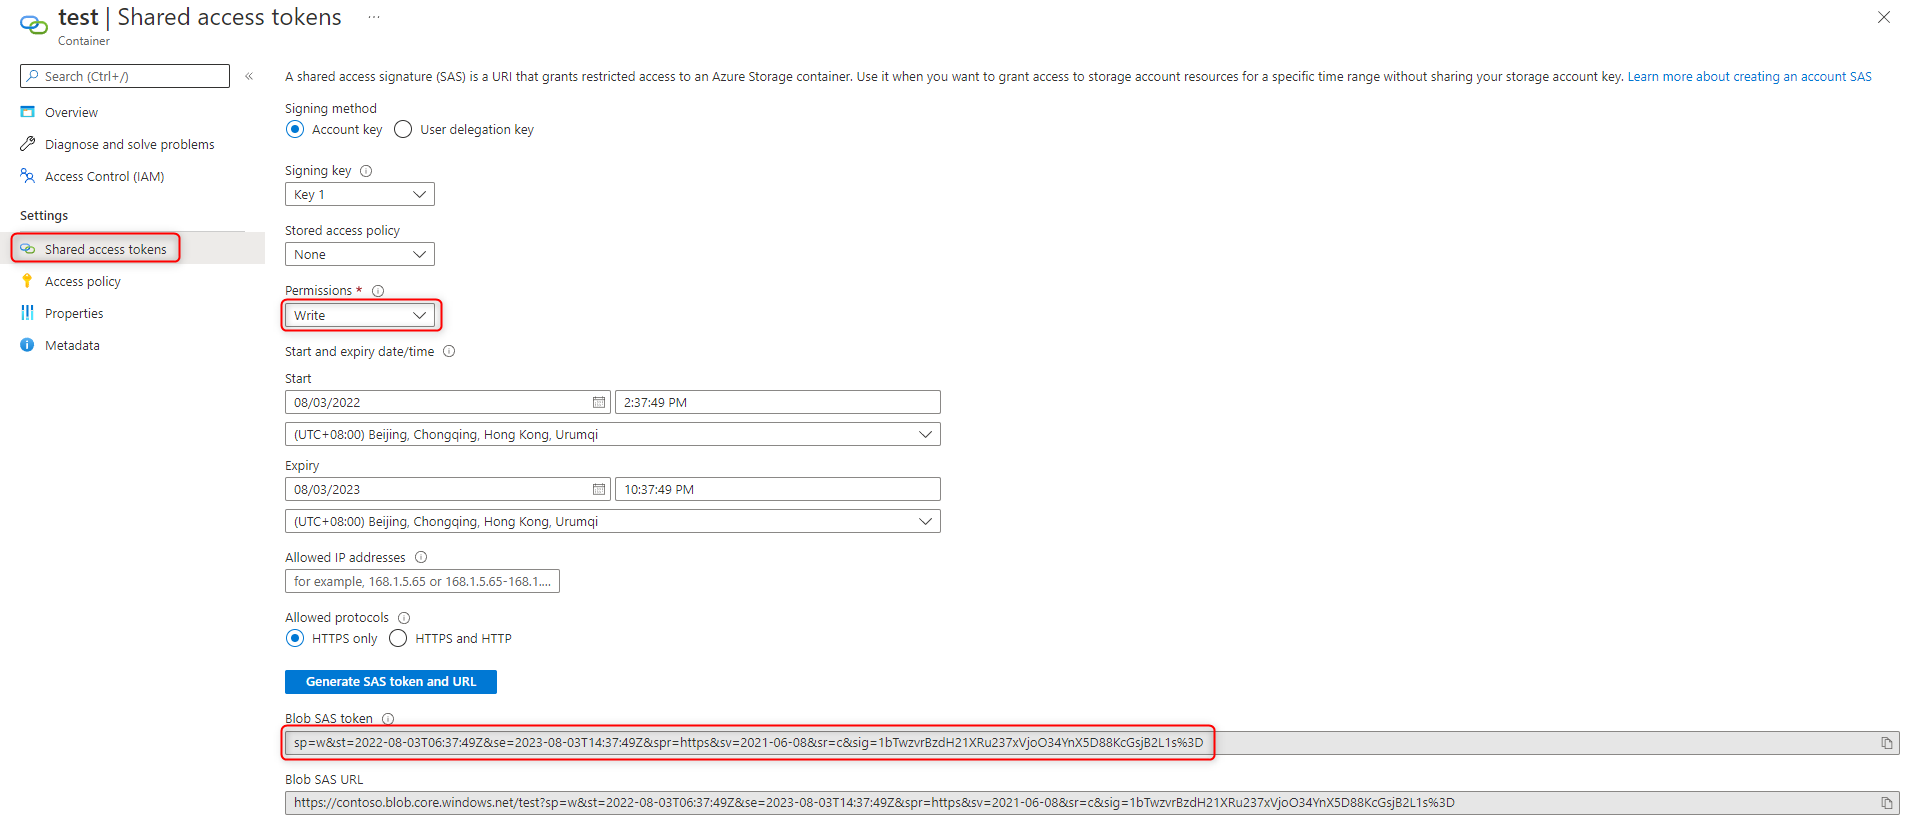
For Azure Blob Storage, you can also obtain an SAS token in Container's Shared access tokens page: