This is a document from the hands-on session at the Tokyo AEC Industry Dev Group on July 04, 2020. Hands-on with RhinoInside and Unity to create a game where you can get the ball to the goal.

-
Clone RhinoInside Repository
- Download here
-
RhinoWIP
- Download here
-
Unity2019.4.1.f1
- Download here
-
Rider2020.1
- VisualStudio, VSCode is okey
- Please install Unity debugger each software
- Rider
- Nothing to extra install file
- Visual Studio
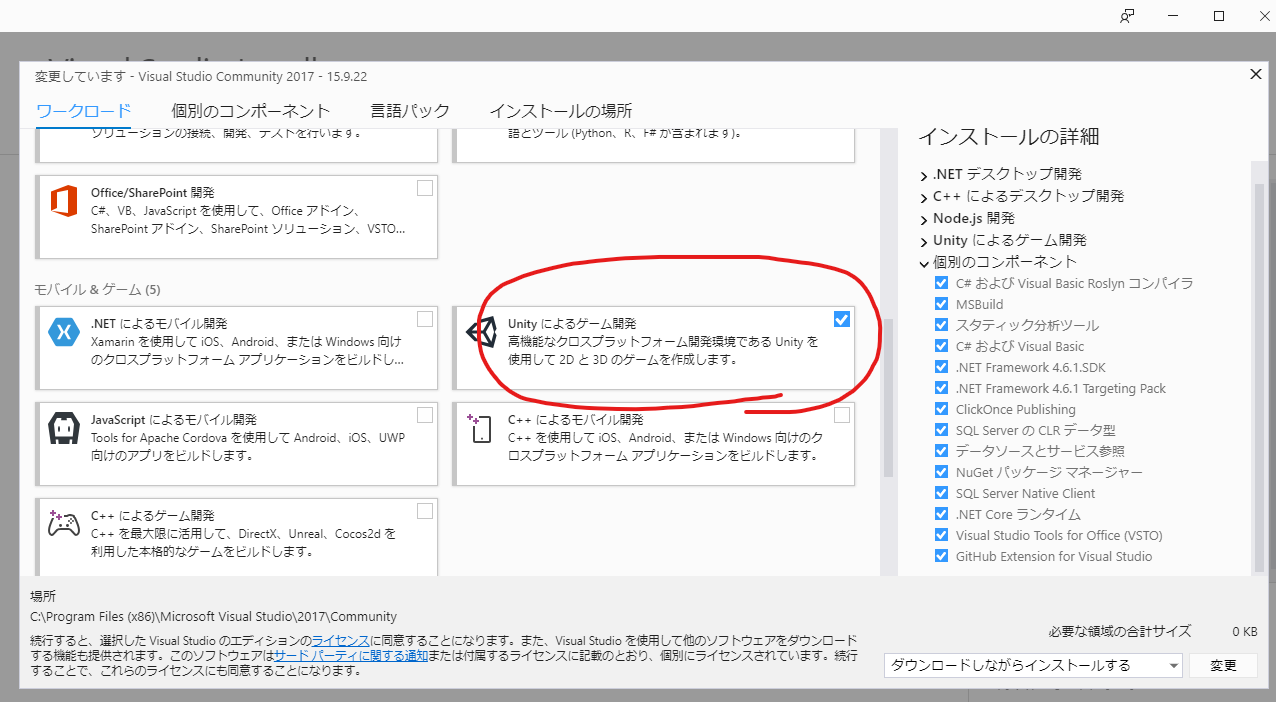
- Install there things about unity from Visual Studio Installer
- VS Code
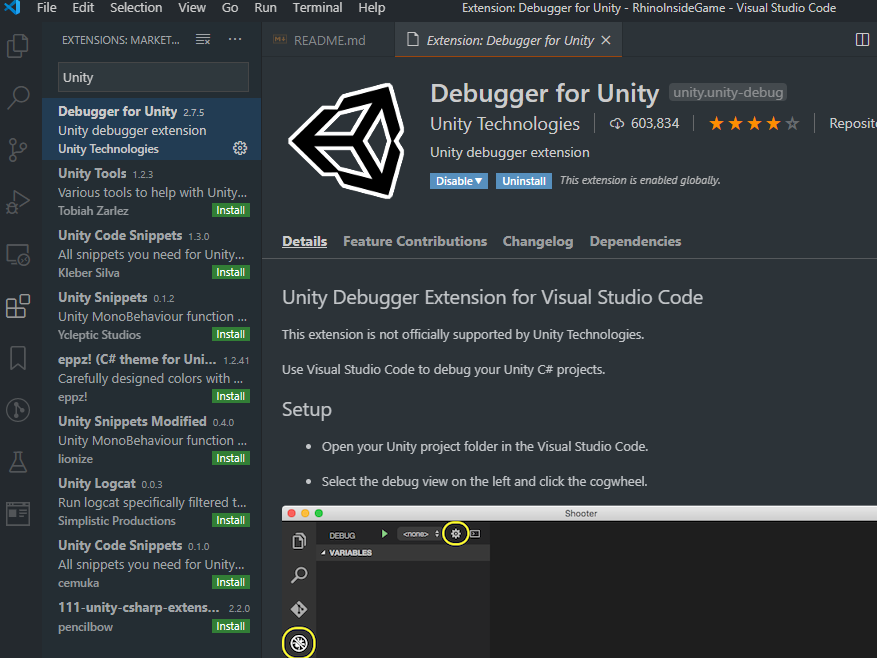
- Install Extensions of Debugger for Unity
- Editer setting in unity
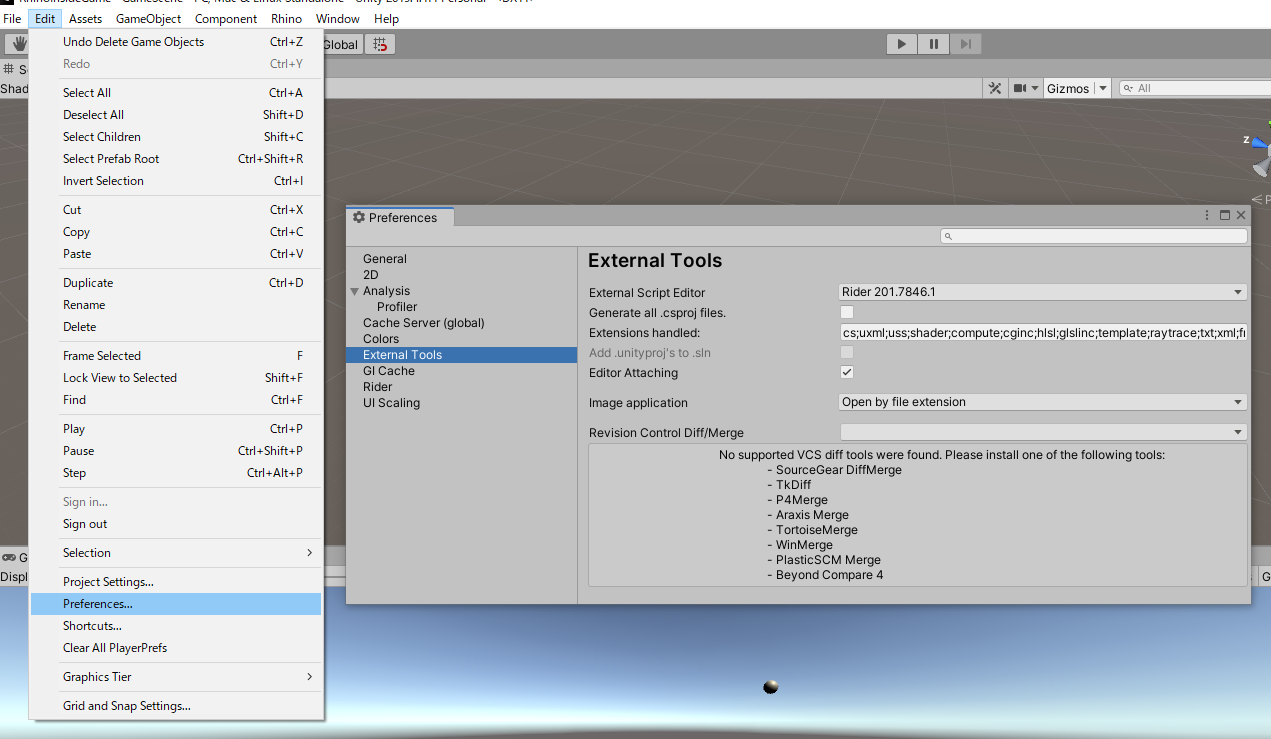
- Rider


- Create a folder under Asset named "Scripts" and put "Convert.cs " into Script folder and create "LoftSurface.cs"
- Create a folder under Asset named "Plugins" and put it in the "RhinoCommon.dll" file.
- Convert.cs and RhinoCommon.dll are in cloned RhinoInside repository
- Create a folder under Asset named "Editor" and create "RhinoInsideUI.cs
- The "Editor" named folder is used in special treatment, so please do not use the name of the folder by mistake.
- Scripting the following in RhinoInisdeUI.cs and start Rhino from your Unity editor
using System;
using System.IO;

using UnityEngine;
using UnityEditor;

using Rhino.Runtime.InProcess;

[ExecuteInEditMode]
public class RhinoInsideUI : MonoBehaviour
{
    [MenuItem("Rhino/Start RhinoInside")]
    public static void StartRhinoInside()
    {
        string rhinoSystemDir = Path.Combine(Environment.GetFolderPath(Environment.SpecialFolder.ProgramFiles), "Rhino WIP", "System");
        var path = Environment.GetEnvironmentVariable("PATH");
        Environment.SetEnvironmentVariable("PATH", path + ";" + rhinoSystemDir);
        GC.SuppressFinalize(new RhinoCore(new string[] { "/scheme=Unity", "/nosplash" }, WindowStyle.Minimized));
    }
}- Make loft surface
- First, make it in Rhino
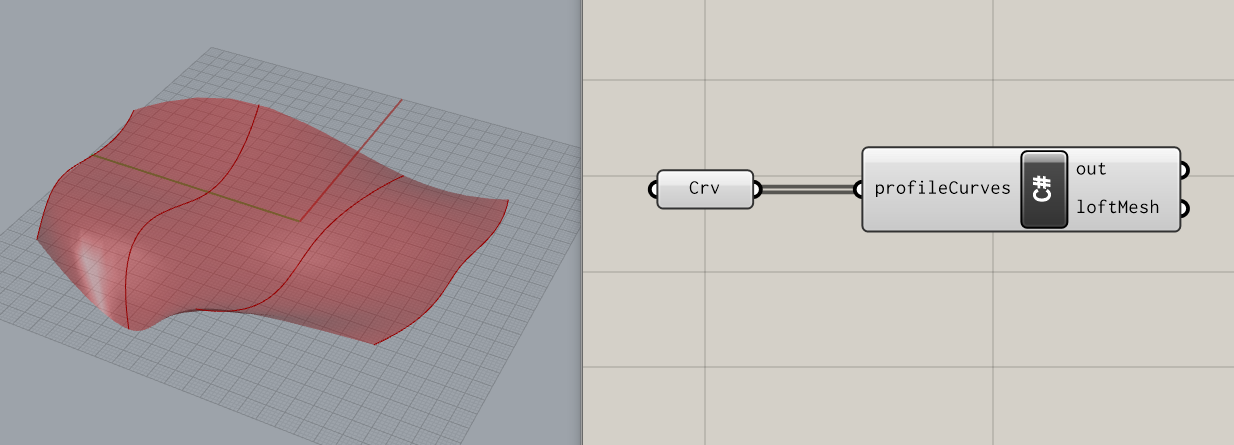

- Next, make it in RhinoInside
- Create a control point first.
public class RhinoInsideUI : MonoBehaviour
{
    public static void StartRhinoInside()
    {
        // ....
    }

    [MenuItem("Rhino/Create Loft Surface")]
    public static void Create()
    {
        var surface = new GameObject("Loft Surface");
        surface.AddComponent<LoftSurface>();
        CreateLoft(surface);
    }

    private static void CreateLoft(GameObject surface)
    {
        surface.AddComponent<MeshFilter>();

        // Surface color
        var material = new Material(Shader.Find("Standard"))
        {
            color = new Color(1.0f, 0.0f, 0.0f, 1.0f)
        };
        surface.AddComponent<MeshRenderer>().material = material;
        // dont receive shadow setting
        surface.GetComponent<MeshRenderer>().receiveShadows = false;

        // control point color
        var cpMaterial = new Material(Shader.Find("Standard"))
        {
            color = new Color(0.2f, 0.2f, 0.8f, 1f)
        };

        // make control point
        for (int i = 0; i < 4; i++)
        {
            for (int j = 0; j < 4; j++)
            {
                int num = 4 * i + j;
                var controlSphere = GameObject.CreatePrimitive(PrimitiveType.Sphere);
                controlSphere.name = "Sphere" + num;
                controlSphere.transform.parent = surface.transform;
                controlSphere.transform.localScale = new Vector3(0.5f, 0.5f, 0.5f);
                controlSphere.transform.position = new Vector3( i * 5f, 0, j * 5f);
                controlSphere.GetComponent<MeshRenderer>().material = cpMaterial;
            }
        }
    }
}- Create a loft surface with the control points you've created
using System.Collections;
using System.Collections.Generic;
using UnityEngine;
using Rhino.Geometry;

#if UNITY_EDITOR
using UnityEditor;
#endif

#if UNITY_EDITOR
[ExecuteInEditMode]
#endif
public class LoftSurface : MonoBehaviour
{
    void Update()
    {
        var controlPoints  = new List<List<Vector3>>();

        int i = 0;
        List<Vector3> controlPointsRow = null;
        foreach (UnityEngine.Transform controlSphere in transform)
        {
            if ((i++ % 4) == 0)
            {
                controlPointsRow = new List<Vector3>(4);
                controlPoints.Add(controlPointsRow);
            }
            controlPointsRow.Add(controlSphere.position);
        }
        gameObject.GetComponent<MeshFilter>().mesh = CreateLoft(controlPoints);
    }

    private UnityEngine.Mesh CreateLoft(List<List<Vector3>> controlPoints)
    {
        if (controlPoints.Count > 0 )
        {
            var profileCurves = new List<Curve>();
            foreach (var controlPointsRow in controlPoints)
            {
                profileCurves.Add(Curve.CreateInterpolatedCurve(controlPointsRow.ToRhino(), 3));
            }
            Brep brep = Brep.CreateFromLoft(profileCurves, Point3d.Unset,Point3d.Unset, LoftType.Normal, false)[0];
            Rhino.Geometry.Mesh mesh = Rhino.Geometry.Mesh.CreateFromBrep(brep, MeshingParameters.Default)[0];
            return mesh.ToHost();
        }
        return null;
    }
}
Now, click on "Rhino/Start RhinoInside" and then click on "Rhino/Create Loft Surface" to create a loft surface

The content up to now is the data in the folder in part 1 of this repo.
- You can debug it by attaching a script editor to Unity
This is the end of RhinoInside part. We are now only in Unity.
- Make Ball
- Push play▶ buttom
- Nothing is going to happen...
- Attach RigidBody
- Gravity will cause the ball to fall, but it will pass through...
- Attach MeshCollider to LoftSurface
- The ball won't bounce...
- Create a Materials folder and create a PhysicMaterial in it.
- Set Bounces to an any value and attach it to Ball and LoftSurface.
- The ball bounces!
- Try to move the control point.
- The collider wouldn't reflect...
- Attach MeshCollider in runtime
- Add LoftSurface.cs below
- Removes the MeshCollider, if any, from the attached game object and adds a SetMeshCollider method to set a new MeshCollider.
public class LoftSurface : MonoBehaviour
{
    void Start()
    {
        SetMeshCollider(gameObject);
    }

    private void SetMeshCollider(GameObject obj)
    {
        if (obj.GetComponent<MeshCollider>() != null)
        {
            DestroyImmediate(gameObject.GetComponent<MeshCollider>());
        }
        obj.AddComponent<MeshCollider>();
        obj.GetComponent<MeshCollider>().material = new PhysicMaterial("SurfMaterial")
        {
            bounciness = (float) 1.0
        };
    }

    void Update()
    {
        SetMeshCollider(gameObject);
        var controlPoints  = new List<List<Vector3>>();
// ...- Change the name "SampleScene" to "GameScene"
- Make Cube named "Respawn"
- Set the Scale of X and Z to 100 with the appropriate distance at the bottom of the LoftSurface
- If the ball doesn't hit here, it won't start again, so be careful where you are!
- Deactivate the MeshRenderer since it is only used to determine the respawn and it doesn't need to be rendered.
- Add Respawn.cs
- Use OnCollisionEnter, a method to be executed when GameObject come into the collider
- Implementing a restart in the form of loading a scene
using UnityEngine;
using UnityEngine.SceneManagement;

public class Respawn : MonoBehaviour
{
    private void OnCollisionEnter(Collision other)
    {
        SceneManager.LoadScene("GameScene");
    }
}- Create Cube named "Goal"
- Place it where you want it to be a goal.
- You can also set the scale to any value you want.
- Simply note that this is what makes the game so difficult.
- Add Goal.cs
- Create the screen when the game is cleared (we'll put it all together in the next part of the game, so we'll do that later).
- The game is clear, so deactive the ball.
- SerializeField atrribute allows you to set values from the editor
- Set Ball gameobject in editor
public class Goal : MonoBehaviour
{
  [SerializeField] private GameObject ball;
  private void OnCollisionEnter(Collision other)
  {
    ball.SetActive(false);
  }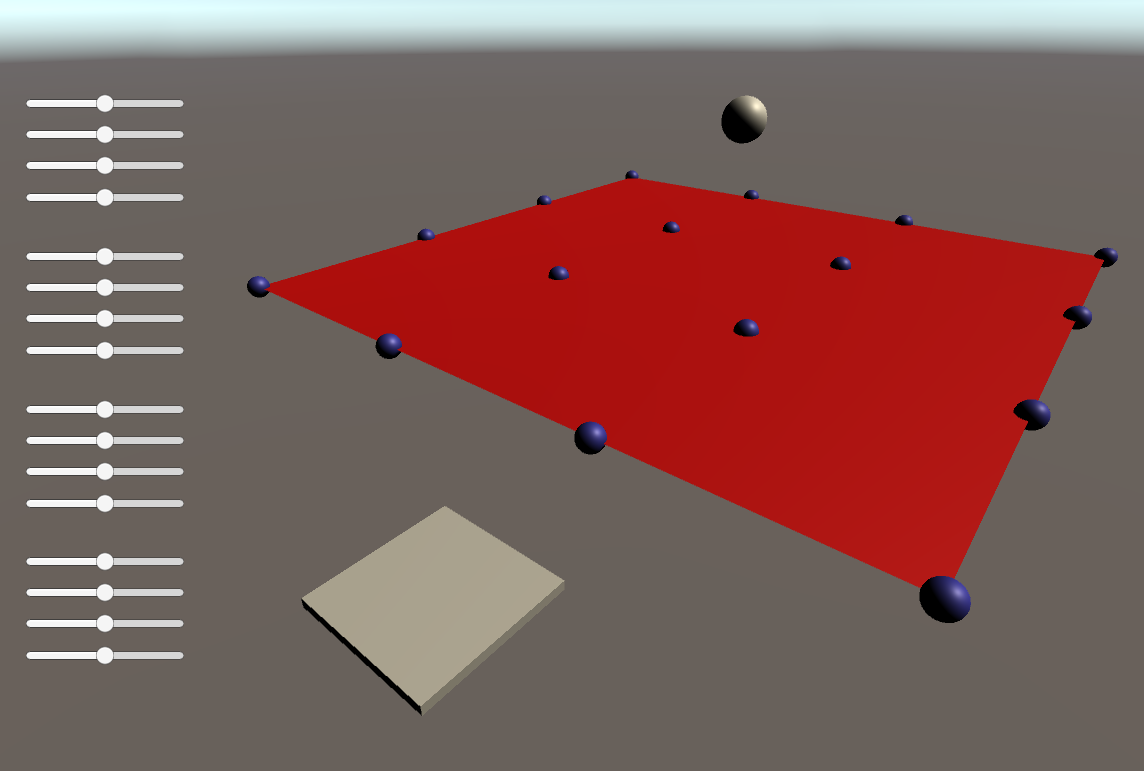
}- This is what Unity should look like when you make it this far

- The data so far is from the part2 folder
-
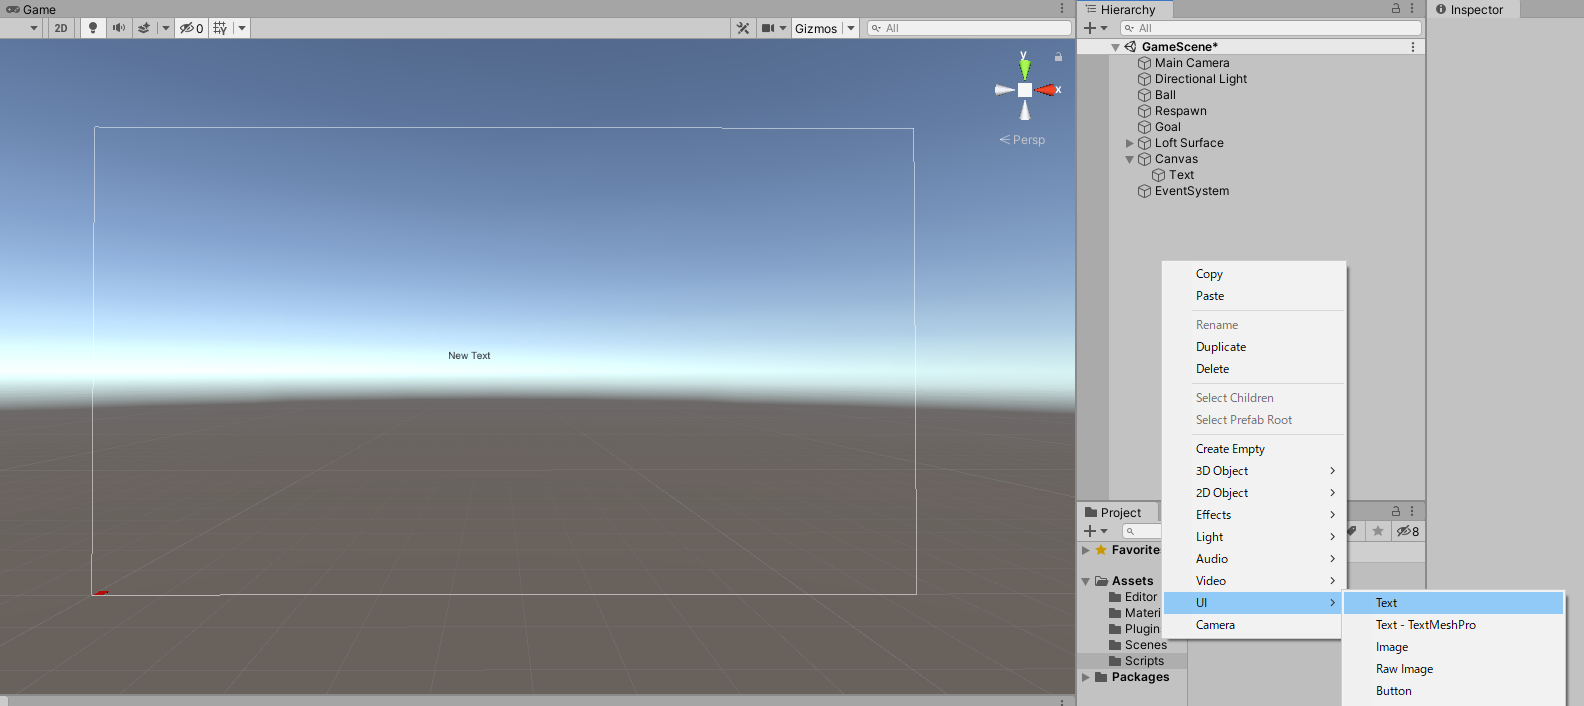
Right-clicking on the Hierarchy and selecting Text from the UI creates Canvas, EventSystem, and Text in Canvas's children in the Hierarchy
- Note that the size of the Canvas depends on the size of the Game window
-
Put the character to indicate clear in Text
-
Use Panel to add a background
-
Name the Panel as GoalPanel and make Text a child
-
Deactivating the GoalPanel
-
Add the following script to Goal.cs created in 2.3, and when the ball enters the goal, you can add Make the GoalPanel active and visible
- Set up the GoalPanel from the editor

public class Goal : MonoBehaviour
{
  [SerializeField] private GameObject ball;
  [SerializeField] private GameObject goalPanel; // ADD
  private void OnTriggerEnter(Collider other)
  {
    goalPanel.gameObject.SetActive(true); // ADD
    ball.SetActive(false);
  }
}- Create a confirmation screen with Text and Panel as in 3.1
- The Respawn.cs created in 2.2 is rewritten as follows
- When the ball is in the frame of Respawn, delete it and display the respawn confirmation screen.
- Update loads GameScene when _retry is true and the right click is pressed
public class Respawn : MonoBehaviour
{
    [SerializeField] private GameObject ball;
    [SerializeField] private GameObject respawn;
    private bool _retry = false;

    private void OnCollisionEnter(Collision other)
    {
        respawn.SetActive(true);
        ball.SetActive(false);
        _retry = true;
    }

    void Update ()
    {
        if (Input.GetMouseButtonDown (0) & _retry == true)
        {
            SceneManager.LoadScene("GameScene");
        }
    }
}- Creating a Slider from the UI
- Anchors to the center left.
- Set Slider's MinValue to -10 and MaxValue to 10
- Create the MoveSphere.cs file and attach it to Slider
public class MoveSphere : MonoBehaviour
{
    [SerializeField] private GameObject sphere;
    private Slider _slider;

    private void Start()
    {
      _slider = gameObject.GetComponent<Slider>();
      _slider.value = 0;
    }

    public void Move()
    {
      var pos = sphere.transform.position;
      pos.y = _slider.value;
      sphere.transform.position = pos;
    }
}-
Set the control point whose coordinates you want to manipulate in the sphere
-
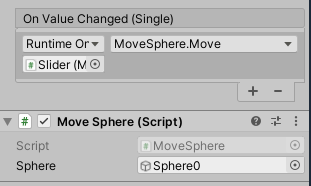
Configuring Slider's OnValueChanged
- The one set here is called when the value of the slider is changed
-
Setting a slider for each control point

-
Selecting MainCamera displays the camera view in the Scene window
-
You want to make it a game screen, set a good angle.

-
Create a Scene from Create by right-clicking on the Project window
- Name it TitleScene
-
Switch the Scene to TitleScene
-
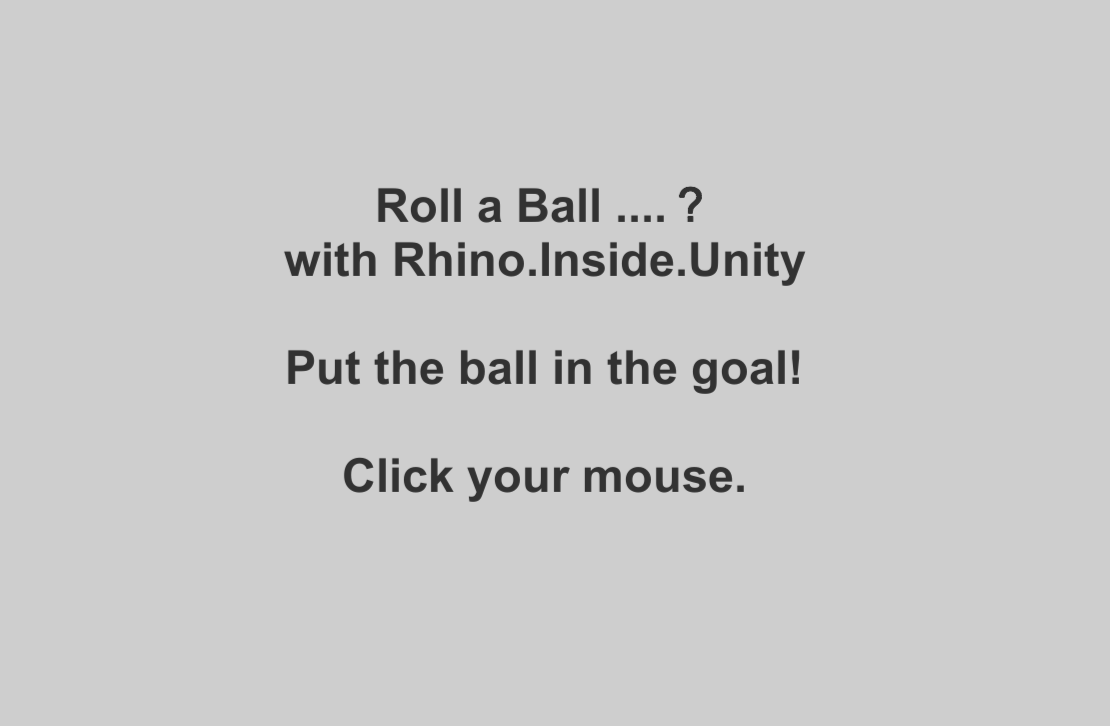
Create the Title screen as you did with the Respawn screen and so on.
-
Create an empty GameObject from CreateEmpty and attach TitleSceneScript to it
- The current application starts RhinoInside from the Unity editor, but we need to start RhinoInside as a standalone application, so we need to write the part that starts RhinoInside in Start
- In Update method, when you click on the screen, the GameScene you just created is loaded

using System;
using System.IO;
using UnityEngine;
using UnityEngine.SceneManagement;
using Rhino.Runtime.InProcess;

public class TitleSceneScript : MonoBehaviour
{
  private void Start()
  {
    string RhinoSystemDir = Path.Combine(Environment.GetFolderPath(Environment.SpecialFolder.ProgramFiles), "Rhino WIP", "System");
    var PATH = Environment.GetEnvironmentVariable("PATH");
    Environment.SetEnvironmentVariable("PATH", PATH + ";" + RhinoSystemDir);
    GC.SuppressFinalize(new RhinoCore(new string[] { "/scheme=Unity", "/nosplash" }, WindowStyle.Minimized));
  }

  void Update () {

    if (Input.GetMouseButtonDown (0)) {
      SceneManager.LoadScene("GameScene");
    }
  }
}- Open File-Build Settings
- Add 2 scene to Scene In Build
- Set Architecture x86_64
- From PlayerSettings From OtherSettings ScriptingBackend to Mono, Api Compatibility Level to .Net 4.x
- Build!!!
- Finished! XDDDDDDDD
- The final version is in the "final version" folder.
- It was mostly Unity, but I hope it worked well.
- The RhinoInside section is based on sample 1 in the Unity folder of the RhinoInside repo.
- For questions, contact Tokyo AEC Industry Dev Group hands-on page, or Discord of Tokyo AEC Industry Dev Group, if you want to ask me directly, Please DM me at my Twitter account.