There project was built by me, Alex and 證壹.
We want build the applications to remove facemask by AI algorithm.
Our goal is make the perfect performance to comaper with Pixel algorithm.
But recording our resouces including time, devices and 💰.
We decided to ✨open source✨ the whole project.
So If you have fun or intersting with our project.
Please give the ⭐ we will appreciate it.
Also you can reference our slide.
There are four parts you can enjoy with them.
-
Detection the face wearing the mask.
-
Remove the face.
-
Generate the blank
-
Generate the mask (Optional)
First git clone repo from yolo
git clone https://ultralytics.com/yolov5
- Mask
- Face
- 929 images of 2 Classes
- Train Q’ty = 836
- Valid Q’ty = 66
- Test Q’ty = 27
- images size: 1024*1024
- labels format: XML
https://drive.google.com/drive/folders/1rDCEDGXvw8YS2cY7BgtQbfsjVi7fhlSm?usp=sharing
-
Label the images [Detection] labelme /your/path/ --labels labels.txt --nodata --autosave
-
Press the right-click to select the rectangle
-
After you have labeled all of the images.
-
Migrate json files to detection/labels/{face/mask} from detection/images/{face/mask}
-
Transfer /your/path/*.json to *.xml [Detection] py json_xml.py
Run "detection.ipynb" on colab and run step by step.
YOLOv5 🚀 requirements Usage: pip install -r requirements.txt
gitpython
ipython  # interactive notebook
matplotlib>=3.2.2
numpy>=1.18.5
opencv-python>=4.1.1
Pillow>=7.1.2
psutil  # system resources
PyYAML>=5.3.1
requests>=2.23.0
scipy>=1.4.1
thop>=0.1.1  # FLOPs computation
torch>=1.7.0  # see https://pytorch.org/get-started/locally (recommended)
torchvision>=0.8.1
tqdm>=4.64.0
tensorboard>=2.4.1
pandas>=1.1.4
seaborn>=0.11.0
Our weight and data split Can try our weight at path .\yolov5\runs\train\yolov5s_results
In this step, the objective is to remove the mask from the face.
To achieve that, we use U-Net (source: https://github.com/milesial/Pytorch-UNet) to segment the mask from the face and cut the segmentation part.
The cutting part won't be including in this repo, you should do it yourself.
Run the following commands in your working directory
Pls read the comments first
# Clone the U-Net repo
git clone https://github.com/milesial/Pytorch-UNet.git

# Create a new conda env, you can skip this step if you don't using conda.
conda create --name unetSeg python=3.8
connda activate unetSeg

# Install the PyTorch
## There are different ways to install PyTorch and its dependencies (like cuda), you can choose any of them, but make sure your PyTorch version should be 1.12 or later
## The following command is for Mac
conda install pytorch==1.12.1 torchvision==0.13.1 torchaudio==0.12.1 -c pytorch

# Install the requirements
cd Pytorch-UNet/
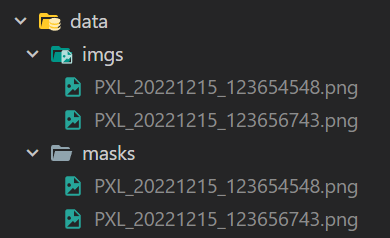
pip install -r requirements.txtThe input images and target masks should be in the data/imgs and data/masks folders respectively (note that the imgs and masks folder should not contain any sub-folder or any other files, due to the greedy data-loader).
Run the following commands in the Pytorch-UNet folder.
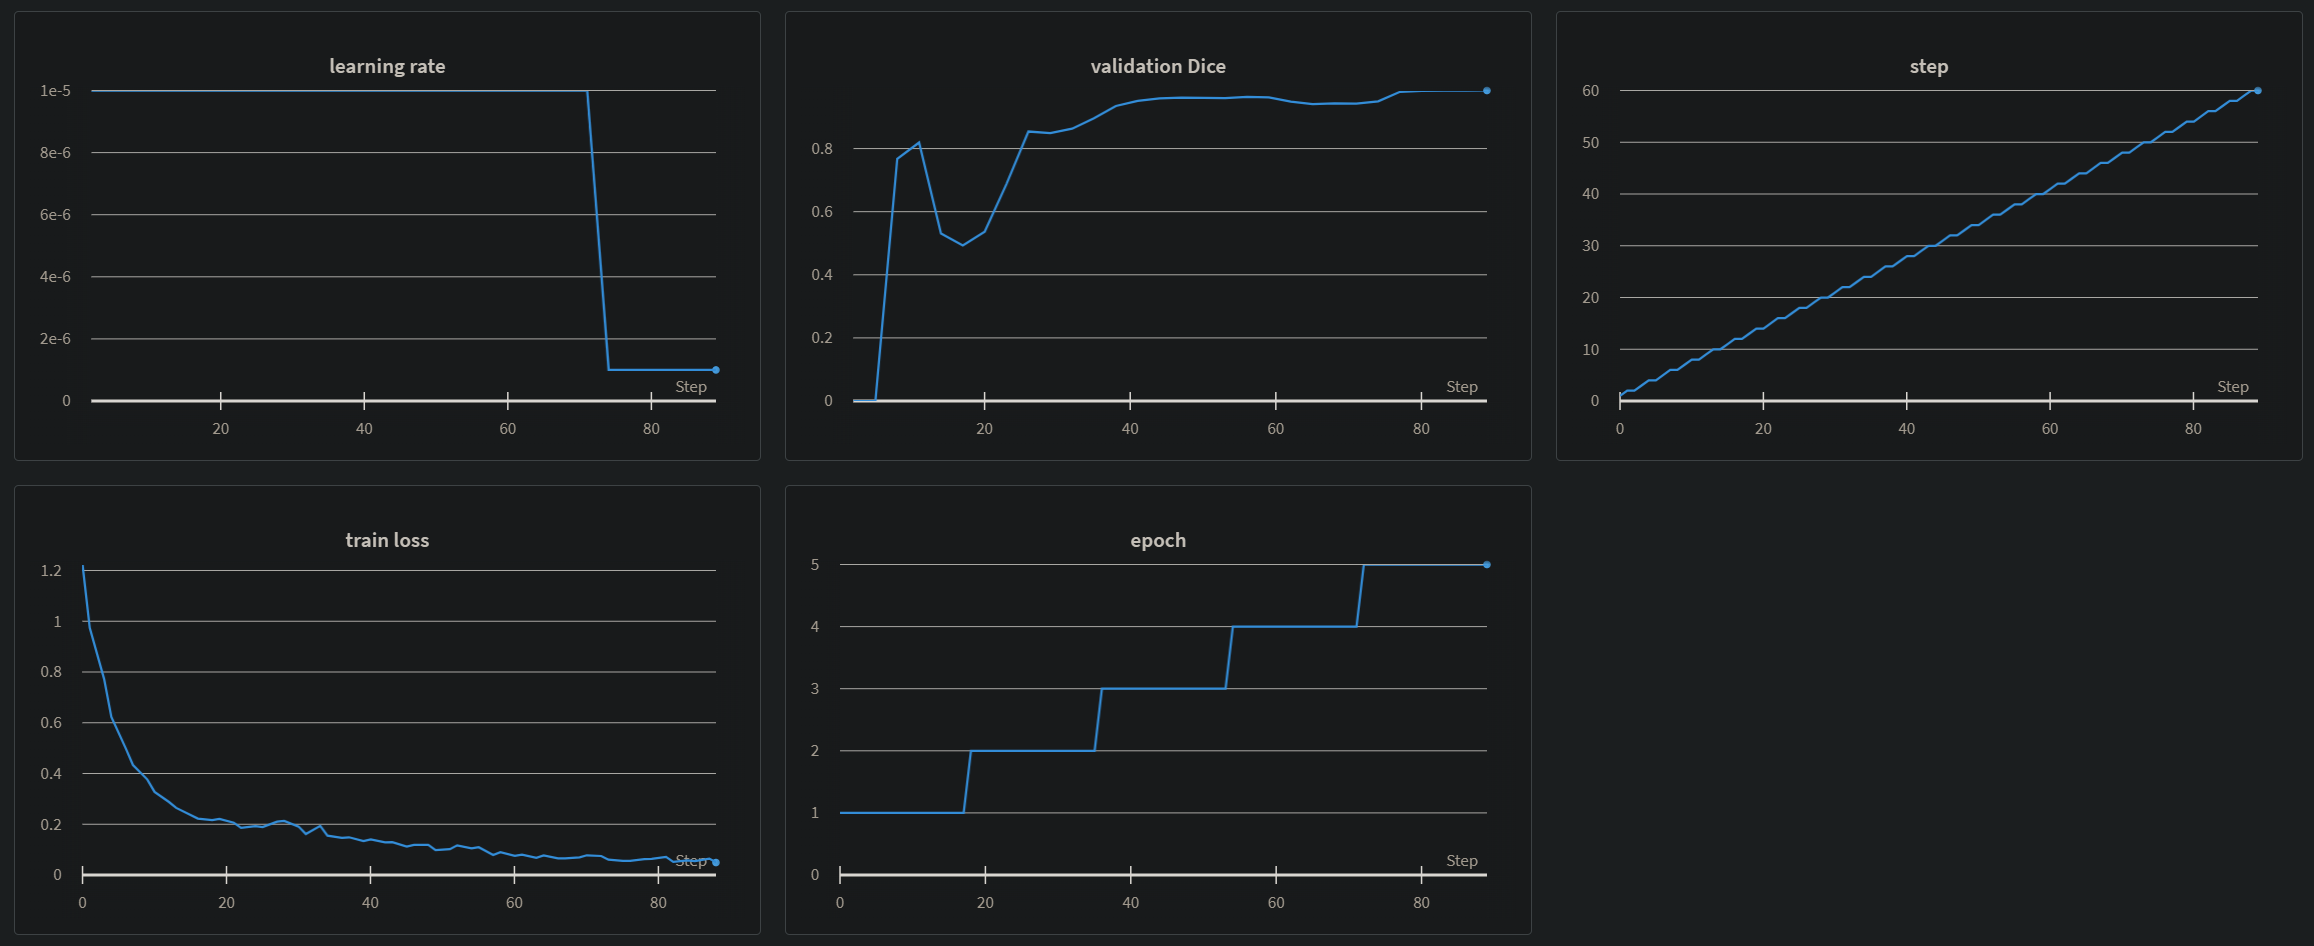
python train.pypython predict.py --model checkpoints/checkpoint_epoch5.pth --input path_to_test_img.png --output result.pngCheck the result.png
We reference the project generative_inpainting.
But it's the older version. So it need some steps to update the version if you
First off, you can install the project by gi_install.sh.
Second, becasue some issue with tf_upgrade_v2. You need to modify the code by yourself.
- change the file [ inpaint_model.py ]
from tensorflow.contrib.framework.python.ops import arg_scope
-> from tf_slim import arg_scope
- change the file [ inpaint_ops ]
from tensorflow.contrib.framework.python.ops import add_arg_scope
-> from tf_slim import arg_scope
Then install neuralgym
cd neuralgym
pip install -e .
cd ..
Download the weight from https://github.com/JiahuiYu/generative_inpainting#pretrained-models
Finally, you can test the code
python test.py --image examples/places2/case1_input.png --mask examples/places2/case1_mask.png --output examples/places2/case1_output_test.png --checkpoint_dir model_logs/release_places2_256_deepfill_v2
4.1 Imstall the gangealing
git clone https://github.com/wpeebles/gangealing.git
cd gangealing
conda env create -f environment.yml
conda activate gg
4.2 Set the environment parameters
export PYTHONPATH="${PYTHONPATH}:${PWD}"
4.3 Test the images
python prepare_data.py --input_is_lmdb --lsun_category cat --out data/lsun_cats --size 512 --max_images 10000
python applications/propagate_to_images.py --ckpt cat --real_data_path data/lsun_cats --real_size 512 --dset_indices 1922 2363 8558 7401 9750 7432 2105 53 1946
If it has a issue with "GLIBCXX_3.4.29" You can try the steps from here
4.4 The the image with facemask It prove the human face and the mask you can use them at images folder
python prepare_data.py --path folder_of_images --out data/my_new_dataset --pad [center/border/zero] --size S # build the data
python applications/propagate_to_images.py --ckpt celeba --real_data_path data/my_new_dataset --real_size 512 --dset_indices 0
Or if you feel complicate on this job, you can try this link by office.
🙌🎆🚀Just for fun for yourself! 🙌🎆🚀

