A react component helps bring Figma's Cursor Chat to your web applications in less than 3 minutes, making real-time collaboration anywhere. based on Presencejs.
- Press
/to bring up the input box - Press
ESCto close the input box
Online Preview: https://commerce-cursor-chat.vercel.app
Youtube Introduction: https://www.youtube.com/watch?v=28VwErGxn9c
by npm:
$ npm i --save @yomo/react-cursor-chatby yarn:
$ yarn add @yomo/react-cursor-chatby pnpm:
$ pnpm i @yomo/react-cursor-chatLogin with your Github account on https://presencejs.yomo.run, and you will get a free app_id and app_secret.
Then, create a file named .env.local and add the following in it:
APP_ID="abrHlqtooFakeID"
APP_SECRET="nFJqSVzQyhbVgdsBeBojoeJTooFakeSecret"
Note - Don't copy the app_id and app_secret examples mentioned above. Replace it with the one that you will see on your screen.
import CursorChat from '@yomo/react-cursor-chat';
// Import theme styles
// import '@yomo/react-cursor-chat/dist/dracula.css';
// import '@yomo/react-cursor-chat/dist/apricot-yellow.css';
import '@yomo/react-cursor-chat/dist/hairy-green.css';

const App = () => {
    return (
        <div className="main">
            <img className="logo" src={logo} alt="logo" />
            <p className="tips">
                Press <span>/</span> to bring up the input box <br /> Press{' '}
                <span>ESC</span> to close the input box
            </p>
            <CursorChat
                presenceURL="https://prsc.yomo.dev"
                presenceAuthEndpoint="/api/auth"
                avatar="https://cursor-chat-example.vercel.app/_next/image?url=%2Flogo.png&w=256&q=75"
            />
        </div>
    );
};

ReactDOM.render(<App />, document.getElementById('root'));If react-cursor-chat color matches with your website background color, your users might get confused with it.
There are built-in styles in the @yomo/react-cursor-chat component: apricot-yellow and hairy-green. You should import one of them to use in your web application.
If you want to change it to apricot yellow, just import '@yomo/react-cursor-chat/dist/apricot-yellow.css'.
You can only choose one of them. Then you can see:
Of course you can also override online-cursor-wrapper__tail-box , e.g.
/* The css file in your project */
.online-cursor-wrapper__tail-box {
    background-color: #fe6ded; /* Your preferred background color */
}
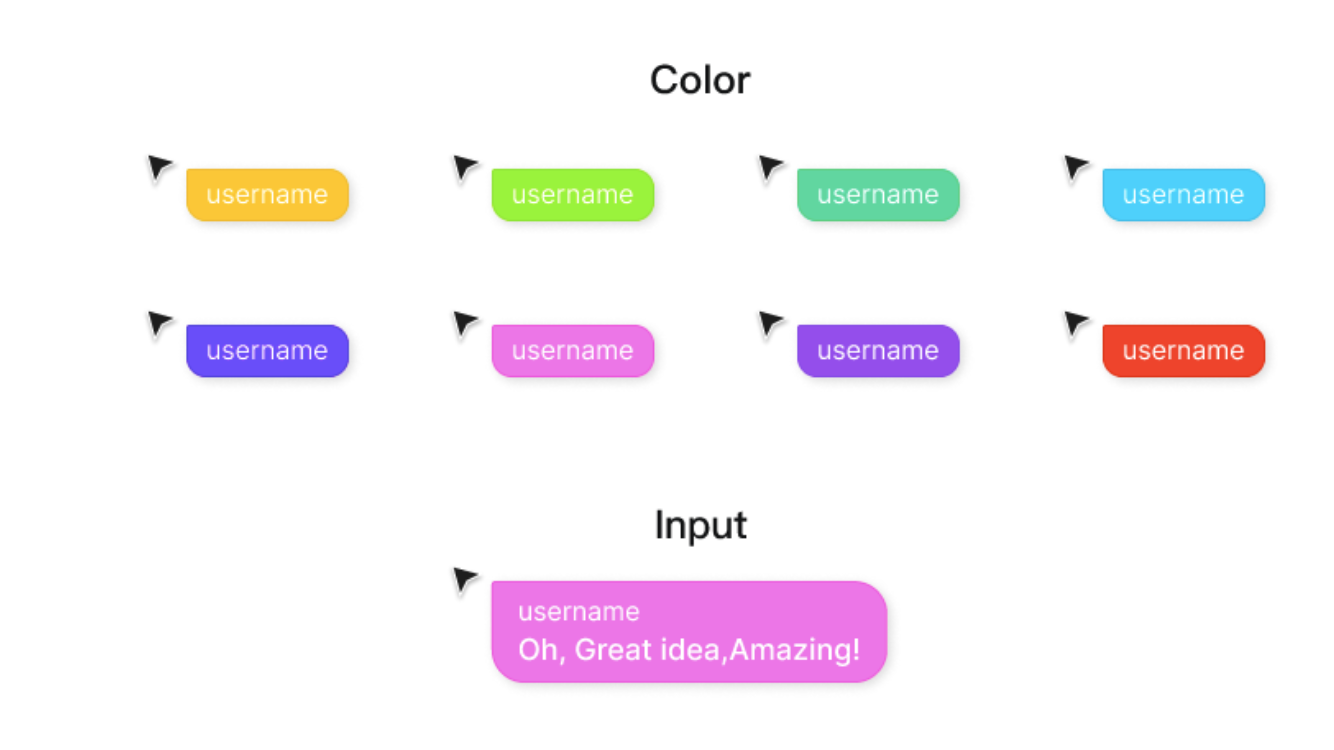
Here are the react-cursor-chat colors you could have :
export default async function handler(req, res) {
    if (req.method === 'GET') {
        try {
            const response = await fetch('https://prsc.yomo.dev/api/v1/auth', {
                method: 'POST',
                headers: {
                    'Content-Type': 'application/json',
                },
                body: JSON.stringify({
                    app_id: process.env.APP_ID,
                    app_secret: process.env.APP_SECRET,
                }),
            });
            const data = await response.json();
            const token = data.data;
            if (token) {
                res.status(200).json(token);
            } else {
                res.status(400).json({ msg: data.message });
            }
        } catch (error) {
            if (typeof error === 'string') {
                res.status(500).json({ msg: error });
            } else if (error instanceof Error) {
                res.status(500).json({ msg: error.message });
            }
        }
    } else {
        // Handle any other HTTP method
    }
}$ npm run devGet your free dev server account from https://presencejs.yomo.run, add them to Enviroment Variables section to your Vercel Console:
or click this button to try out:
import React from 'react';
import CursorChat from '@yomo/react-cursor-chat';
import '@yomo/react-cursor-chat/dist/hairy-green.css';

// `https://prsc.yomo.dev` is YoMo's free public test service
<CursorChat
    presenceURL="https://prsc.yomo.dev"
    presenceAuthEndpoint="/api/auth"
    avatar="https://avatars.githubusercontent.com/u/67308985?s=200&v=4"
/>;
presenceURL: string: to set the YoMo's service address.presenceAuthEndpoint: string: to set api for getting access tokenroom?: string: to set room.showLatency?: boolean: to show connected mesh server and the end-to-end latency.avatar?: string: to set avatar.name?: string: to set name.
import React, { useMemo } from 'react';
import { useOnlineCursor, useRenderPosition } from '@yomo/react-cursor-chat';
import CursorIcon from './CursorIcon';
import './your-style.css';

// You can customise the content of your own mouse block
const MeCursor = ({ cursor }) => {
    const refContainer = useRenderPosition(cursor);

    return useMemo(
        () => (
            <div className="cursor" ref={refContainer}>
                <CursorIcon color={cursor.color} />
                {cursor.name && <div>{cursor.name}</div>}
                {cursor.avatar && (
                    <img className="avatar" src={cursor.avatar} alt="avatar" />
                )}
            </div>
        ),
        []
    );
};

// You can customise what other people's mouse blocks can display
const OthersCursor = ({ cursor }) => {
    const refContainer = useRenderPosition(cursor);
    return (
        <div ref={refContainer} className="cursor">
            <CursorIcon color={cursor.color} />
            {cursor.name && <div>{cursor.name}</div>}
            {cursor.avatar && (
                <img className="avatar" src={cursor.avatar} alt="avatar" />
            )}
        </div>
    );
};

// Exporting your custom components
const YourComponent = ({
    presenceURL,
    presenceAuthEndpoint,
    room,
    name,
    avatar,
}) => {
    const { me, others } = useOnlineCursor({
        presenceURL,
        presenceAuthEndpoint,
        room,
        name,
        avatar,
    });

    if (!me) {
        return null;
    }

    return (
        <div className="container">
            {others.map(item => (
                <OthersCursor key={item.id} cursor={item} />
            ))}
            <MeCursor cursor={me} />
        </div>
    );
};


