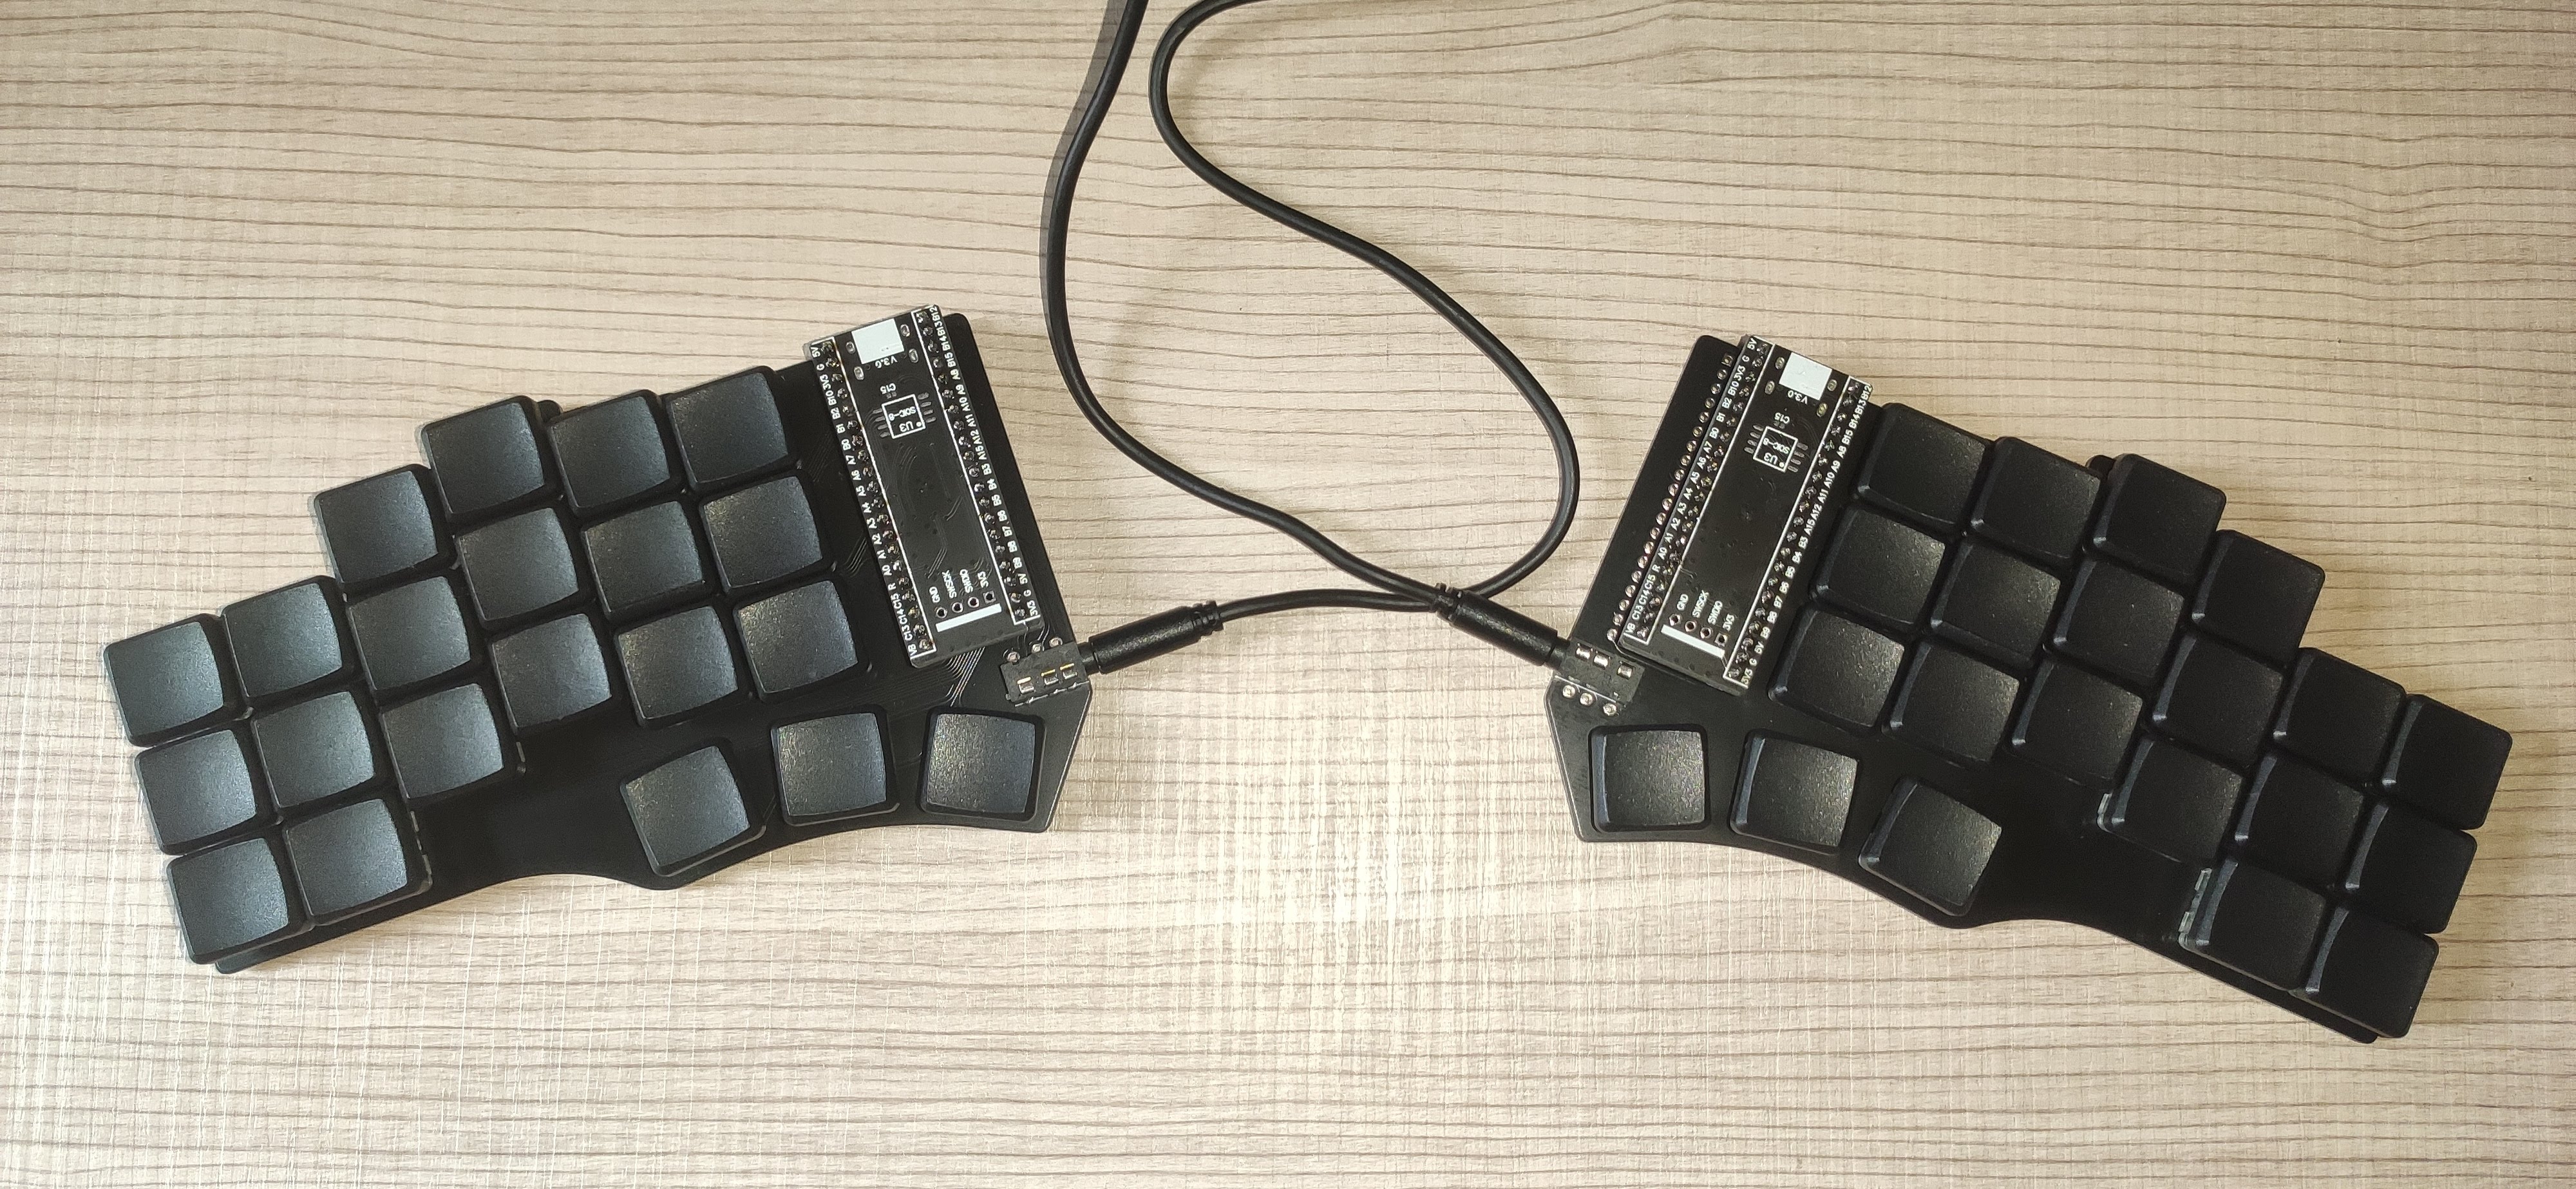
The Cantor keyboard is a 42 key diodeless split keyboard, designed with simplicity in mind. It is inspired on the popular corne, ferris and sweep keyboards, aiming to provide a more ergonomic (stronger column stagger) corne-like layout with a simple, easy to assemble and cheap design.
The keyboard uses choc switches with choc spacing. Therefore, only MBK keycaps can be used.
A diodeless design reduces the keyboard assembly time, as the amount of components to solder is significantly reduced. Moreover, soldering diodes can cause trouble during the keyboard build. Diodes need to be placed in the correct direction, if not, the keys won't work well! Eliminating diodes will prevent many errors during the assembly process.
All the designs and files are provided "AS IS" without any warranty or support.
The Cantor is designed with the following goals:
- Comfort
- Powerful
- Low cost
- Simplicity
- Ease of build
- USB-C
- No diodes
The PCB is reversible to reduce manufacturing costs.
Would you like to build this keyboard? Then continue reading!
You can also buy a kits to build the Cantor keyboard from one of the honorable sponsors:
To build the keyboard, you will need the following materials:
- 2x PCB boards (both are equal since they are reversible)
- 2x STM32F401CC blackpill microcontrollers (they are cheap on aliexpress)
- Pins and sockets for the microcontrollers (blackpill needs 20 pin stripes)
- 42 Choc v1 switches
- 42 MBK keycaps
- Some little rubber feet/bumpers (recommended 6 mm of diameter)
- 2x TRRS jacks (PJ-320A)
- 1x TRRS cable
- 1x USB cable compatible with your computer and the blackpill
Download the gerber file from realeses, and submit it to your favorite PCB manufacturer. The keyboard designs have been tested with JLCPCB.
Note: if you don't want a random tracking number to be printed in the PCB, make sure to select the option 'Remove Order Number' in JLCPCB.
To build the keyboard, you'll also need a soldering iron and some tin. Follow the build guide.
The Cantor keyboard uses the QMK firmware. Firmware for this keyboard is coming soon to the main QMK repository with this PR.
To flash the firmware to the microcontroller connect the blackpill to your computer and set it to bootloader mode. To do this the first time:
- Press and hold the BOOT0 button.
- Press and release the NRST button.
- Release the BOOT0 button.
The following times you want to flash the keyboard, it is much simpler thanks to bootmagic. Hold the top left key of the keyboard and plug the microcontroller. If flashing the right part, hold the top right key.
If you have build this keyboard, please fill this form to provide feedback. This will help to improve the keyboard design in future revisions.
Also, you can open an issue reporting any problem or feature request.
The development of a keyboard takes time and money. If you like this keyboard a want to support me for the work and to develop future revisions of the keyboard, consider donating:
PayPal: 
Thank you very much to everyone contributing and/or sonponsoring this project. Special thanks to the honorable sponsors:

