- 修复issue.line()空指针bug
Caused by: java.lang.NullPointerException at io.nthienan.phdiff.report.RemarkupUtils.issue(RemarkupUtils.java:112) at io.nthienan.phdiff.report.RemarkupGlobalReportBuilder.add(RemarkupGlobalReportBuilder.java:38) at io.nthienan.phdiff.PhabricatorDifferentialPostJob$execute$3.accept(PhabricatorDifferentialPostJob.kt:58) at io.nthienan.phdiff.PhabricatorDifferentialPostJob$execute$3.accept(PhabricatorDifferentialPostJob.kt:20) at io.nthienan.phdiff.PhabricatorDifferentialPostJob.execute(PhabricatorDifferentialPostJob.kt:56)
- 原来插件是添加新issue到comment中,但是有如下问题
- 显示的issue汇总会包含非当前提交的文件
- 当前提交的文件之前产生的issue不会显示出来
现在修改为当前diff中文件的issue,汇总只是针对这些issue,而且之前产生的issue也会在其中
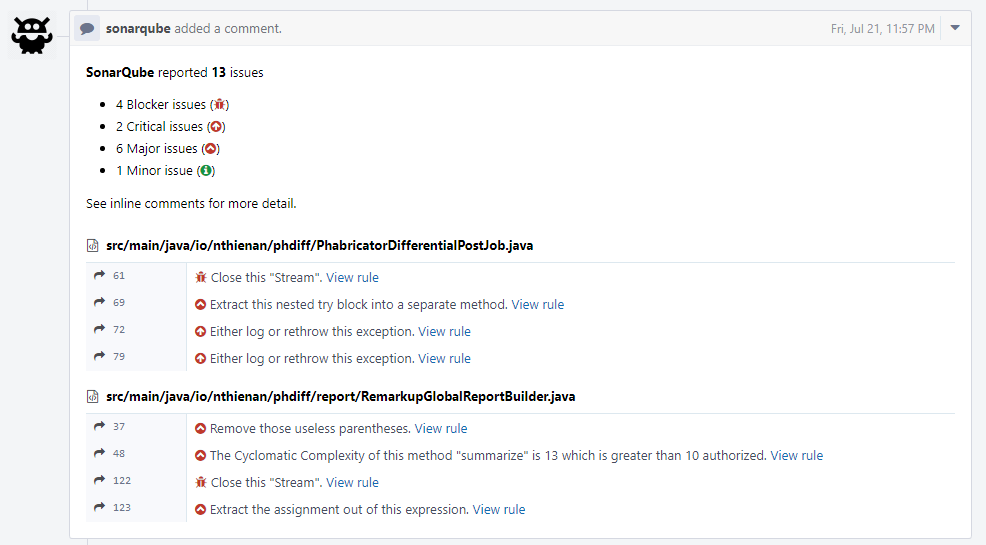
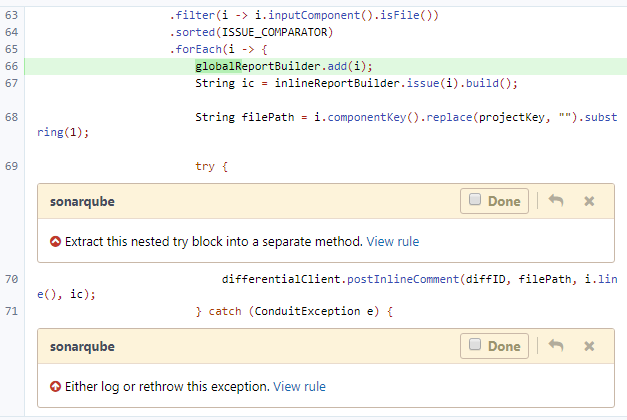
The Phabricator Differential plugin provides integration with Phabricator. It allows SonarQube to analytic and report issues on differential revision without pushing results to SonarQube. Any issues that are found are published as comments on the revision. The plugin performs the following operations:
phdiff is not published to Update Center yet, so follow these steps to install:
- Clone this repo
- Run:
mvn clean package - Copy
target/phdiff-<version>.jarto$SONAR_HOME/extensions/plugins - Restart SonarQube
-
Requirements
- SonarQube Server must be up and running.
- Minimal SonarQube Version: 5.6
- The Phabricator Differential plugin is installed on SonarQube Server.
- A Jenkins server is installed
-
Create SonarQube bot
- Navigate to
https://phabricator.example/peoplewith your base Phabricator URL in place ofphabricator.example. - Click the Create New User button in the top right corner of the page
- Choose Create Bot User for the Account Type option and click Continue button
- Enter Username field by
sonarqube, Real Name field bySonarQube, Email Address field bysonarqube-bot@noreply.example.com
 5. Click Create User button
6. Go to SonarQube bot user profile and click Manage at the left of page, then click Edit Settings link at the right of page
7. Click Conduit API Tokens, then click Generate API Token button in the top right corner of the page, click Generate Token
8. Copy token and store somewhere to use for later steps
- SonarQube
- Navigate to
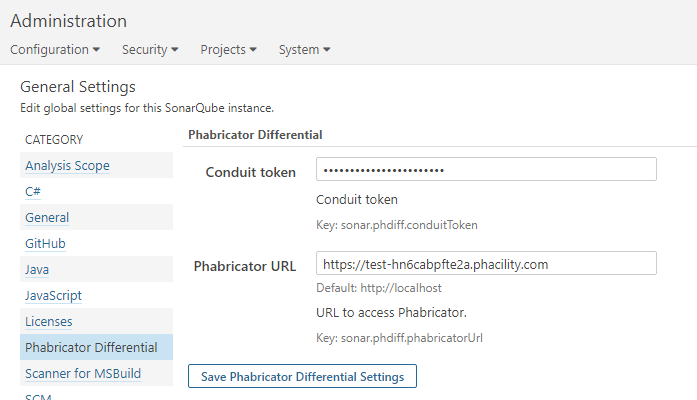
https://sonarqube.example/settings?category=phabricator+differentialwith your base Phabricator URL in place ofsonarqube.example - Enter
tokenthat was generated from create sonarqube bot steps above into Conduit token filed - Enter Phabricator URL into Phabricator URL field
- Click Save Phabricator Differential Settings button
- Navigate to the Post-build Actions section.
- Click the Add post-build action button and select Post to Phabricator.
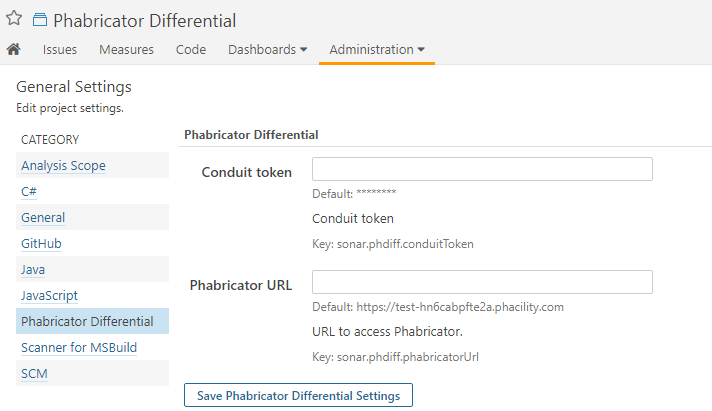
Note: These setting can override for each project at Project Administration Settings page.
- Jenkins job
- Navigate to the Jenkins job you want to integrate with Phabricator.
- Click the Configure button.
- Click the Add Parameter button and select String Parameter.
- Enter
DIFF_IDin the Name field of the parameter. - Navigate to the Build section.
- Click the Add build step button and select Maven or Gradle.
- Enter these options:
-Dsonar.analysis.mode=preview -Dsonar.phdiff.diffId=${DIFF_ID}
Note: You can combined this jenkins job with Phabricator Jenkins plugin job to do two things in one job
- Harbormaster
- With Phabricator, Jenkins, and your Jenkins jobs configured it's time to configure a new Harbormaster build plan. This build plan will trigger the Jenkins job using a Herald rule that will be configured in the next section.
- Navigate to
https://phabricator.example/harbormaster/plan/with your base Phabricator URL in place ofphabricator.example. - Click the Create Build Plan button in the top right corner of the page.
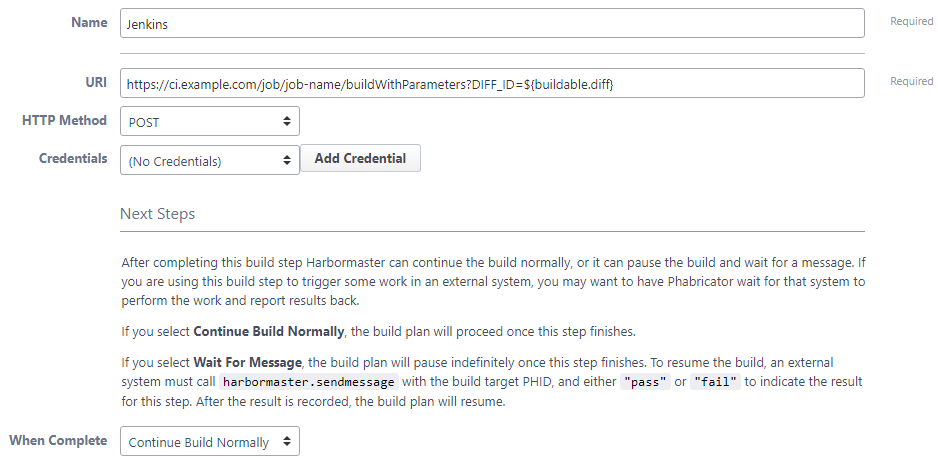
- Enter a name for the build plan in the Name field. For these instructions, we'll use "test-example" as the build name.
- Click the Create Build Plan button.
- Click the Add Build Step button.
- Click the Make HTTP Request step.
- Use this template URI to fill in the URI field for the build plan:
https://ci.example.com/job/job-name/buildWithParameters?DIFF_ID=${buildable.diff}. Be sure to replacehttps://ci.example.comwith the URI of your Jenkins instance andtest-examplewith the name of your Jenkins job. If your Jenkins instance is exposed to the internet, make sure to install the Build Token Root Plugin and fill in thetokenparameter. - Click the When Complete dropdown menu and select Continue Build Normally.
- Click the Create Build Step button.
- Herald
- With the build plans created it's time to create a Herald Rule to trigger the plans. The steps below will configure a Herald Rule to trigger the build plans on Differential Revisions to your repository.
- Navigate to
https://phabricator.example/herald/with your base Phabricator URL in place ofphabricator.example. - Click the Create Herald Rule button in the top right corner of the page.
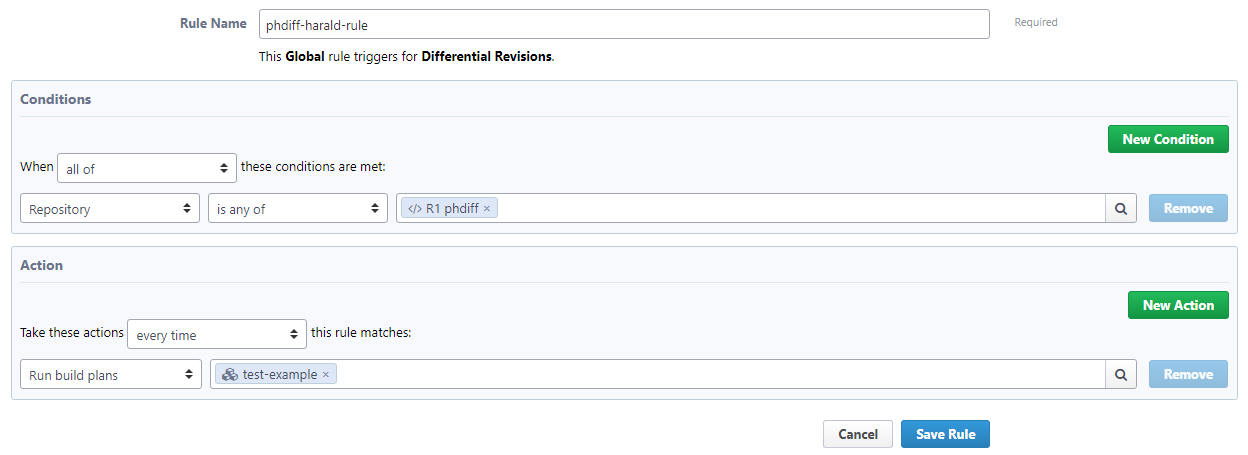
- Select the Differential Revisions checkbox and click Continue.
- Select the Global checkbox and click Continue.
- Enter a name for the Herald Rule in the Rule Name field.
- In the Conditions section, click the dropdown menu that says "Author" and select "Repository".
- Enter your repository name in to the blank field in the Conditions section.
- In the Actions section, click the dropdown menu that says "Add blocking reviewers" and select "Run build plans".
- Enter the build plans that were created in the previous section in to the blank field in the Action section.
- Click Save Rule.
- Gradle:
gradle sonarqube -Dsonar.analysis.mode=preview -Dsonar.phdiff.diffId=<your-diff-id> - Maven:
mvn sonar:sonar -Dsonar.analysis.mode=preview -Dsonar.phdiff.diffId=<your-diff-id>
Please open all pull requests and issues against https://github.com/thienan93/phdiff
Fixing SonarQube issues of this plugin at sonarcloud.io

