Unity Infinite Isometric Terrain Generator
Test in your browser: https://zulfajuniadi.github.io/isometric-land-generator/
Minimum required version is Unity 2018.3. Will not work on older versions.
Features:
- Generates infinite terrain
- Uses the new Unity isometric tilemap
- Tool included to create your own terrain set
- Near-zero allocation (after all active tilemaps has been generated)
- Uses
Graphics.DrawMeshInstancedIndirectto drawa crap tonlots of trees at once - Recycles inactive chunks
- Simple randomized spawners (for trees, shrubs, etc)
- Fast terrain generation (< 16 ms per chunk)
- Rendering the whole map with trees inside the editor takes 3ms with vSync off. Should be less than that on a built player.
- Unsorted (fast) and Sorted (3x slower) tree rendering
- WebGL Support
Quick Start:
Open up the Example scene inside the Example folder and press play
Settings:
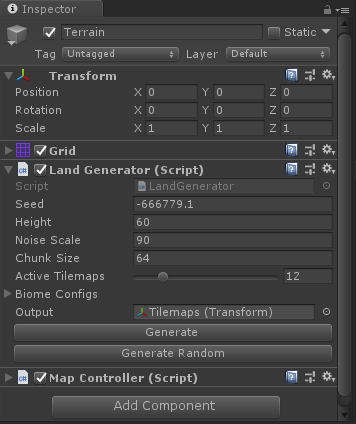
- Seed: The generator seed
- Height: The maximum height of the terrain
- Noise Scale: Flatness of the terrain
- Active Tilemaps: How many chunks are active at once
- Biome configs: The configuration of the biome
- Terrain Curve: The curve to be used when interpolating the results of the perlin noise sample
- Rendering mode: Unsorted (fast) and Sorted (3x slower) spawner items rendering, WebGL only supports Sorted Rendering
- Auto Generate: Detect changes inside the editor and auto generates tiles
Biome Configs:
- Tile config: The tile configuration
- Height: 0-1
floatvalue of the height of this biome - Spawners - Spawner: The Spawner config
- Spawners - Probability: The probability of the spawner being spawned
Tile Config:
A list of TileBase being used to generate the terrain. The config is read clock wise from the top corner. For example 1110, would be:
- 1 tile up on the top corner
- 1 tile up on the right corner
- 1 tile up on the bottom corner
- 0 tile up on the left corner
Which you would set to this:
It can be counter intuitive at times but it makes sense once you see it generated.
As the field type is TileBase you can extend the Tilemap.Tilebase class to create your own tiles. I've downloaded the AnimatedTile class from Unity's 2D Extras repository.
Spawner Config:
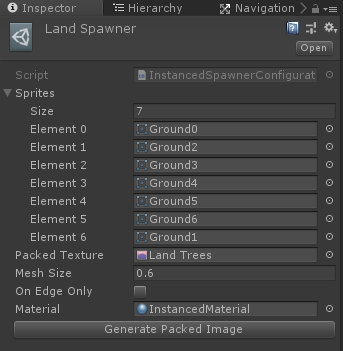
The instanced renderer takes a list of 2D sprites that are packed into a 3D texture.
- Sprites: The sprites you want to pack
- Packed Texture: The result 3D texture
- Mesh Size: The size of the generated Mesh on the map
- On Flat: If this is true, then the sprite will be spawned on flat terrain.
- On Slopes: If this is true, then the sprite will be spawned on slopes (like the bamboo around the lake).
- Enabled: If this is unchecked, it will not be rendered
- Click on
Generate Packed Imagebutton if you add / remove / update the sprites list. That will generate a new 3D texture and assign it to thePacked Texturefield.
Tile Generator Tool
Requires Blender
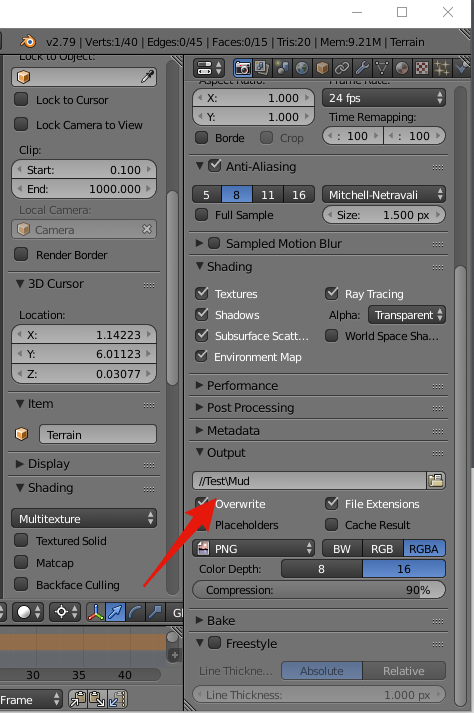
The tile genertor tool is a Blender file that takes a texture and exports terrain sprites to be used inside this terrain generator. It is located at Assets/Example/Terrain/Tile Generator Tool.blend.
- Create a
.pngimage namedtexture.pngin the same directory of the blend file - Double click the
Tile Generator Tool.blendto open up the blender file - Change the
Outputdirectory and file name
- Click on the
Animation
- New textures will be generated according to the output directory that you set
It is important to create the texture first before running the tool
Texture Import Settings
Once you've created the tiles, you'll have to import them as sprites with these settings:
- Texture Type: Sprite
- Sprite mode: Single
- Pixels Per Unit: 63
Some tiles will need a custom pivot to look right on the map. Refer to the import settings on the examples tiles I've already created.
Future improvements
Pull requests are welcomed :)
- Tile map tools such as grid management and pathfinding so that this can actually be used in a game.
- Terraforming
- Prefab spawning
- Animals


