WiFi enabled LED light controller for UCS Millennium Falcon LEGO set. This using an Arduino (Pro Micro) board and ESP-01 (ESP8266) WiFi module.
NOTE! There is now a new improved version of this project: BrickPico
This contoller is able to control 4 separate light segments and adjust brighness (using PWM modulation). Additionally controller has automatic "sleep timer" so that lights will turn off after a set interval (default 8 hours).
This module was created to control lights from the light kit for UCS Millennium Falcon #75192 from LightMyBricks.
This light kit was slightly "modified" by splitting it into 4 sections (main lights, engine lights, interior lights, and weapon lights).
- 1 x (Arduino) Pro Micro 3.3V/8Mhz module
- 1 x ESP-01 (ESP8266) WiFi module
- 1 x 3.3V Voltage buck regulator module
- 1 x Adafruit Perma-Proto board (half-size)
- 5 x 1K resistor
- 2 x 10K resistor
- 5 x 1N4007 diode (or similar)
- 1 x 2200uF/16V capasitor (or larger capacity)
- 4 x TIP120 darlington transistors (TIP121 or TIP122 work as well) or IRLB8721 N-channel MOSFETs
- some 0.1" / 2.54mm female header to make 2x4 socket for the ESP-01
- some Mini/Micro JST (2-pin) connector pigtails
Schematic is available as a PDF. PCB layout is left as an exersice for the reader :)
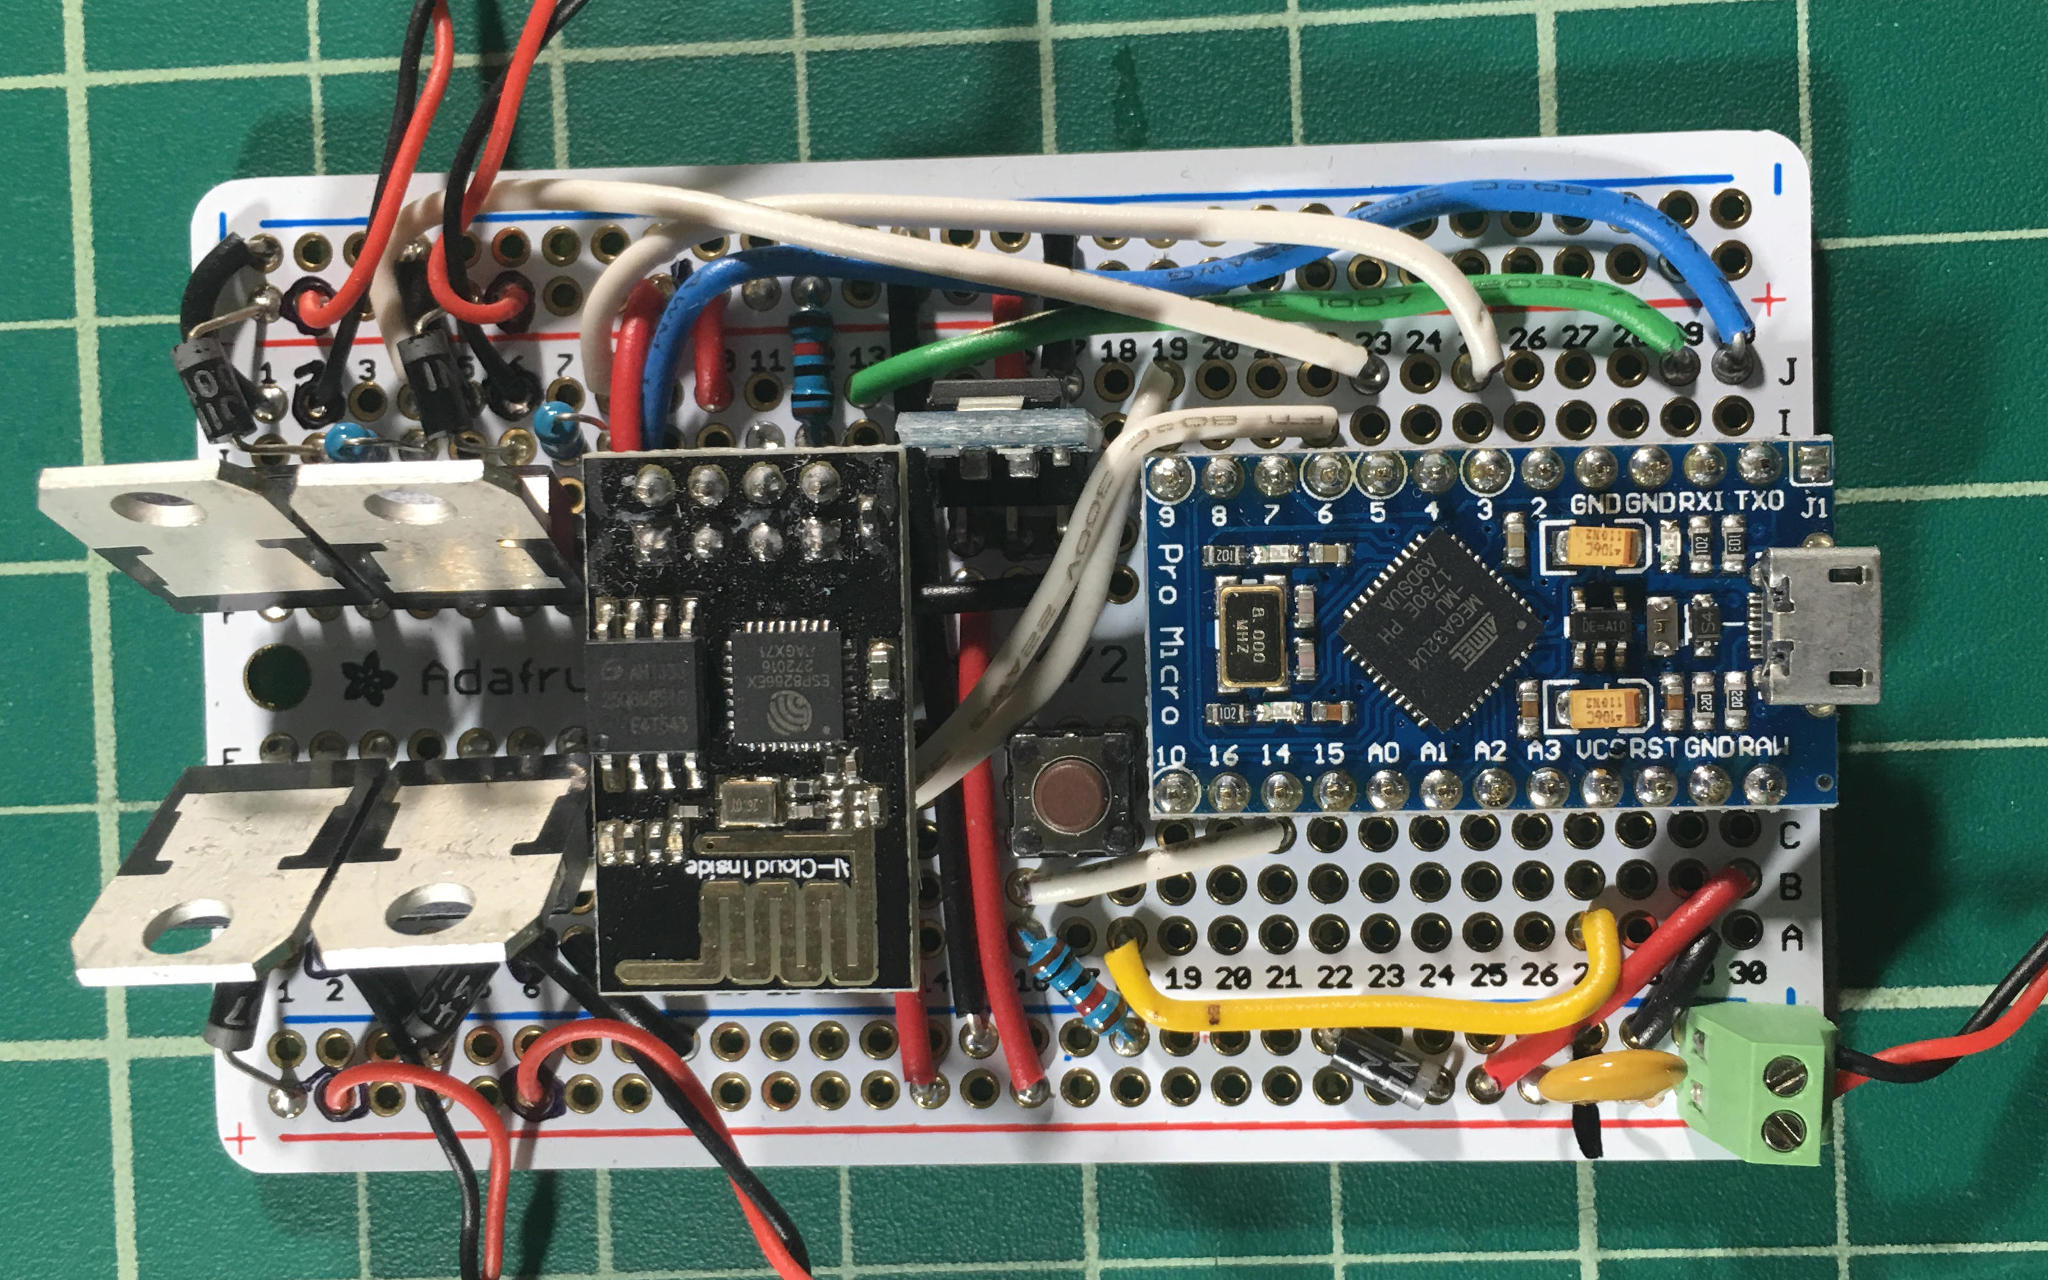
Following images show one implementation on a half-size "Perma-Proto" board from Adafruit:
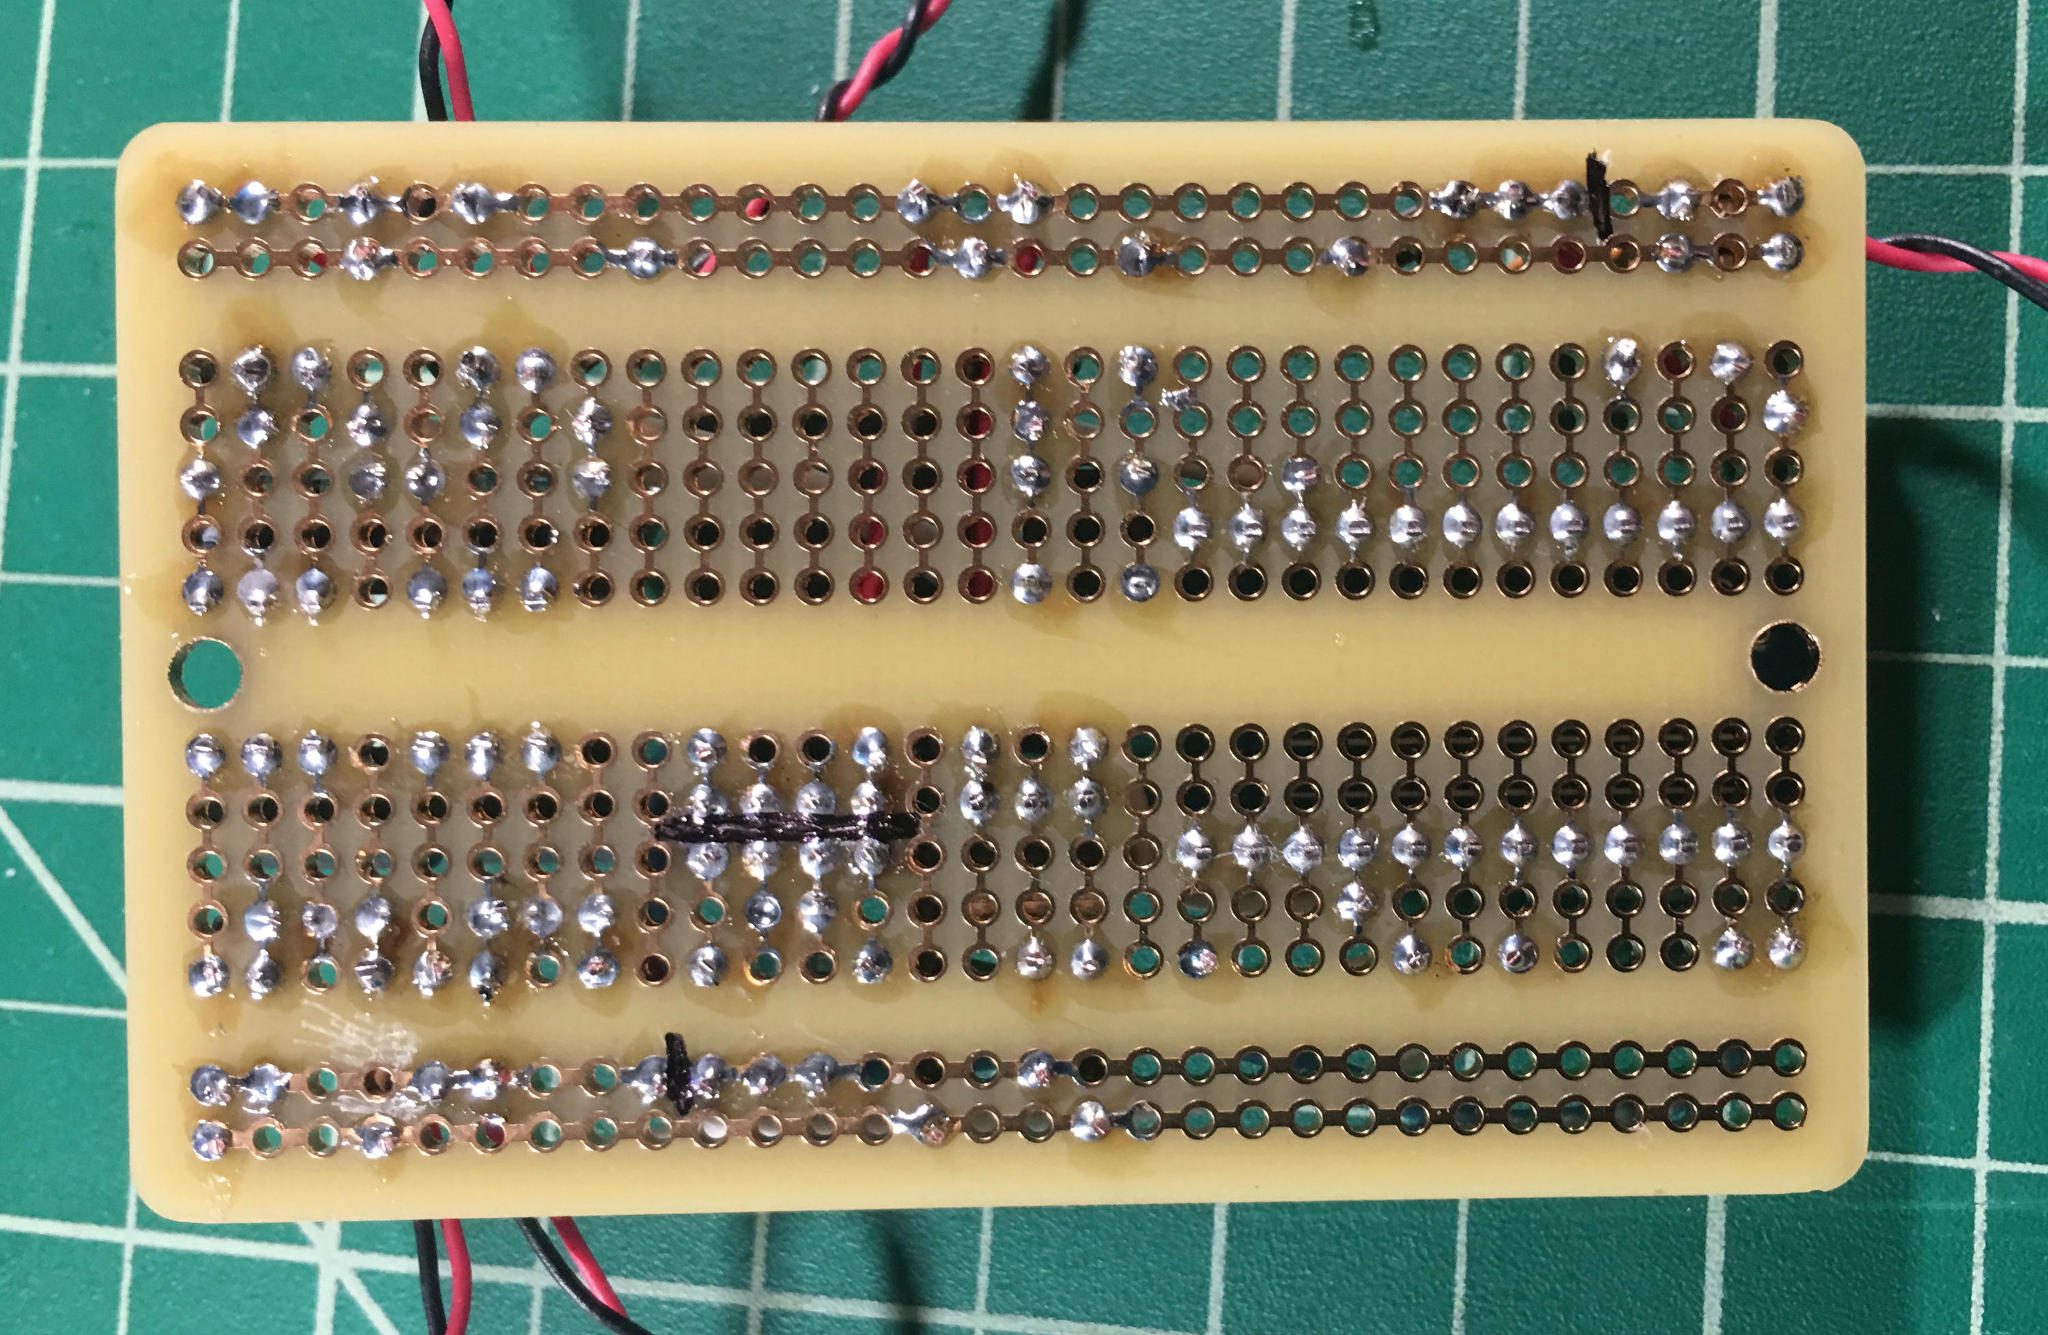
Black marker shows three cuts that were needed on the traces on the back side of the board:
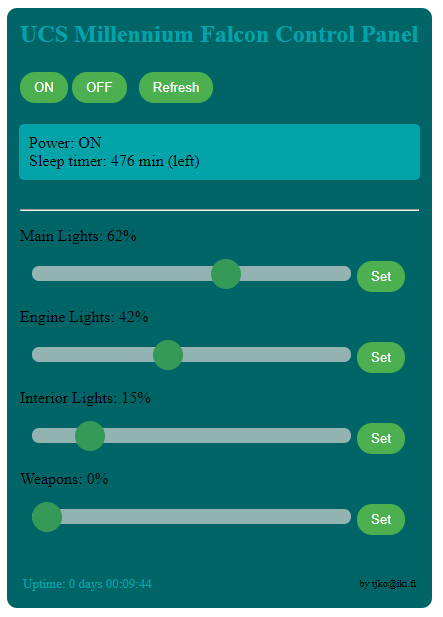
Controller has basic Web UI availble using
http://x.x.x.x/
Additionally device can be easily controlled from scripts/programs using following URLs:
| URL | Function |
|---|---|
| http://x.x.x.x/on | Turn lights ON |
| http://x.x.x.x/off | Turn lights OFF |
| http://x.x.x.x/status | Return current device status in CSV format |
| http://x.x.x.x/save | Save currently set light levels as (power on) defaults |
Device status is returned in following format (when using http://x.x.x.x/status):
UCS Millennium Falcon,powerstatus,sleeptimer,main_level,engine_level,interior_level,weapons_level,main_default,engine_default,inerior_default,weapons_default
Before connecting ESP-01 module, it needs some defaults configured (like WiFi SSD/password). This is usually esiest with one of the cheap USB adapters that power the module and provide USB serial port connection.
Connect to ESP-01 module using a terminal emulator (Arduino IDE Serial Monitor works well, just remember to choose "Both NL & CR" option).
Configure defaults as follows:
AT+CWMODE_DEF=1
AT+CWDHCP_DEF=3
AT+CWAUTOCONN=1
AT+WPS=0
AT+CWJAP_DEF="SSID,PASSWORD"
AT+UART_DEF=57600,8,1,0,0
Note! after the last command, you may loose connection to the ESP-01 until you change your terminal emulator to speed to 57600.
ESP-01 module needs to have "AT firmware" image for this to work. This is known to work with SDK v2.2.1, and should work on any later version as well.
To check which version is currently loaded, following command cand be used:
AT+GMR
AT version:1.6.0.0(Feb  3 2018 12:00:06)
SDK version:2.2.1(f42c330)
compile time:Feb 12 2018 16:31:26
Bin version(Wroom 02):1.6.1
OK


