This Java Web Application is not a Microservices but standard Java Web Application which is wrote by using Java EE 8 technologies.
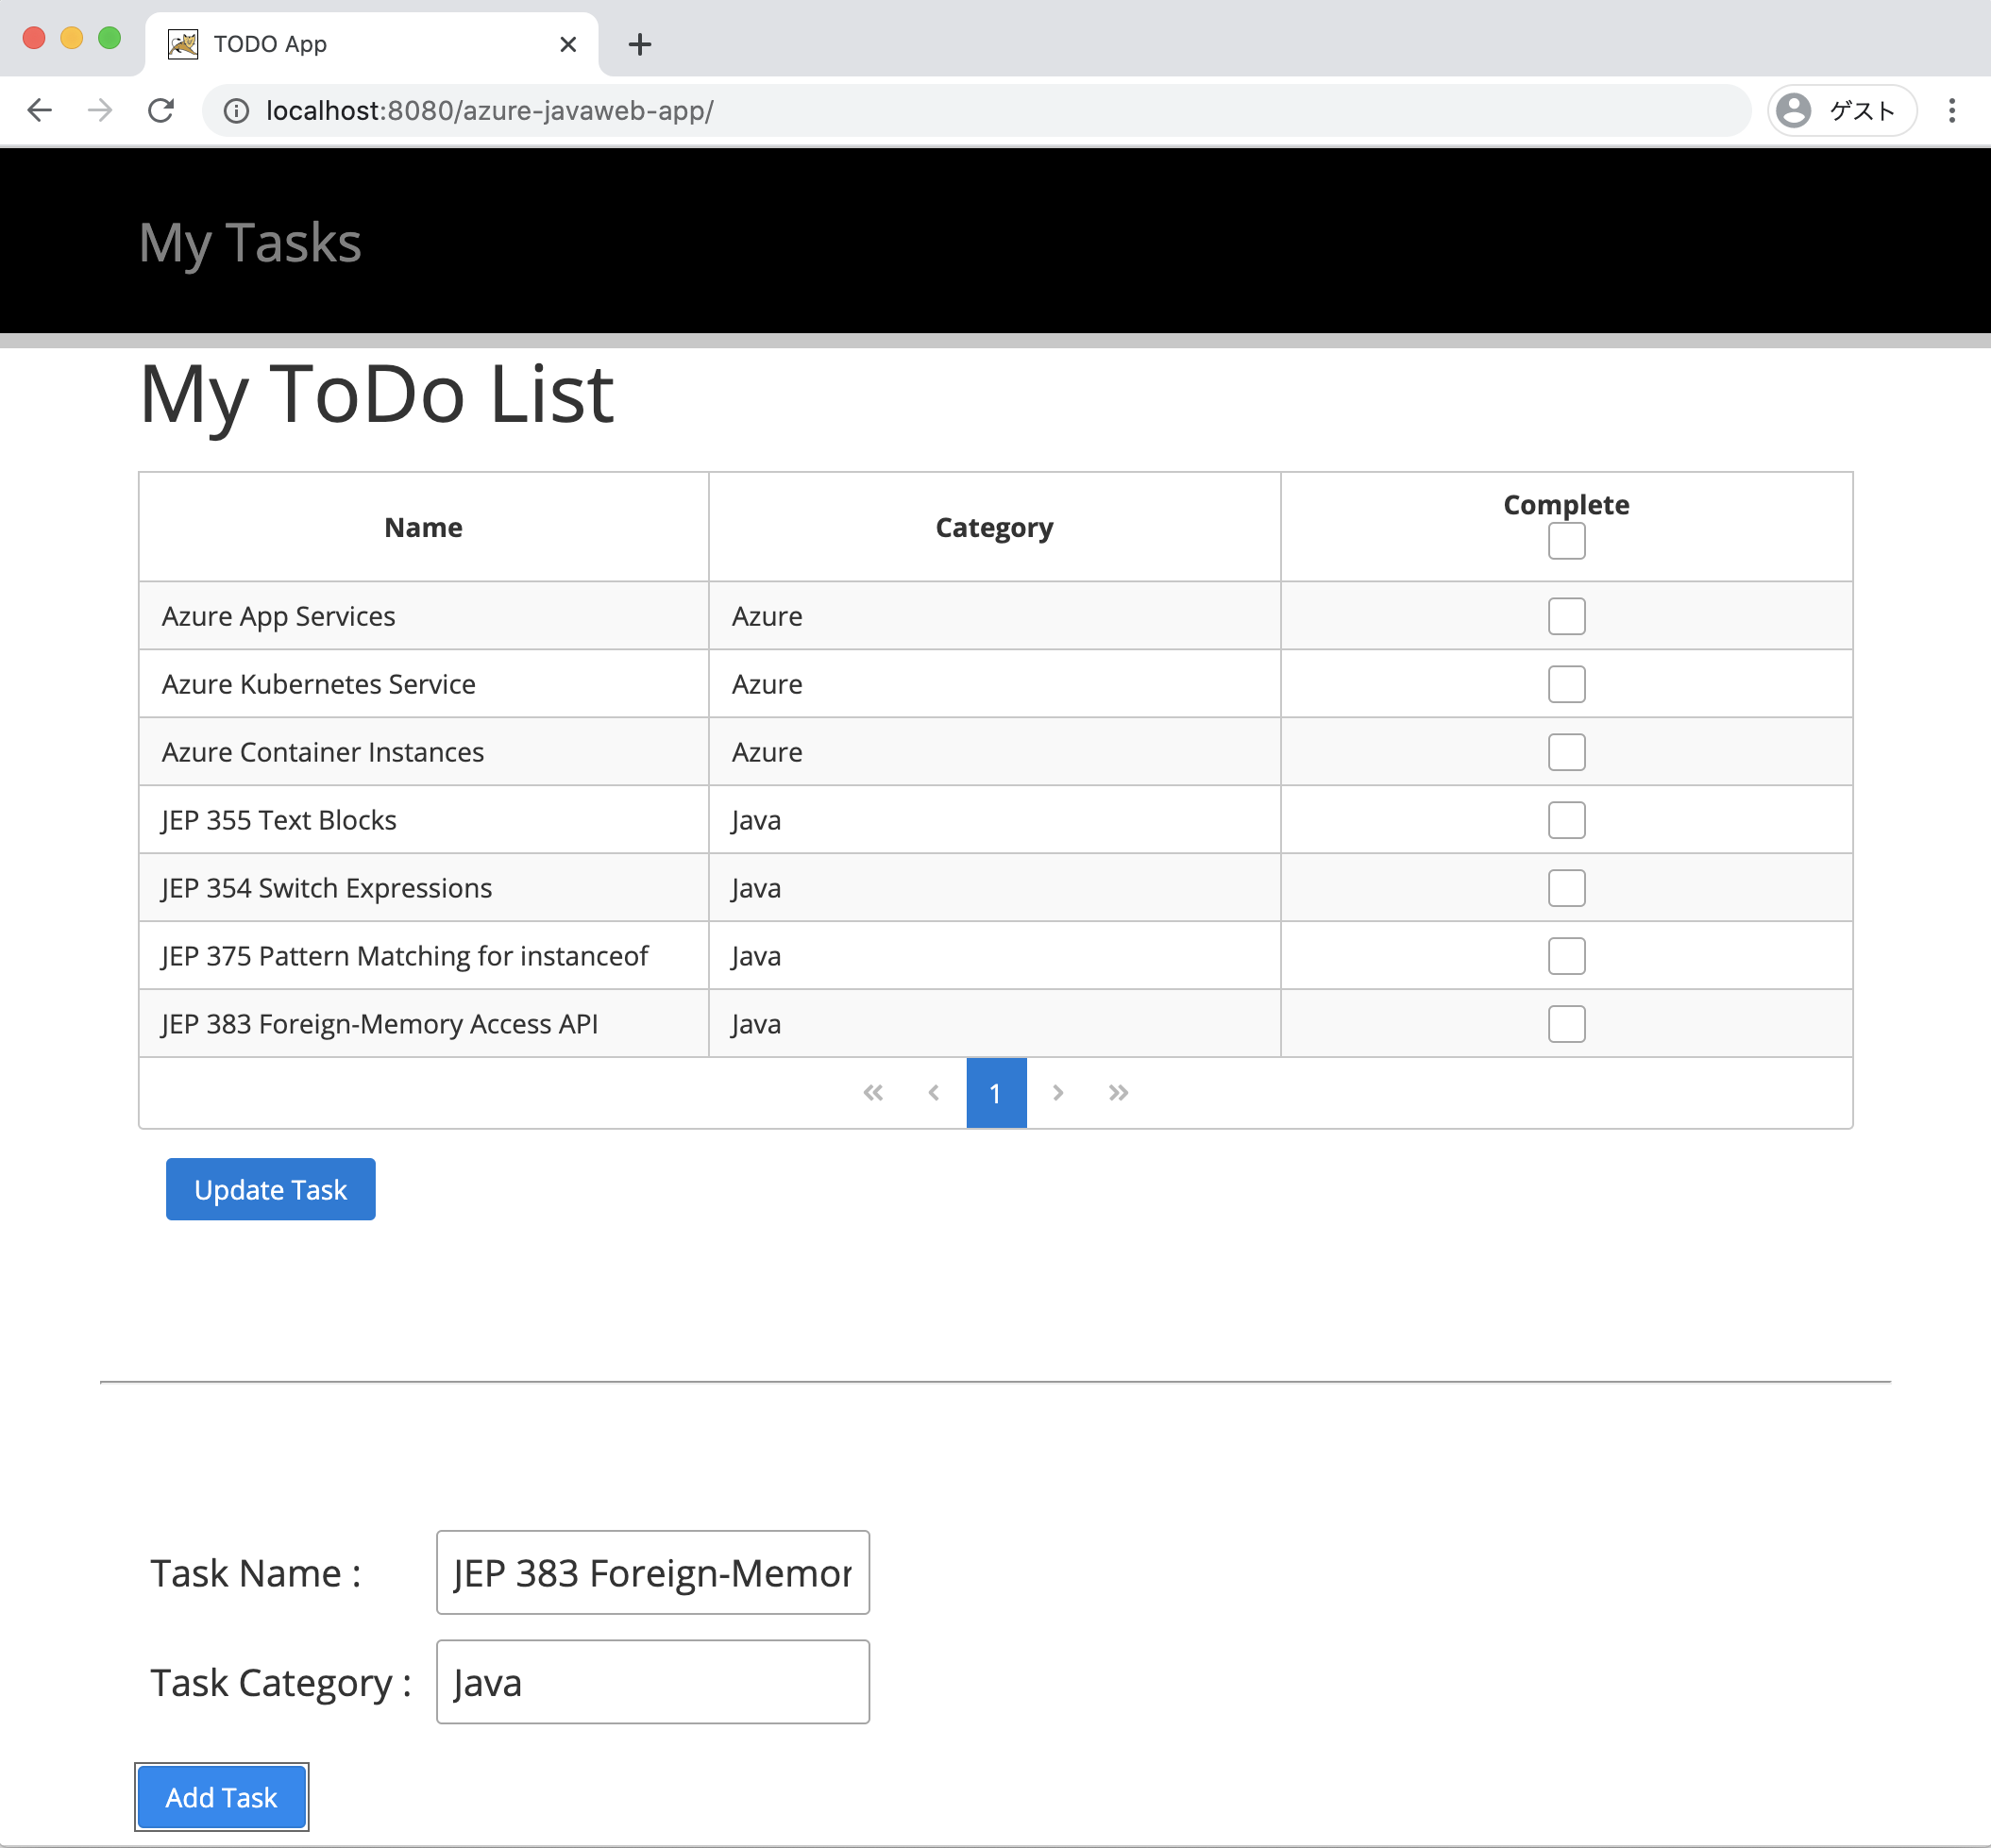
In this module, we'll create a Todo application and learn about its PrimeFaces components. The Todo application can add new tasks, see the lists of all tasks, and mark the task as finished.
In this exercise, you'll build this web application.
Let's look at the PrimeFaces components that we 'll use to create your Todo application.
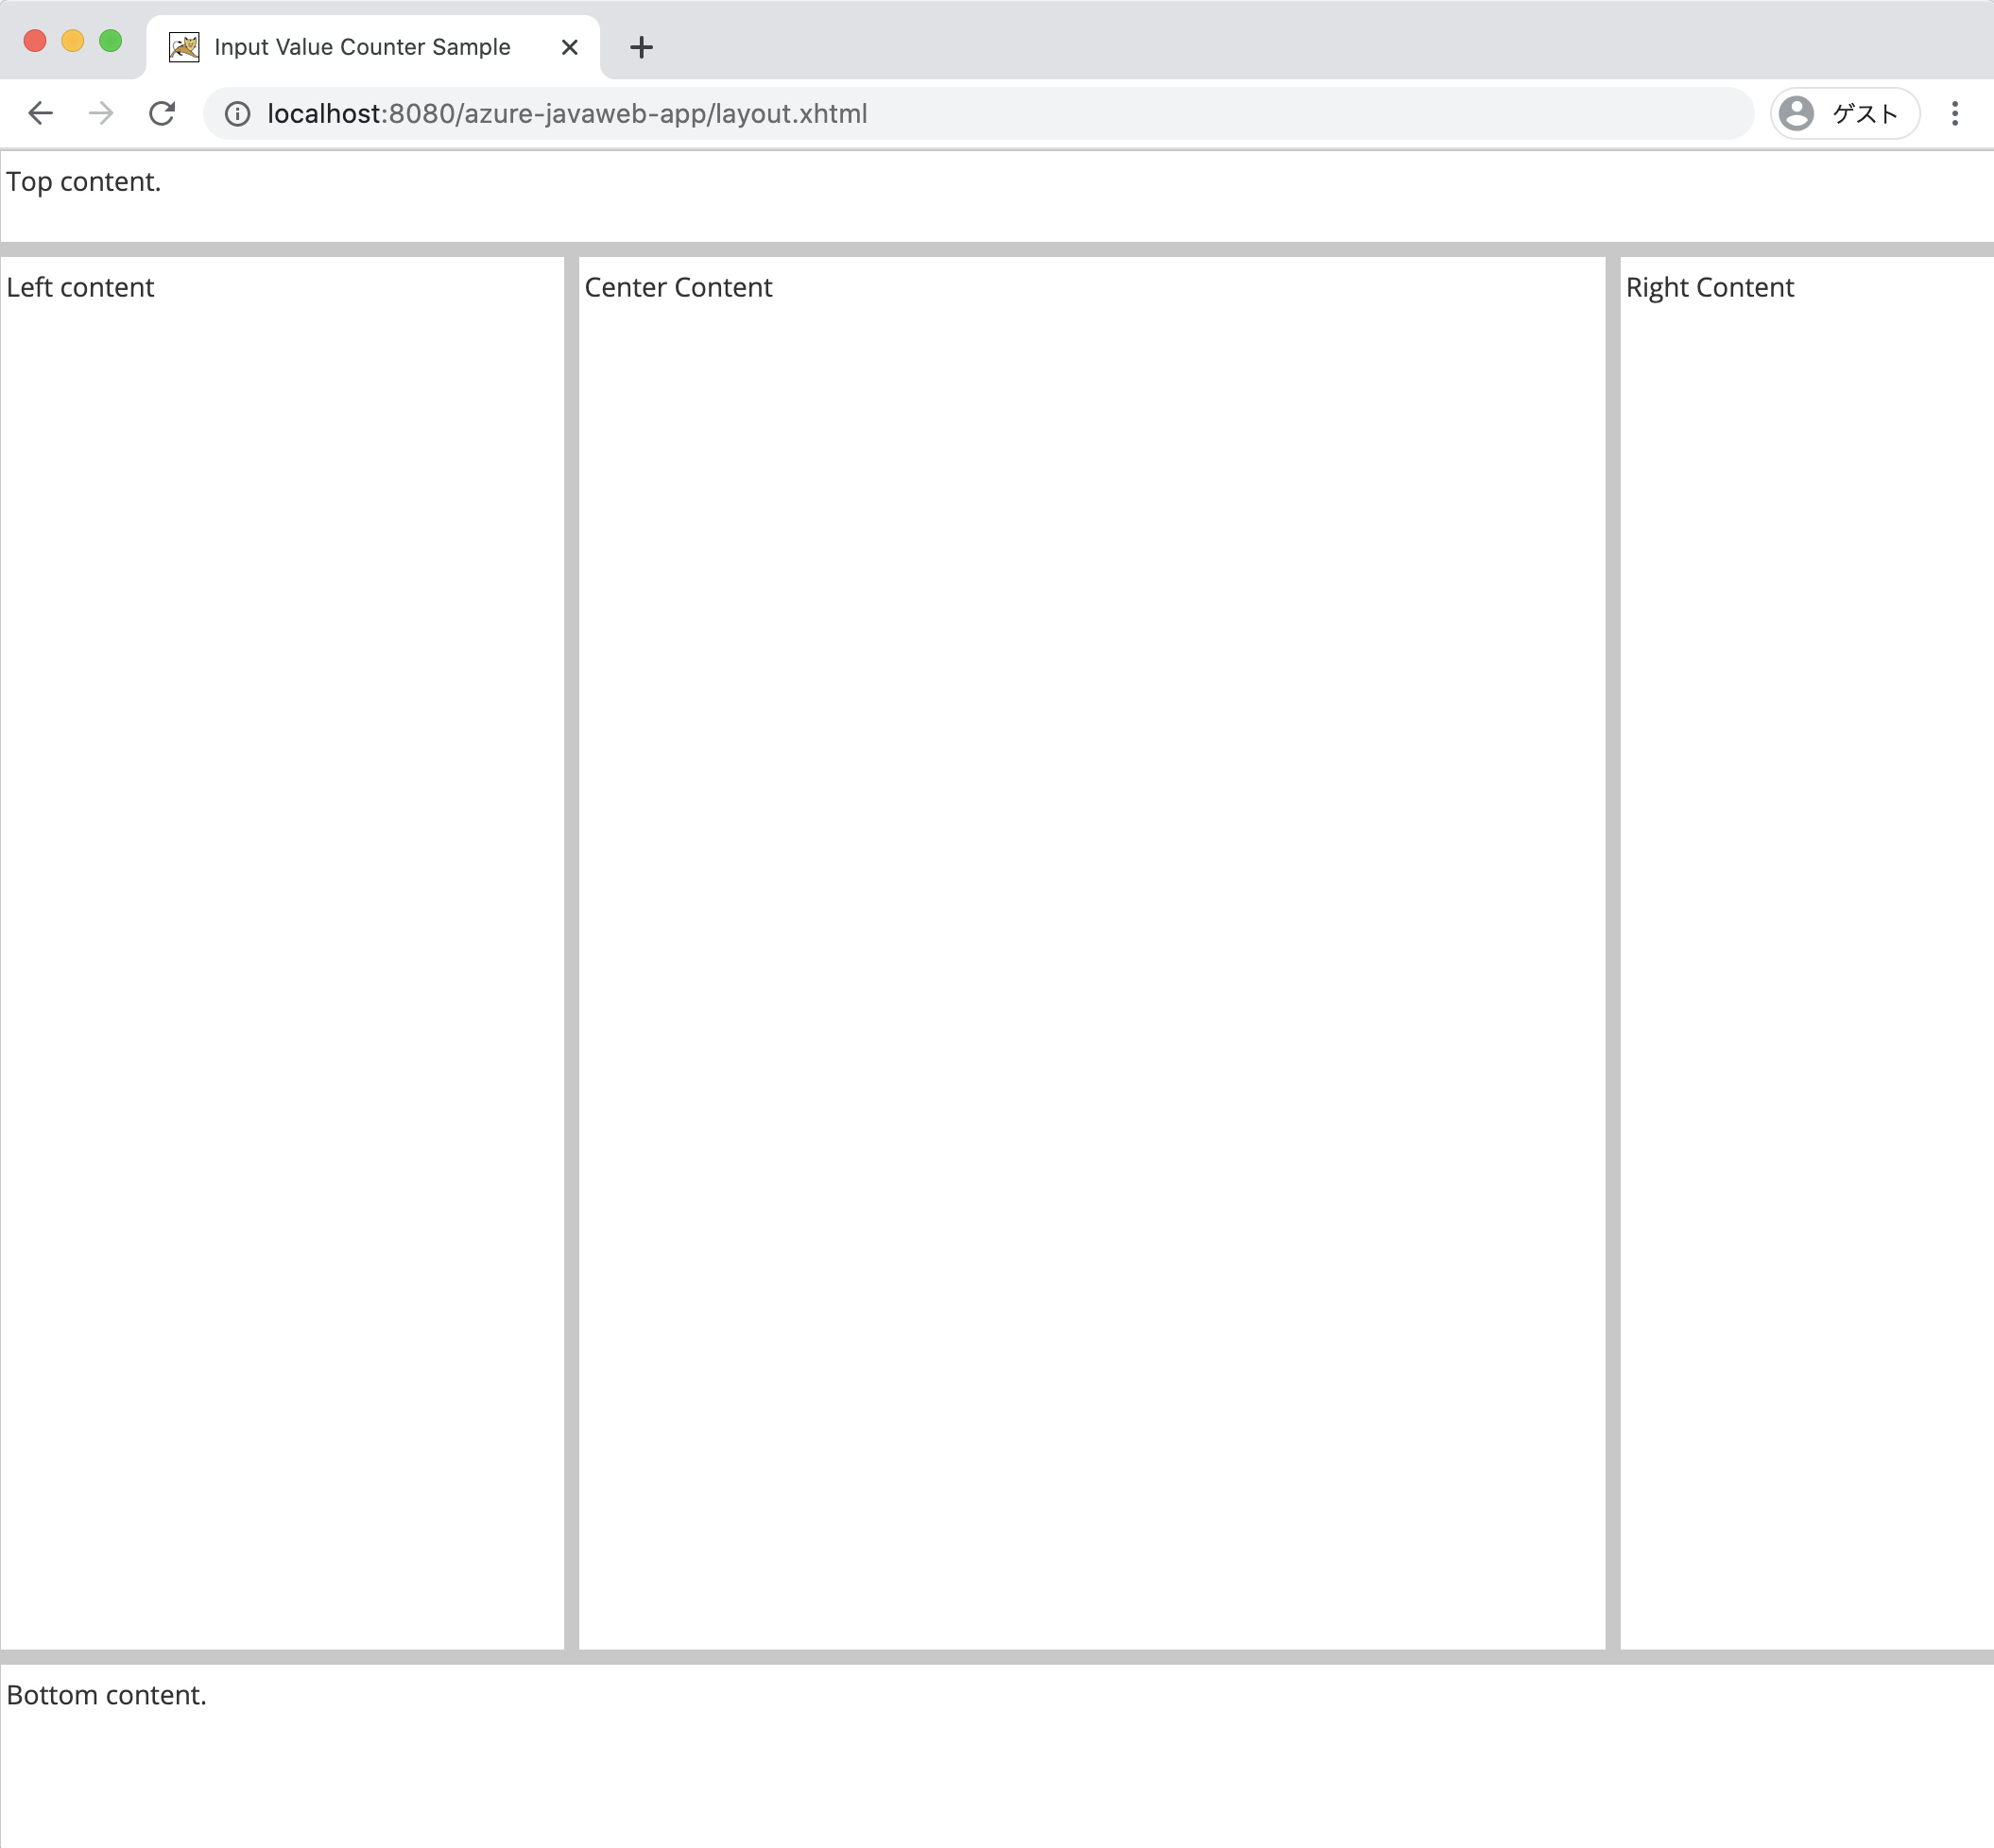
PrimeFaces Layout creates a layout for the entire screen. PrimeFaces allows you to configure various layouts. For example, if you want to create headers, footers, menus that you often see in general web pages, you can easily configure the screen layout by using the p:layout, p:layoutUnit tags like below.
In the Todo Application, we'll use the position="north" and position="center" tags.
<p:layout fullPage="true">
    <p:layoutUnit position="north" size="50">
        <h:outputText value="Top content." />
    </p:layoutUnit>
    <p:layoutUnit position="south" size="100">
        <h:outputText value="Bottom content." />
    </p:layoutUnit>
    <p:layoutUnit position="west" size="300">
        <h:outputText value="Left content" />
    </p:layoutUnit>
    <p:layoutUnit position="east" size="200">
        <h:outputText value="Right Content" />
    </p:layoutUnit>
    <p:layoutUnit position="center">
        <h:outputText value="Center Content" />
    </p:layoutUnit>
</p:layout>In the next section we'll discuss the p:outputLabel,p:inputText, p:commandButton tags as show in the below example:
 <h:form>
     <p:outputLabel id="out" value="My Tasks" />
     <p:inputText id="name" value="#{todocontroller.name}" />
     <p:commandButton id="addtask" value="Add Task"
         action="#{todocontroller.buttonAddAction()}"
         styleClass="ui-priority-primary" />
 </h:form>
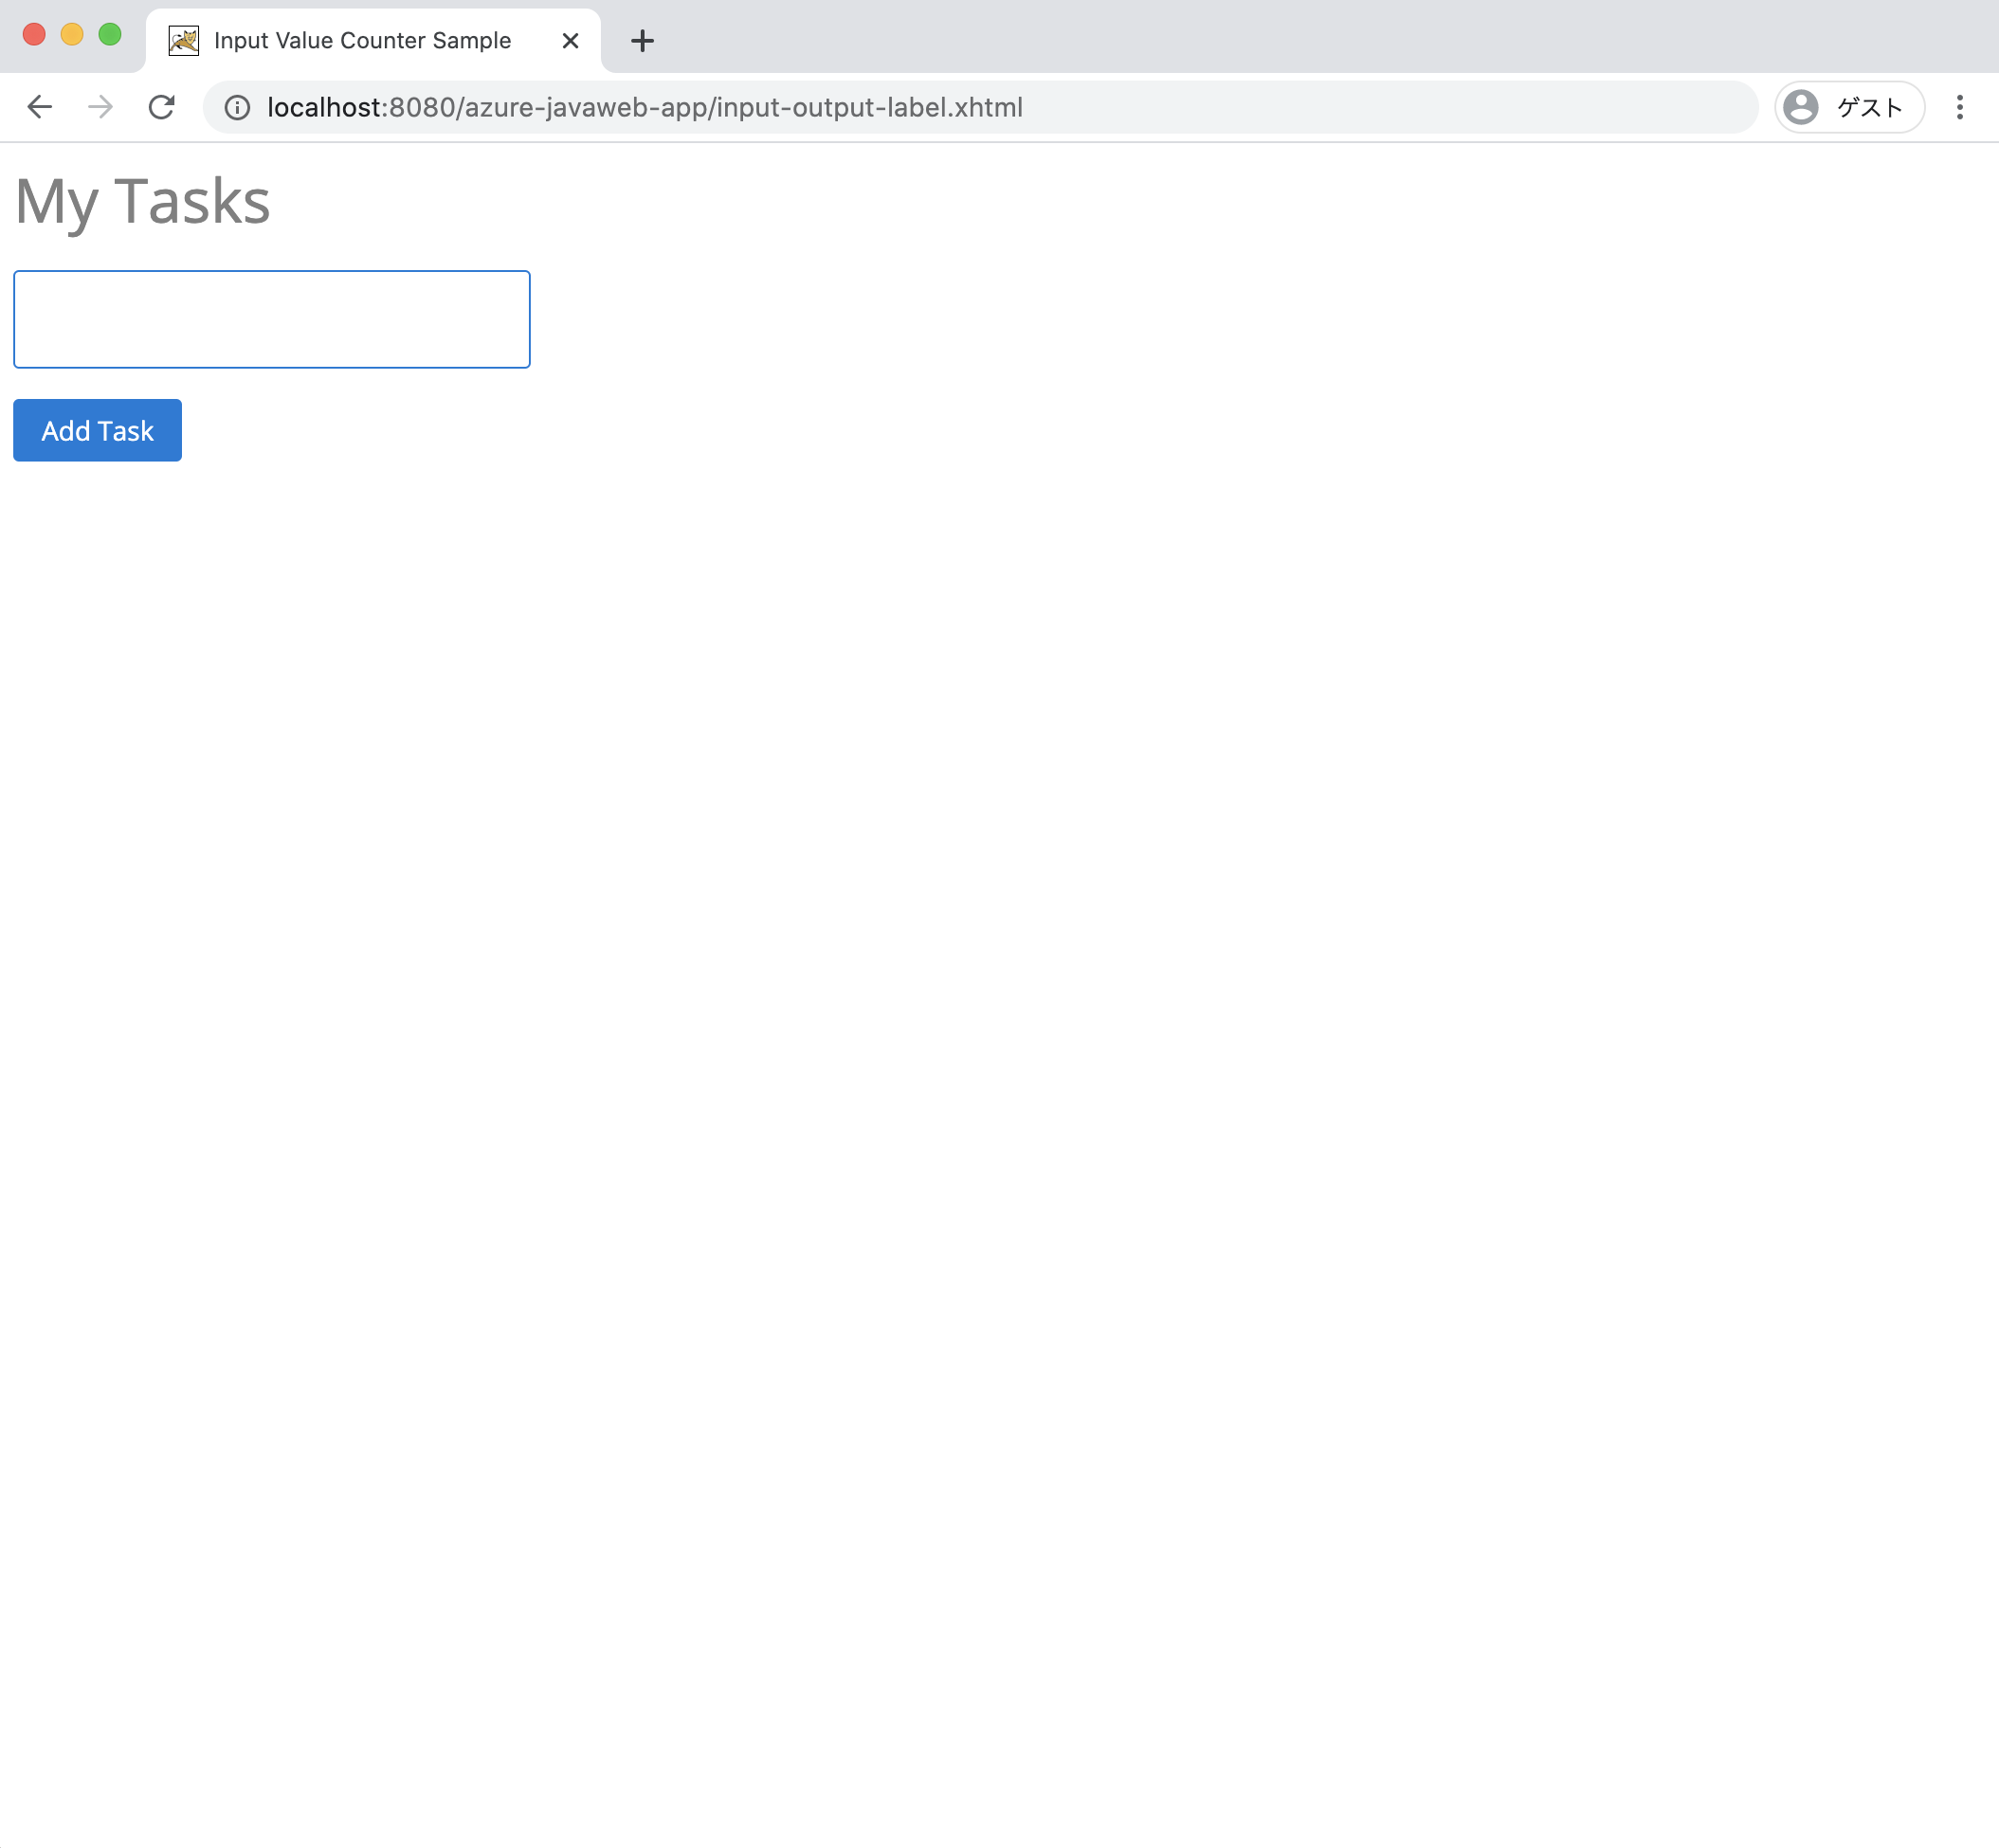
p:outputLabel is a component for displaying text and is an extension of the standard outputLabel of JSF. Since value ="My Tasks" and a static character string are described here, My Tasks is also displayed on the screen, but if you want to change the character string to be outputted dynamically, you can replace it with the EL expression #{todocontroller.name} and binding it to the backing bean field as described in p:inputText.
p:inputText is a component for working with input text fields and extends the standard inputText component of JSF.
The EL expression #{todocontroller.name} binds the value to the field defined in the corresponding backing bean (TodoListController) class, and the value entered by the user can now be referenced by name from other code.
p:commandButton is a component for displaying buttons and extends the standard commandButton component of JSF. When the button is pressed, the EL expression #{todocontroller.buttonAddAction() described in action is executed. Specifically, the buttonAddAction() method defined in the corresponding backing bean (TodoListController) class is invoked.
You can also execute the process with Ajax by adding update=" target-id" to the button's attribute.
An implementation example of the Backing Bean corresponding to the above Facelets(XHTML) is shown below.
The content entered in p:inputText can be bound to name of instance field in the TodoListController class and handled in the program. Also, when a button is pressed with p:commandButton, then the buttonAddAction() method of the TodoListController class is invoked to print the value entered by the user in name on the standard output.
import lombok.Getter;
import lombok.Setter;
import javax.faces.view.ViewScoped;
import javax.inject.Named;
import java.io.Serializable;

@Named("todocontroller")
@ViewScoped
public class TodoListController implements Serializable {

 @Setter @Getter
 private String name;

 public void buttonAddAction(){
     System.out.println("Input Value is " name);
     // write some command action
 }
}
After you create the XHTML and Backing Bean, the following screen will be displayed:
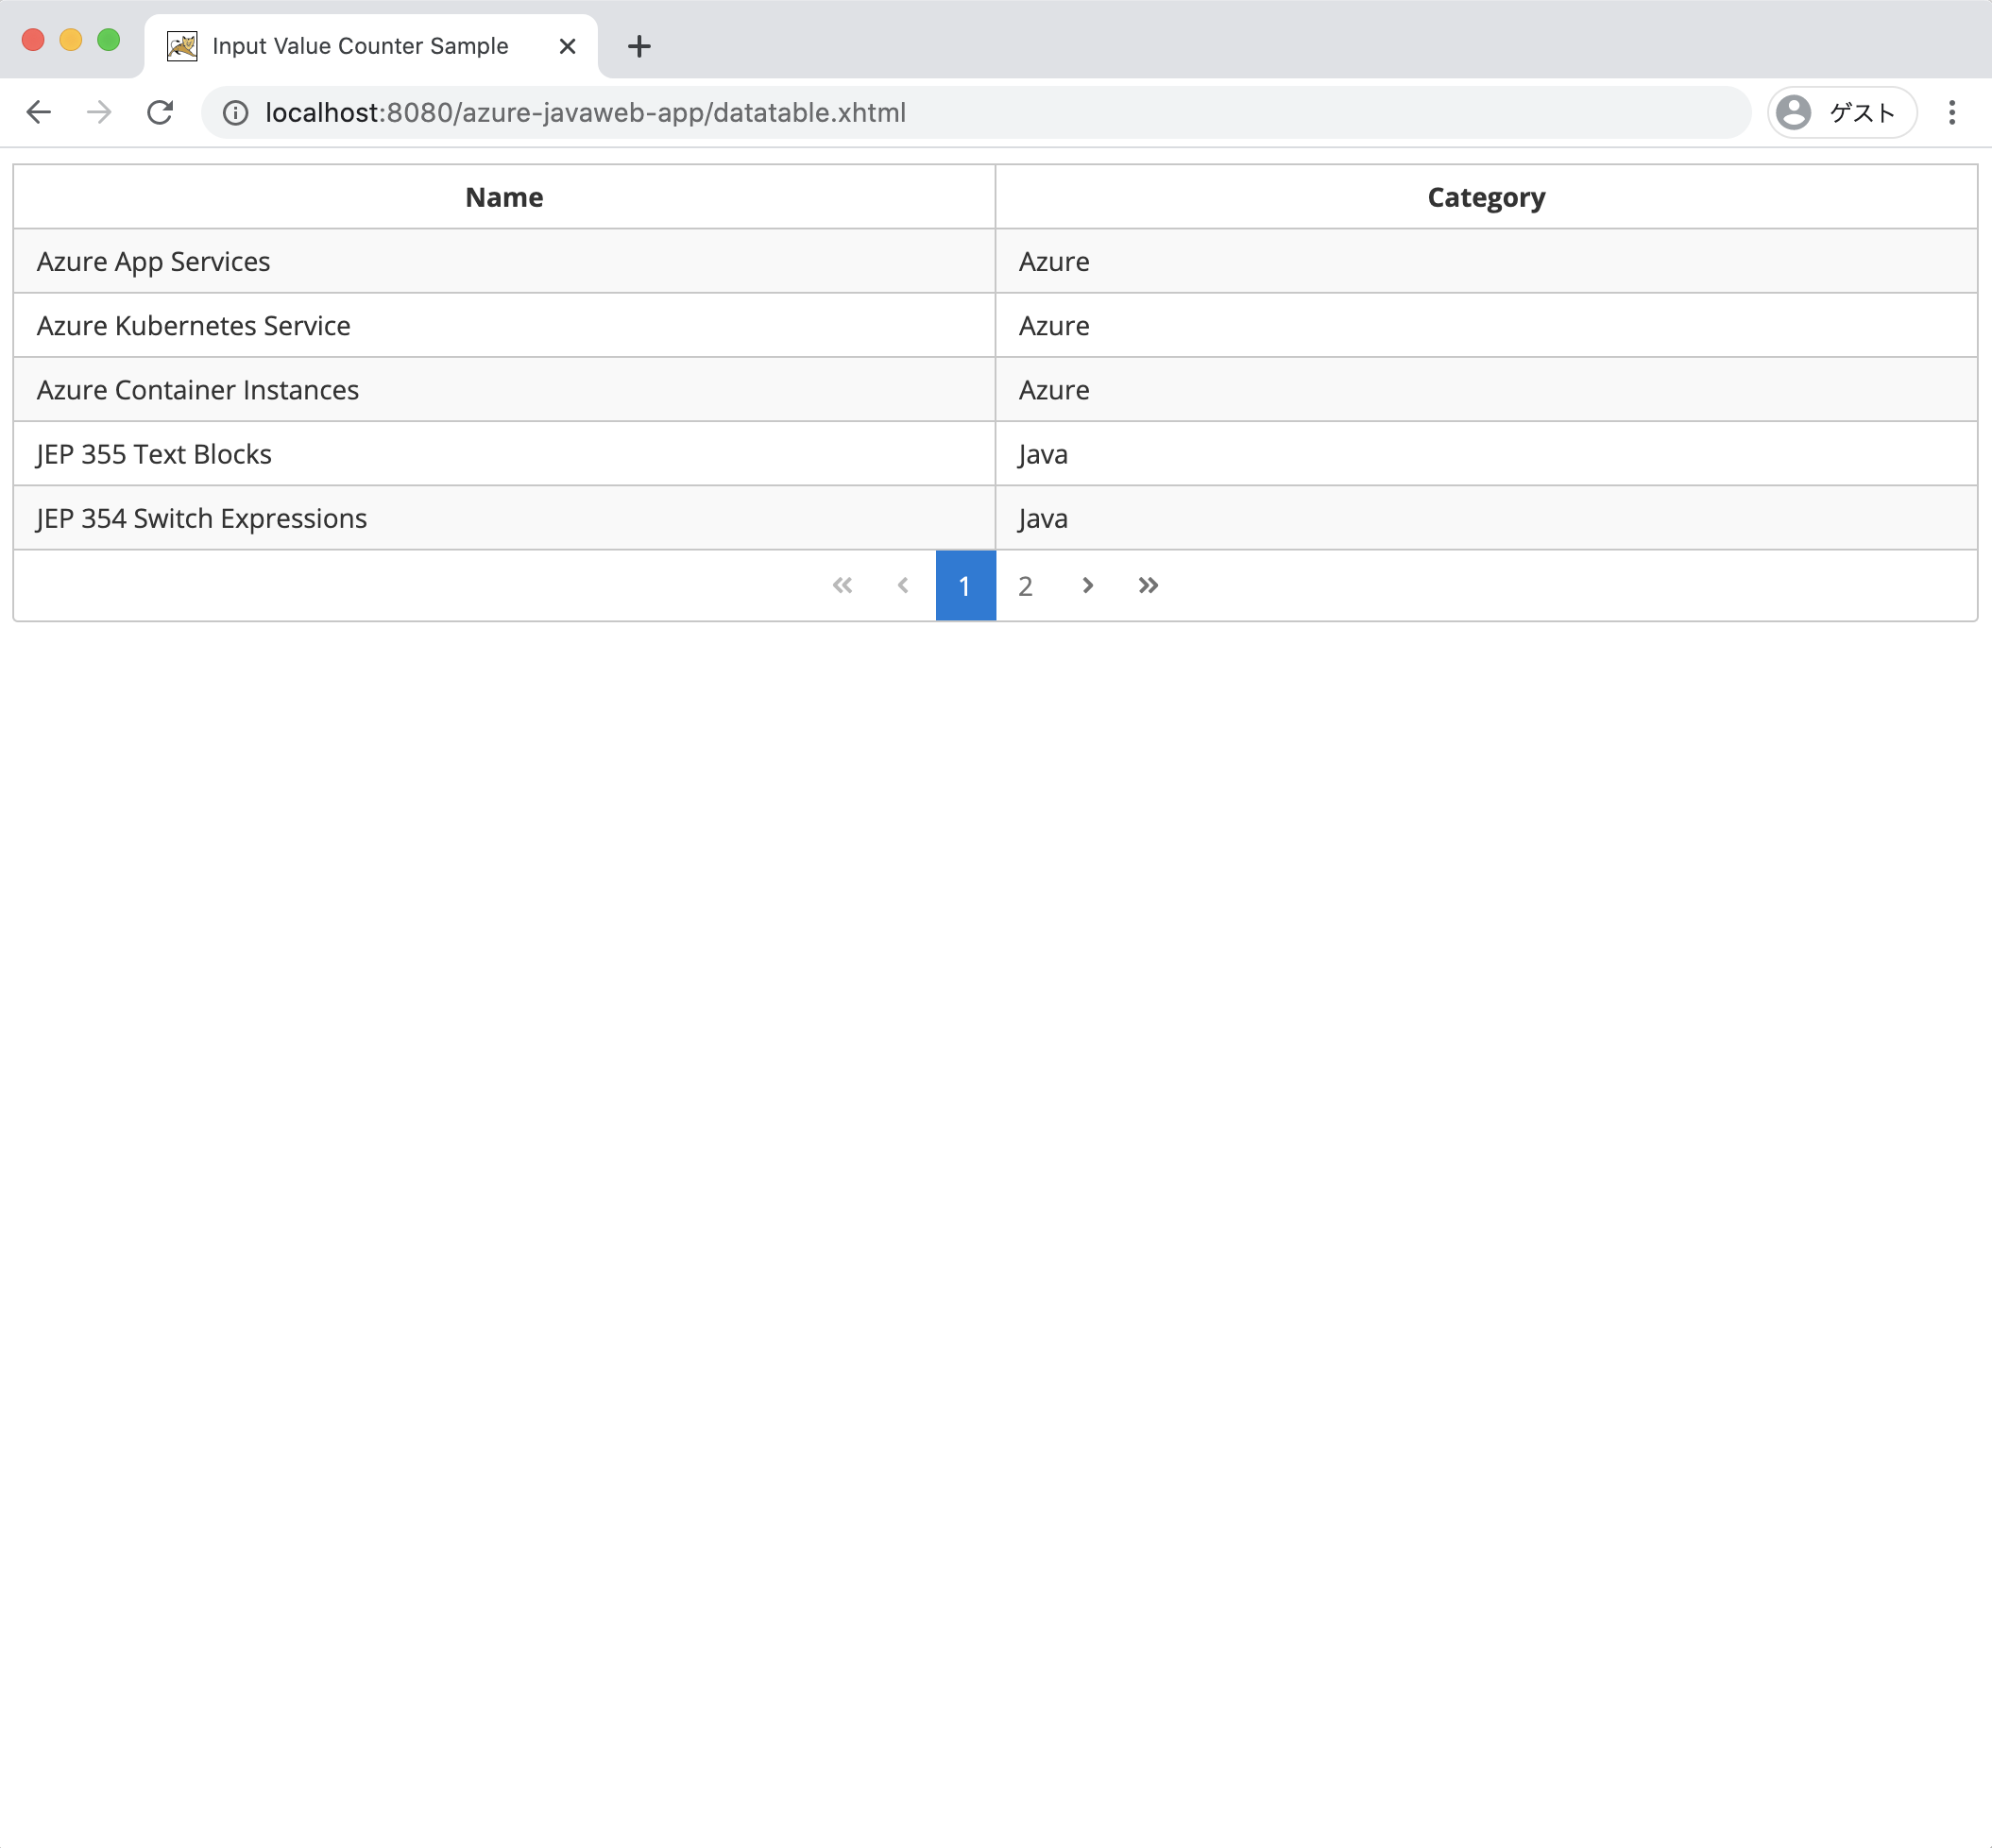
p:dataTable is a component for displaying HTML tables, which is an extension of a standard JSF table. You can use the Paginator function by adding the paginator attribute. Here, the transition function of Paginator is placed at the bottom of the table and is set with paginatorPosition="bottom" attribute, and five items that can be displayed on the screen by default because we configured it with rows="5".
The display items in the table use todoItems, which is defined in the TodoListController class. You can refer each element in the List by using var="item". For example, #{item.name} and #{item.category} are used to display each value of the TodoItem instance in the List.
    <h:form>
        <p:dataTable id="itemTables" var="item"
            value="#{todocontroller.todoItems}" paginator="true"
            paginatorPosition="bottom" rows="5">

            <p:column headerText="Name">
                <h:outputText value="#{item.name}" />
            </p:column>
            <p:column headerText="Category">
                <h:outputText value="#{item.category}" />
            </p:column>

        </p:dataTable>
    </h:form>
The implementation example of the TodoListController class is described below.
In this example, the @PostConstruct init() method is used to generate dummy List <TodoItem> data when this instance is created.
In our code, dummy data is generated at startup, so it displays some contents by default.
import com.microsoft.samples.model.TodoItem;
import lombok.Getter;
import lombok.Setter;
import javax.annotation.PostConstruct;
import javax.faces.view.ViewScoped;
import javax.inject.Named;
import java.io.Serializable;
import java.util.ArrayList;
import java.util.List;

@Named("todocontroller")
@ViewScoped
public class TodoListController implements Serializable {

    private static final long serialVersionUID = 8118071083254011575L;

    @Setter @Getter
    private List<TodoItem> todoItems;

    @PostConstruct
    public void init(){
        TodoItem item1 = new TodoItem("App Services","Azure",false);
        TodoItem item2 = new TodoItem("Azure Kubernetes Service","Azure",false);
        TodoItem item3 = new TodoItem("JEP 359","Java",false);
        TodoItem item4 = new TodoItem("JEP 368","Java",false);
        TodoItem item5 = new TodoItem("MicroProfile","Java",false);
        TodoItem item6 = new TodoItem("Spring Boot","Java",false);
        TodoItem item7 = new TodoItem("Jakarta EE","Java",false);

        todoItems = new ArrayList<>();
        todoItems.add(item1);
        todoItems.add(item2);
        todoItems.add(item3);
        todoItems.add(item4);
        todoItems.add(item5);
        todoItems.add(item6);
        todoItems.add(item7);
    }
}
The implementation of the TodoItem class is described below.
We'll use this class to manage the display of data.
We use the @Data annotation of Project Lombok, so our Setter/Getter method is automatically added for all fields and toString(), equals (Object o), and hashCode() methods will be overridden by default.
import java.io.Serializable;
import lombok.Data;

@Data
public class TodoItem implements Serializable {

    private static final long serialVersionUID = -8967340396649549045L;
    private Long id;
    private String category;
    private String name;
    private boolean complete;

    public TodoItem() {}

    public TodoItem(String name, String category, boolean complete) {
        this.name = name;
        this.category = category;
        this.complete = complete;
    }

    public TodoItem( String name, String category) {
        this.category = category;
        this.name = name;
        this.complete = false;
    }

    @Override
    public String toString() {
        return String.format(
                "TodoItem[id=%d, category='%s', name='%s', complete='%b']",
                id, category, name, complete);
    }
}
After you execute the above DataTable, the following screen will be displayed:
In the above, we discussed how to use PrimeFaces Components.
Now, we'll create your Todo Application by using the above PrimeFaces components.
At First we'll create the PrimeFaces Web Page in an XHTML file. After that, we'll create the DataModel class. In the DataModel class, we'll define id, category, name, and complete fields. All our Todo items will have these attributes. Then we'll create a DAO class, which is used to store the data of Todo Items and update Items. Finally we'll create the Controller class, which is used as a Backing Bean for our PrimeFaces Web Page. In this class, we'll implement the binding field of the PrimeFaces web page and also implement the operation when a user pushes its button.
This view uses the components of p:layout,p:layoutUnit, p:outputLabel,p:inputText, p:commandButton, and p:dataTable explained in the previous section.
This page supports Ajax, so when the button Add Task is pressed, we'll dynamically add the task to our p:dataTable field (This dynamic binding is because we bind the action of update="itemTables" to p:commandButton)
We also add a new attribute to the DataTable, selection ="#{todocontroller.selectedItems}". You can now select items in your table using checkboxes, and complete a task by selecting the checkbox and pressing the Update Task button.
Copy and paste the code below into the index.xhtml file to create a view for your Todo application:
<!DOCTYPE html>
<html xmlns="http://www.w3.org/1999/xhtml" xmlns:f="http://xmlns.jcp.org/jsf/core"
   xmlns:h="http://xmlns.jcp.org/jsf/html" xmlns:ui="http://xmlns.jcp.org/jsf/facelets"
   xmlns:p="http://primefaces.org/ui">

<h:head>
 <title>TODO App</title>
</h:head>
<h:body>

 <p:layout fullPage="true">
     <p:layoutUnit style="background-color: black; position: relative; height: 100px;" position="north" size="100"
                   resizable="false" closable="false" collapsible="true">
         <div class="header-task" style="margin: 50px; padding: 20px;">
             <p:outputLabel
                     style="color: #808080; font-size: 2em; position: absolute;top: 50%; -webkit-transform : translateY(-50%); transform : translateY(-50%);"
                     value="My Tasks"/>
         </div>
     </p:layoutUnit>

     <p:layoutUnit position="center">
         <h:form id="updateForm">
             <div class="task-lists" style="margin: 50px; padding: 20px;">
                 <p:outputLabel value="My ToDo List" style="font-size: 3em;"/>
                 <p/>

                 <p:dataTable id="itemTables" var="item" value="#{todocontroller.todoItems}"
                              disabledSelection="#{item.complete == true}"
                              selection="#{todocontroller.selectedItems}" rowKey="#{item.name}" paginator="true"
                              paginatorPosition="bottom" rows="20">

                     <p:column headerText="Name">
                         <h:outputText value="#{item.name}"/>
                     </p:column>
                     <p:column headerText="Category">
                         <h:outputText value="#{item.category}"/>
                     </p:column>
                     <p:column headerText="Complete" selectionMode="multiple" style="text-align:center"/>
                 </p:dataTable>

                 <div class="updatataks" style="margin: 15px">
                     <p:commandButton value="Update Task" id="updatatask" update="itemTables"
                                      action="#{todocontroller.buttonUpdateAction()}" style="margin-right:20px;"
                                      styleClass="ui-priority-primary"/>
                 </div>
             </div>

             <hr style="margin: 50px;"/>

             <div class="task-add" style="margin: 50px; padding: 20px;">
                 <h:panelGrid columns="2" cellpadding="5">
                     <p:outputLabel style="font-size: 1.4em;" value="Task Name :"/>
                     <p:inputText style="font-size: 1.4em;" id="name" value="#{todocontroller.name}"/>


                     <p:outputLabel style="font-size: 1.4em;" value="Task Category : "/>
                     <p:inputText style="font-size: 1.4em;" id="category" value="#{todocontroller.category}"/>
                 </h:panelGrid>
                 <p/>
                 <p:commandButton update="itemTables" value="Add Task" id="addtask"
                                  action="#{todocontroller.buttonAddAction()}"
                                  style="margin-right:20px;" styleClass="ui-priority-primary"/>
             </div>
         </h:form>
     </p:layoutUnit>
 </p:layout>
</h:body>
</html>First, we'll implement the data model classes in the com.microsoft.azure.samples.model package.
Execute the following command to create a directory for the package:
mkdir src/main/java/com/microsoft/azure/samples/modelThen create a TodoItem.java file inside the com.microsoft.azure.samples.model package directory and copy and paste the code below:
package com.microsoft.azure.samples.model;

import java.io.Serializable;
import lombok.Data;

@Data
public class TodoItem implements Serializable {

 private static final long serialVersionUID = -8967340396649549045L;
 private Long id;
 private String category;
 private String name;
 private boolean complete;

 public TodoItem() {}

 public TodoItem( String name, String category) {
     this.category = category;
     this.name = name;
     this.complete = false;
 }

 public TodoItem(String name, String category, boolean complete) {
     this.name = name;
     this.category = category;
     this.complete = complete;
 }

 @Override
 public String toString() {
     return String.format(
             "TodoItem[id=%d, category='%s', name='%s', complete='%b']",
             id, category, name, complete);
 }
}We'll create a class for Data Access in the com.microsoft.azure.samples.dao package.
Execute the following command to create a directory for the package:
mkdir src/main/java/com/microsoft/azure/samples/daoIn a production environment, you use a Database, in-memory grids, and document databases to store data. In the next section, we'll use a List to simulate a database.
Our class will be annotated with @ApplicationScoped. This annotation allows the data of todoItems to be available from the start to the end of our application's lifecycle.
Next, create a TodoItemManagement.java file inside the com.microsoft.azure.samples.dao package directory and copy and paste the code below.
package com.microsoft.azure.samples.dao;

import com.microsoft.azure.samples.model.TodoItem;
import javax.enterprise.context.ApplicationScoped;
import java.util.List;
import java.util.concurrent.CopyOnWriteArrayList;

@ApplicationScoped
public class TodoItemManagement {

    private CopyOnWriteArrayList<TodoItem> todoItems  = new CopyOnWriteArrayList<TodoItem>();

    public  CopyOnWriteArrayList<TodoItem> getTodoItems() {
        return todoItems;
    }

    public  void setTodoItems(CopyOnWriteArrayList<TodoItem> todoItems) {
        this.todoItems = todoItems;
    }

    public void addTodoItem(TodoItem item) {
        synchronized (this){
            int size = todoItems.size();
            long id = 0;
            if(size != 0){
                id = todoItems.get(size - 1).getId();
                id++;
            }
            item.setId(id);
            todoItems.add(item);
        }
    }

    public void updateTodoItem(List<TodoItem> items){
        items.stream().forEach(item -> {
            item.setComplete(true);
            synchronized (this) {
                todoItems.set(item.getId().intValue(), item);
            }
        });
    }

}Finally, we'll implement the class for the controller in the com.microsoft.azure.samples.controller package.
Execute the following command to create a directory for the package:
mkdir src/main/java/com/microsoft/azure/samples/controllerThe annotations @ViewScoped and @Named are added to this class. @ViewScoped is useful for creating Single Page Application web pages with a scope that is valid until the screen is reloaded or a screen transition occur. Also, by adding the @Named annotation, you can refer to this class from Facelets (XHTML) using EL expressions.
In the implementation, we use @Inject to inject an instance of TodoItemManagement. And it's used to add the data (buttonAddAction()), refer the data(getTodoItems()), and update the data (buttonUpdateAction()). We'll also be implementing each method in the TodoItemManagement class.
We also added the selectedItem and selectedItems fields to allow each row in the table to be selected, and the onRowSelect(SelectEvent<TodoItem> event) and onRowUnselect(UnselectEvent <TodoItem> event) methods.
Each method can act on the event when the table is selected or not selected. Even though no processing is done on selection, if this method isn't defined, a compile error will occur.
Next, create a TodoListController.java file inside the com.microsoft.azure.samples.controller package directory and copy and paste the code below.
package com.microsoft.azure.controller;

import com.microsoft.azure.samples.dao.TodoItemManagement;
import com.microsoft.azure.samples.model.TodoItem;
import org.primefaces.event.SelectEvent;
import org.primefaces.event.UnselectEvent;

import lombok.Getter;
import lombok.Setter;

import javax.annotation.PostConstruct;
import javax.faces.application.FacesMessage;
import javax.faces.context.FacesContext;
import javax.faces.view.ViewScoped;
import javax.inject.Inject;
import javax.inject.Named;
import java.io.Serializable;
import java.util.List;

@Named("todocontroller")
@ViewScoped
public class TodoListController implements Serializable {

    private static final long serialVersionUID = -1945255472338540370L;

    @Inject
    TodoItemManagement todoManagement;

    private List<TodoItem> todoItems;
    @Setter @Getter
    private TodoItem selectedItem;
    @Setter @Getter
    private List<TodoItem> selectedItems;
    @Setter @Getter
    private String name;
    @Setter @Getter
    private String category;


    public List<TodoItem> getTodoItems() {
        return todoManagement.getTodoItems();
    }

    public void buttonUpdateAction(){
        todoManagement.updateTodoItem(selectedItems);
    }

    public void buttonAddAction(){
        TodoItem addItem = new TodoItem(name, category, false);
        todoManagement.addTodoItem(addItem);
    }

    public void onRowSelect(SelectEvent<TodoItem> event) {
        FacesMessage msg = new FacesMessage("TodoItem Selected", event.getObject().getId().toString());
        FacesContext.getCurrentInstance().addMessage(null, msg);
    }

    public void onRowUnselect(UnselectEvent<TodoItem> event) {
        FacesMessage msg = new FacesMessage("Car Unselected", event.getObject().getId().toString());
        FacesContext.getCurrentInstance().addMessage(null, msg);
    }
}Once you complete the above programs, compile the program and execute the following command:
mvn clean packageThis step is optional if you have installed Tomcat in your local environment. If you don't have the local environment, continue to the Next section.
cp target/azure-javaweb-app.war /$INSTALL_DIR/apache-tomcat-9.0.39/webapps/$INSTALL_DIR/apache-tomcat-9.0.39/bin/startup.shAfter running Tomcat, access http://localhost:8080/azure-javaweb-app/ and you'll see the screen below.
Use the Add Task button to add a task, or use the Update Task to update the task.
You have successfully run the Todo web application implemented in PrimeFaces in your local Tomcat environment.


