An alternative low-cost Linux board for exploits PS4 on V11.00 or below.
Original work by theflow PPPwn
and thanks to xfangfang PPPwn-CPP for an executable re-write of PPPwn in C++ and SiSTRo for his GoldHen, and lastly Stooged for his inspiration.
- Currently support version:
9.00, 9.60, 10.00, 10.01, 10.50, 10.70, 10.71, 11.00 - The average PPPwned time is around
1min - 2minsometimes it loads under1 minute - Using
pppwnC++ nightly build from xfangfang PPPwn_cpp
Thanks to @harsha-0110 for the webserver base scripts and PHP.
You can access it at 192.168.1.1 on your PS4 browser. It allows you to:
- Change your PPPwn settings
- Shutdown your Luckfox device
- Execute PPPwn
- Inject payloads for 9.00 & 11.00 (make sure to enable BinLoader in GoldHEN)
- Set on/off auto-run PPPwn on boot (on by default)
- Disable Eth0 (to free LAN port)
You can manually edit the configuration file located at /etc/pppwn/config.json.
- Luckfox Pico
- Luckfox Pico Pro
- Luckfox Pico Max
- Luckfox Pico Ultra/Ultra W
- Luckfox Pico Plus
- Luckfox Pico Mini A/B
- One of Luckfox Pico models above
- SD Card 4GB or above (for Luckfox Pico/Mini A)
- Ethernet Cable
- USB Type-C
- A USB drive with exFAT32 formatted (only use for the first time to load GoldHEN)
- PC/Laptop for config the Luckfox
Download one of the custom buildroot image for your respective Luckfox models below or from the release pages.
-
NAND Flash boot
Luckfox Model Buildroot Image Luckfox Pico Pro/Max download Luckfox Pico Plus/Mini B download -
SD Card boot
Luckfox Model Buildroot Image Luckfox Pico/Mini A download
-
Use SocToolKit to burn the buildroot image you downloaded above to your Luckfox.
-
Plug your luckfox to your PC via USB type-c port and wait a few minutes until you hear the device connect sound.
-
On your PC open
Control Panel -> Network and Internet -> Network and Sharing Center -> Change Adapter Options. You will findRemote NDIS based Internet Sharing Device. Right-click and choose Properties.
-
Double-click on
Internet Protocol Version 4 (TCP/IPv4). Set the IPv4 address to172.32.0.100and subnet mask to255.255.0.0and click OK.

-
MobaXterm Login
-
Download MobaXterm and unzip to use.
-
Open the MobaXterm remote login software, choose Session->SSH, and enter the static IP address of Luckfox pico as
172.32.0.93.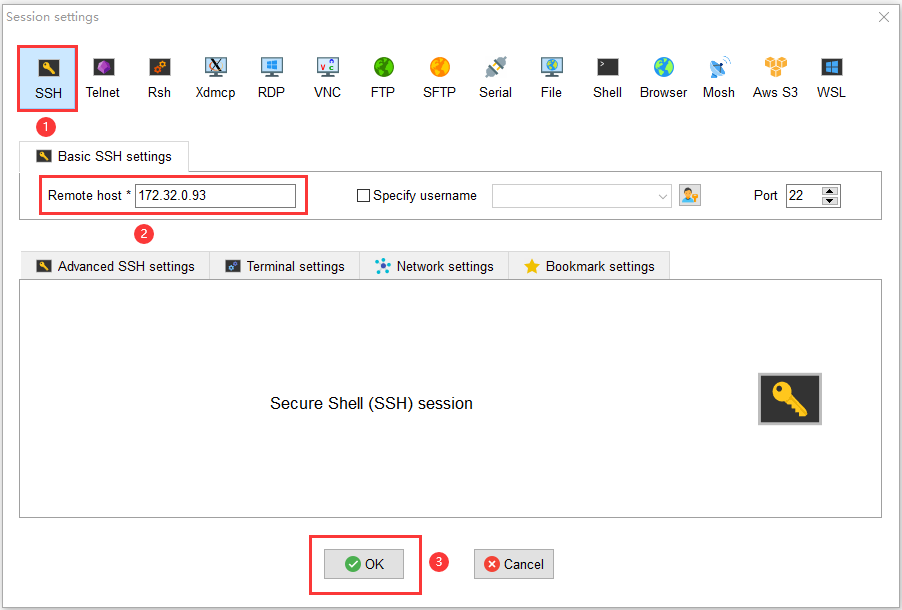
-
After filling it out, click OK, enter the login name, and login
rootpasswordluckfox.
-
-
At this point, you have successfully logged in to Luckfox pico. Download PPPwn-Luckfox from release pages or from GitHub repo, unzip and rename folder to
PPPwn-Luckfoxdrag and drop the files in the highlight red rectangle there, it will copy the files to the luckfox.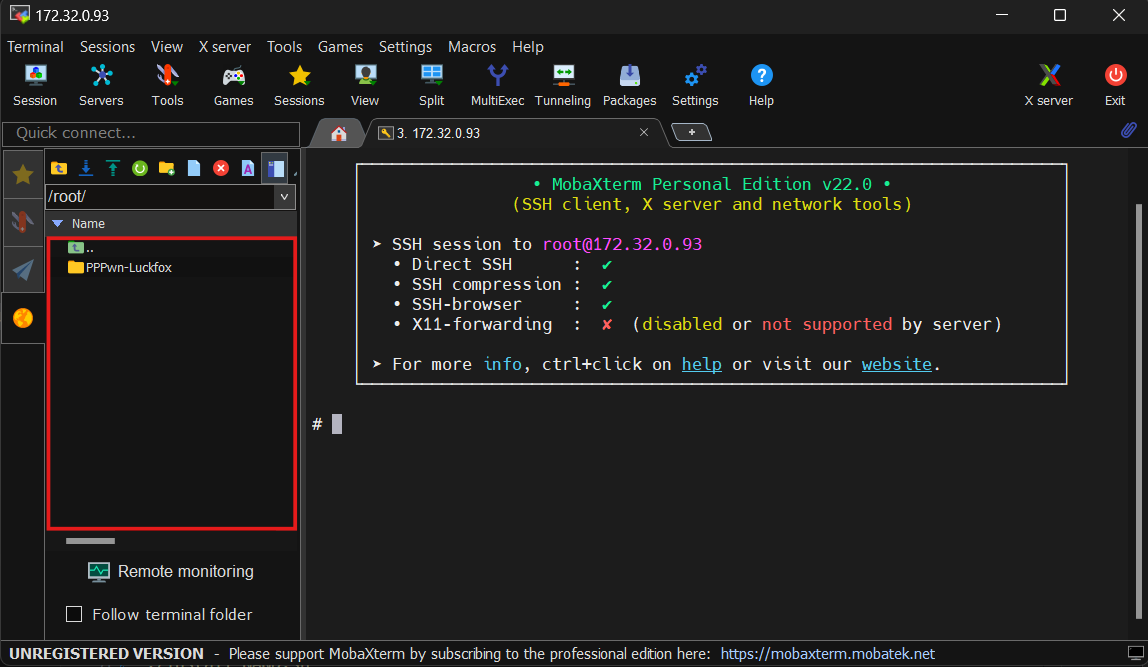
-
After finish copy, paste this cmd, and follow the instructions.


cd PPPwn-Luckfox
chmod +x install.sh
./install.sh
Once the Luckfox reboots pppwn will run automatically.
- You simply need to connect the LAN cable from Luckfox Pico to the PS4 and power the Luckfox from the PS4 via a USB Type-C cable or other sources.
- Go to
Settingsand thenNetwork - Select
Set Up Internet connectionand chooseUse a LAN Cable - Choose
Customsetup and choosePPPoEforIP Address Settings - Enter
pppfor bothPPPoE User IDandPPPoE Password - Choose
AutomaticforDNS SettingsandMTU Settings - Choose
Do Not UseforProxy Server
For Goldhen you need to place the goldhen.bin file onto the root of a USB drive and plug it into the console.
Once Goldhen has been loaded for the first time it will be copied to the console's internal HDD and the USB is no longer required.
To update Goldhen just repeat the above process and the new version will be copied to the internal HDD.