Uses:
Deploys to AWS
If you don't already have one, create an AWS account
Install the AWS CLI v2 here
Install Node20
Open a terminal/powershell and run:
npm i -g yarnNote: if you just want to deploy w/ Vercel then you can skip this part. I choose not to use Vercel because I find their offering expensive. Deploying directly to AWS, for most websites, will remain entirely within the free tier of usage. If you find later that you need to scale your website, then you will save money running directly on AWS and will run into fewer rate limiting moments.
Creating an AWS profile and setting up permissions is a complex discussion. The instructions here are the least secure but shortest path to getting started.
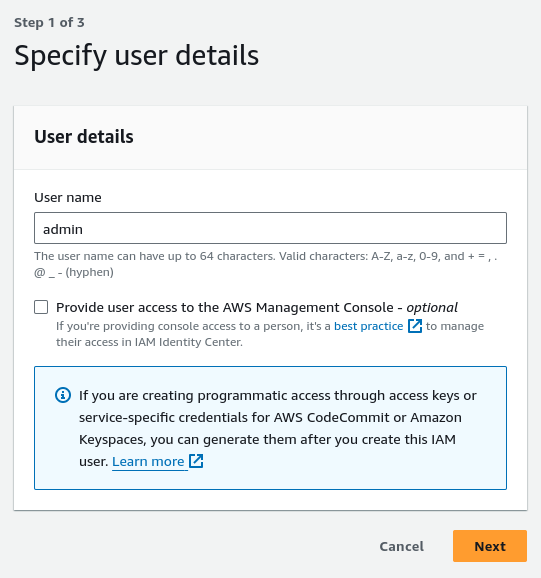
In the AWS console, create a user in the here
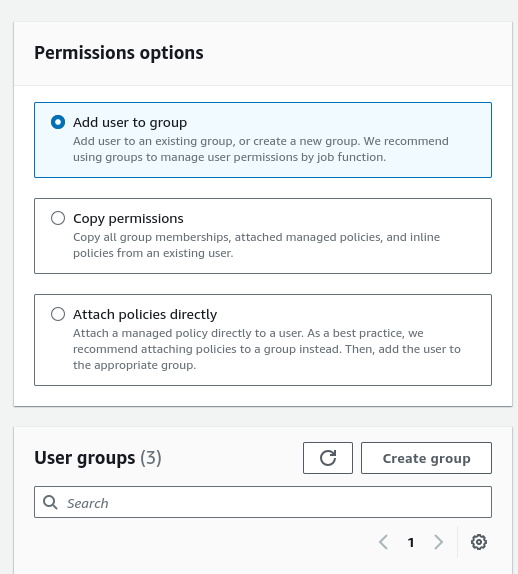
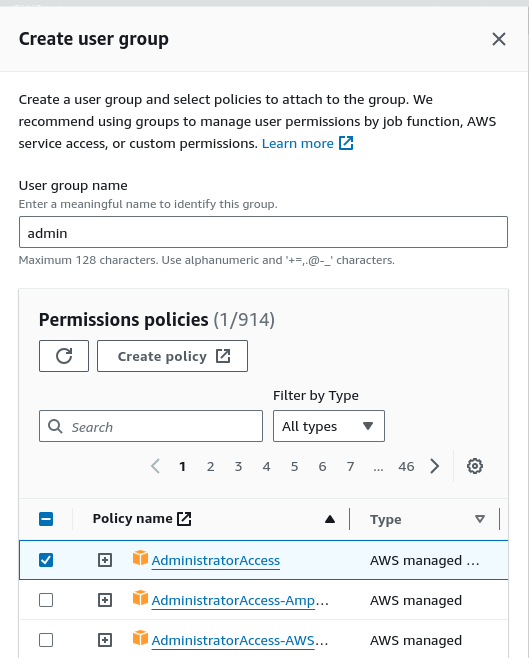
Next we are going to create an "admin" group so click on the " Create Group" button
Add the "AdminstrationAccess" role
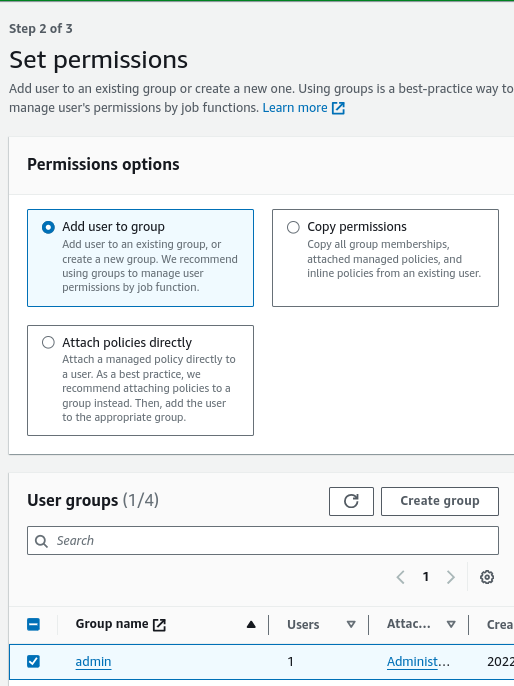
Next select the newly created group and press "Next" and "Create User"
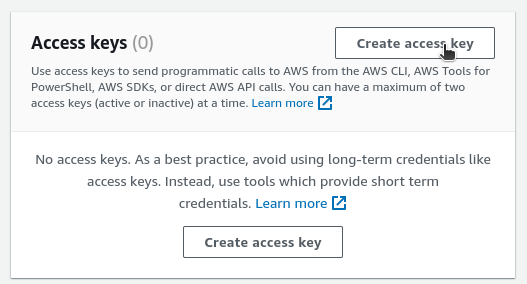
Click on the newly created user, then click on the "security credentials" tab, and finally click on "Create access key"
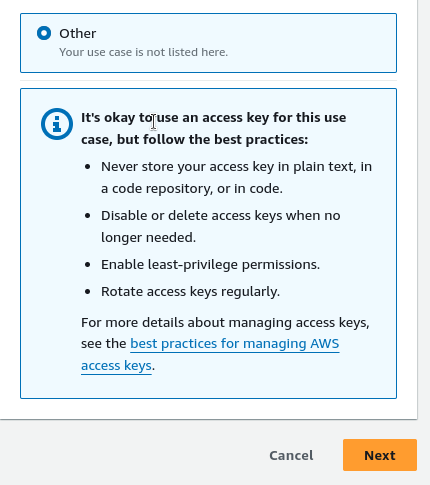
Here is the scary part where AWS tells you there are better ways. It's true but if you delete the key from your system when you are done you should be all good.
On the next screen you will be given one chance to copy your access key and secret
While that screen is up, go back to your terminal and type:
aws configurecopy and paste the access key and secret when prompted.
enter "us-east-1" for the region
default output format: none
example:
AWS Access Key ID [None]: AKIAIOSFODNN7EXAMPLE
AWS Secret Access Key [None]: wJalrXUtnFEMI/bPxRfiCYEXAMPLEKEY
Default region name [None]: us-east-1
Default output format [None]:Clone this repo if you haven't already:
git clone https://github.com/0xflicker/flick-a-frame.git
cd flick-a-frame
Install dependencies:
cd www
yarn
In order to remove all of the complexities of deploying to AWS I choose to use SST in this example. If you are deploying to vercel you can skip this part and deploy away!
Create a local dev stage in SST:
yarn sst devSelecting the defaults is fine
Go to https://console.sst.dev/local/www/user in your browser
You will be asked to create a SST account. This only requires entering in a PIN code sent to an email. Once complete you should end up at the root SST console.
You need to deploy a stack to AWS. The SST console will link you to your AWS Cloudformation panel. Check that you are in the us-east-1 region and press "Deploy stack" when prompted (sorry I should have taken screenshots of this process)
You are now ready to run everything locally as well as deploy a production website.
To run locally, go to the www directory in a terminal and run:
yarn devOpen http://localhost:3000/debug to see the frame.js debugger with their frames example.
When you are ready to deploy, run
yarn sst deploy --stage prodYou should get back a cloudfront distribution URL. Click on it and done!
Now that you have the final URL you can pass it back into the application to make the debug links work out of the box.
Inside www:
cp .env.example .env.productionEdit the .env.production file and replace http://localhost:3000 with the Cloudfront distribution URL
Re-run:
yarn sst deploy --stage prodThe example app uses Next.js and frames.js to make writing frames as powerful as possible.
Here is some relevant documentation:
See www/app/page.tsx as a good starting point for making changes. One thing to notice is the FrameImage component. This component will allow you to render images on the fly using the HTML contained inside.
Have fun and reach out to @flick on farcaster if you have any questions!
