Raspberry-Pi-Fan-Controller is a temperature based fan controller that turns the fan on when a certain temperature is reached and turns the fan off when the threshold isn't met anymore.
-
Raspberry Pi
-
Fan
-
2N2222 Transistor
-
10K ohm Resistor
-
Python 3.8+
-
Bash 4.2+
The installation script will create an executable script, a config file and if selected it will autostart the script at boot.
sh -c "$(wget -qO- https://raw.githubusercontent.com/0xharu/raspberry-pi-fan-controller/master/install.sh)"To uninstall the program and all of its files use:
sh -c "$(wget -qO- https://raw.githubusercontent.com/0xharu/raspberry-pi-fan-controller/master/uninstall.sh)"It's always a good idea to inspect the installation script, you can do that by downloading the installation script first, looking through it and then running it.
wget -q https://raw.githubusercontent.com/0xharu/raspberry-pi-fan-controller/master/install.shgit clone https://github.com/0xharu/raspberry-pi-fan-controller.gitIf you cloned the repository or used the DownGit links use: python3 fan.py or bash fan.sh.
If you used the installation script and installed only one of the scripts use: fan
If you installed both scripts use: fan-py or fan-sh.
In my experience even if the benchmarks are pretty much the same the python script seems to perform better and triggers the fan less frequently compared to the bash script.
To autostart the script either use the installation script or edit your crontab list.
-
chmod +x <script> -
crontab -e -
Add this line at the end of the file:
@reboot /path/to/the/script >/dev/null 2>&1 || touch "$HOME/Desktop/AUTOSTART_FAILED"
In case the script fails to autostart a file will be created on the desktop to alert the user.
If you installed the bash script add sudo before the path.
nohup fan >/dev/null 2>&1 &
I recommend using an alias like: alias fan-d="nohup fan >/dev/null 2>&1 &"
To kill the process use: kill -9 <PID>
The PID is returned by fan-d.
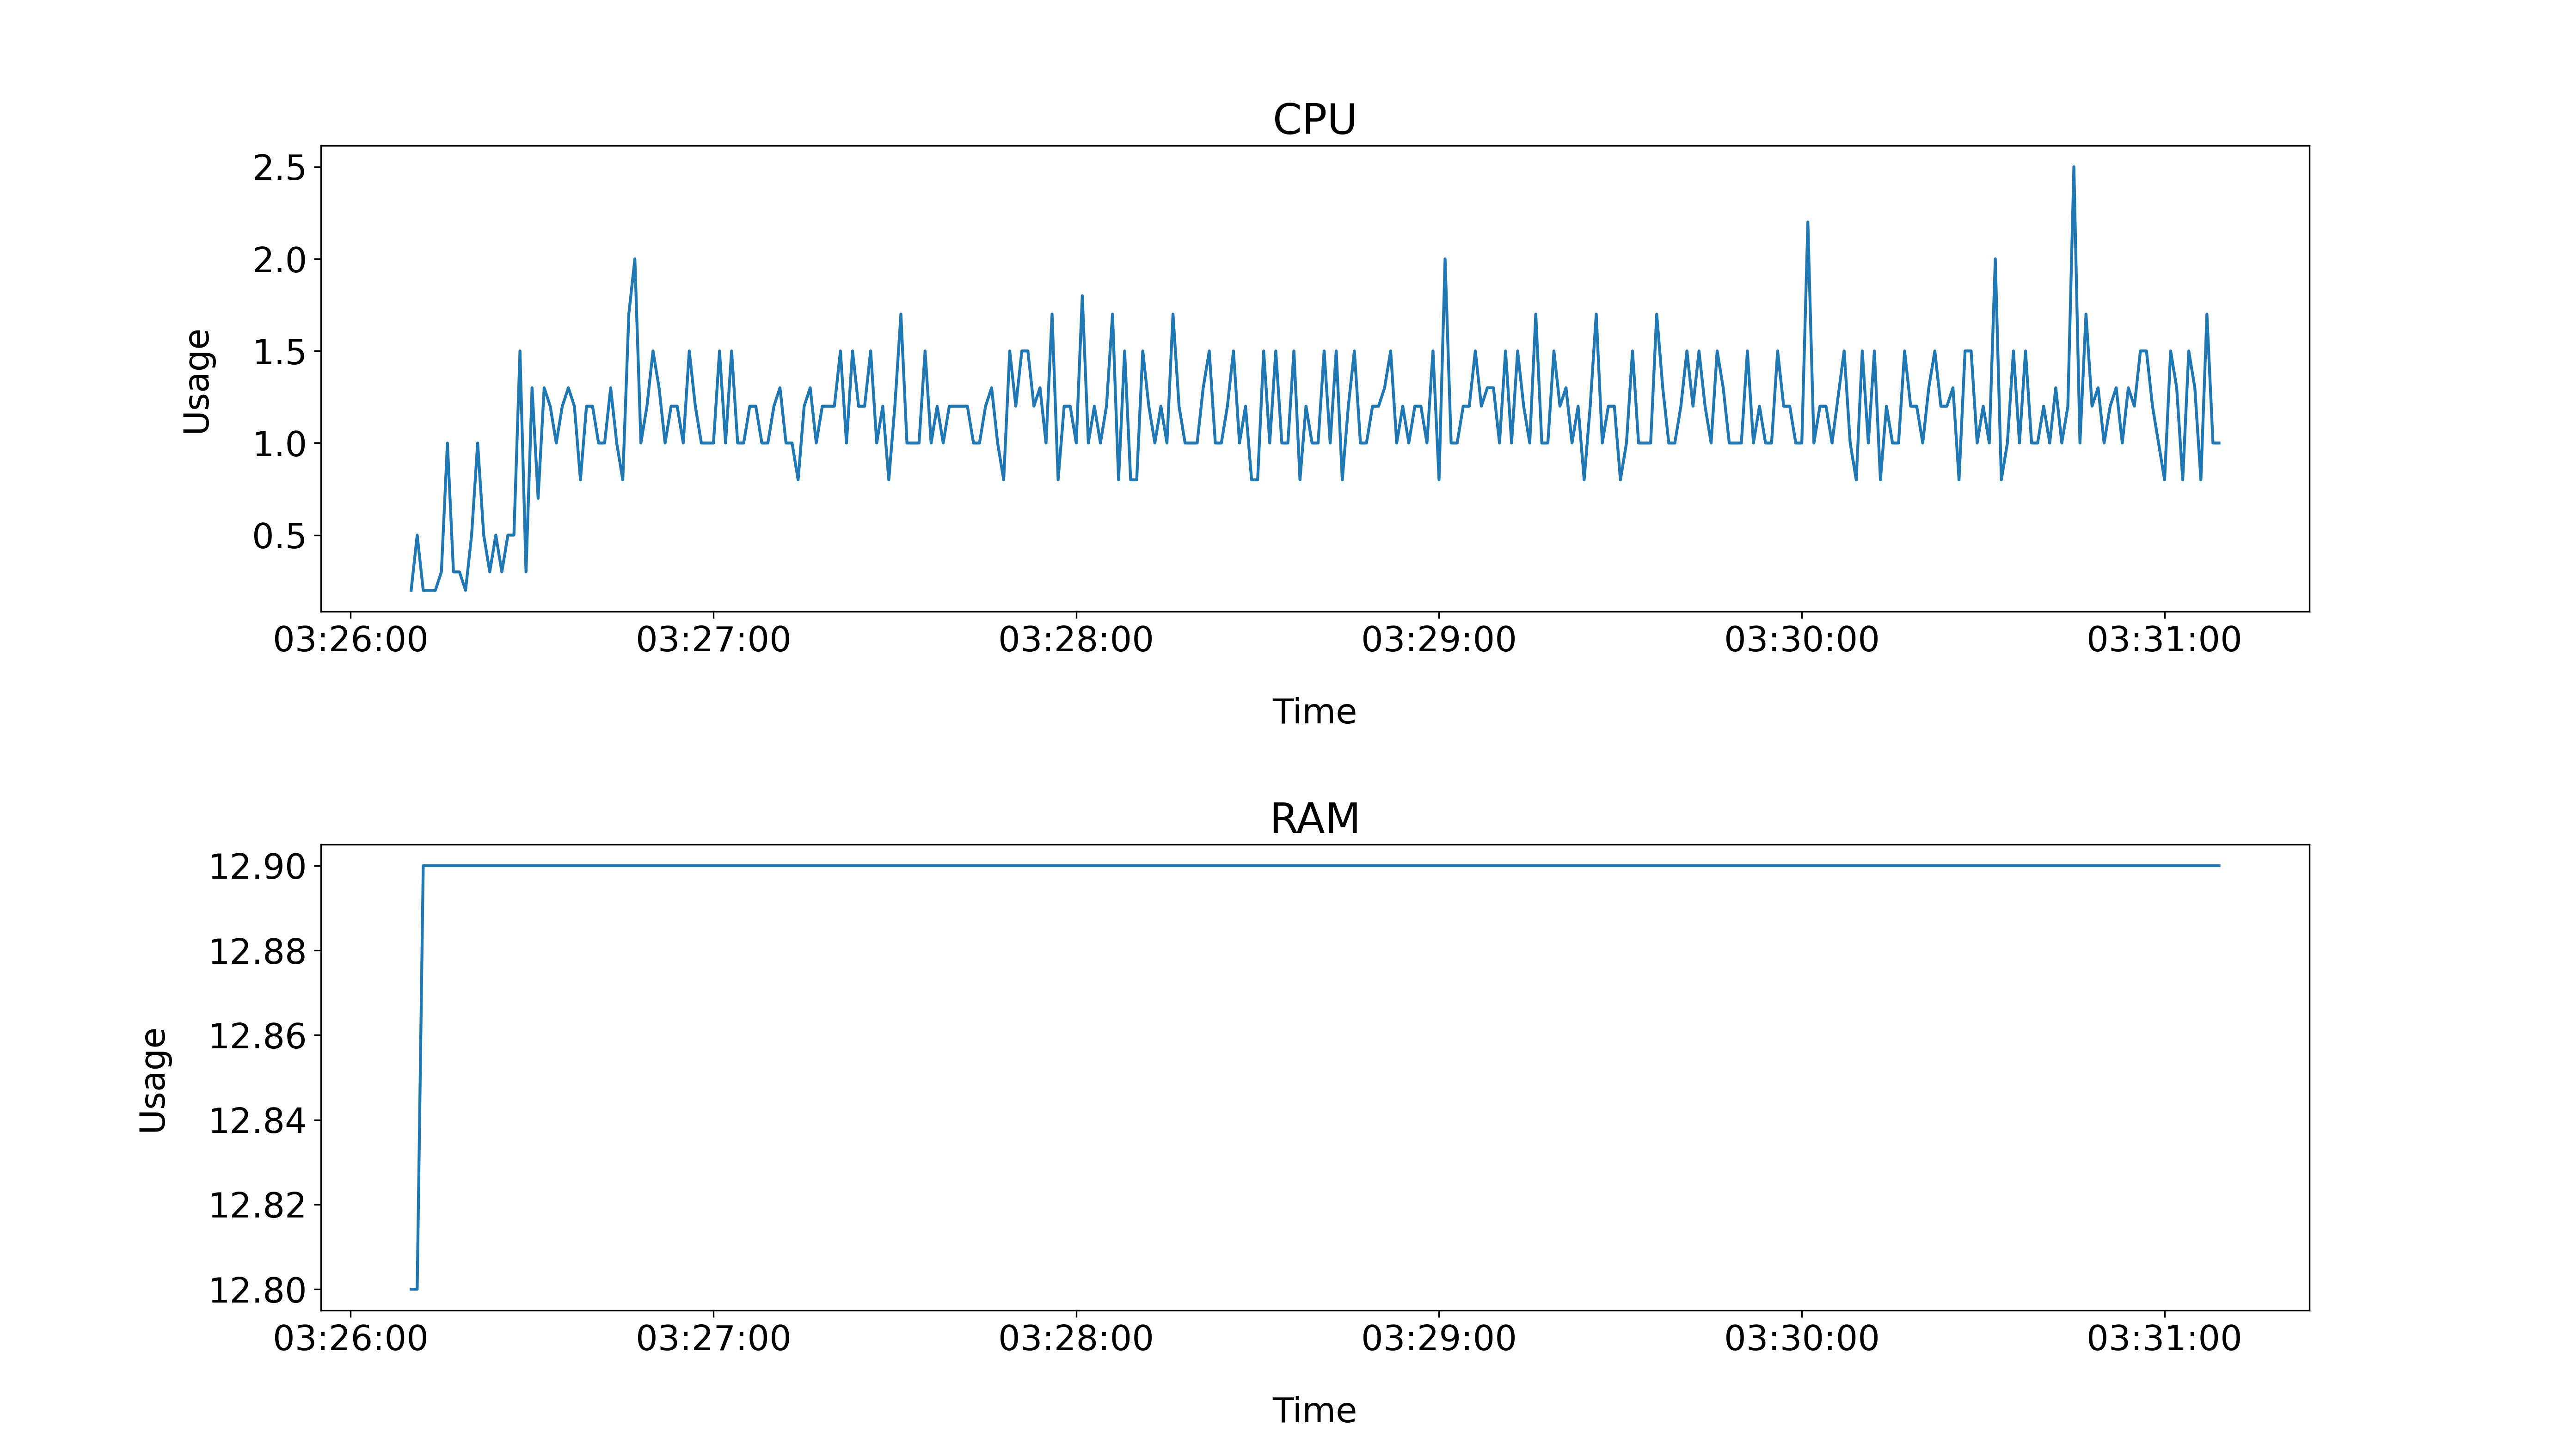
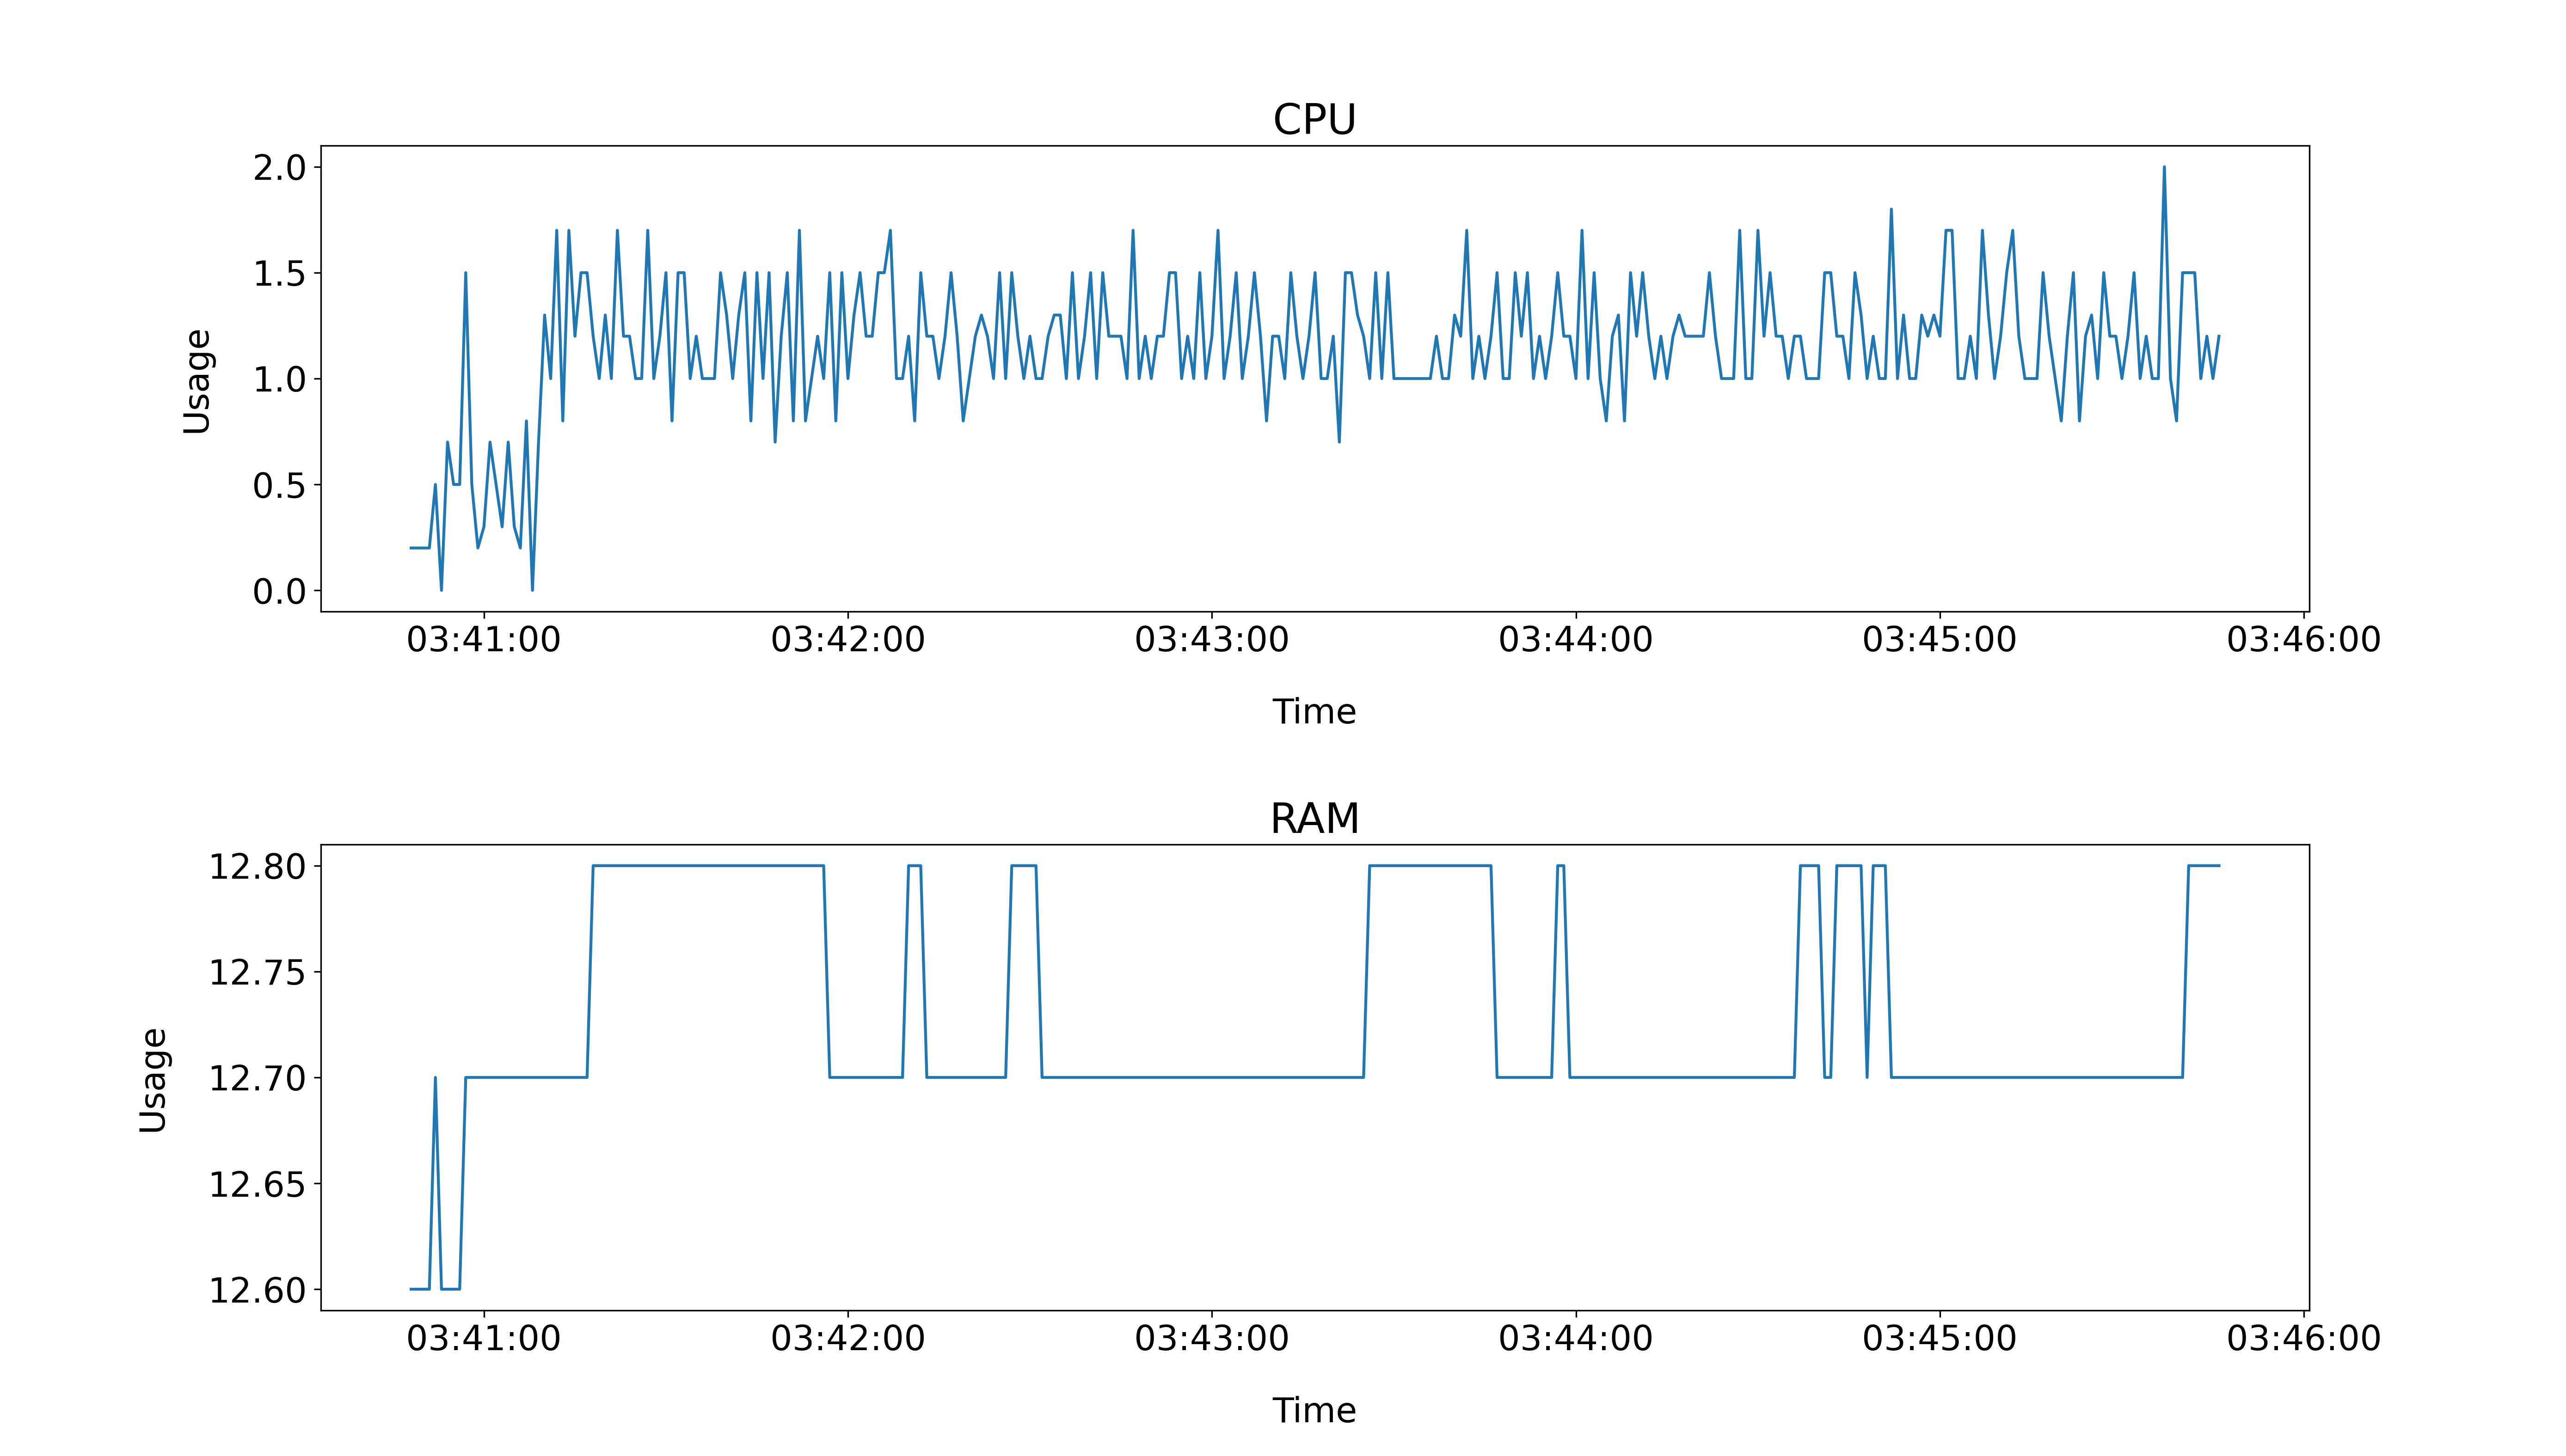
I benchmarked both scripts, I measured CPU and RAM usage every second for 5 minutes and plotted the collected data with Matplotlib.
CPU AVG: 1.1428%
RAM AVG: 12.8993%
CPU AVG: 1.1505%
RAM AVG: 12.7267%
github.com/mishka/RaspberryPiFanController
raspberrypi-aa.github.io/session2/bash.html
medium.com/coinmonks/controlling-raspberry-pi-gpio-pins-from-bash-scripts-traffic-lights
cyberciti.biz/faq/linux-execute-cron-job-after-system-reboot
cyberciti.biz/faq/how-to-redirect-output-and-errors-to-devnull
linux.com/training-tutorials/how-kill-process-command-line
This project uses the following license: MIT.


