Need help? Join us on Discord!
Non-developers should also consider using Boto for their Discord sales bot needs.
This project includes a script that can be used to routinely hit the OpenSea API, check for recent sales on a collection, and post embeds into a Discord channel with information about the sale.
Please don't abuse the OpenSea API by running this more frequently than once per hour. Ideally you should request an API key from OpenSea, and in a perfect world you would instead use Webhooks from OpenSea.
This script can easily be deployed to Heroku and run on a job schedule, so you'll need a free Heroku account from https://heroku.com. The script can be run locally or from any server that offers a NodeJS runtime.
You'll also need a Discord bot who has the ability to post in a channel in your Discord server.
First, you need a Discord server where you have permission to add a Bot. It's free and easy to create your own Discord server.
Once you have a server you can use, grab the channel ID following the instructions at this Discord support article. You'll enable developer mode, which will allow you to easily copy the channel ID from the Discord app - https://support.discord.com/hc/en-us/articles/206346498-Where-can-I-find-my-User-Server-Message-ID-.
Next, create a New Application on the Discord developer portal by clicking the button in the top right corner at https://discord.com/developers/applications.
Give your application a name.
Click into the Bot menu item. You can name your bot and give it an avatar, but the only requirement is that you copy the Bot token:
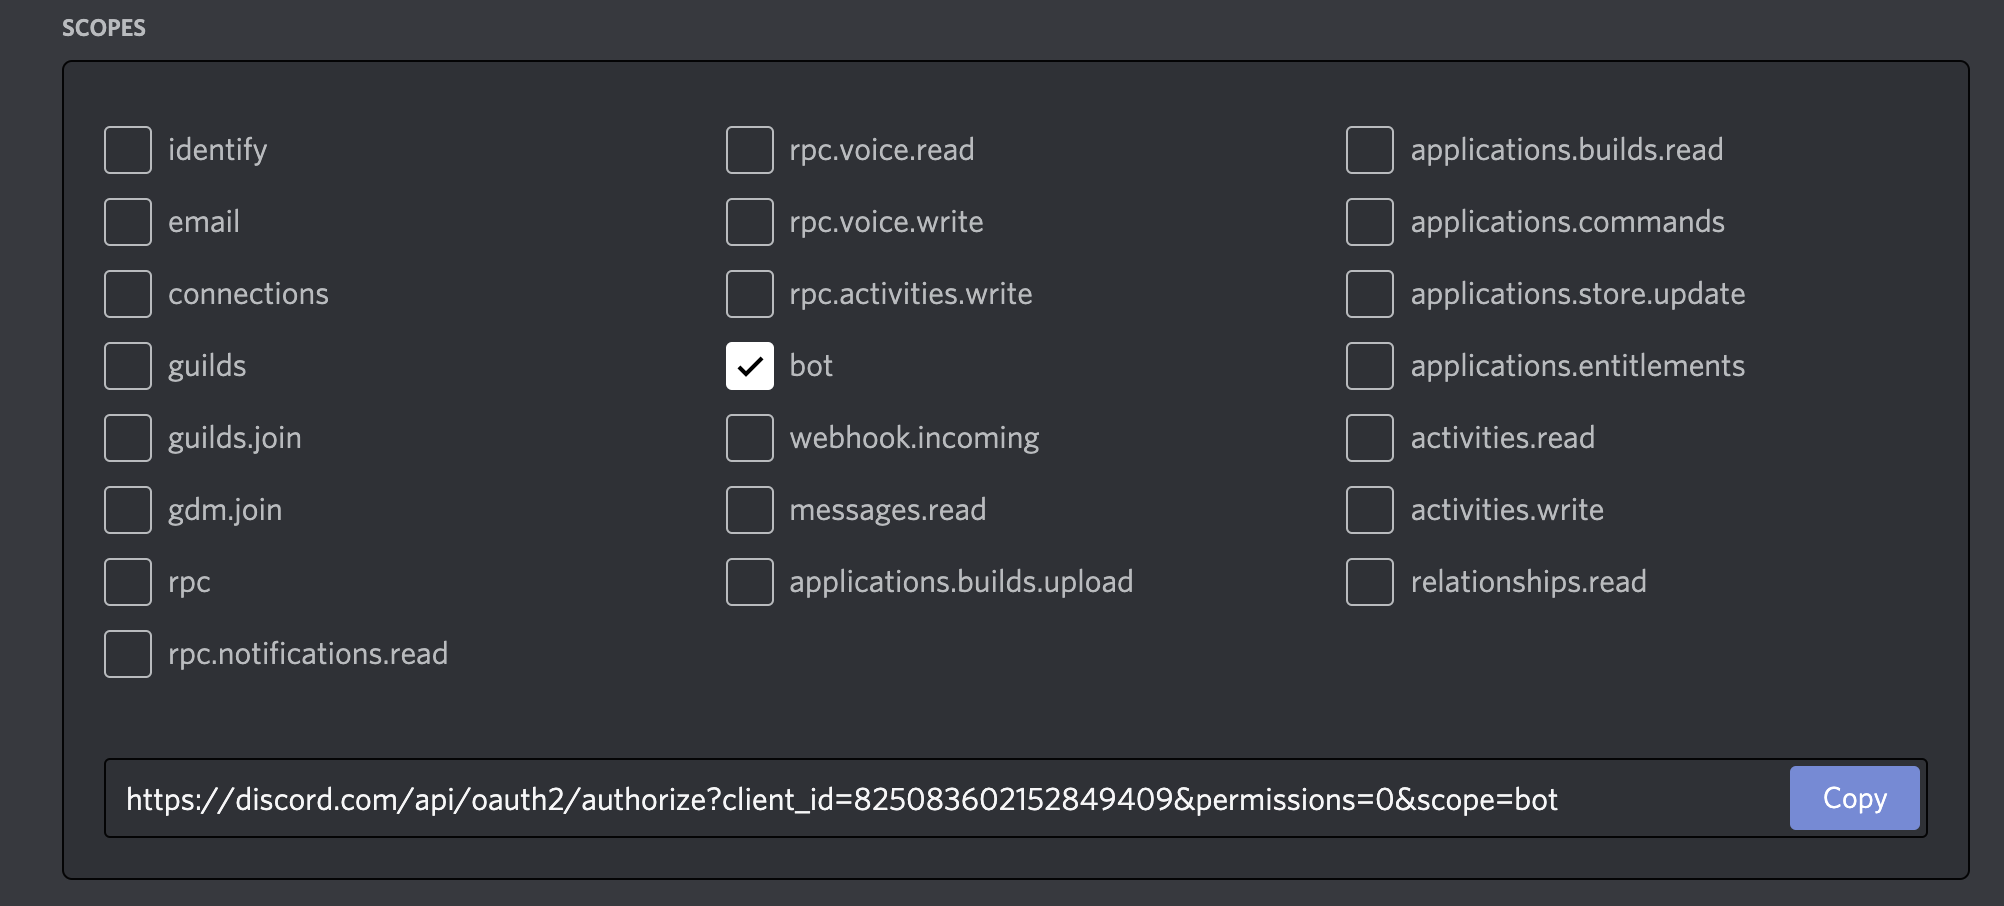
Click into the OAuth2 menu item. Give your application the bot scope:
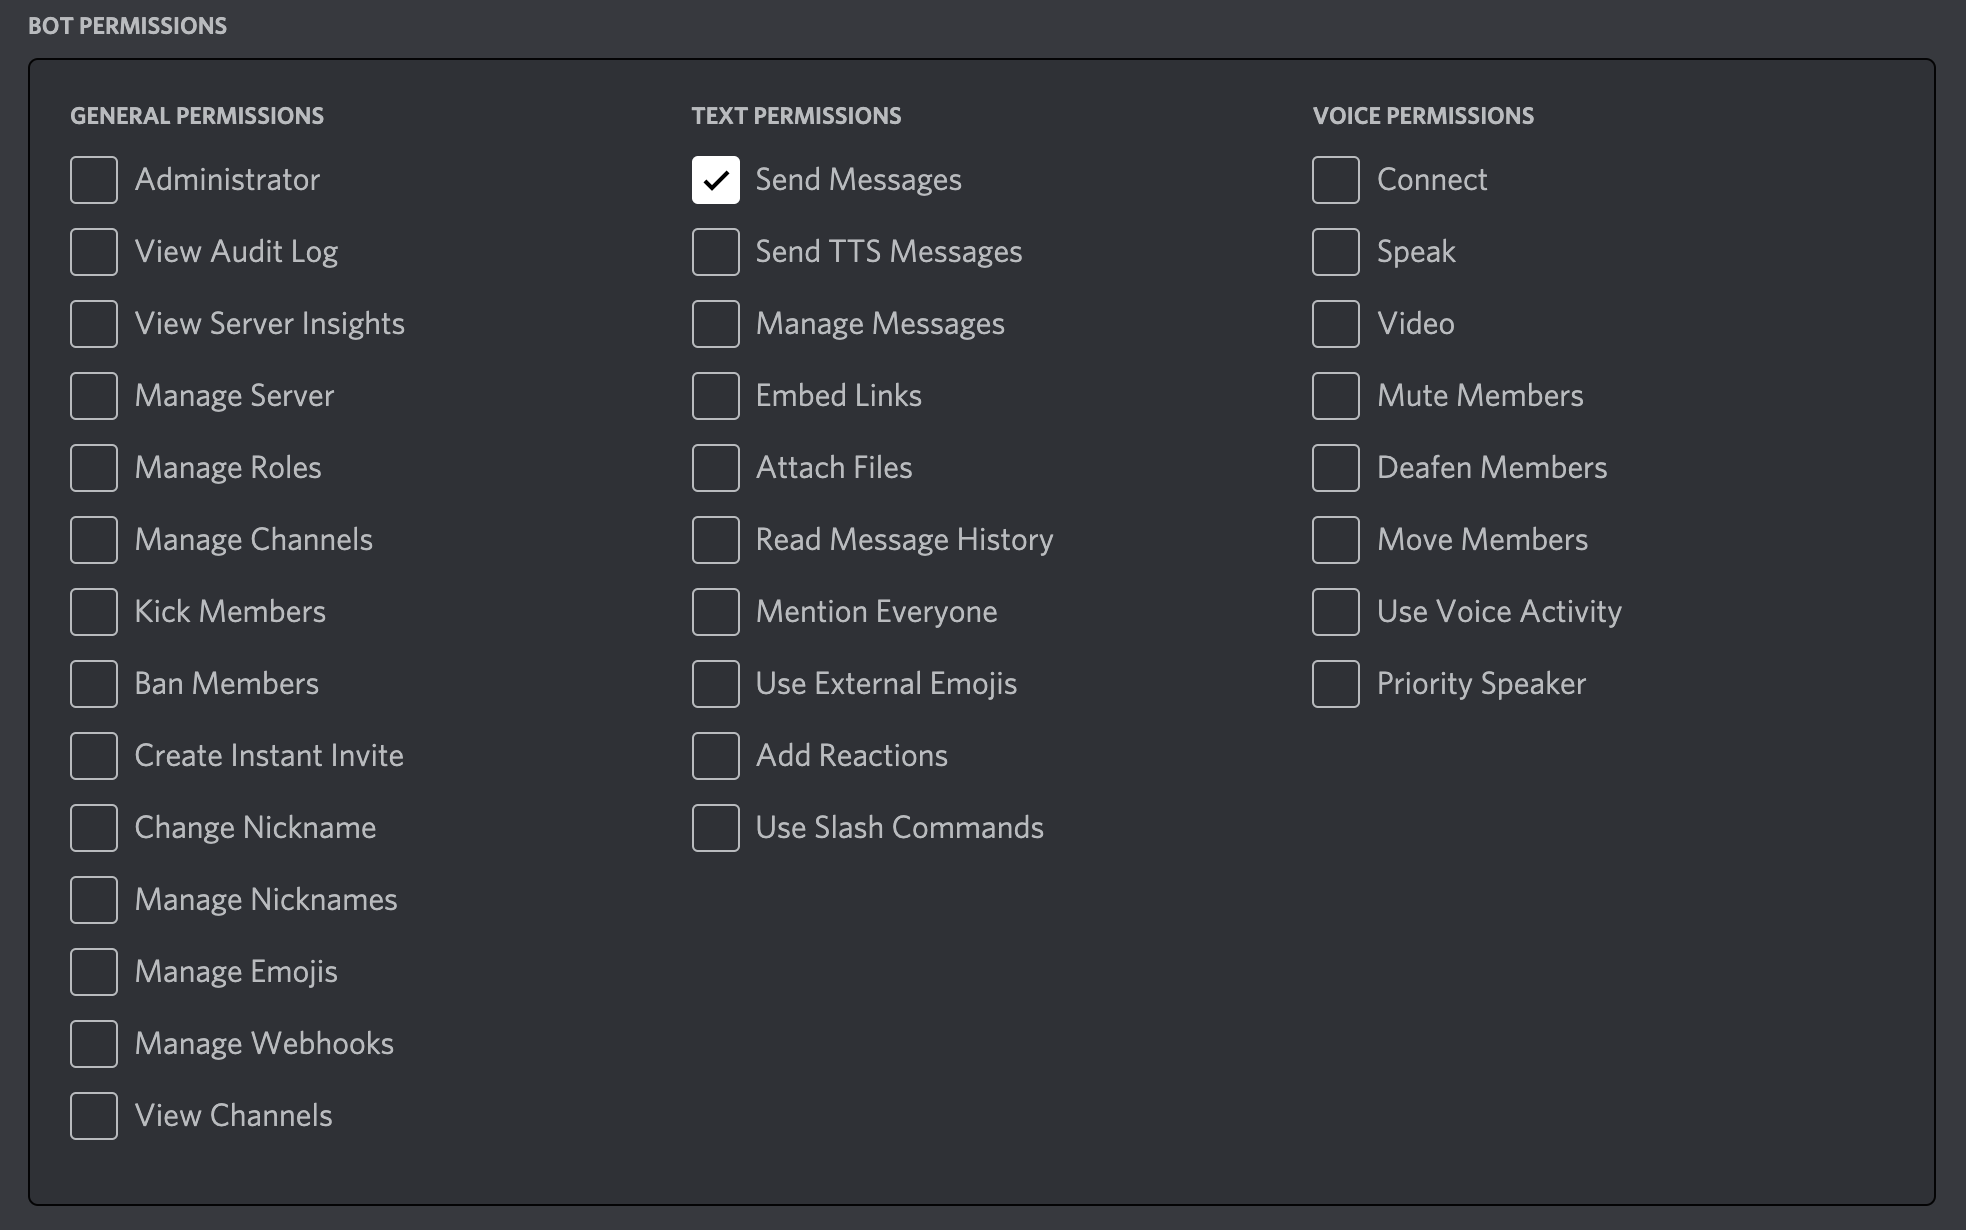
Then, in the next section, give your bot the Send Messages permission under Text Permissions:
Now you're ready to authenticate your bot to your server - copy the OAuth URL from the scopes box and open it in your browser. You'll be asked to give permission to the bot to enter your server.
Once the bot is in your server, ensure you have the following two values and you are ready to deploy or run your script:
- botToken i.e
SBI1MDI0NzUyNDQ3NzgyOTEz.YF36LQ.Sw-rczOfalK0lVzuW8vBjjcnsy0 - channelId i.e.
814900494928445450
You can run this script locally by pulling the repo to your local machine.
First, install the dependencies with npm or yarn.
Then copy the .env.example file to .env and replace the example values with your own. Or set them in your environment manually.
The contract address for the NFT collection:
CONTRACT_ADDRESS=0x196c4C7291D47BCDBbf37ab7ec9AE7ECB21Aef52
The collection slug as found in the OS URL https://opensea.io/collection/picassopunks:
COLLECTION_SLUG=picassopunks
The Id of the discord channel to post sales to:
DISCORD_CHANNEL_ID=123456789101112130
You can also send to multiple channels by adding multiple IDs:
DISCORD_CHANNEL_ID=123456789101112130;123456789101738273;123456783649182736
The token from the discord bot you created above:
DISCORD_BOT_TOKEN=SBI1MDI0NzUyNDQ3NzgyOTEz.YF36LQ.Sw-rczOfalK0lVzuW8vBjjcnsy0
Your OpenSEA API token:
OPENSEA_TOKEN=some-key-here
If you don't have one yet, request for an API token.
Then just run the code!
$ yarn ts-node ./checkSales.ts
// or
$ ts-node ./checkSales.ts
The easiest way to run this script on a chron scheduler is to deploy it to Heroku with this button:
Heroku will require that you input the ENV vars that are necessary to run the script, and will run the checkSales.ts script after a successful deploy.
The scheduler add-on is included in the app.json but you still must schedule the script to run and we recommend running it hourly. This way the script will run every hour and will check the OpenSea API for sales in the last hour.
To set up the script to run on a schedule, once your Heroku app finishes deploying, click "Manage App", and then navigate to the Heroku Scheduler addon. Create a new job, run it every, and enter
yarn ts-node checkSales.tsas the Run Command.


