ECHONET Lite to MQTT bridge.
日本語のReadmeはこちら (Readme in Japanese is here)
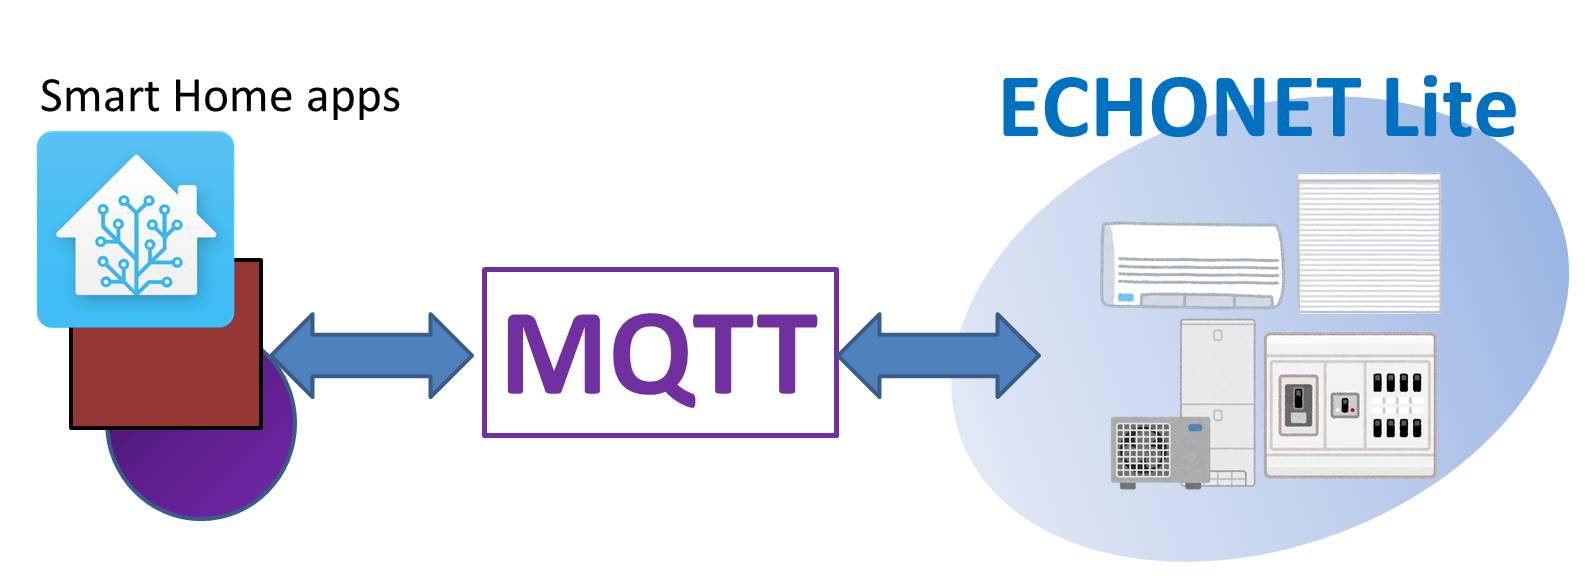
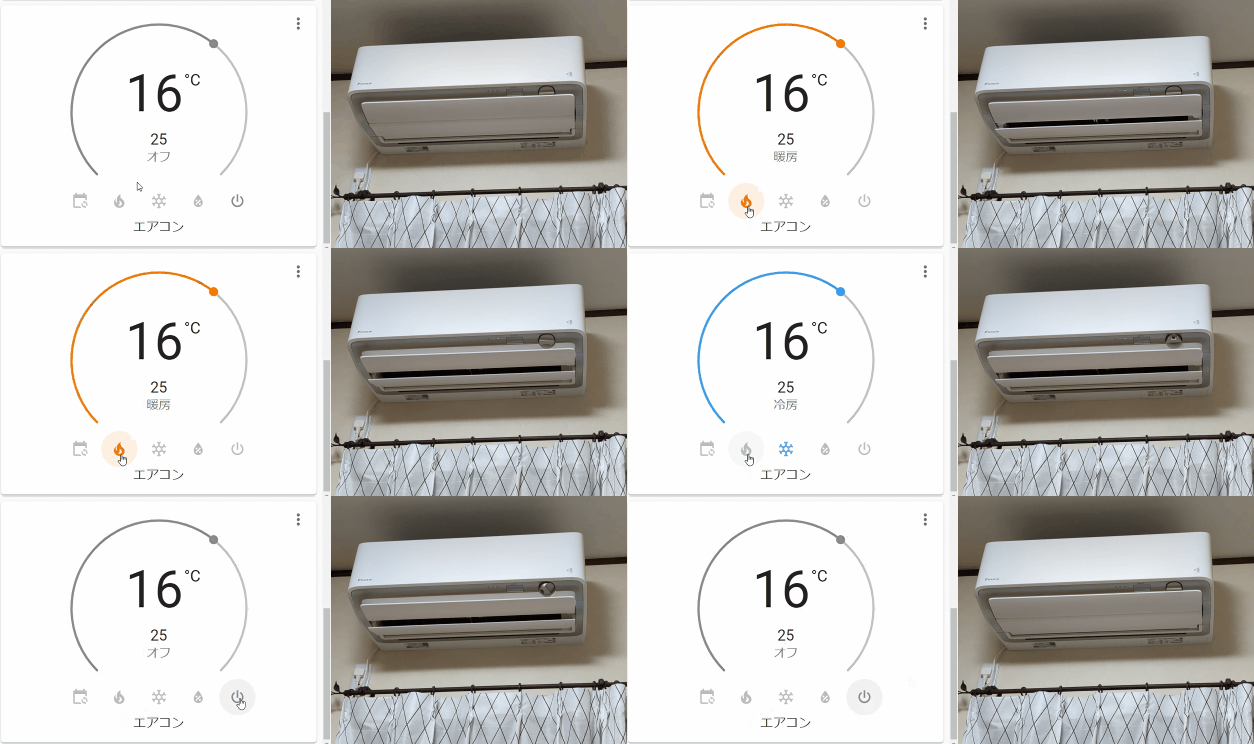
This application publishes ECHONET Lite devices to MQTT. And uses MQTT to work with ECHONET Lite devices. This will allow you to operate your ECHONET Lite device from a smart home application that supports MQTT.
The supported devices are as follows.
- Emergency button (0x0003)
- Human detection sensor (0x0007)
- Temperature sensor (0x0011)
- Humidity sensor (0x0012)
- Bath heating status sensor (0x0016)
- CO2 sensor (0x001B)
- VOC sensor (0x001D)
- Electric energy sensor (0x0022)
- Current sensor (0x0023)
- Illuminance sensor (0x00D0)
- Home air conditioner (0x0130)
- Ventilation fan (0x0133)
- Air conditioner ventilation fan (0x0134)
- Air cleaner (0x0135)
- Package-type commercial air conditioner (indoor unit) (except those for facilities) (0x0156)
- Package-type commercial air conditioner (outdoor unit) (0x0157)
- Electrically operated rain sliding door/shutter (0x0263)
- Electrically operated window (0x0265)
- Electric water heater (0x026B)
- Electric lock (0x026F)
- Instantaneous water heater (0x0272)
- Bathroom heater dryer (0x0273)
- Household solar power generation (0x0279)
- Cold or hot water heat source equipment (0x027A)
- Floor heater (0x027B)
- Fuel cell (0x027C)
- Storage battery (0x027D)
- EV charger and discharger (0x027E)
- Watt-hour meter (0x0280)
- Water flowmeter (0x0281)
- Gas meter (0x0282)
- Power distribution board metering (0x0287)
- Low-voltage smart electric energy meter (0x0288)
- High-voltage smart electric energy meter (0x028A)
- Smart electric energy meter for sub-metering (0x028D)
- General lighting (0x0290)
- Mono functional lighting (0x0291)
- EV Charger (0x02A1)
- Lighting system (0x02A3)
- Extended lighting system (0x02A4)
- Hybrid water heater (0x02A6)
- Refrigerator (0x03B7)
- Cooking heater (0x03B9)
- Rice cooker (0x03BB)
- Commercial showcase (0x03CE)
- Washer and dryer (0x03D3)
- Commercial show case outdoor unit (0x03D4)
- Switch (supporting JEM-A/HA terminals) (0x05FD)
- Controller (0x05FF)
- Television (0x0602)
echonetlite2mqtt automatically finds devices in the same network.
Therefore, echonetlite2mqtt must be run on the same network as the devices.
Also, when using docker, --net=host is required.
- Run the following command
docker run -d --net=host -e MQTT_BROKER="mqtt://your.mqtt.brocker" banban525/echonetlite2mqtt
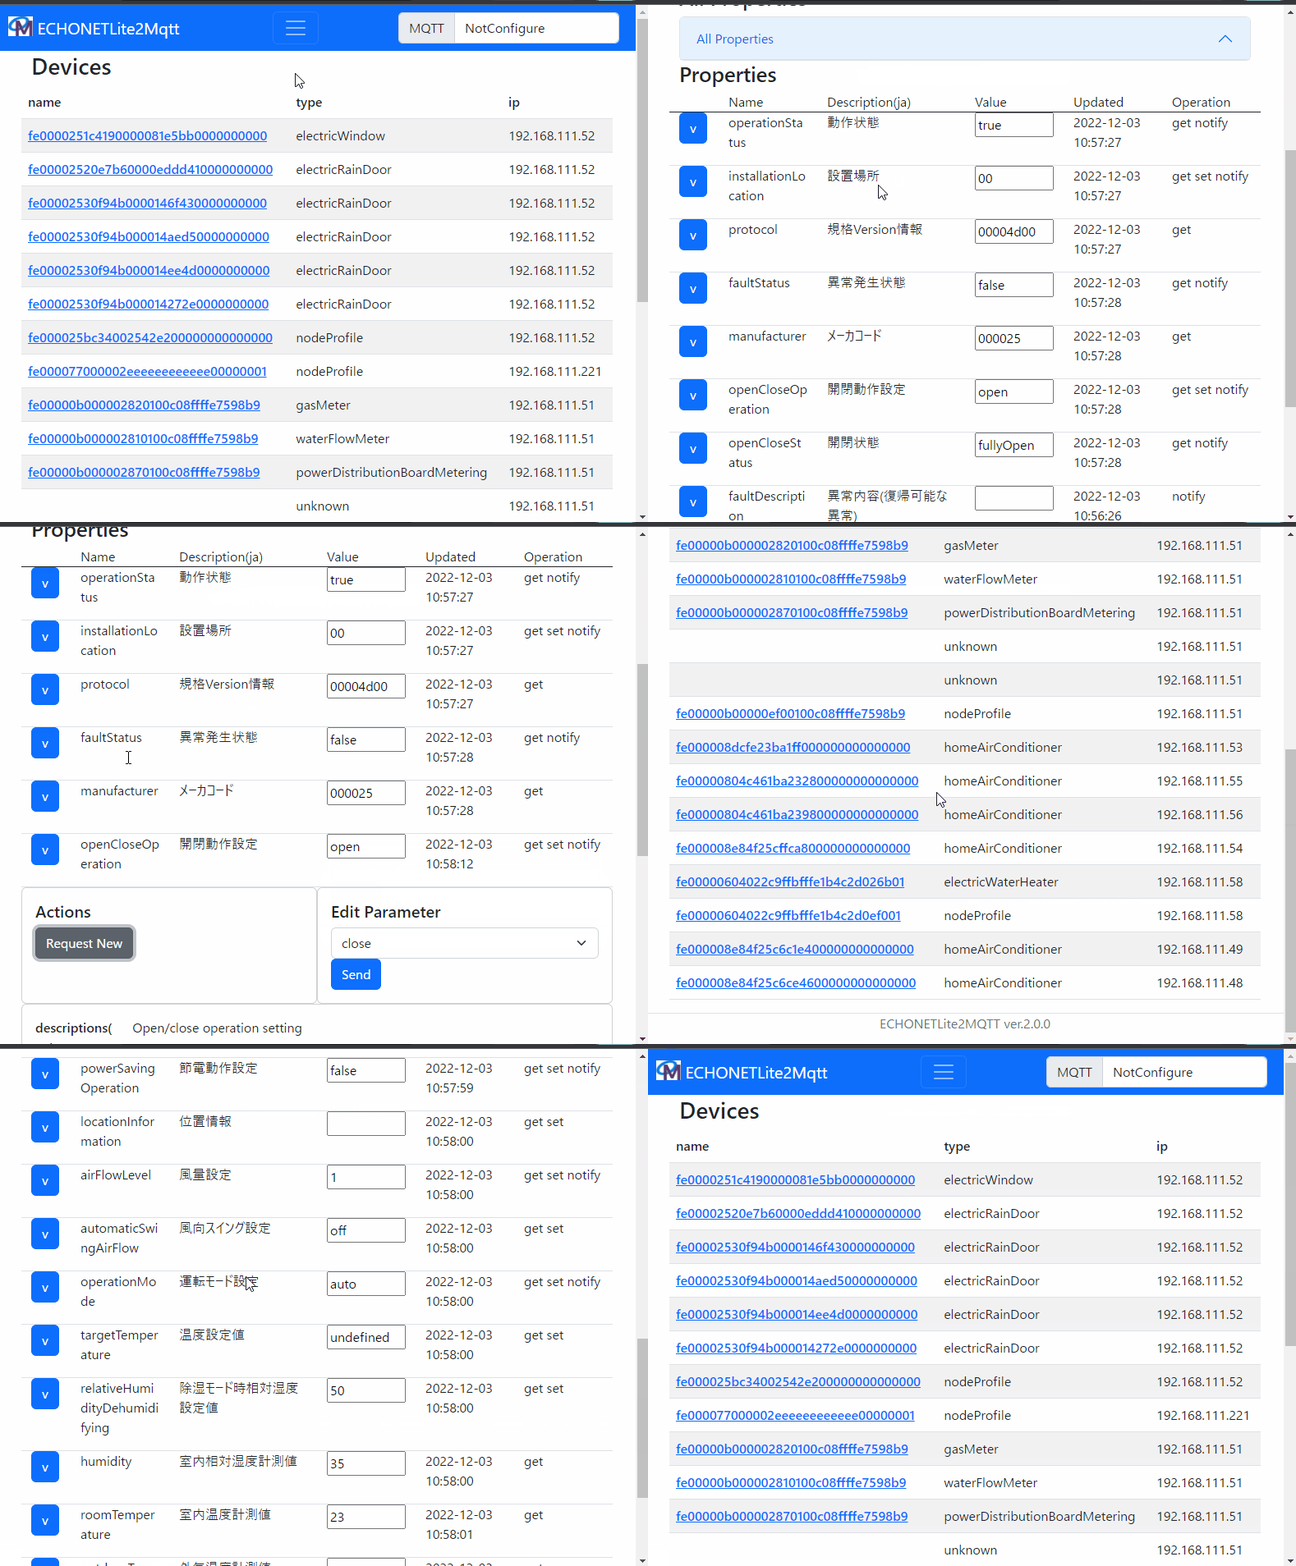
- Open "http://(docker host):3000" in your browser. You can view the detected devices and logs.
- clone this repository.
git clone https://github.com/banban525/echonetlite2mqtt.git
- Run the following command to initialize in repository root directory.
cd echonetlite2mqtt
npm install
- Run the following command to start the service.
npm start -- --MqttBroker "mqtt://your.mqtt.brocker"
- Open "http://localhost:3000" in your browser. You can view the detected devices and logs.
MQTT Options
| Environment Variables | Commandline Parameter | Description |
|---|---|---|
MQTT_BROKER |
--MqttBroker |
MQTT Brocker's URL. starts with "mqtt://" or "mqtts://". |
MQTT_OPTION_FILE |
--MqttOptionFile |
the MQTT option file path. The schema is MQTT.js ClientOptions. (Default: empty) |
MQTT_CA_FILE |
--MqttCaFile |
The MQTT CA file path. If this file exists, it will be loaded and set as an "ca" option. (Default: not load) |
MQTT_CERT_FILE |
--MqttCertFile |
The MQTT cert file path. If this file exists, it will be loaded and set as an "cert" option. (Default: not load) |
MQTT_KEY_FILE |
--MqttKeyFile |
The MQTT key file path. If this file exists, it will be loaded and set as an "key" option. (Default: not load) |
MQTT_BASE_TOPIC |
--MqttBaseTopic |
MQTT topic prefix. (Default:"echonetlite2mqtt/elapi/v2/devices") |
REST API Options
| Environment Variables | Commandline Parameter | Description |
|---|---|---|
REST_API_HOST |
--RestApiHost |
Host IP of the administrator page. If there are multiple IPs, specify them. (Default: 0.0.0.0) |
REST_API_PORT |
--RestApiPort |
Admin page port number. (Default: 3000) |
ECHONET Lite Options
| Environment Variables | Commandline Parameter | Description |
|---|---|---|
ECHONET_TARGET_NETWORK |
--echonetTargetNetwork |
Specify the network for ECHONET Lite in the format "000.000.000.000/00". (Default: Auto) |
ECHONET_DEVICE_IP_LIST |
--echonetDeviceIpList |
Specify the device IPs separated by commas. (Default: none) |
ECHONET_DISABLE_AUTO_DEVICE_DISCOVERY |
--echonetDisableAutoDeviceDiscovery |
Disable automatic device discovery. (default: off) |
ECHONET_ALIAS_FILE |
--echonetAliasFile |
The file path for alias option file. (Defalt: (empty)) |
ECHONET_LEGACY_MULTI_NIC_MODE |
--echonetLegacyMultiNicMode |
Revert to legacy communication mode. (Default: off) |
ECHONET_UNKNOWN_AS_ERROR |
--echonetUnknownAsError |
Specifies whether to treat unknown classes and unknown properties as errors. (Default: off) |
ECHONET_INTERVAL_TO_GET_PROPERTIES |
--echonetIntervalToGetProperties |
(Deprecated since v3.0.0) |
ECHONET_ALT_MULTI_NIC_MODE |
--echonetAltMultiNicMode |
(Deprecated since v3.0.0) |
You can alias device Ids using ECHONET_ALIAS_FILE ( or --echonetAliasFile ) option.
This option specifies the path of the Alias Option File.
The Alias Option File is a Json file with the following format:
{
  "aliases":[
    {
      "id":"fe00-your-device-id-00000000000000",
      "name":"alias name"
    },

...

    {
      "id":"fe0000251c4190000081e5bb0000000000",
      "name":"shutter"
    },
    {
      "id":"fe000008dcfe23ba1ff000000000000000",
      "name":"airconditioner-living"
    }
  ]
}
the major changes from version 1.x to version 2.x:
- (1) Default MQTT topic name changed from "echonetlite2mqtt/elapi/v1" to "echonetlite2mqtt/elapi/v2".
- (2) The Id has changed on some devices.
- (3) The property "schema" specification changed.
- (4) Redesigned the web front end.
If you want to keep compatibility with version 1.x as much as possible, you can use the MQTT_BASE_TOPIC (or --MqttBaseTopic ) option for (1) and the ECHONET_ALIAS_FILE ( or --echonetAliasFile ) option for (2).
docker run -d --net=host -e MQTT_BROKER="mqtt://your.mqtt.brocker" -e MQTT_BASE_TOPIC="echonetlite2mqtt/elapi/v1/devices" -e ECHONET_ALIAS_FILE=/app/configure/alias.json -v (some folder):/app/configure banban525/echonetlite2mqtt

or

npm start -- --MqttBroker "mqtt://your.mqtt.brocker" --MqttBaseTopic "echonetlite2mqtt/elapi/v1/devices" --echonetAliasFile ./alias.json
You can set connection options in the json file. The schema of the json file is Client Options in mqtt.js.
For example, if you want to specify a username and password:
- Save the connection options file in any folder. (Example: /(any folder)/config.json)
{
  "port": 1883,
  "username": "your-username",
  "password": "your-password"
}
- [docker]Mount the configuration file with the -v option and set the file path with MQTT_OPTION_FILE.
docker run -d --net=host \
-v /(any folder)/config.json:/app/config/config.json \
-e MQTT_OPTION_FILE=/app/config/config.json \
-e MQTT_BROKER="mqtt://your.mqtt.brocker" \
banban525/echonetlite2mqtt
- [node.js] Use the
--MqttOptionFileoption to set the file path of the configuration file.
npm start -- --MqttBroker "mqtt://your.mqtt.brocker" --MqttOptionFile /(any folder)/config.json
If your execution environment has multiple IPs, try the environment variable ECHONET_TARGET_NETWORK and ECHONET_ALT_MULTI_NIC_MODE. (when use Node.js, the command line parameter --echonetTargetNetwork and --echonetAltMultiNicMode)
- for Docker:
-e ECHONET_TARGET_NETWORK="192.168.1.0/24" -e ECHONET_ALT_MULTI_NIC_MODE=1 - for Node.js:
--echonetTargetNetwork "192.168.1.0/24" --echonetAltMultiNicMode
You can reload the properties on the web screen. If you can reload from the web screen, you can manually update the properties by sending an MQTT topic.
For example, if you want to update the room temperature value of an air conditioner, send the following MQTT topic. (Replace "fe00-your-device-id-00000000000000" with your device ID.)
echonetlite2mqtt/elapi/v2/devices/fe00-your-device-id-00000000000000/properties/roomTemperature/request
This is not possible as the ECHONET Lite "Set temperature value" (ja:温度設定値) specification is in units of 1 degree.
See specs below.
ECHONETLite2MQTT uses Echonet lite Machine Readable Appendix (MRA) as a device definition. However, you may want to use a device class that is not in MRA, or a manufacturer-specific extension. You can overwrite the MRA definition by creating a Json file with the eoj name in the "MRA_custom" folder.
Example: For air conditioner (eoj=0x0130)
/MRA_custom/0x0130.json

{
   "eoj": "0x0130"
   ...
}
For the file format, please refer to Echonet lite Machine Readable Appendix (MRA). Also, Json Schema is provided in "MraTypes.schema.json".
- The images in the repository use materials such as "いらすとや" (https://www.irasutoya.com/).
- Machine Readable Appendix (MRA) Version 1.1.1 is used as the definition of ECHONET Lite. (https://echonet.jp/spec_mra_rp1/)


