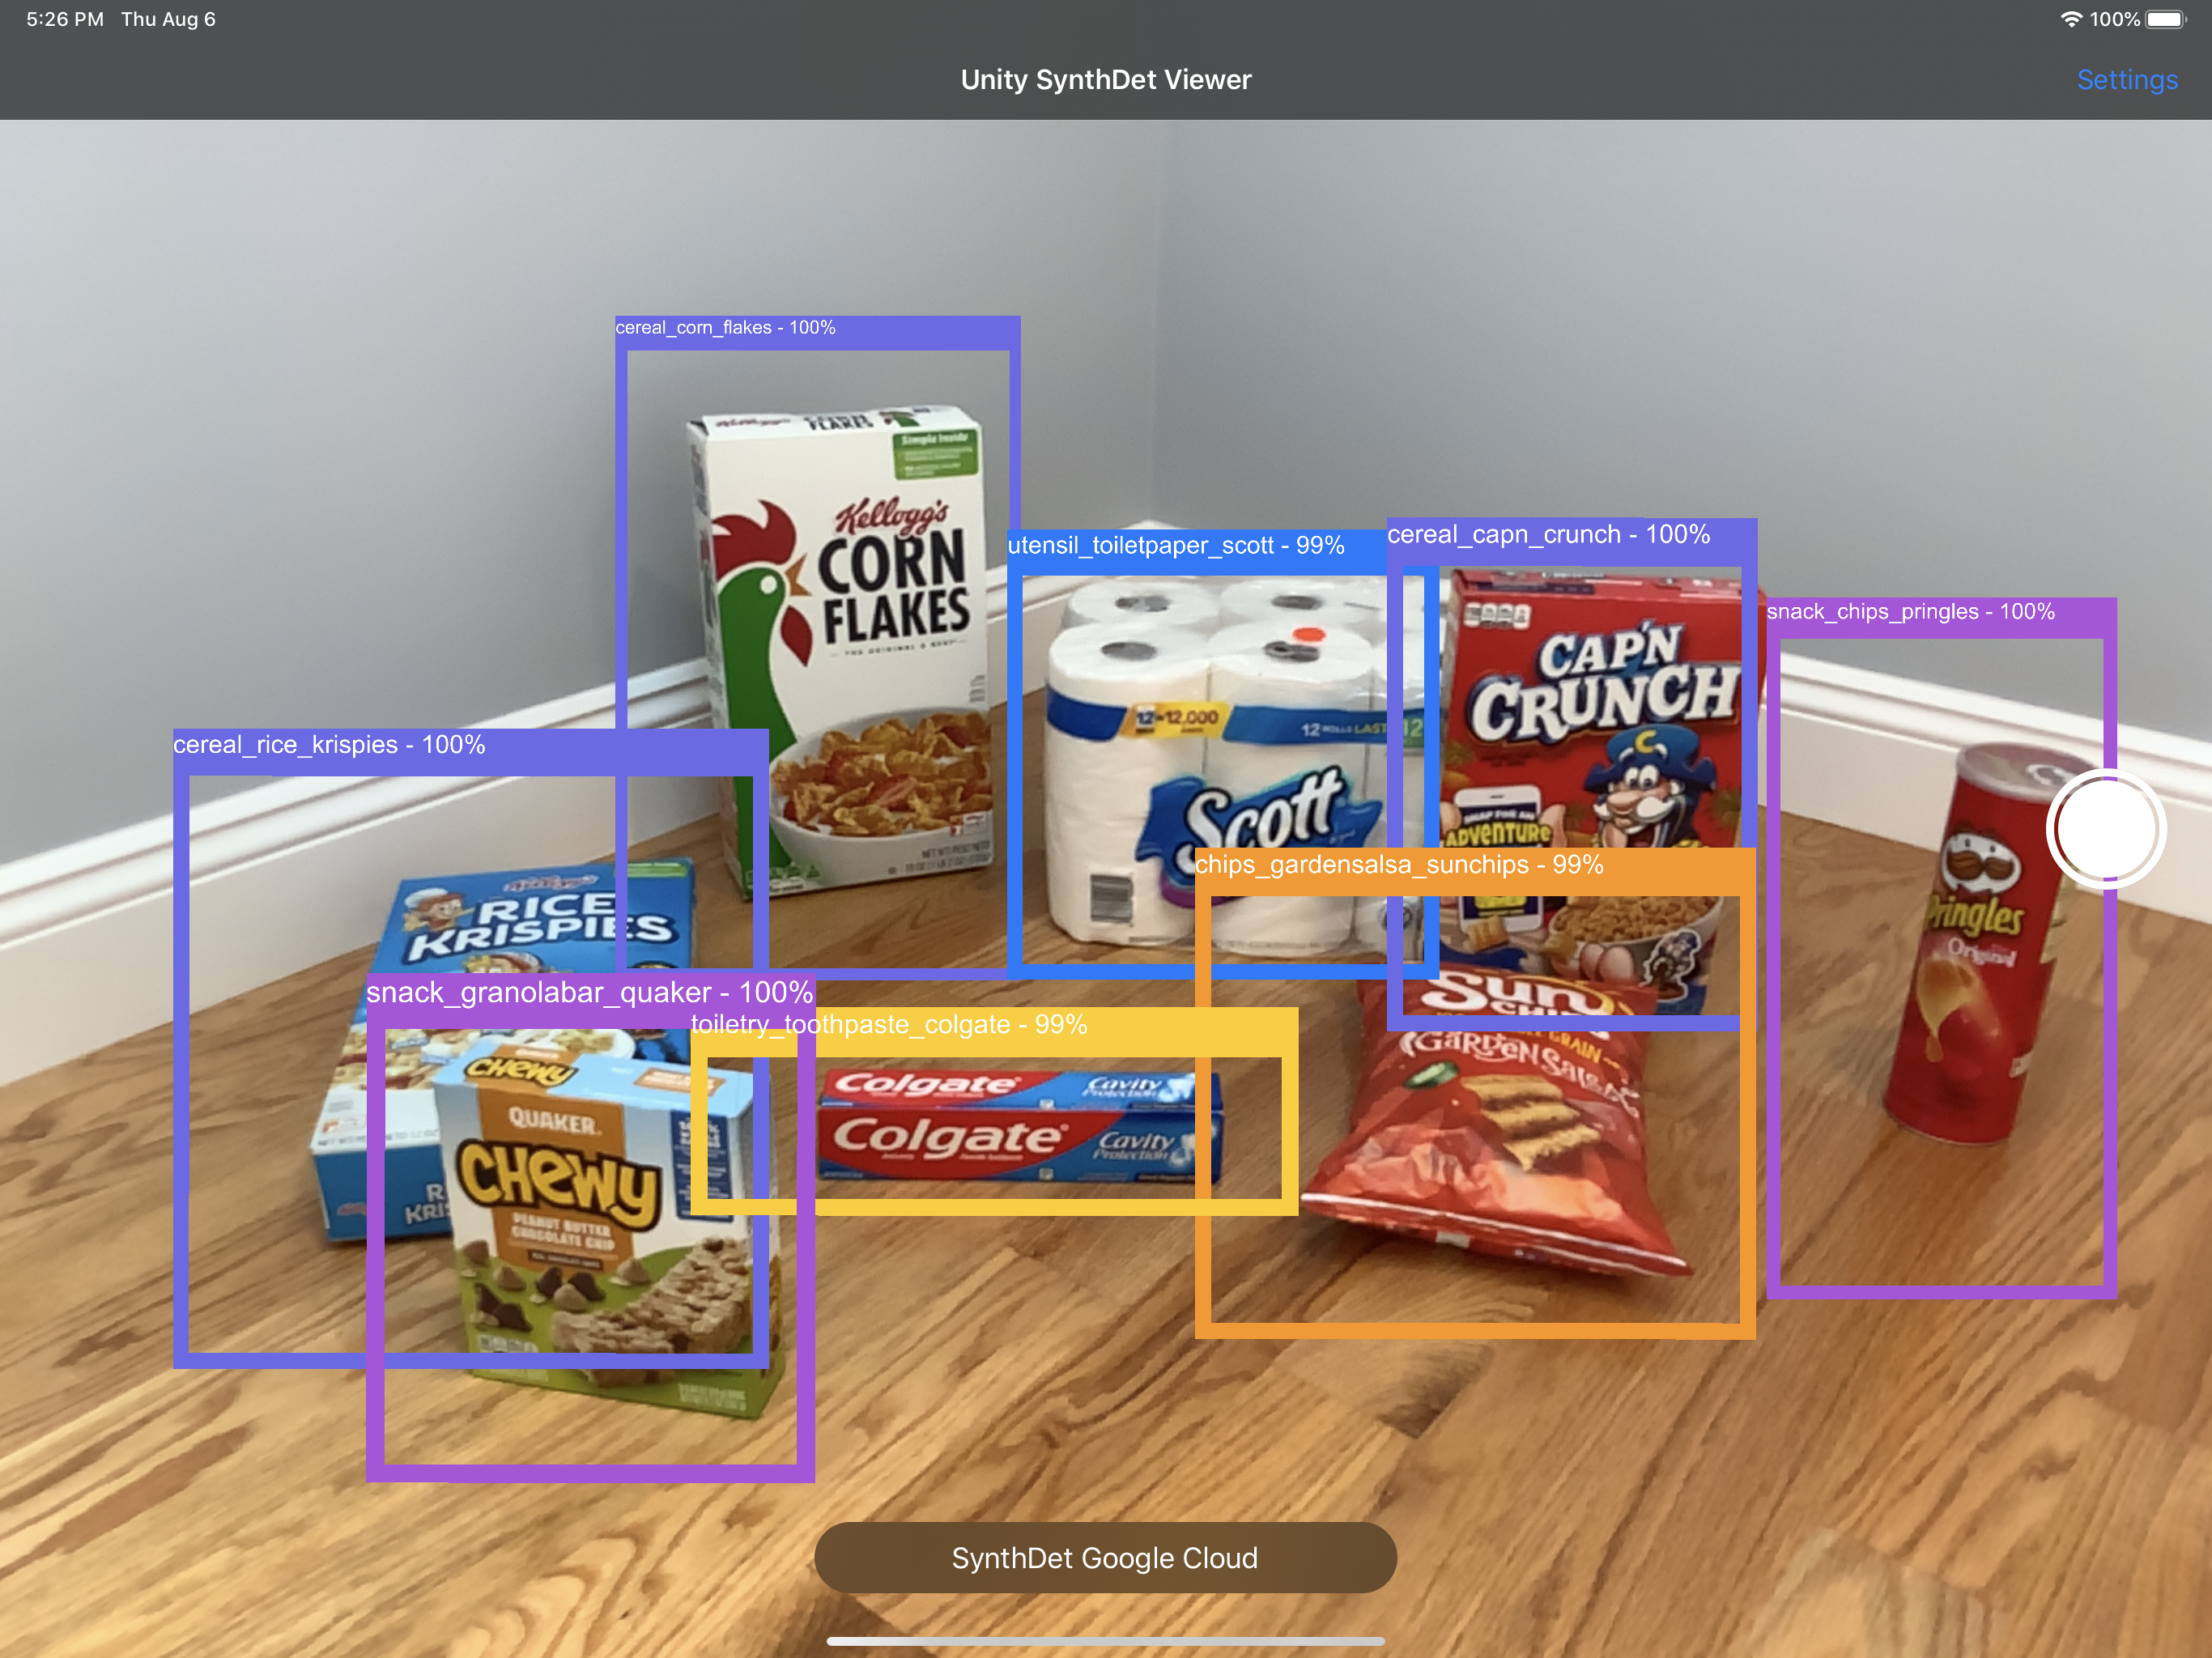
Test your machine learning models generated with Unity SynthDet in real life using Unity SynthDet Viewer! This app uses your device’s camera to send a stream of pictures to your machine learning models. Host your machine learning models online, and point the app to your server. Bounding boxes will appear around everything your ML models detect. Capture, share, and export the results of your object detection.
This is an app for iPhone and iPad that displays results of object detection machine learning models in augmented reality. For AR, this app uses Unity AR Foundation. Bounding boxes of detected objects are added to points in the real world through AR. The app relies on a web API for prediction. We use TorchServe to host our SynthDet model. The app consists of two parts: the Unity component and native iOS component.
- Augmented Reality rendering of bounding boxes around your ML model's predictions
- Customizable experience with ability to change minimum prediction score, and easily editable model list
- Switch models in the Viewer live, for easy comparison in training between many models
- Capture, share, and export the results of your object detection
| Section | Steps |
|---|---|
| Dependencies | TorchServe REST server: Host your SynthDet trained model using perception-synthdet-torchserve. You can also host your own object dection model. |
| Installation |
|
| Run |
|
| Button | What it does | Where it is |
|---|---|---|
| Choose Model / {model name} | Tap to choose the active model | Bottom center of the main screen |
| Shutter Button | Circular button that takes a picture of the current image on screen, and saves a COCO export of the scene as well, for data analysis | On the middle right side of the screen |
| Share Captures | Shares a folder of all captures taken with the Shutter Button. This uses the iOS Share Sheet, so you can share your captures like normal photos on iOS, sending them via AirDrop, Google Drive, email, text, etc | Settings screen |
| Delete All Captures | Deletes all captures taken | Settings screen |
| QR | Reads current camera image for QR codes; if it finds one, places the text in the URL box next to it | Settings screen, on each model row |
Check out the guide for developing new features.
