movy.js is an intuitive animation engine for creating explanatory videos.
Make sure you have node.js (version >= 12) installed on your computer.
- Install movy.js by:
npm i movy@latest -g - Run
movyto open a list of examples (example animations are located in themovy/examplesfolder):
- To create a new animation, simply run
movy hello.js. It will automatically create a new animation filehello.js(if the file does not exist):
import * as mo from "movy";

mo.addText("Hello, Movy!", {
  scale: 0.8,
  color: "yellow",
}).grow();
Note: Modifying the source code will automatically refresh the browser.
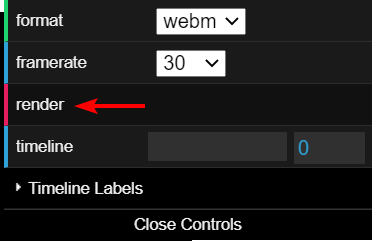
- Click "Render" button to render the animation to a video file:
xxx.webm
To add new objects, you can use mo.add___(). For example:
| Method | Comment | Preview |
|---|---|---|
mo.addCircle() |
Add a circle |  |
mo.addRect() |
Add a rect |  |
mo.addTriangle() |
Add a triangle |  |
| ... | ... | ... |
All methods above can take extra named arguments for customization. For example, to set the object color and scale, you can use
mo.addTriangle({ color: "yellow", scale: 0.5 });
This will create a half-sized yellow triangle.
Furthermore, you can pass
Besides, you can use mo.add___Outline() methods to create outlined shapes. For example:
| Method | Comment | Preview |
|---|---|---|
mo.addCircleOutline() |
Add circle outline. |  |
mo.addRectOutline() |
Add rect outline. |  |
mo.addTriangleOutline() |
Add triangle outline. |  |
| ... | ... | ... |
All named arguments mentioned in the previous section still works for these outlined shapes. Moreover, you can pass
For each added scene object, you can call, e.g. obj.fadeIn(), obj.reveal(), obj.grow(), etc. to add different animations.
const rect = mo.addRect();

rect.grow();  // This will add grow animation to the circle object.
The following table lists the common animations supported by movy.js.
|
 |
|
 |
|
 |
|
 |
|
 |
|
 |
All animations can take following parameters for customization.
|
t parameter specifies when the animation should be started. For example, t: 1 specifies that the animation should start at 1 second. t: '<' specifies that the animation should begin at the same time of the previous animation. t: '+=1' specifies that the animation should starts 1 second after all previous animations finish. movy.js internally uses gsap. For more information, please refer to Understanding the Position Parameter. |
|
Set the animation duration to 2 seconds. |
|
ease parameter specifies the easing curve used for the animation. Different animations are pre-configured with different default easing functions. However, you can overwrite this to completely change the nature of your animation. For more information, please refer to gsap / Eases |
Note that some animation can take extra parameters. For example, you can pass { direction: 'down' } in obj.reveal() to specify the direction from which the object reveals.
By combining existing animations with some parameter tweaking, we can derive more complicated and beautiful animations.
mo.addRectOutline()
  .reveal()
  .moveTo({ rz: Math.PI * 4, duration: 2 })
  .fadeOut();


