This repository contains the code and resources used for virtualizing the circuit of the Putlec EQP1A studio equalizer. The virtual analog model was developed using Wave Digital Filters (WDF) and the resulting model was integrated into a VST3 plugin using the JUCE framework.
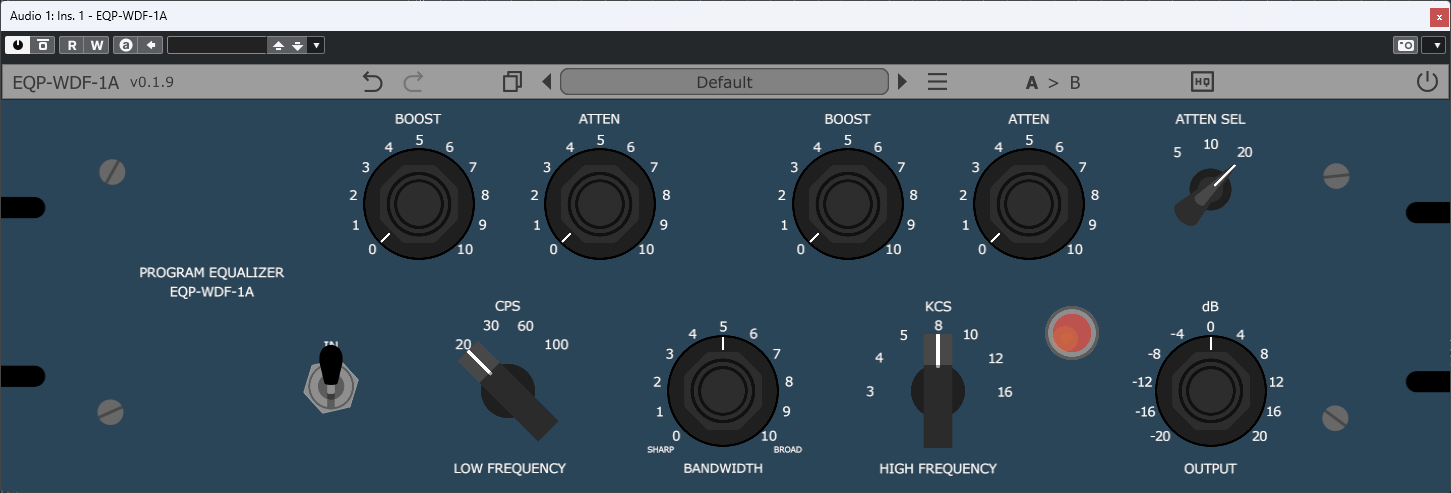
GUI of the EQP-WDF-1A VST3 plug-in.
The plug-in is available in VST3 and as a standalone application and is compatible with 64 bit Windows and MacOS operating systems. It closely matches the curves of the original Pultec EQP-1A using WDFs and internal oversampling. You can download it here.
The Pultec EQP-1A is a classic analog equalizer that has been widely used in the music industry since its introduction in the 1950s. It is renowned for its unique sound and musicality, making it a favorite among audio engineers and producers.
The low-frequency section of the EQP-1A is a shelving EQ, providing four selectable frequency bands at 20, 30, 60 and 100Hz. These frequencies can be boosted to a maximum of 13.5dB and attenuated (cut) by 17.5dB. Sound engineers long ago discovered that interesting (and useful) equalization curves could be achieved by simultaneously boosting and cutting at the same time, as the boost and cut frequencies overlap.
This has become known as the ‘low-end trick’. On a bass drum, for example, if 30Hz is simultaneously boosted and cut, the curve created gives a boost at 80Hz with a dip at around 200Hz – a very pleasing curve on some bass drums. The sound can be further sweetened using the high-frequency controls.
The Pultec’s high-frequency section features a boost-peaking EQ and offers seven centre frequencies – at 3, 4, 5, 8, 10, 12 and 16kHz – which can be boosted by up to 18dB, while a Bandwidth control alters the Q of the equalization curve from sharp to broad. The high frequencies can also be cut at 5, 10 and 20kHz. This is a shelf-cut with up to 16dB of attenuation available.
Taken from MusicTech
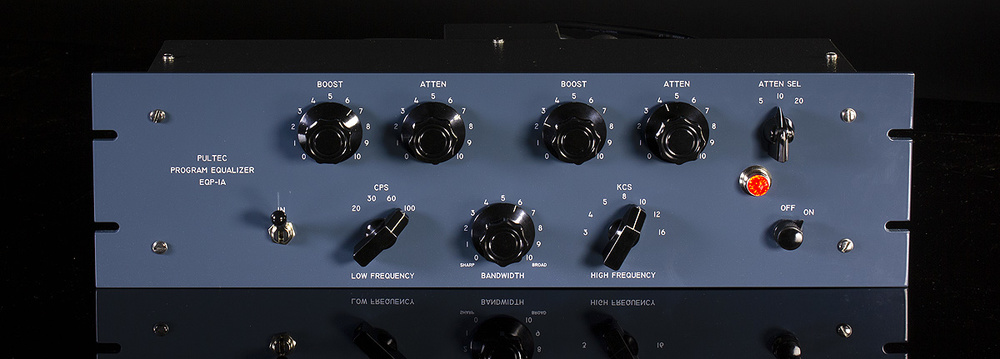
Pulse Technique's EQP-1A hardware unit.
To model the EQP1A circuit, first I compiled a few schematics of the unit that can be found online, and then I setup a simulation of the circuit in LTSpice. The schematic files used for the LTSpice simulations are included in the /CircuitSim folder.
After some adjustments in the values of the elements of the circuit to get the frequency response as close as possible to the original unit's one the circuit was implemented using Python and Gus Anthon's pywdf library. The Python implementation (and a second implementation using R-Type adaptors) can be found in the /Prototype folder.
WDF structure used for the modeling of the circuit.
The comparison between the frequency response of the LTSpice simulation and Python implementation is included below.
Full boost and cut curves for the selectable low frequencies (20 Hz, 30 Hz, 60 Hz y 100 Hz).
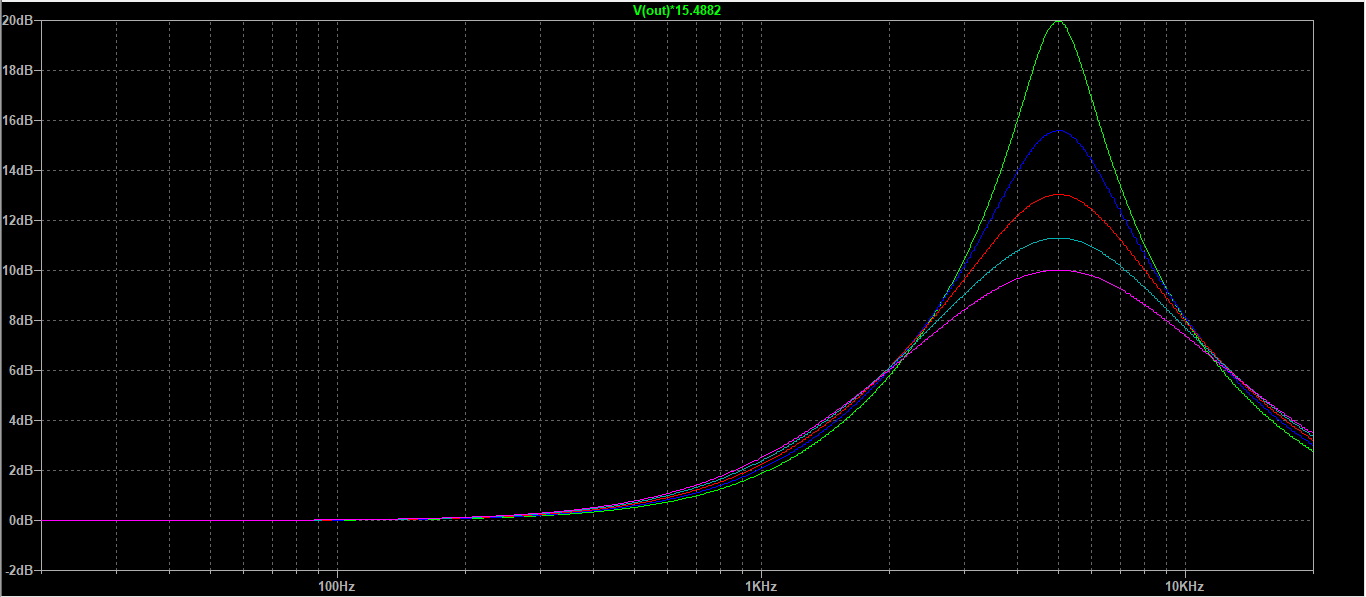
Curves for the high frequency boost at 5 kHz for different Q values.
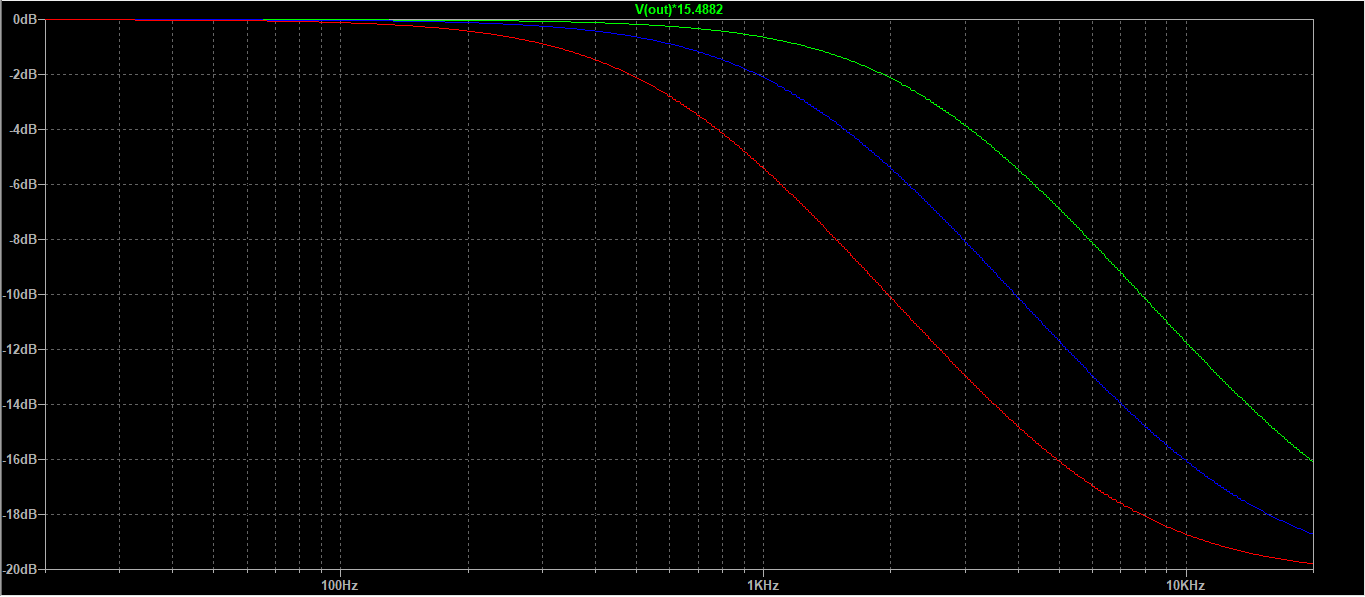
Full cut curves for the selectable high frequencies (5 kHz, 10 kHz, 20 kHz)
Frequency response for the EQP1A simulation and the prototype with the same configuration.
Once the prototype is working as expected, the model needs to be ported to C++ to be able to compile it into a VST3 plugin that can run in a DAW. To do this, I used the JUCE framework and Chowdsp's WDF library to take care of the WDFs part in C++. I wrote the EQP1A.h class that performs the circuit modeling and can be used from JUCE's PluginProcessor.
For the WDF model to behave as expected at audio sample rates, oversampling is necessary. Luckily, JUCE has the dsp::Oversampling class that allows to do this easily. All the DSP happens in the PluginProcessor.cpp and the EQP1A.cpp scripts while the code related to the interface and the editor of the plug-in is contained in PluginEditor.cpp.
All the code necessary to compile the plugin is included in the /Source folder and the JUCE Projucer file is also included.
On Windows you can download the VST3 installer from the releases section of the repository.
On MacOS you'll need to compile the plugin from source. See Development section below.
To build the plugin from source, follow these steps:
- Clone the repository:
git clone https://github.com/ABsounds/EQP1A-WDF - Open the
EQP-WDF-1A.jucerfile in the Projucer application. - Configure your build settings and export the project to your preferred IDE or build system.
- Build the project and run the plugin in your DAW.
Contributions to this project are welcome! If you find any issues, have suggestions for improvements, or would like to add new features, please submit a pull request.
- pywdf was used for the WDF Python prototyping.
- chowdsp::wdf was used for the C++ implementation of the circuit.
- R-Solver was used to compute the scattering matrix for the R-Type implementation.
- JUCE was used for the development of the VST3 plugin.


