Simple, reliable & efficient distributed task queue in Go
Asynq is a Go library for queueing tasks and processing them asynchronously with workers. It's backed by Redis and is designed to be scalable yet easy to get started.
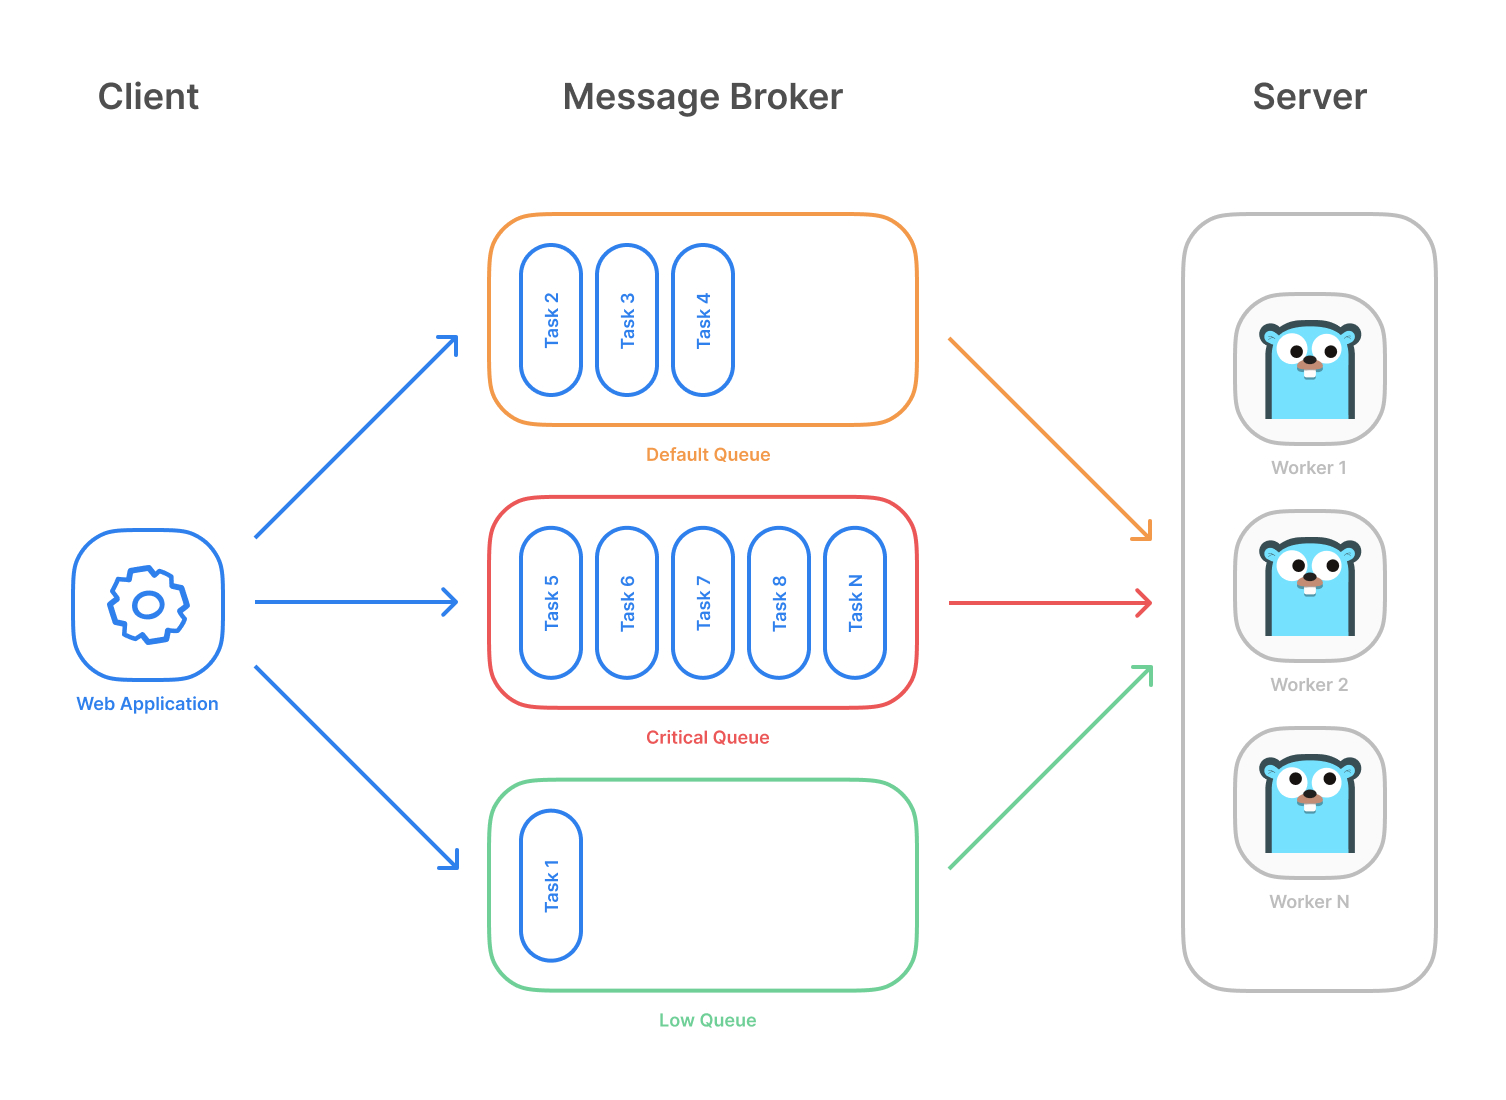
Highlevel overview of how Asynq works:
- Client puts tasks on a queue
- Server pulls tasks off queues and starts a worker goroutine for each task
- Tasks are processed concurrently by multiple workers
Task queues are used as a mechanism to distribute work across multiple machines. A system can consist of multiple worker servers and brokers, giving way to high availability and horizontal scaling.
Example use case
Features
- Guaranteed at least one execution of a task
- Scheduling of tasks
- Retries of failed tasks
- Automatic recovery of tasks in the event of a worker crash
- Weighted priority queues
- Strict priority queues
- Low latency to add a task since writes are fast in Redis
- De-duplication of tasks using unique option
- Allow timeout and deadline per task
- Allow aggregating group of tasks to batch multiple successive operations
- Flexible handler interface with support for middlewares
- Ability to pause queue to stop processing tasks from the queue
- Periodic Tasks
- Support Redis Cluster for automatic sharding and high availability
- Support Redis Sentinels for high availability
- Integration with Prometheus to collect and visualize queue metrics
- Web UI to inspect and remote-control queues and tasks
- CLI to inspect and remote-control queues and tasks
Stability and Compatibility
Status: The library is currently undergoing heavy development with frequent, breaking API changes.
☝️ Important Note: Current major version is zero (
v0.x.x) to accomodate rapid development and fast iteration while getting early feedback from users (feedback on APIs are appreciated!). The public API could change without a major version update beforev1.0.0release.
Quickstart
Make sure you have Go installed (download). Version 1.14 or higher is required.
Initialize your project by creating a folder and then running go mod init github.com/your/repo (learn more) inside the folder. Then install Asynq library with the go get command:
go get -u github.com/hibiken/asynqMake sure you're running a Redis server locally or from a Docker container. Version 4.0 or higher is required.
Next, write a package that encapsulates task creation and task handling.
package tasks

import (
    "context"
    "encoding/json"
    "fmt"
    "log"
    "time"
    "github.com/hibiken/asynq"
)

// A list of task types.
const (
    TypeEmailDelivery   = "email:deliver"
    TypeImageResize     = "image:resize"
)

type EmailDeliveryPayload struct {
    UserID     int
    TemplateID string
}

type ImageResizePayload struct {
    SourceURL string
}

//----------------------------------------------
// Write a function NewXXXTask to create a task.
// A task consists of a type and a payload.
//----------------------------------------------

func NewEmailDeliveryTask(userID int, tmplID string) (*asynq.Task, error) {
    payload, err := json.Marshal(EmailDeliveryPayload{UserID: userID, TemplateID: tmplID})
    if err != nil {
        return nil, err
    }
    return asynq.NewTask(TypeEmailDelivery, payload), nil
}

func NewImageResizeTask(src string) (*asynq.Task, error) {
    payload, err := json.Marshal(ImageResizePayload{SourceURL: src})
    if err != nil {
        return nil, err
    }
    // task options can be passed to NewTask, which can be overridden at enqueue time.
    return asynq.NewTask(TypeImageResize, payload, asynq.MaxRetry(5), asynq.Timeout(20 * time.Minute)), nil
}

//---------------------------------------------------------------
// Write a function HandleXXXTask to handle the input task.
// Note that it satisfies the asynq.HandlerFunc interface.
//
// Handler doesn't need to be a function. You can define a type
// that satisfies asynq.Handler interface. See examples below.
//---------------------------------------------------------------

func HandleEmailDeliveryTask(ctx context.Context, t *asynq.Task) error {
    var p EmailDeliveryPayload
    if err := json.Unmarshal(t.Payload(), &p); err != nil {
        return fmt.Errorf("json.Unmarshal failed: %v: %w", err, asynq.SkipRetry)
    }
    log.Printf("Sending Email to User: user_id=%d, template_id=%s", p.UserID, p.TemplateID)
    // Email delivery code ...
    return nil
}

// ImageProcessor implements asynq.Handler interface.
type ImageProcessor struct {
    // ... fields for struct
}

func (processor *ImageProcessor) ProcessTask(ctx context.Context, t *asynq.Task) error {
    var p ImageResizePayload
    if err := json.Unmarshal(t.Payload(), &p); err != nil {
        return fmt.Errorf("json.Unmarshal failed: %v: %w", err, asynq.SkipRetry)
    }
    log.Printf("Resizing image: src=%s", p.SourceURL)
    // Image resizing code ...
    return nil
}

func NewImageProcessor() *ImageProcessor {
	return &ImageProcessor{}
}
In your application code, import the above package and use Client to put tasks on queues.
package main

import (
    "log"
    "time"

    "github.com/hibiken/asynq"
    "your/app/package/tasks"
)

const redisAddr = "127.0.0.1:6379"

func main() {
    client := asynq.NewClient(asynq.RedisClientOpt{Addr: redisAddr})
    defer client.Close()

    // ------------------------------------------------------
    // Example 1: Enqueue task to be processed immediately.
    //            Use (*Client).Enqueue method.
    // ------------------------------------------------------

    task, err := tasks.NewEmailDeliveryTask(42, "some:template:id")
    if err != nil {
        log.Fatalf("could not create task: %v", err)
    }
    info, err := client.Enqueue(task)
    if err != nil {
        log.Fatalf("could not enqueue task: %v", err)
    }
    log.Printf("enqueued task: id=%s queue=%s", info.ID, info.Queue)


    // ------------------------------------------------------------
    // Example 2: Schedule task to be processed in the future.
    //            Use ProcessIn or ProcessAt option.
    // ------------------------------------------------------------

    info, err = client.Enqueue(task, asynq.ProcessIn(24*time.Hour))
    if err != nil {
        log.Fatalf("could not schedule task: %v", err)
    }
    log.Printf("enqueued task: id=%s queue=%s", info.ID, info.Queue)


    // ----------------------------------------------------------------------------
    // Example 3: Set other options to tune task processing behavior.
    //            Options include MaxRetry, Queue, Timeout, Deadline, Unique etc.
    // ----------------------------------------------------------------------------

    task, err = tasks.NewImageResizeTask("https://example.com/myassets/image.jpg")
    if err != nil {
        log.Fatalf("could not create task: %v", err)
    }
    info, err = client.Enqueue(task, asynq.MaxRetry(10), asynq.Timeout(3 * time.Minute))
    if err != nil {
        log.Fatalf("could not enqueue task: %v", err)
    }
    log.Printf("enqueued task: id=%s queue=%s", info.ID, info.Queue)
}
Next, start a worker server to process these tasks in the background. To start the background workers, use Server and provide your Handler to process the tasks.
You can optionally use ServeMux to create a handler, just as you would with net/http Handler.
package main

import (
    "log"

    "github.com/hibiken/asynq"
    "your/app/package/tasks"
)

const redisAddr = "127.0.0.1:6379"

func main() {
    srv := asynq.NewServer(
        asynq.RedisClientOpt{Addr: redisAddr},
        asynq.Config{
            // Specify how many concurrent workers to use
            Concurrency: 10,
            // Optionally specify multiple queues with different priority.
            Queues: map[string]int{
                "critical": 6,
                "default":  3,
                "low":      1,
            },
            // See the godoc for other configuration options
        },
    )

    // mux maps a type to a handler
    mux := asynq.NewServeMux()
    mux.HandleFunc(tasks.TypeEmailDelivery, tasks.HandleEmailDeliveryTask)
    mux.Handle(tasks.TypeImageResize, tasks.NewImageProcessor())
    // ...register other handlers...

    if err := srv.Run(mux); err != nil {
        log.Fatalf("could not run server: %v", err)
    }
}
For a more detailed walk-through of the library, see our Getting Started guide.
To learn more about asynq features and APIs, see the package godoc.
Web UI
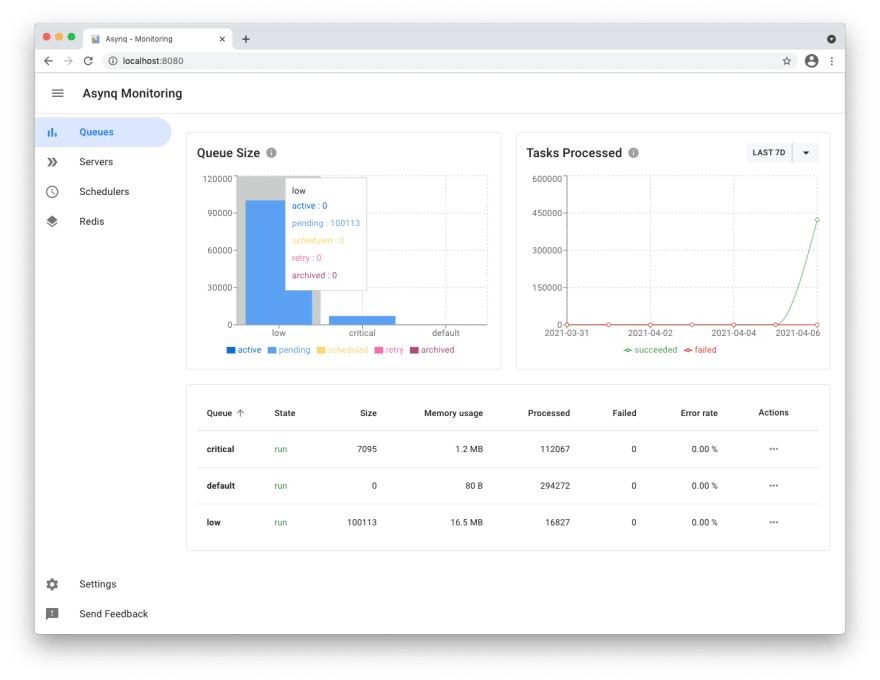
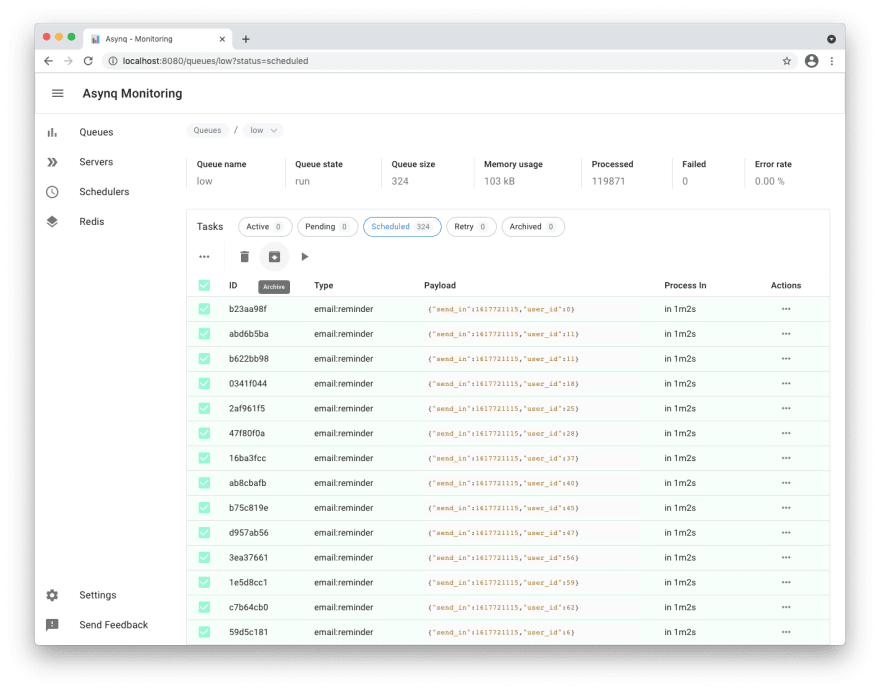
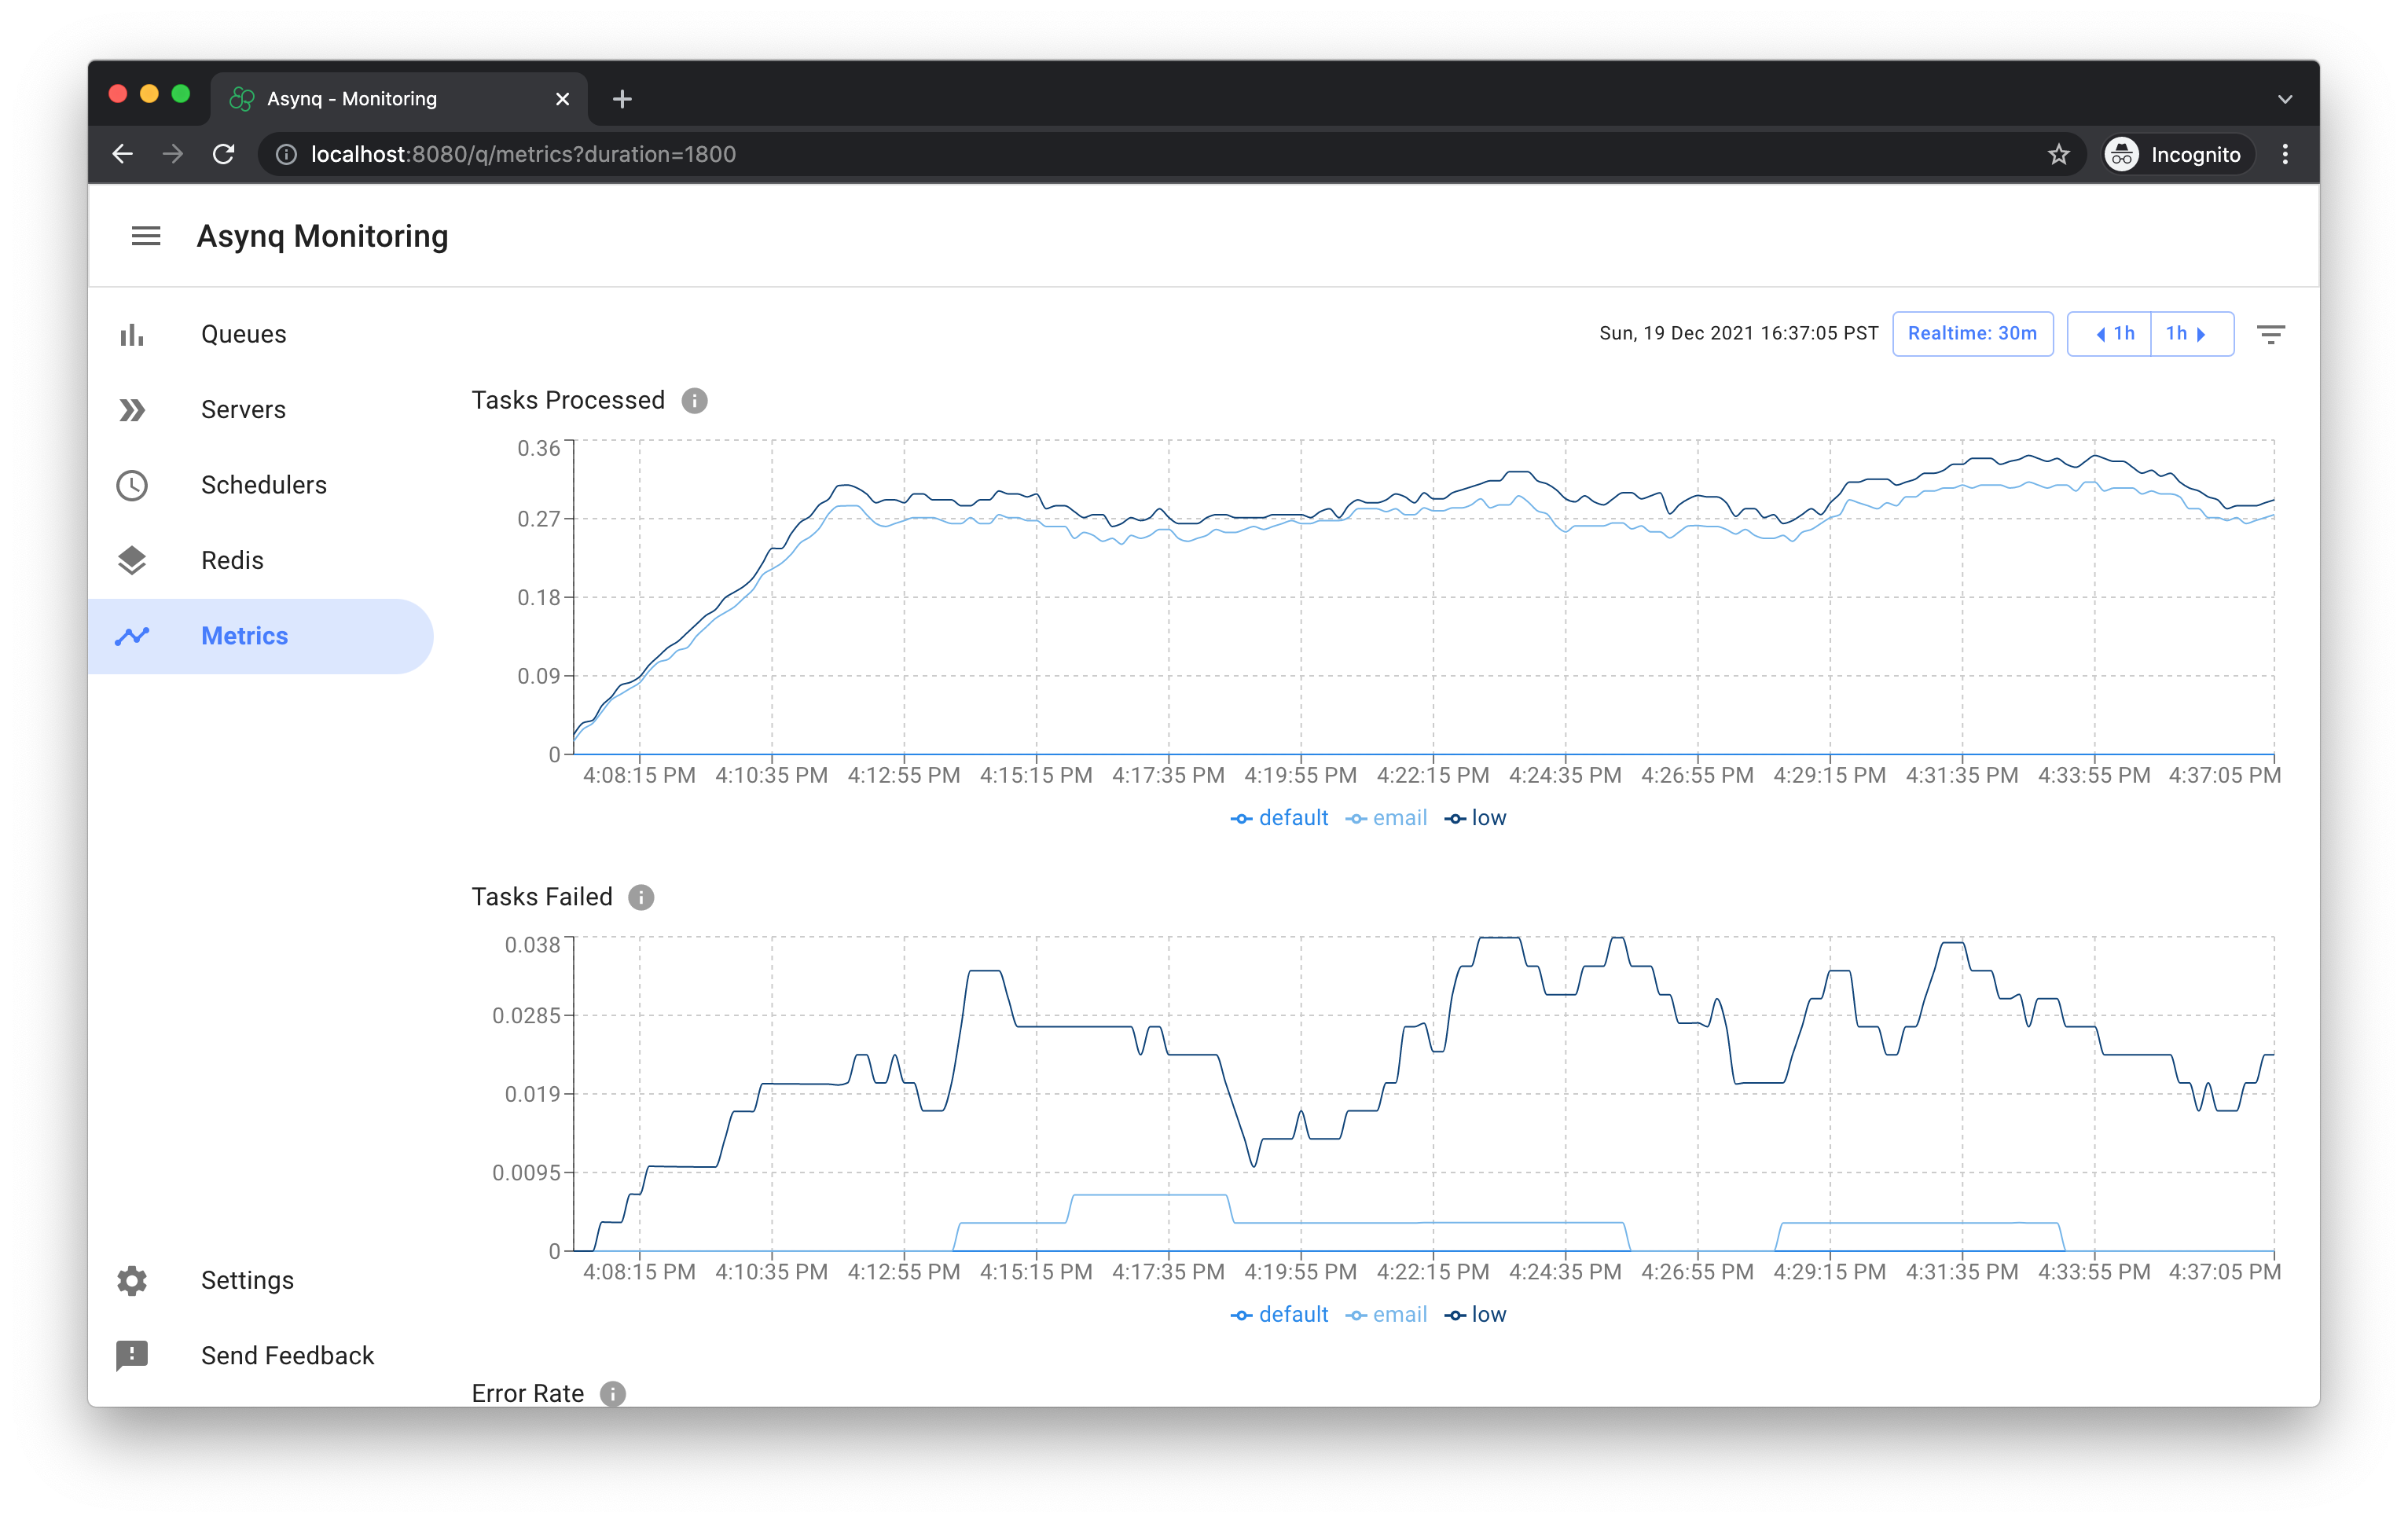
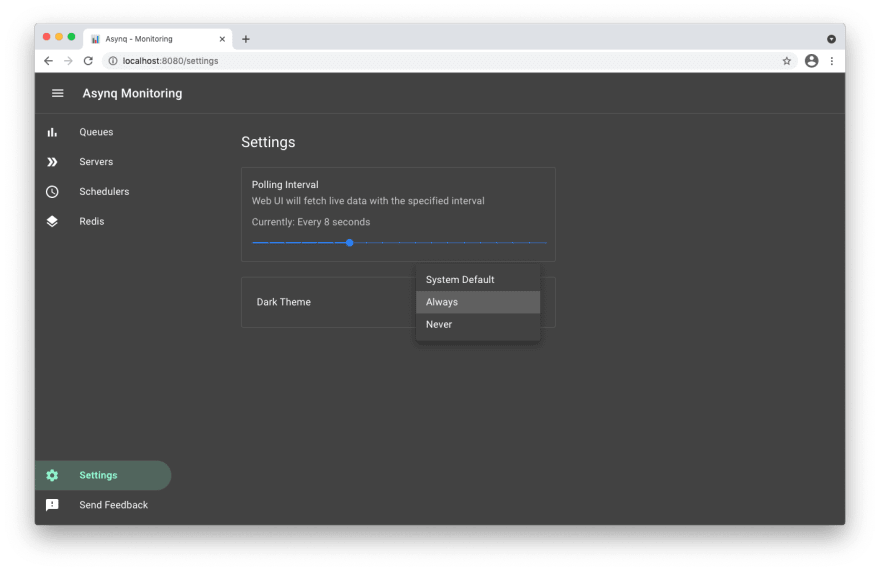
Asynqmon is a web based tool for monitoring and administrating Asynq queues and tasks.
Here's a few screenshots of the Web UI:
Queues view
Tasks view
Settings and adaptive dark mode
For details on how to use the tool, refer to the tool's README.
Command Line Tool
Asynq ships with a command line tool to inspect the state of queues and tasks.
To install the CLI tool, run the following command:
go install github.com/hibiken/asynq/tools/asynqHere's an example of running the asynq dash command:
For details on how to use the tool, refer to the tool's README.
Contributing
We are open to, and grateful for, any contributions (GitHub issues/PRs, feedback on Gitter channel, etc) made by the community.
Please see the Contribution Guide before contributing.
License
Copyright (c) 2019-present Ken Hibino and Contributors. Asynq is free and open-source software licensed under the MIT License. Official logo was created by Vic Shóstak and distributed under Creative Commons license (CC0 1.0 Universal).
