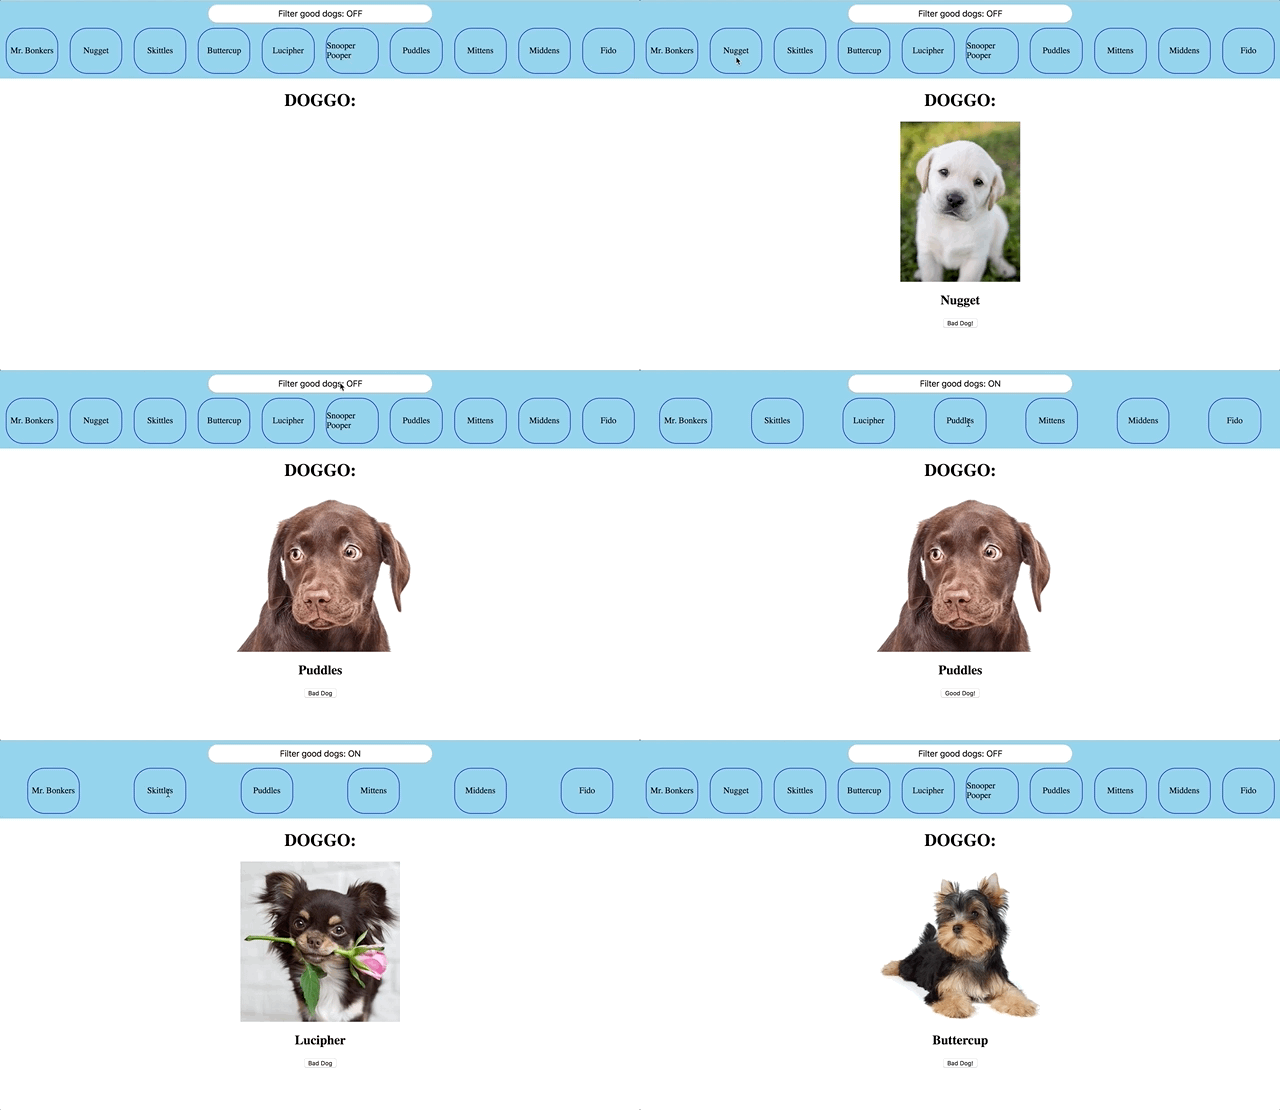
- Access information from an API using a GET request and use it to update the DOM
- Listen for user events and update the DOM in response
- Send data to an API using a PATCH request
THIS GOOD APPLICATION FOR LOOKING AT DOGS BOW WOW.
WHEN LOOKING AT PUP PUPS USER SHOULD BE ABLE TO:
- CLICK ON DOGS IN THE DOG BAR TO SEE MORE INFO ABOUT THE GOOD PUPPER;
- MORE INFO INCLUDES A DOG PIC, A DOG NAME, AND A DOG BUTTON THAT INDICATES WHETHER IT IS A GOOD DOG OR A BAD DOG;
- CLICK ON GOOD DOG/BAD DOG BUTTON IN ORDER TO TOGGLE PUP GOODNESS;
- CLICK ON "FILTER GOOD DOGS" BUTTON IN ORDER TO JUST SEE GOOD DOGS OR SEE ALL DOGS IN DOG BAR.
All of the dog data is stored in the db.json file. You'll want to access this
data using json-server. If you don't have json-server installed already,
install it first with:
$ npm install -g json-serverThen run the server:
$ json-server --watch db.jsonThis will setup the data on a server using RESTful routes at
http://localhost:3000/pups. Go ahead and head to
that URL in your browser to view the data. Familiarize yourself with the
attributes for each pup. Try going to /pups/:id to see an individual pup as
well.
On the page, there is a div with the id of "dog-bar". When the page loads,
use fetch to get all of the pup data from your server. When you have this
information, you'll need to add a span with the pup's name to the dog bar (ex:
<span>Mr. Bonkers</span>).
When a user clicks on a pup's span in the div#dog-bar, that pup's info
(image, name, and isGoodDog status) should show up in the div with the
id of "dog-info". Display the pup's info in the div with the following
elements:
- an
imgtag with the pup's image url - an
h2with the pup's name - a
buttonthat says"Good Dog!"or"Bad Dog!"based on whetherisGoodDogis true or false. Ex:
<img src="dog_image_url" />
<h2>Mr. Bonkers</h2>
<button>Good Dog!</button>When a user clicks the Good Dog/Bad Dog button, two things should happen:
- The button's text should change from Good to Bad or Bad to Good
- The corresponding pup object in the database should be updated to reflect the new isGoodDog value
You can update a dog by making a PATCH request to /pups/:id and including
the updated isGoodDog status in the body of the request.
When a user clicks on the Filter Good Dogs button, two things should happen:
- The button's text should change from "Filter good dogs: OFF" to "Filter good dogs: ON", or vice versa.
- If the button now says "ON" (meaning the filter is on), then the Dog Bar should only show pups whose isGoodDog attribute is true. If the filter is off, the Dog Bar should show all pups (like normal).
