
To :Mr.Ahmed Alsaleh
Content 1 Content 1 Content 1 Content 1 Content 1
By :Eng.Alaa Elnaggar
Content 1 Content 1 Content 1 Content 1 Content 1

wifi SOC (system on a chip) produced by Espressif Systems . It is an highly integrated chip designed to provide full internet connectivity in a small package.
ESP8266 can be used as an external Wifi module, using the standard AT Command set Firmware by connecting it to any microcontroller using the serial UART, or directly serve as a Wifi-enabled micro controller, by programming a new firmware using the provided SDK.

The GPIO pins allow Analog and Digital IO, plus PWM, SPI, I2C, etc.
This board has been around for almost a year now, and has been used mostly in IoT contexts, where we want to add connectivity for example to an Arduino project. A wide adoption has been facilitated by the very modest price, ranging from 2.50 to 10 USD depending on the features offered by the manufacturers.
- Temperature logging and Web UI

- Retro Web Browser

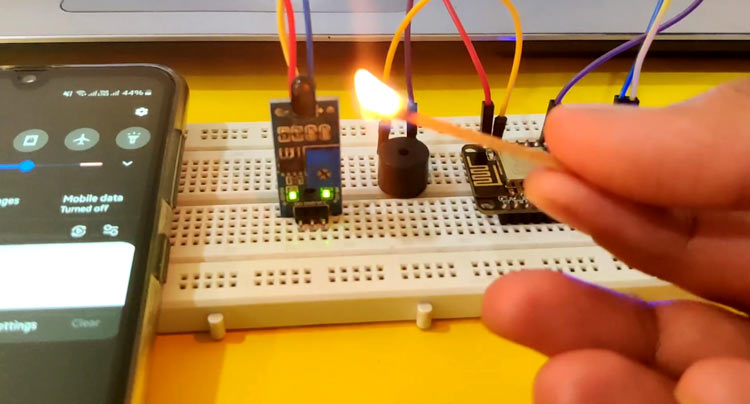
- Internet Enabled Smoke alarm
- Wi-Fi Direct (P2P), soft-AP
- Built-in TCP / IP protocol stack
- Built-in TR switch, balun, LNA, power amplifier and matching network
- Built-in PLL, voltage regulator and power management components
- Built-in temperature sensor
- Support antenna diversity
- off leakage current is less than 10uA
- Built-in low-power 32-bit CPU: can double as an application processor
- SDIO 2.0, SPI, UART
- STBC, 1×1 MIMO, 2×1 MIMO
- A-MPDU, A-MSDU aggregation and the 0.4 Within wake
- connect and transfer data packets
- standby power consumption of less than 1.0mW (DTIM3) Variants
/*
 * Created by esp32io.com
 *
 * This example code is in the public domain
 *
 * Tutorial page: https://esp32io.com/tutorials/esp32-button-led
 */

// constants won't change. They're used here to set pin numbers:
const int BUTTON_PIN = 7;  // the number of the pushbutton pin
const int LED_PIN =  3;   // the number of the LED pin

// variables will change:
int buttonState = 0;   // variable for reading the pushbutton status

void setup() {
  // initialize the LED pin as an output:
  pinMode(LED_PIN, OUTPUT);
  // initialize the pushbutton pin as an pull-up input:
  // the pull-up input pin will be HIGH when the switch is open and LOW when the switch is closed.
  pinMode(BUTTON_PIN, INPUT_PULLUP);
}

void loop() {
  // read the state of the pushbutton value:
  buttonState = digitalRead(BUTTON_PIN);

  // control LED according to the state of button
  if(buttonState == LOW)         // If button is pressing
    digitalWrite(LED_PIN, HIGH); // turn on LED
  else                           // otherwise, button is not pressing
    digitalWrite(LED_PIN, LOW);  // turn off LED
}