Preferred Network List Sniffer (PNLS) is a Red Team Wi-Fi auditing tool with a simple web interface that is capable of intercepting SSIDs1 from the device's preferred network list (PNL)2. This is achieved by sniffing out Probe Requests in the nearby vicinity, which are then parsed for SSID and other information and finally propagated to the web UI. The primary motivation for this project was to look into 802.11 Probe Requests and the privacy risks associated with the data they transmit.
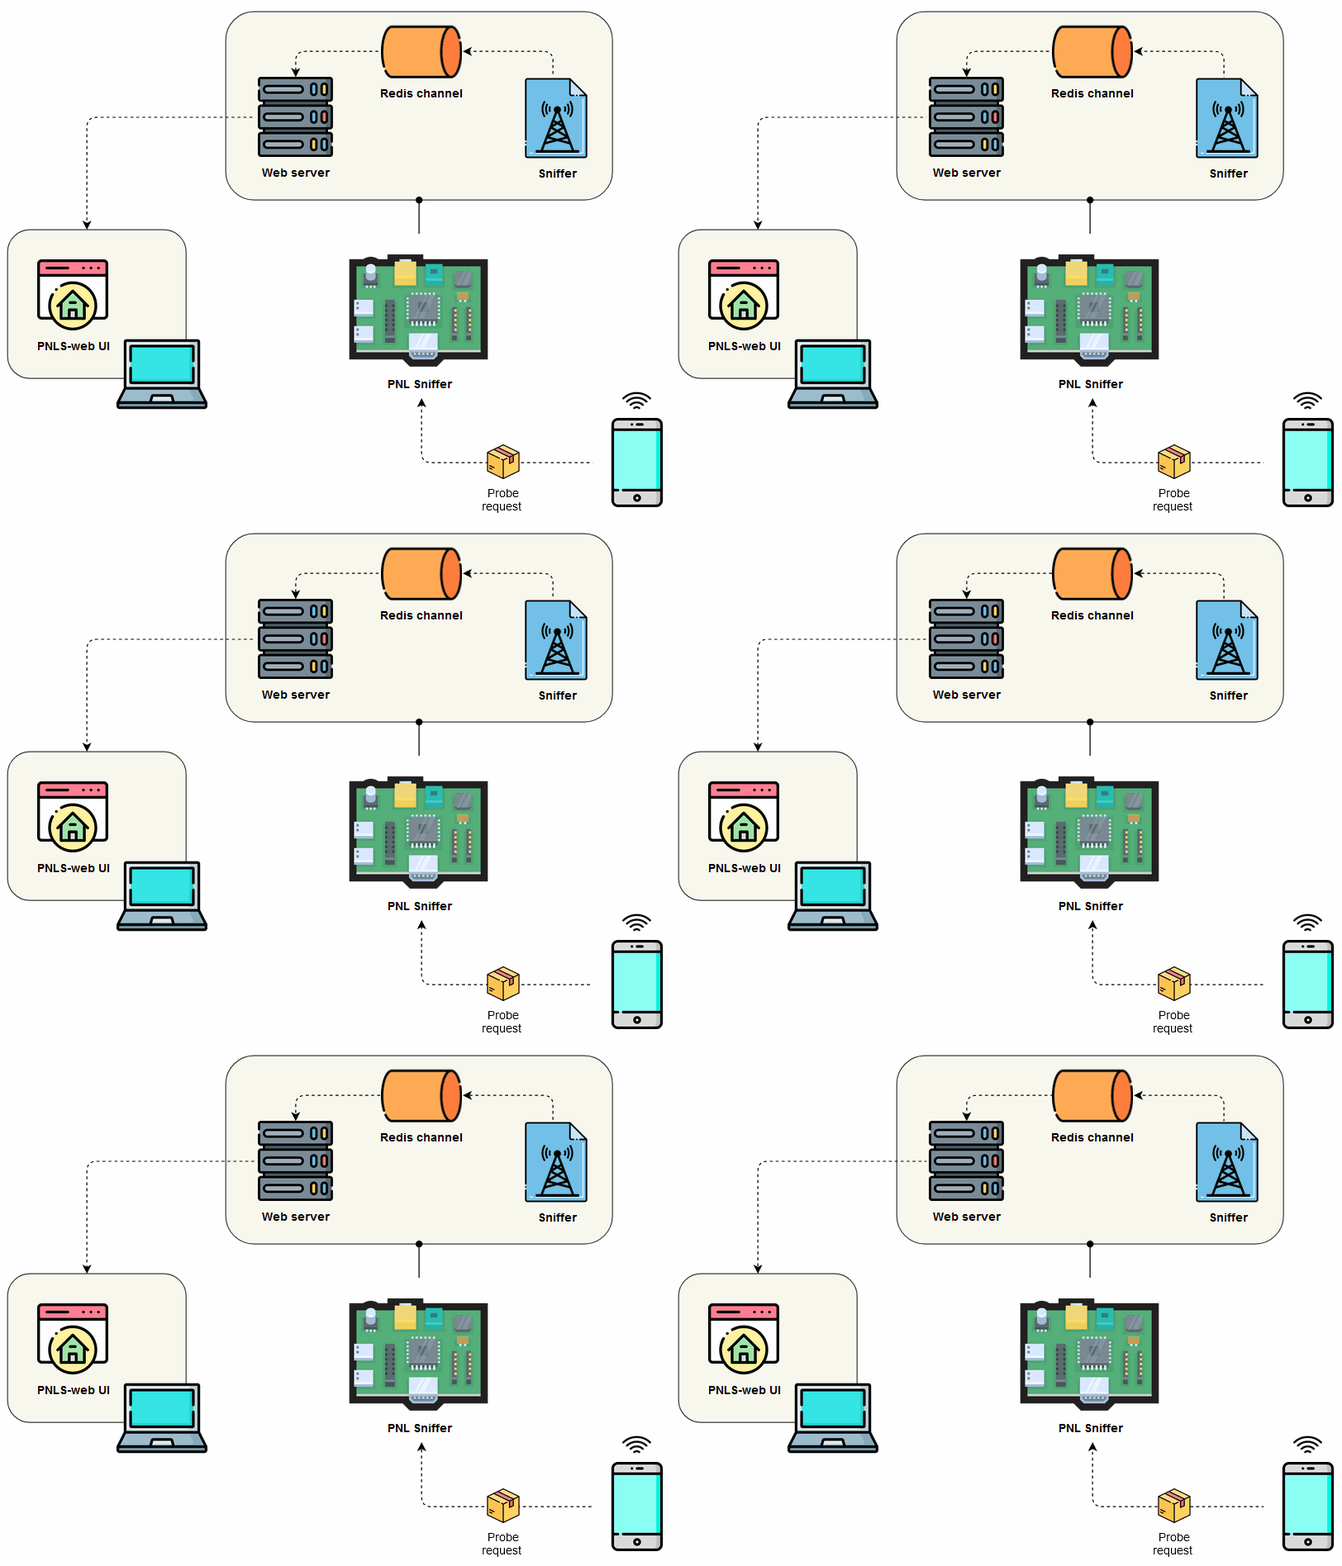
Fig. 1: PNLS system overview
Warning
All content in this project is intended for security research purposes only.
Note
-
I'm currently writing a paper that will thoroughly explain the theory that makes this tool possible. It should be published in the coming weeks.
-
To monitor the ongoing work on the PNLS, see the project's board.
Here is what you will need in order to duplicate and deploy this project, including both the hardware and software components. Once you have your working environment ready, head over to the setup sections.
- Raspberry Pi (RPi)
- Suitable RPi power supply (see the power supply documentation for details)
- Micro SD card (see the SD card documentation for details)
- USB Wi-Fi adapter (optional)
- Used to achieve a bigger range when capturing packets.
- HDMI cable (optional)
- Used to display the web UI from the RPi instead of connecting to it remotely using your computer.
- Kali Linux OS
- Needed in order to use monitoring mode and aircrack-ng tool. You can download the Kali Linux ARM image from here.
- Alternatively, you could use another OS, but you will need to patch3 the kernel using the nexmon4 or use a wireless adapter that supports monitoring mode. Here is a link for supported USB adapters by Raspberry Pi.
- You will also have to install the aircrack-ng tool, as it only comes preinstalled on Kali Linux.
- Needed in order to use monitoring mode and aircrack-ng tool. You can download the Kali Linux ARM image from here.
- Start your network interface in monitoring mode with:
sudo airmon-ng start wlan0[2].
Note
The Kali image uses Re4son's kernel, which includes the drivers for external Wi-Fi cards and the Nexmon firmware for the built-in wireless card on the RPi 3 and 4 [3].
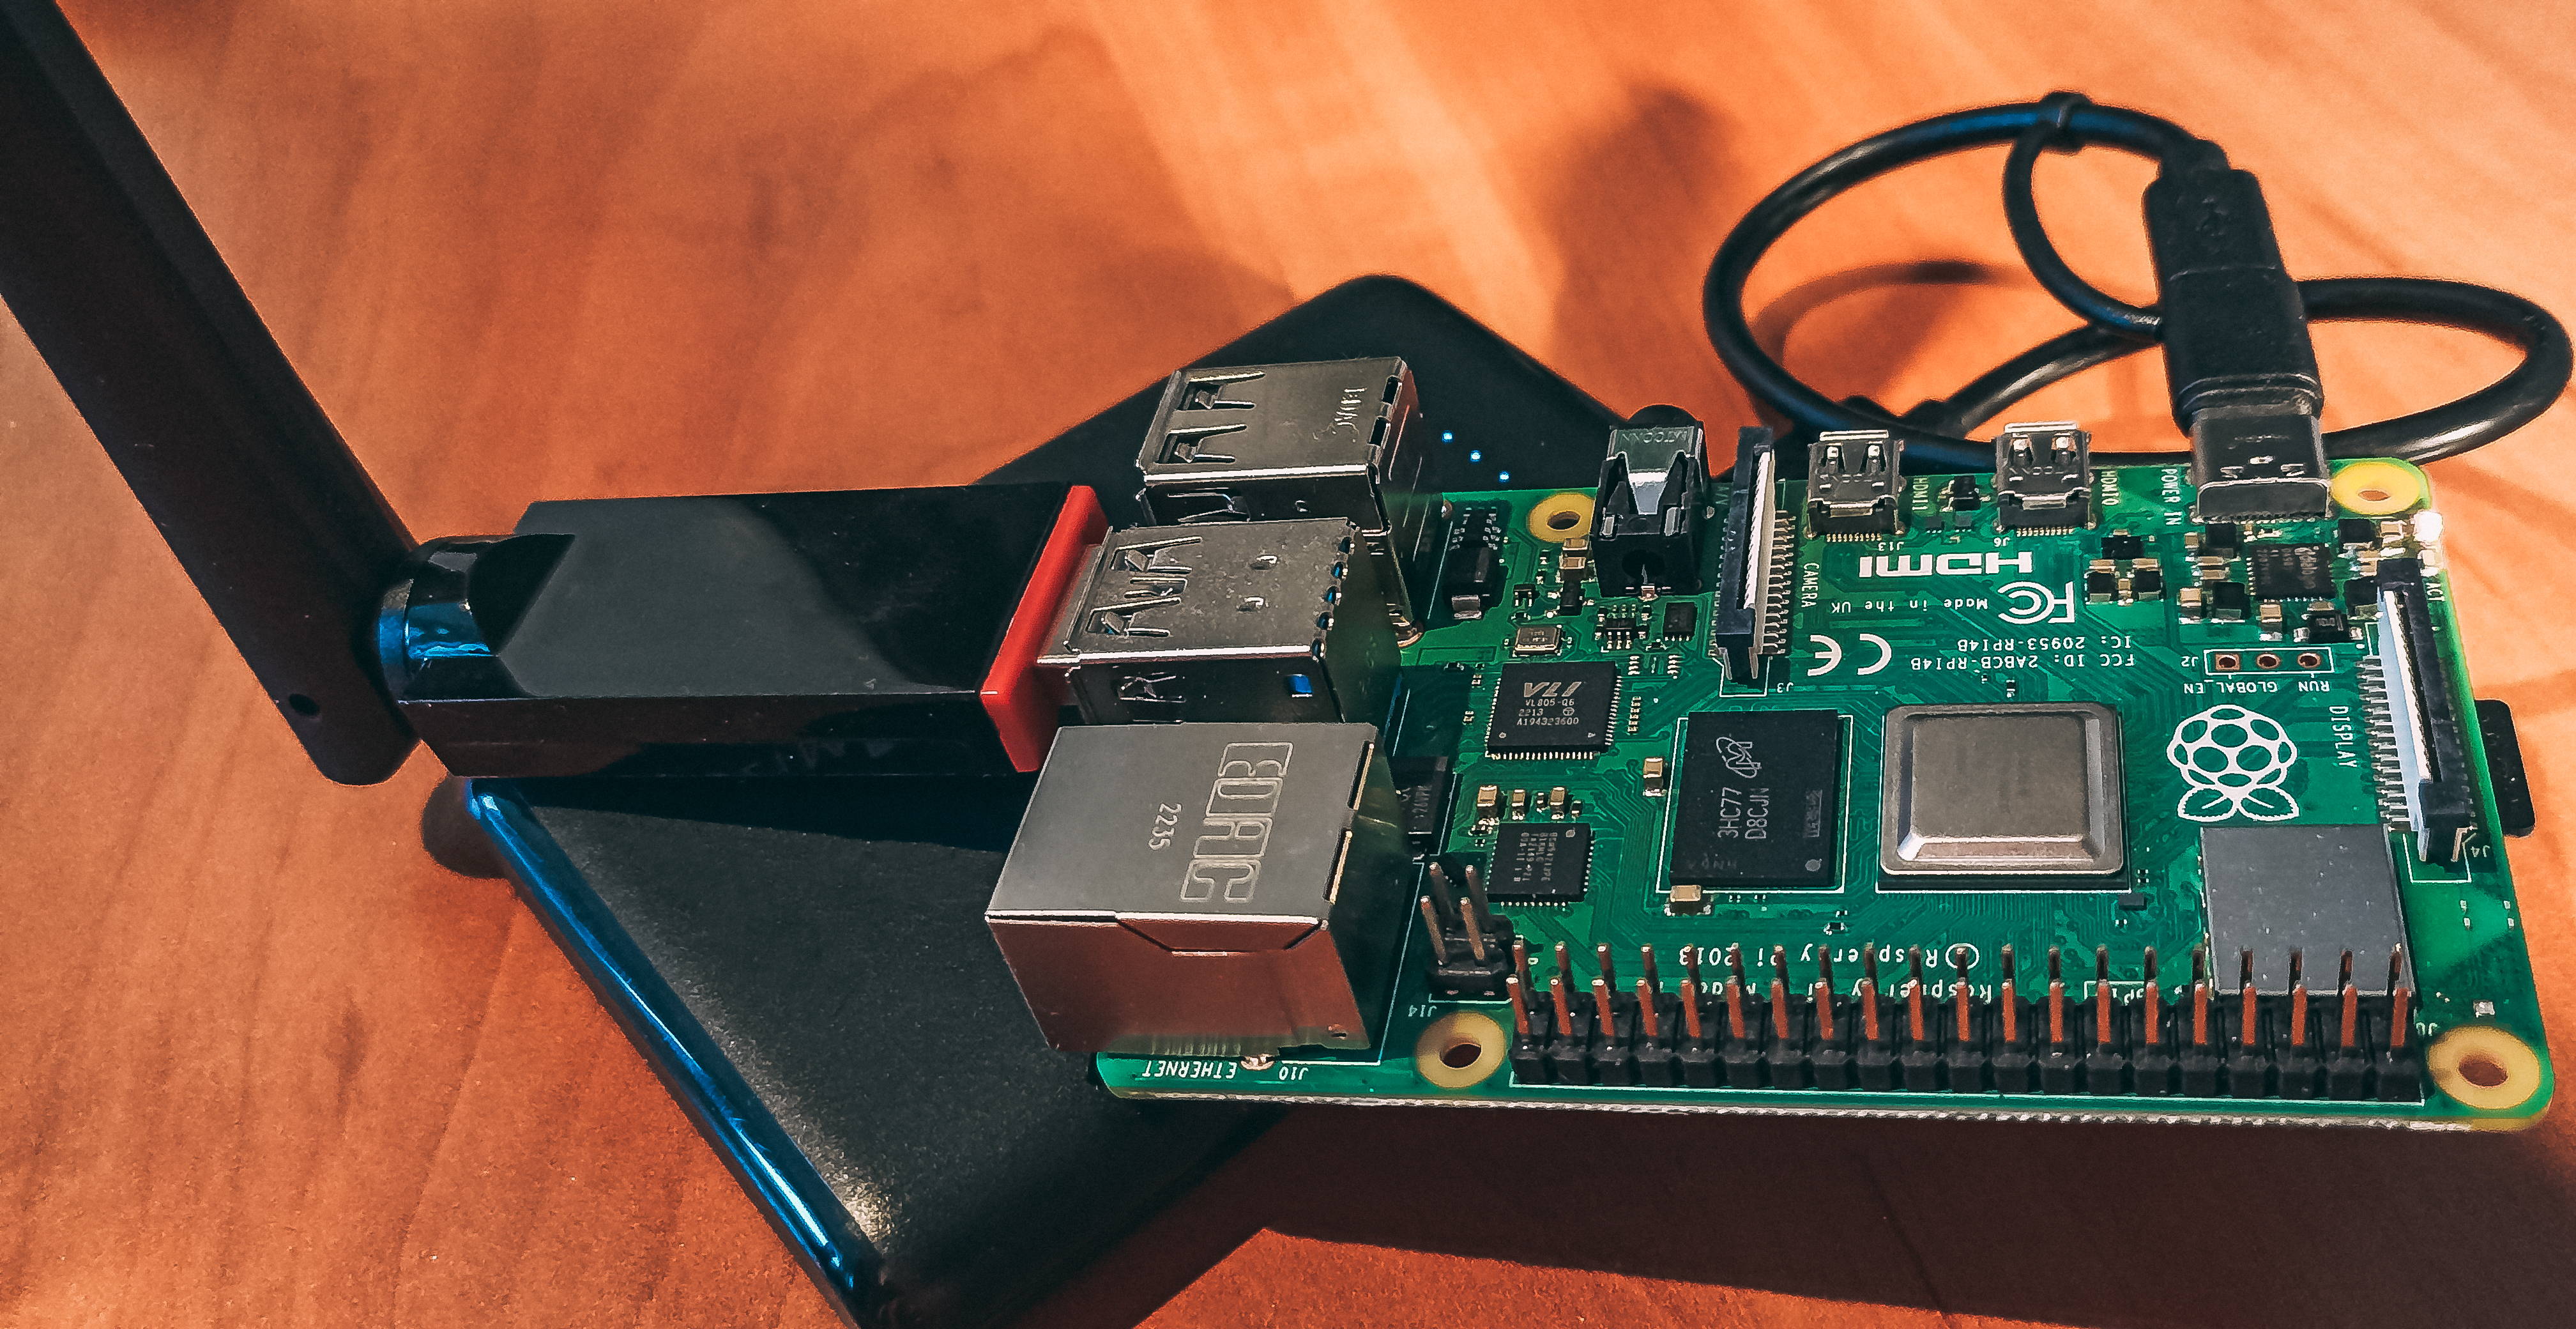
Fig. 2: PNLS - RPi 4 with an external antena and a battery bank
If you don't want to use Docker, head over to setup without Docker.
Quickly setup a development instance:
# First clone this repo.
git clone https://github.com/AleksaMCode/Preferred-Network-List-Sniffer.git
# Move to the project root folder.
cd Preferred-Network-List-Sniffer
# Build backend and frontend image.
docker compose build
# Bring up both the backend and the frontend server.
docker compose up
# Move into the sniffer folder.
cd sniffer
# Run the Sniffer service.
sudo python3 sniffer.pyCurrently, multi-platform images are not available, and the project only supports the ARM64v8 architecture. Download the latest prebuild images from the GitHub Container Registry and run them locally.
# First clone this repo.
git clone https://github.com/AleksaMCode/Preferred-Network-List-Sniffer.git
# Move to the project root folder.
cd Preferred-Network-List-Sniffer
# Download the prebuild images.
docker pull ghcr.io/aleksamcode/pnls-backend-ghcr:latest
docker pull ghcr.io/aleksamcode/pnls-frontend-ghcr:latest
# Bring up both the backend and the frontend server.
docker compose up
# Move into the sniffer folder.
cd sniffer
# Run the Sniffer service.
sudo python3 sniffer.py-
Backend: to start the ASGI and Redis servers and to run needed services, see these instructions.
-
Frontend: to run the React server, see these instructions.
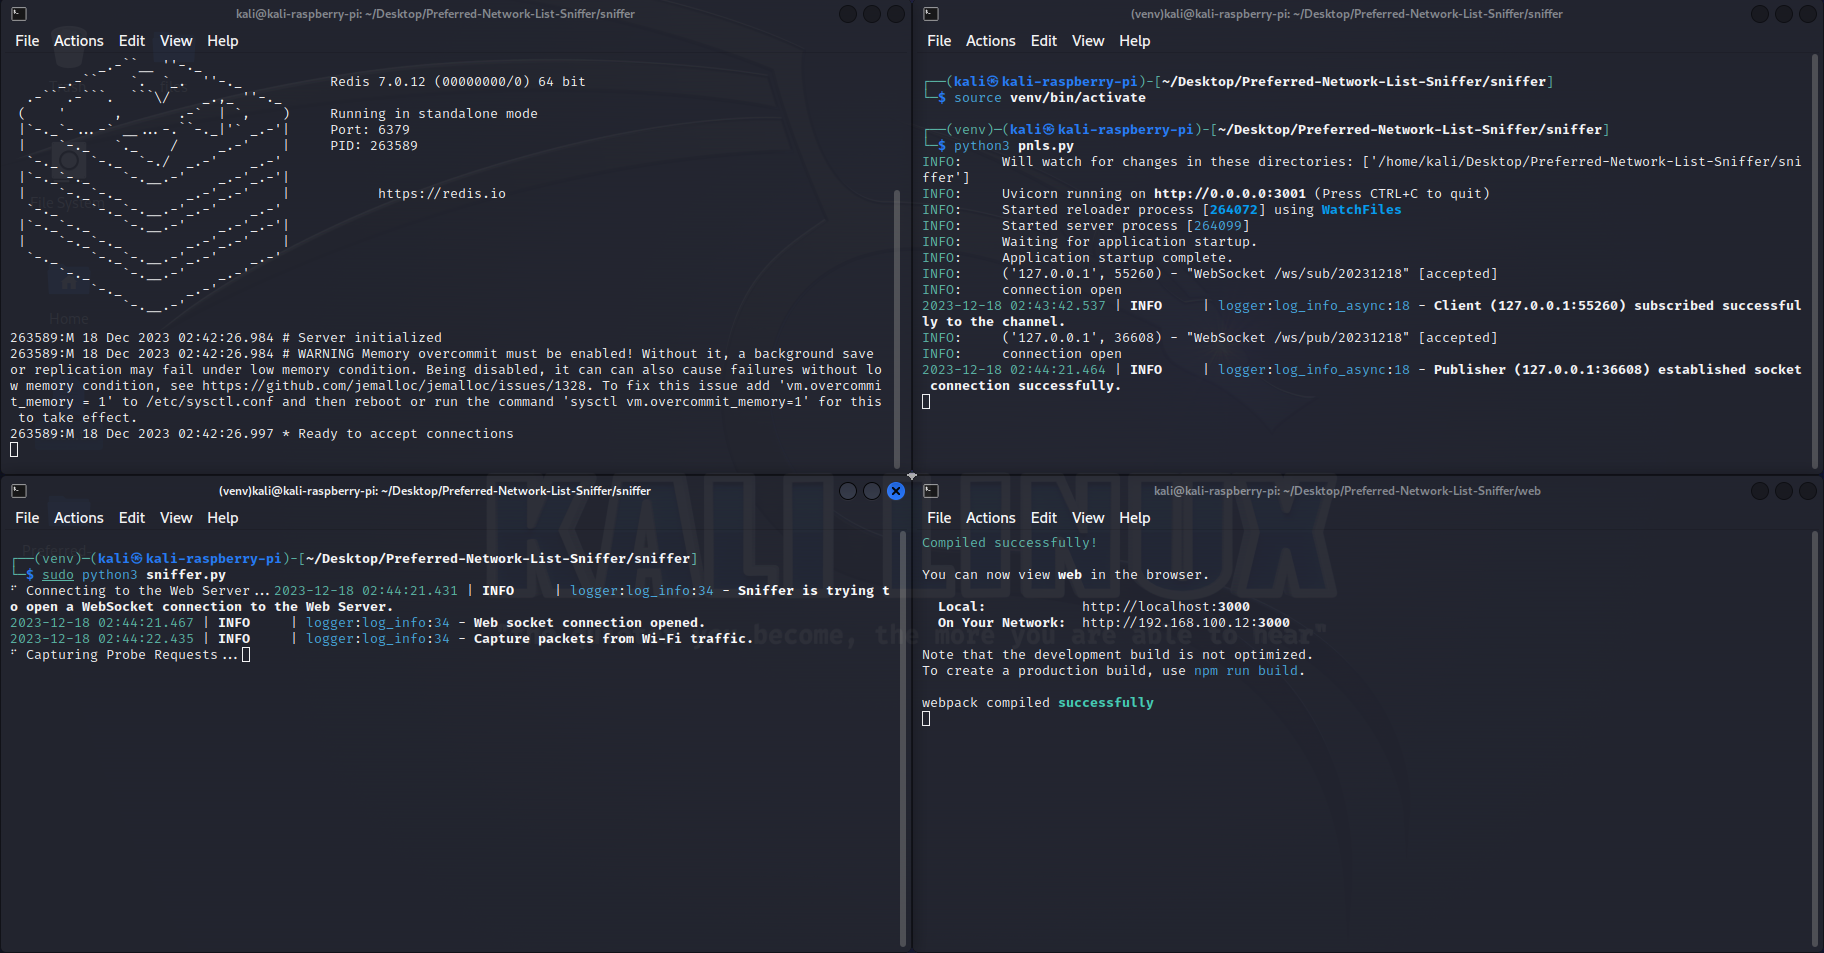
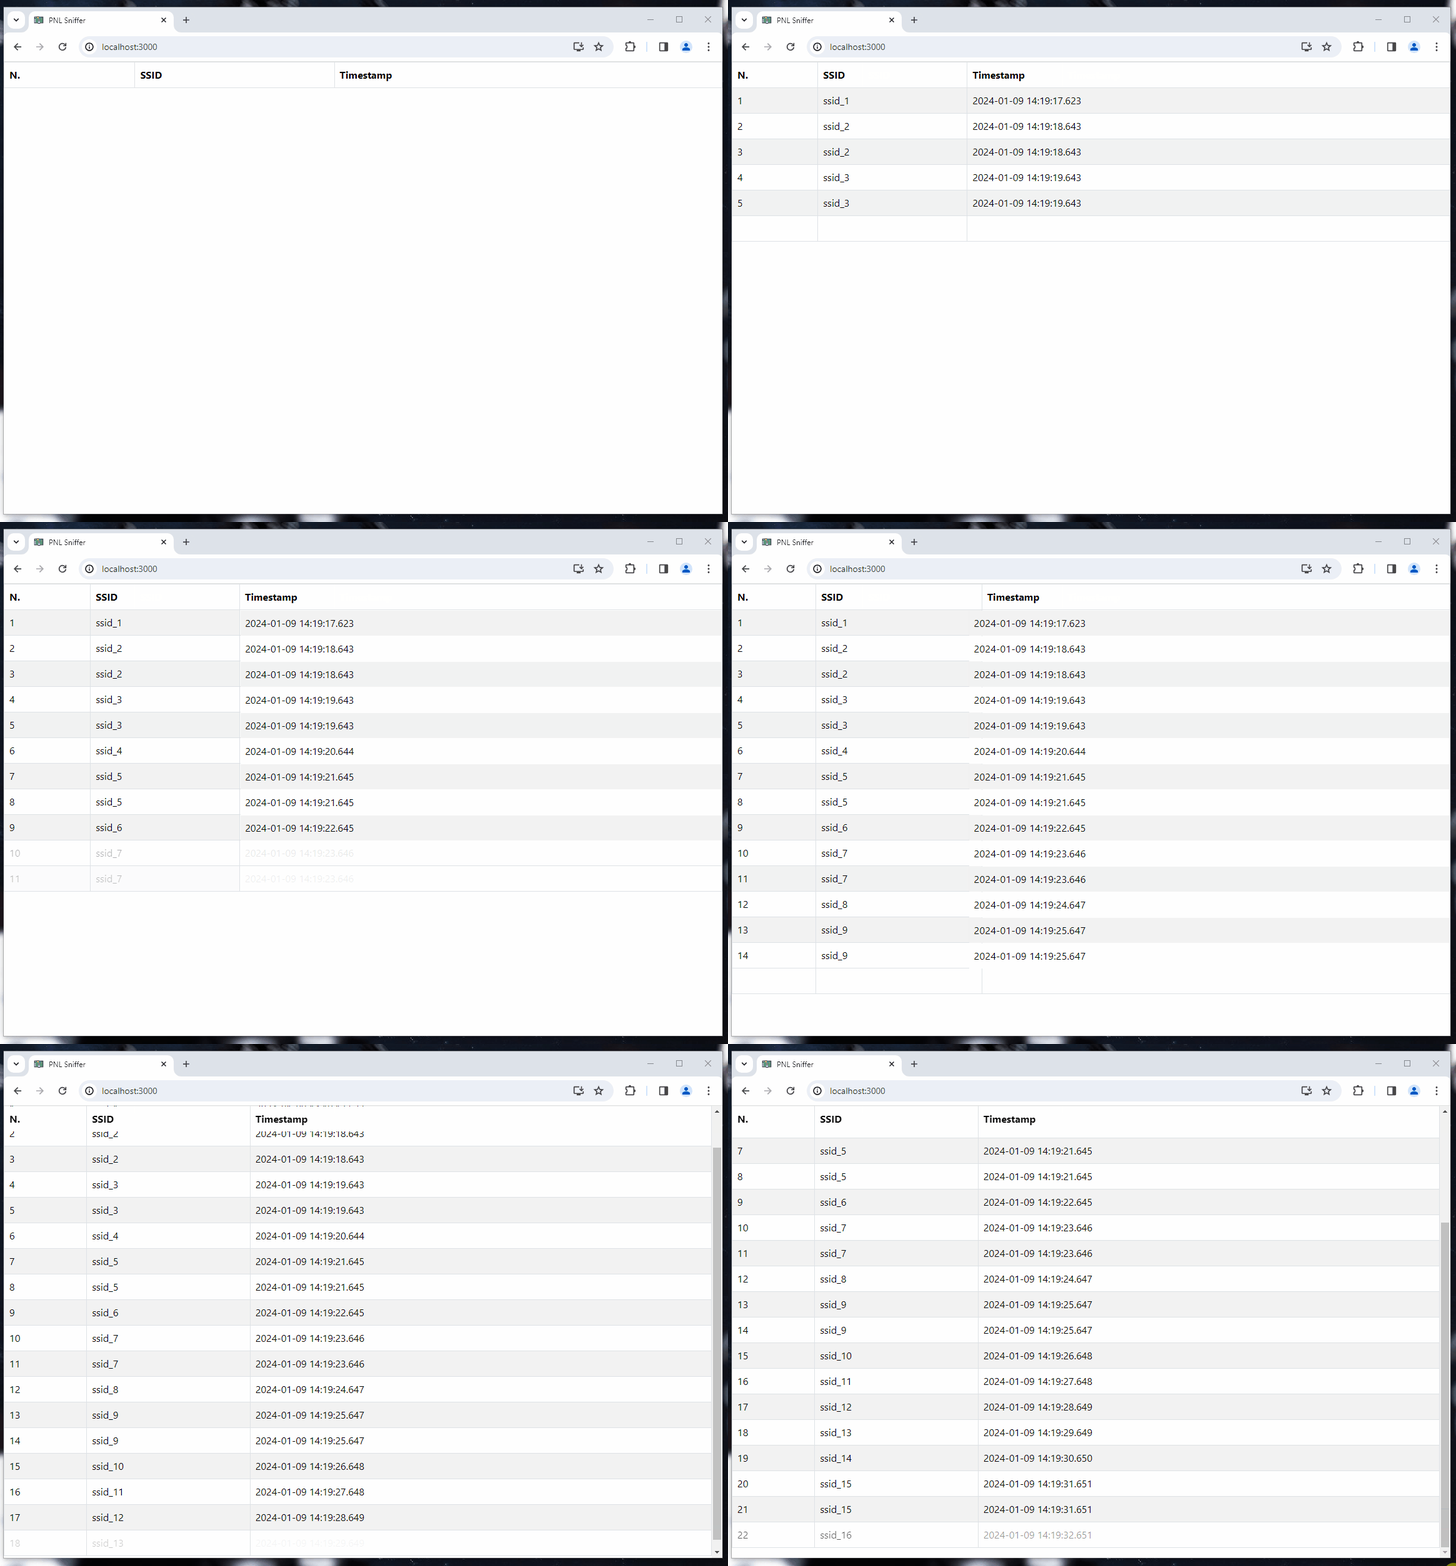
Here is a screenshot when everything was ran "manually":
- Top Left: Redis server
- Top Right: ASGI server
- Bottom Left: Sniffer service
- Bottom Right: React server
Fig. 3: PNLS screenshot
Probe Requests are management 802.11 frames that are used to connect devices to the previously associated wireless Access Points (AP). Whenever a device has enabled Wi-Fi but isn't connected to a network, it is periodically sending a burst of Probe Requests containing SSIDs from its PNL. These frames are sent unencrypted, and anyone who is Radio Frequency (RF) monitoring can capture and read them. Probes are sent to the broadcast DA address (ff:ff:ff:ff:ff:ff). Once they are sent, the device starts the Probe Timer. At the end of the timer, the device processes the received answer. If the device hasn't received an answer, it will go to the next channel and repeat the process. There are two types of Probe Requests:
Directed Probe Requests: using specific SSID from device's PNL
Null Probe Requests: using Wildcard SSID (empty SSID)
Blank Requests are sent in order to get a response from all available APs that are in range.
In addition to filtering 802.11 Probe Request frames from all the captured packets, Sniffer will also filter out the Wildcard SSIDs.
When capturing Probe Requests at places where there is a large local network with a lot of Wi-Fi clients, PNLS will inevitably capture a lot of Probe Requests that contain the SSID of the said network. The filtering of such SSIDs might be advantageous, as they are of no value to us and can cause an increase in socket load. Filtering out these SSIDs will not only reduce the load on socket connections, but it will also prevent the spam of the aforementioned SSIDs on the web UI.
When using this feature, you will need to make slight adjustments to the source code. Precisely, you will need to update the SSID_FILTER list in the settings.py file with the value you want the Sniffer to ignore. Once updated, rebuild the project and start the PNLS.
This project uses Event-Driven architecture (EDA), which is designed atop of message-driven architectures. While this project uses a centralized solution (everything is run from the RPi), due to loosely coupled components as a result of the usage of EDA, it is possible to create a decentralized solution if needed. PNLS consists of an event publisher (sniffer), an event consumer (web application), and an event channel. Here, the event channel is implemented as Message-Oriented Middleware (MOM).
Fig. 4: PNLS system deployment diagram
The Asynchronous Server Gateway Interface (ASGI) provides a standardized interface between async-capable Python web servers and services [4]. The ASGI was chosen due to the project's need for a long-lived WebSocket connection in order to facilitate async communications between different clients. In addition, it also allows for the utilization of background coroutines during API calls. The PNLS uses the uvicorn implementation for Python in order to use the ASGI web server.
Through the utilization of WebSocket communication protocol, we are able to facilitate full-duplex, two-way communication. While this project doesn't have the need for two-way communication, it does have a need for real-time interaction between the system components. This way, the sniffed data will be available to the end-user as soon as it is captured.
The project's MOM is realized through the Message Broker using Redis. In the publish-subscribe (pub-sub) model, the Sniffer is responsible for producing messages, while the web application (subscriber) registers for the specific Topic (Redis channel). When the Sniffer sends a message to a Topic, it is distributed to all subscribed consumers, allowing for asynchronous and scalable communication. PNLS uses the lightweight messaging protocol Redis Pub/Sub for message broadcasting in order to propagate short-lived messages with low latency and large throughput [5][6]. In this way, overheads associated with encoding data structures in a form that can be written to a disk have been avoided. In doing so, this solution will have potentially better performance [7]. The figure below displays the simplified system activity through the event-driven workflow.
Fig. 5: PNLS Pub-Sub model sequence diagram
Note
Implemented MOM does not provide persistent storage or a message queue for data accumulation, which means messages will be lost if they are published to a Topic without subscribers.
Below is an example of a web UI displaying published test SSIDs.
Fig. 6: PNLS web - example with test SSIDs
| PNL | Preferred Network List |
| PNLS | Preferred Network List Sniffer |
| SSID | Service Set Identifier |
| UI | User Interface |
| RPi | Raspberry Pi |
| OS | Operating System |
| AP | Access Points |
| RF | Radio Frequency |
| EDA | Event-Driven Architecture |
| MOM | Message-Oriented Middleware |
| ASGI | Asynchronous Server Gateway Interface |
| pub-sub | publish-subscribe |
- Nexmon Git repository
- Aircrack-ng documentation
- Kali On ARM documentation
- ASGI Documentation
- Low-latency message queue & broker software
- Redis - Pub/Sub Defined
- Stephen M. Rumble, Ankita Kejriwal, and John K. Ousterhout, “Log-Structured Memory for DRAM-Based Storage,” at 12th USENIX Conference on File and Storage Technologies (FAST)
- Enable Monitor Mode & Packet Injection on the Raspberry Pi
Footnotes
-
A Service Set Identifier (SSID) is an 802.11 ID used to name a Wi-Fi network that consists of a maximum of 32 characters that can contain case-sensitive letters, numbers, and special characters no longer than 32 characters. ↩
-
A Preferred Network List is a collection of saved SSIDs with additional settings that you created the first time you connected your device to those networks. ↩
-
Broadcom never officially supported monitor mode, which limited the usefulness of the wireless cards in Raspberry Pi devices [8]. The Nexmon project is a firmware patch for the Broadcom chips in use within RPi devices. [1]. This patch will allow you to use the monitoring mode on your RPi device. ↩
-
The C-based Firmware Patching Framework for Broadcom/Cypress Wi-Fi Chips that enables Monitor Mode, Frame Injection and much more. ↩
