Alexa AI IoT Sample
Sample code for using Alexa with an IoT thing and managed AI services.
About
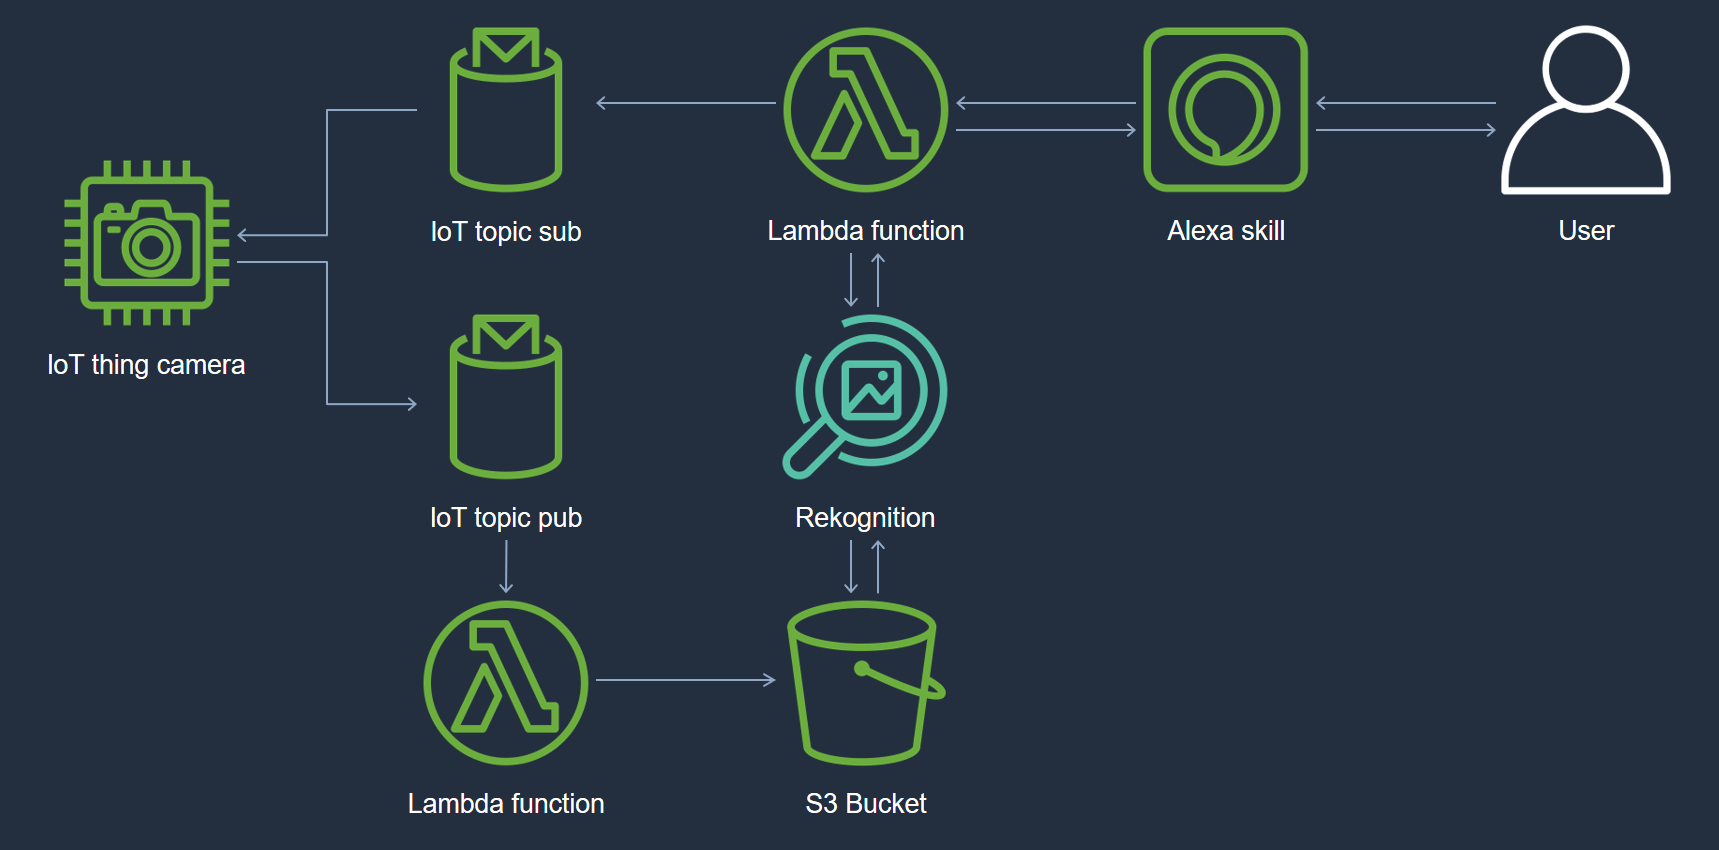
Using the sample code you can connect an ESP32-CAM device to AWS IoT Core and have it take pictures on-demand and store them in Amazon S3 using Alexa. You can then have Alexa analyze the image using Amazon Rekognition.
1. Setup IoT thing
- Open
devicesubfolder in VS Code and install PlatformIO extension. - Create your device using the
Creating AWS IoT thingswizard in AWS Console (or using cli for power users). Take note of the thing name and download the certificates and CA certificate. - Create a policy using the AWS Console or cli. See
policy.json.templatefor needed policies. - Create
lib/conf/conf.hbased onlib/conf/conf.h.template. Update WIFI_SSID, WIFI_PASSWORD, DEVICE_NAME, AWS_IOT_SUB_TOPIC, AWS_IOT_PUB_TOPIC, AWS_IOT_ENDPOINT and the three certificates. - Flash your device. Keep an eye on the serial output to see that all goes well.
Read Nathan Glover's blog post for more information: https://devopstar.com/2020/05/16/aws-iot-esp32-cam-setup
2. Create a new Alexa skill
- Click
Create skillin Alexa developer console and give it a name. - Select
Custommodel andProvision your ownbackend. - Add
AnalyzePictureIntentandTakePictureIntent. - Go to
Assets>Endpointand take note ofYour Skill IDto use later.
Read more in the Alexa documentation: https://developer.amazon.com/en-US/docs/alexa/devconsole/create-a-skill-and-choose-the-interaction-model.html
3. Setup backend using AWS SAM and connect to Alexa skill
- Open
backendsubfolder in VS Code. - Build using AWS SAM.
sam build- Deploy using AWS SAM guided.
sam deploy --guided- Enter values for
AlexaSkillId,IotEndpoint,IotTopicPub,IotTopicSub, andObjectName. - Take note of
AlexaSkillFunctionARNin the SAM output. - Go to
Assets>Endpointin the Alexa developer console and enterAlexaSkillFunctionARNinDefault Region. ClickSave Endpoints.
Questions
Reach out to Gunnar Grosch if you have any questions.
