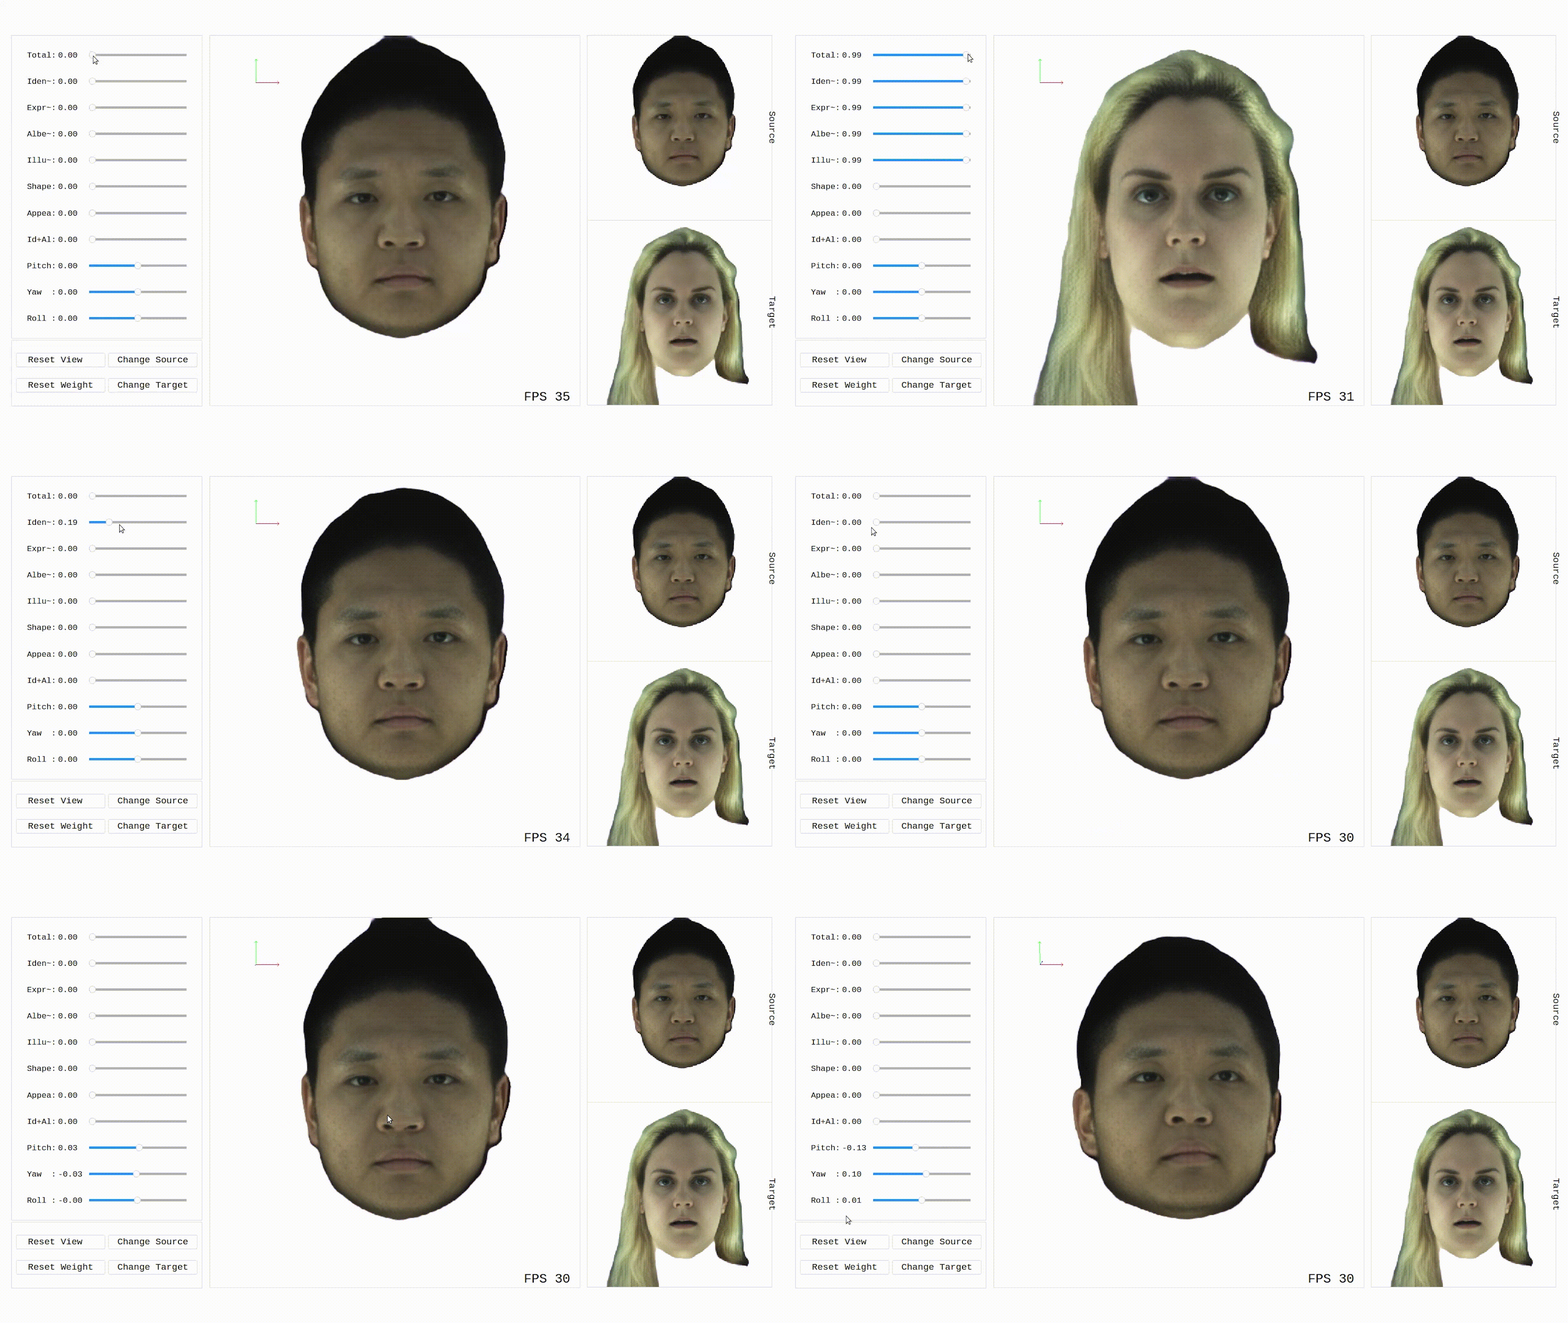
This repository contains a pytorch implementation of "HeadNeRF: A Real-time NeRF-based Parametric Head Model (CVPR 2022)". Authors: Yang Hong, Bo Peng, Haiyao Xiao, Ligang Liu and Juyong Zhang*.
| Project Page | Paper |
This code has been tested on ubuntu 20.04/18.04 and contains the following parts:
- An interactive GUI that allows users to utilize HeadNeRF to directly edit the generated images’ rendering pose and various semantic attributes.
- A fitting framework for obtaining the latent code embedding in HeadNeRF of a single image.
-
python3
-
torch>=1.8.1
-
torchvision
-
imageio
-
kornia
-
numpy
-
opencv-python==4.3.0.36
-
pyqt5
-
tqdm
-
face-alignment
-
Pillow, plotly, matplotlib, scipy, scikit-image We recommend running the following commands to create an anaconda environment called "headnerf" and automatically install the above requirements.
conda env create -f environment.yaml
conda activate headnerf
-
Please refer to pytorch for details.
-
It is recommended to install pytorch3d from a local clone.
git clone https://github.com/facebookresearch/pytorch3d.git
cd pytorch3d && pip install -e . && cd ..
Note:
- In order to run the code smoothly, a GPU with performance higher than 1080Ti is recommended.
- This code can also be run on Windows 10 when the mentioned above requirements are satisfied.
Download ConfigModels.zip, TrainedModels.zip, and LatentCodeSamples.zip, then unzip them to the root dir of this project.
Other links: Google Drive, One Drive
The folder structure is as follows:
headnerf
├── ConfigModels
│   ├── faceparsing_model.pth
│   ├── nl3dmm_dict.pkl
│   └── nl3dmm_net_dict.pth
│
├── TrainedModels
│   ├── model_Reso32.pth
│   ├── model_Reso32HR.pth
│   └── model_Reso64.pth
│
└── LatentCodeSamples
    ├── model_Reso32
    │   ├── S001_E01_I01_P02.pth
    │   └── ...
    ├── model_Reso32HR
    │   ├── S001_E01_I01_P02.pth
    │   └── ...
    └── model_Reso64
        ├── S001_E01_I01_P02.pth
        └── ...
Note:
-
faceparsing_model.pth is from face-parsing.PyTorch, and we utilize it to help generate the head mask.
-
nl3dmm_dict.pkl and nl3dmm_net_dict.pth are from 3D face from X, and they are the parameters of 3DMM.
-
model_Reso32.pth, model_Reso32HR.pth and model_Reso64.pth are our pre-trained models, and their properties are as follows:
Pre-trained Models Feature Map's Reso Result's Reso GPU 1080Ti GPU 3090 model_Reso32 32 x 32 256 x 256 ~14fps ~40fps model_Reso32HR 32 x 32 512 x 512 ~13fps ~30fps model_Reso64 64 x 64 512 x 512 ~ 3fps ~10fps -
LatentCodeSamples.zip contains some latent codes that correspond to some given images.
#GUI, for editing the generated images’ rendering pose and various semantic attributes.
python MainGUI.py --model_path "TrainedModels/model_Reso64.pth"
Args:
- model_path is the path of the specified pre-trained model.
An interactive interface like the first figure of this document will be generated after executing the above command.
This part provides a framework for fitting a single image using HeadNeRF. Besides, some test images are provided in test_data/single_images dir. These images are from FFHQ dataset and do not participate in building HeadNeRF's models.
# generating head's mask.
python DataProcess/Gen_HeadMask.py --img_dir "test_data/single_images"

# generating 68-facial-landmarks by face-alignment, which is from
# https://github.com/1adrianb/face-alignment
python DataProcess/Gen_Landmark.py --img_dir "test_data/single_images"

# generating the 3DMM parameters
python Fitting3DMM/FittingNL3DMM.py --img_size 512 \
                                    --intermediate_size 256  \
                                    --batch_size 9 \
                                    --img_dir "test_data/single_images"
The generated results will be saved to the --img_dir.
# Fitting a single image using HeadNeRF
python FittingSingleImage.py --model_path "TrainedModels/model_Reso32HR.pth" \
                             --img "test_data/single_images/img_000037.png" \
                             --mask "test_data/single_images/img_000037_mask.png" \
                             --para_3dmm "test_data/single_images/img_000037_nl3dmm.pkl" \
                             --save_root "test_data/fitting_res" \
                             --target_embedding "LatentCodeSamples/*/S025_E14_I01_P02.pth"
Args:
- para_3dmm is the 3DMM parameter of the input image and is provided in advance to initialize the latent codes of the corresponding image.
- target_embedding is a head's latent code embedding in HeadNeRF and is an optional input. If it is provided, we will perform linear interpolation on the fitting latent code embedding and the target latent code embedding, and the corresponding head images are generated using HeadNeRF.
- save_root is the directory where the following results are saved.
Results:
- The image that merges the input image and the fitting result.
- The dynamic image generated by continuously changing the rendering pose of the fitting result.
- The dynamic image generated by performing linear interpolation on the fitting latent code embedding and the target latent code embedding.
- The latent codes (.pth file) of the fitting result.
Note:
- Fitting a single image based on model_Reso32.pth requires more than ~5 GB GPU memory.
- Fitting a single image based on model_Reso32HR.pth requires more than ~6 GB GPU memory.
- Fitting a single image based on model_Reso64.pth requires more than ~13 GB GPU memory.
If you find our work useful in your research, please consider citing our paper:
@article{hong2021headnerf,
     author     = {Yang Hong and Bo Peng and Haiyao Xiao and Ligang Liu and Juyong Zhang},
     title      = {HeadNeRF: A Real-time NeRF-based Parametric Head Model},
     booktitle  = {{IEEE/CVF} Conference on Computer Vision and Pattern Recognition (CVPR)},
     year       = {2022}
  }
If you have questions, please contact hymath@mail.ustc.edu.cn.
- We use face-alignment for detecting 68-facial-landmarks.
- We use face-parsing.PyTorch for generating the head mask.
- The 3DMM that we use is from 3D face from X and Noliner3DMM.
- The code of fitting a single image using 3DMM is modified from 3DMM-Fitting-Pytorch.
Academic or non-profit organization noncommercial research use only.
- OMP: Error #15: Initializing libiomp5md.dll, but found libiomp5md.dll already initialized. 解决方法:代码前加入两行如下代码即可
import os
os.environ["KMP_DUPLICATE_LIB_OK"] = "TRUE"
- ImportError: Numba needs NumPy 1.20 or less 解决方法
pip install numba==0.54
- from .pytorch3d.pytorch3d.renderer import PointLights, Materials ImportError: attempted relative import with no known parent package 解决方法
删除之前pip安装的pytorch3d同名包, 不然会git安装的pytorch3d起冲突
python FittingSingleImage.py --model_path "TrainedModels/model_Reso32HR.pth" --img "test_data/single_images/img_000037.png" --mask "test_data/single_images/img_000037_mask.png" --para_3dmm "test_data/single_images/img_000037_nl3dmm.pkl" --save_root "test_data/fitting_res" --target_embedding "LatentCodeSamples/*/S025_E14_I01_P02.pth"
