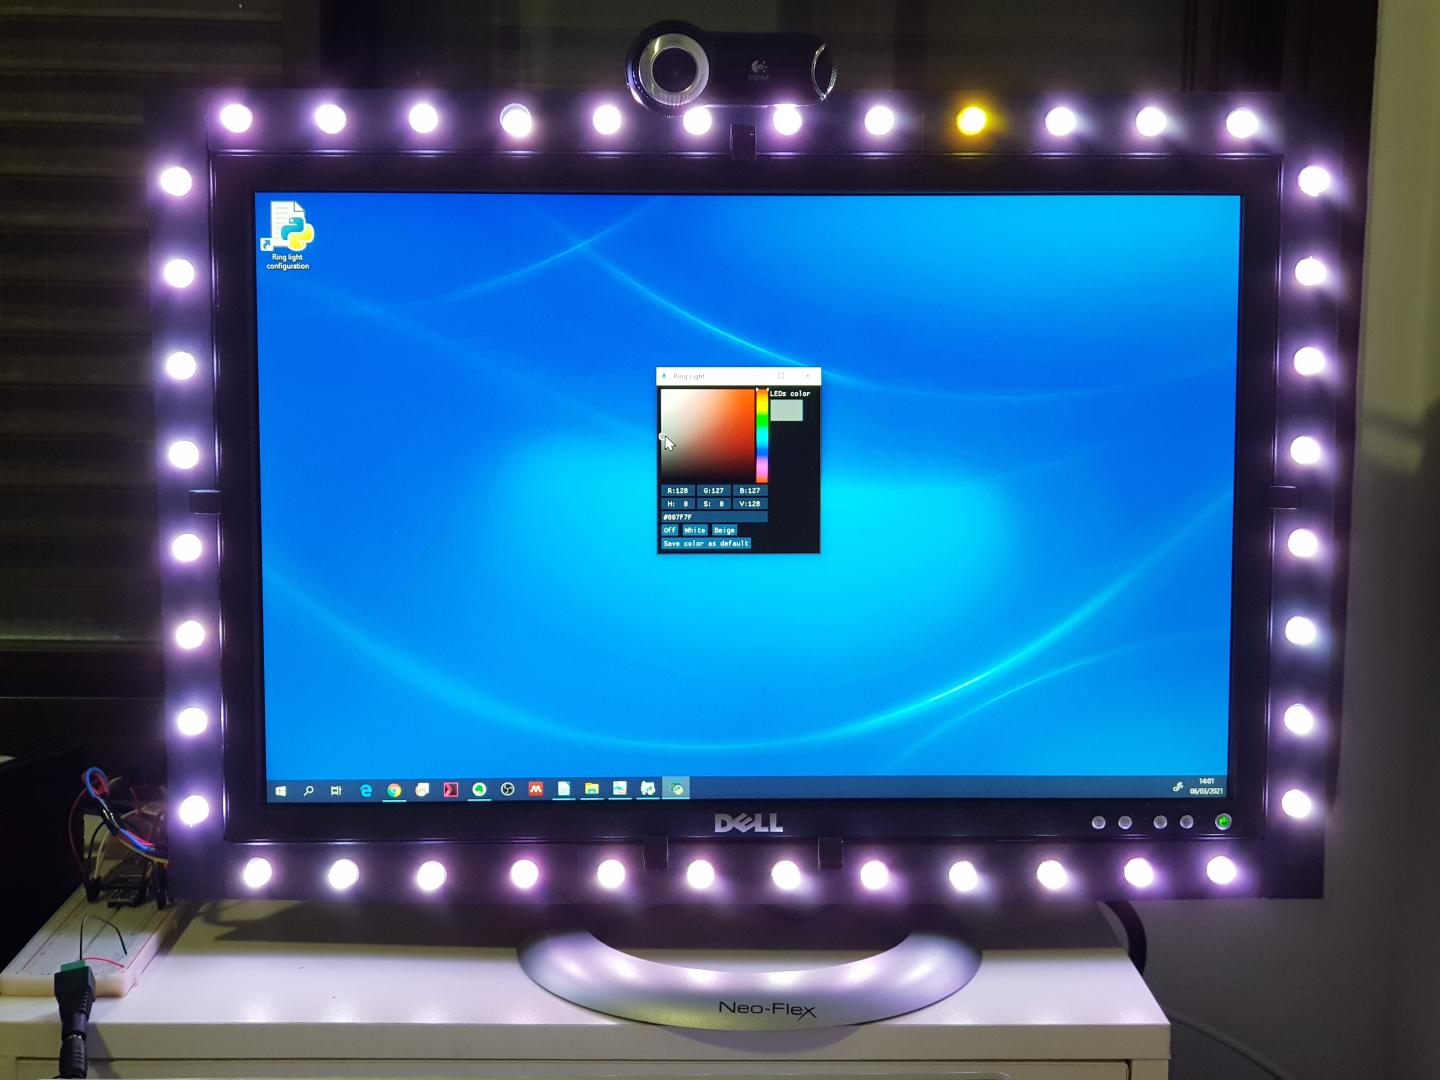
A custom ring light around a monitor, providing uniform lighting and custom color toning for video recordings and video meetings. Made with RGB LED Pixels (WS2801), ESP32, MicroPython and Dear PyGUI.
A PC client sends data to an ESP32 board, which in turn controls a strip of LEDs assembled in a frame around the monitor.
The PC client is a Python script, using Dear PyGui for the GUI to set the LEDs color, and sending UDP packets to the ESP32 via Wi-Fi.
The ESP32 board (ESP32-DevKitC V4) has a MicroPython firmware installed. A MicroPython script started after boot connects to the Wi-Fi access point, waits for UDP packets, parse the received packets and communicates with the LED strip via SPI to set the colors. A logic level converter is used since this LED strip requires 5V for data and clock but the ESP32 uses 3.3V. The system mighgt work without it, though - except for the 1st LED, which was flickering on my tests.
Obviously, check the details of your WS2801 LED strip before making any connections. I used the ESP32 hardware SPI pins:
- 🔴 LED red cable: +5V
- 🔵 LED blue cable: ground
- 🟡 LED yellow cable (data): MOSI (ESP32 pin 13), through logic level converter
- 🟢 LED green cable (clock): SCK (ESP32 pin 14), through logic level converter
Download the files in the pc folder to your PC, and the files in the esp32 folder to your ESP32 (already with the MicroPython firmware).
Install Dear PyGui on your PC: pip install dearpygui
Reserve an IP address for your ESP32 on your DHCP server, or set a custom DHCP hostname for it.
Edit ring_light_pc.py on your PC to use the IP address or name of your ESP32.
Run ring_light_pc.py on your PC.
Power up the ESP32 and LED strip. The LEDs should light up with the default color in a few seconds.
Use the PC client to select a color, and the LEDs should change immediately (as long as the ESP32 and PC are connected to the same Wi-Fi network). If you save the current color as default, the information is saved on the PC and on the ESP32.
Enjoy!
First I tested the concept on a protoboard with the ESP32 and just 3 LEDs. When the software and eletronics were done, I built the frame.
I used some letfover foam board to build the frame around the monitor, cutting holes for the LEDs with a compass cutter (see image 1 and image 2).
Most LEDs fit snuggly in place, but a few might require a bit of glue. I didn't want to cut and solder 40 LEDs to space them as I wanted, so I just tied the cables a bit and left the remaining behind the frame for now (see image 3).


