This is the accompanied repo for my blog post at: https://giangnt2.medium.com/automating-analytical-application-with-chatgpt-bdc8d193275
This application demonstrates the of Open AI (ChatGPT/GPT-4) to help answer business questions by performing advanced data analytic tasks on a business database. Examples of questions are:
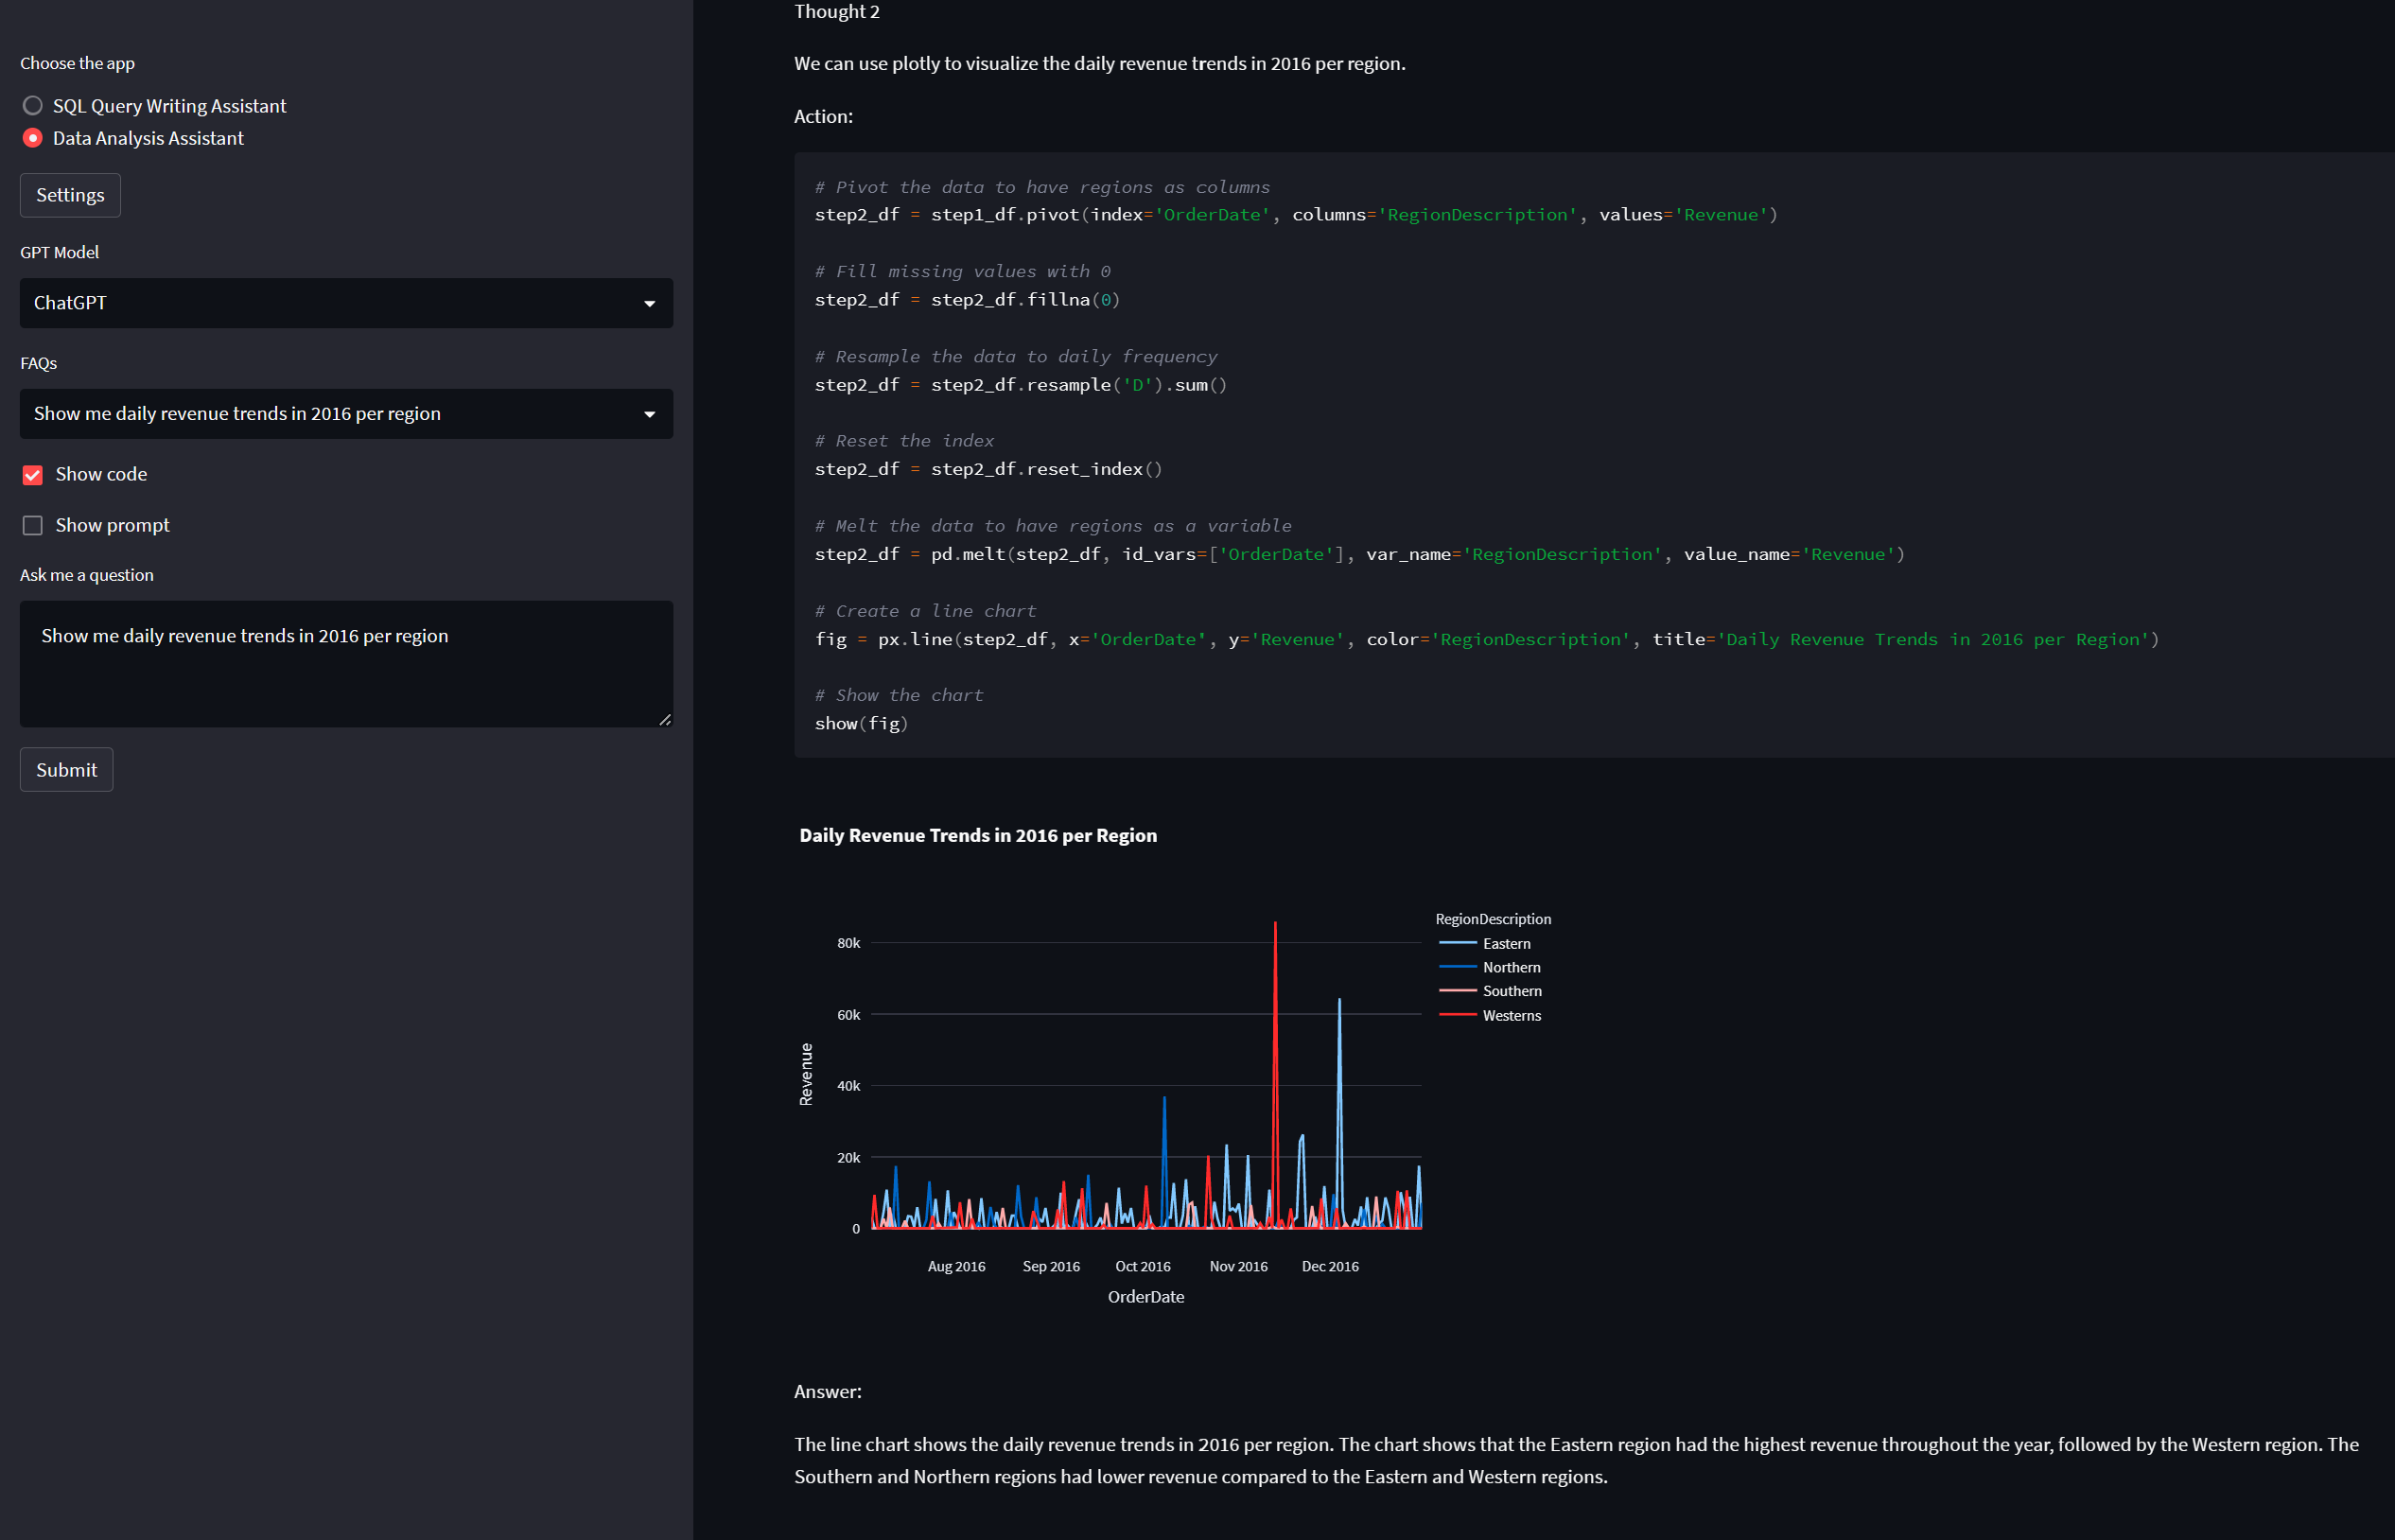
- Simple: Show me daily revenue trends in 2016 per region
- More difficult: Is that true that top 20% customers generate 80% revenue in 2016?
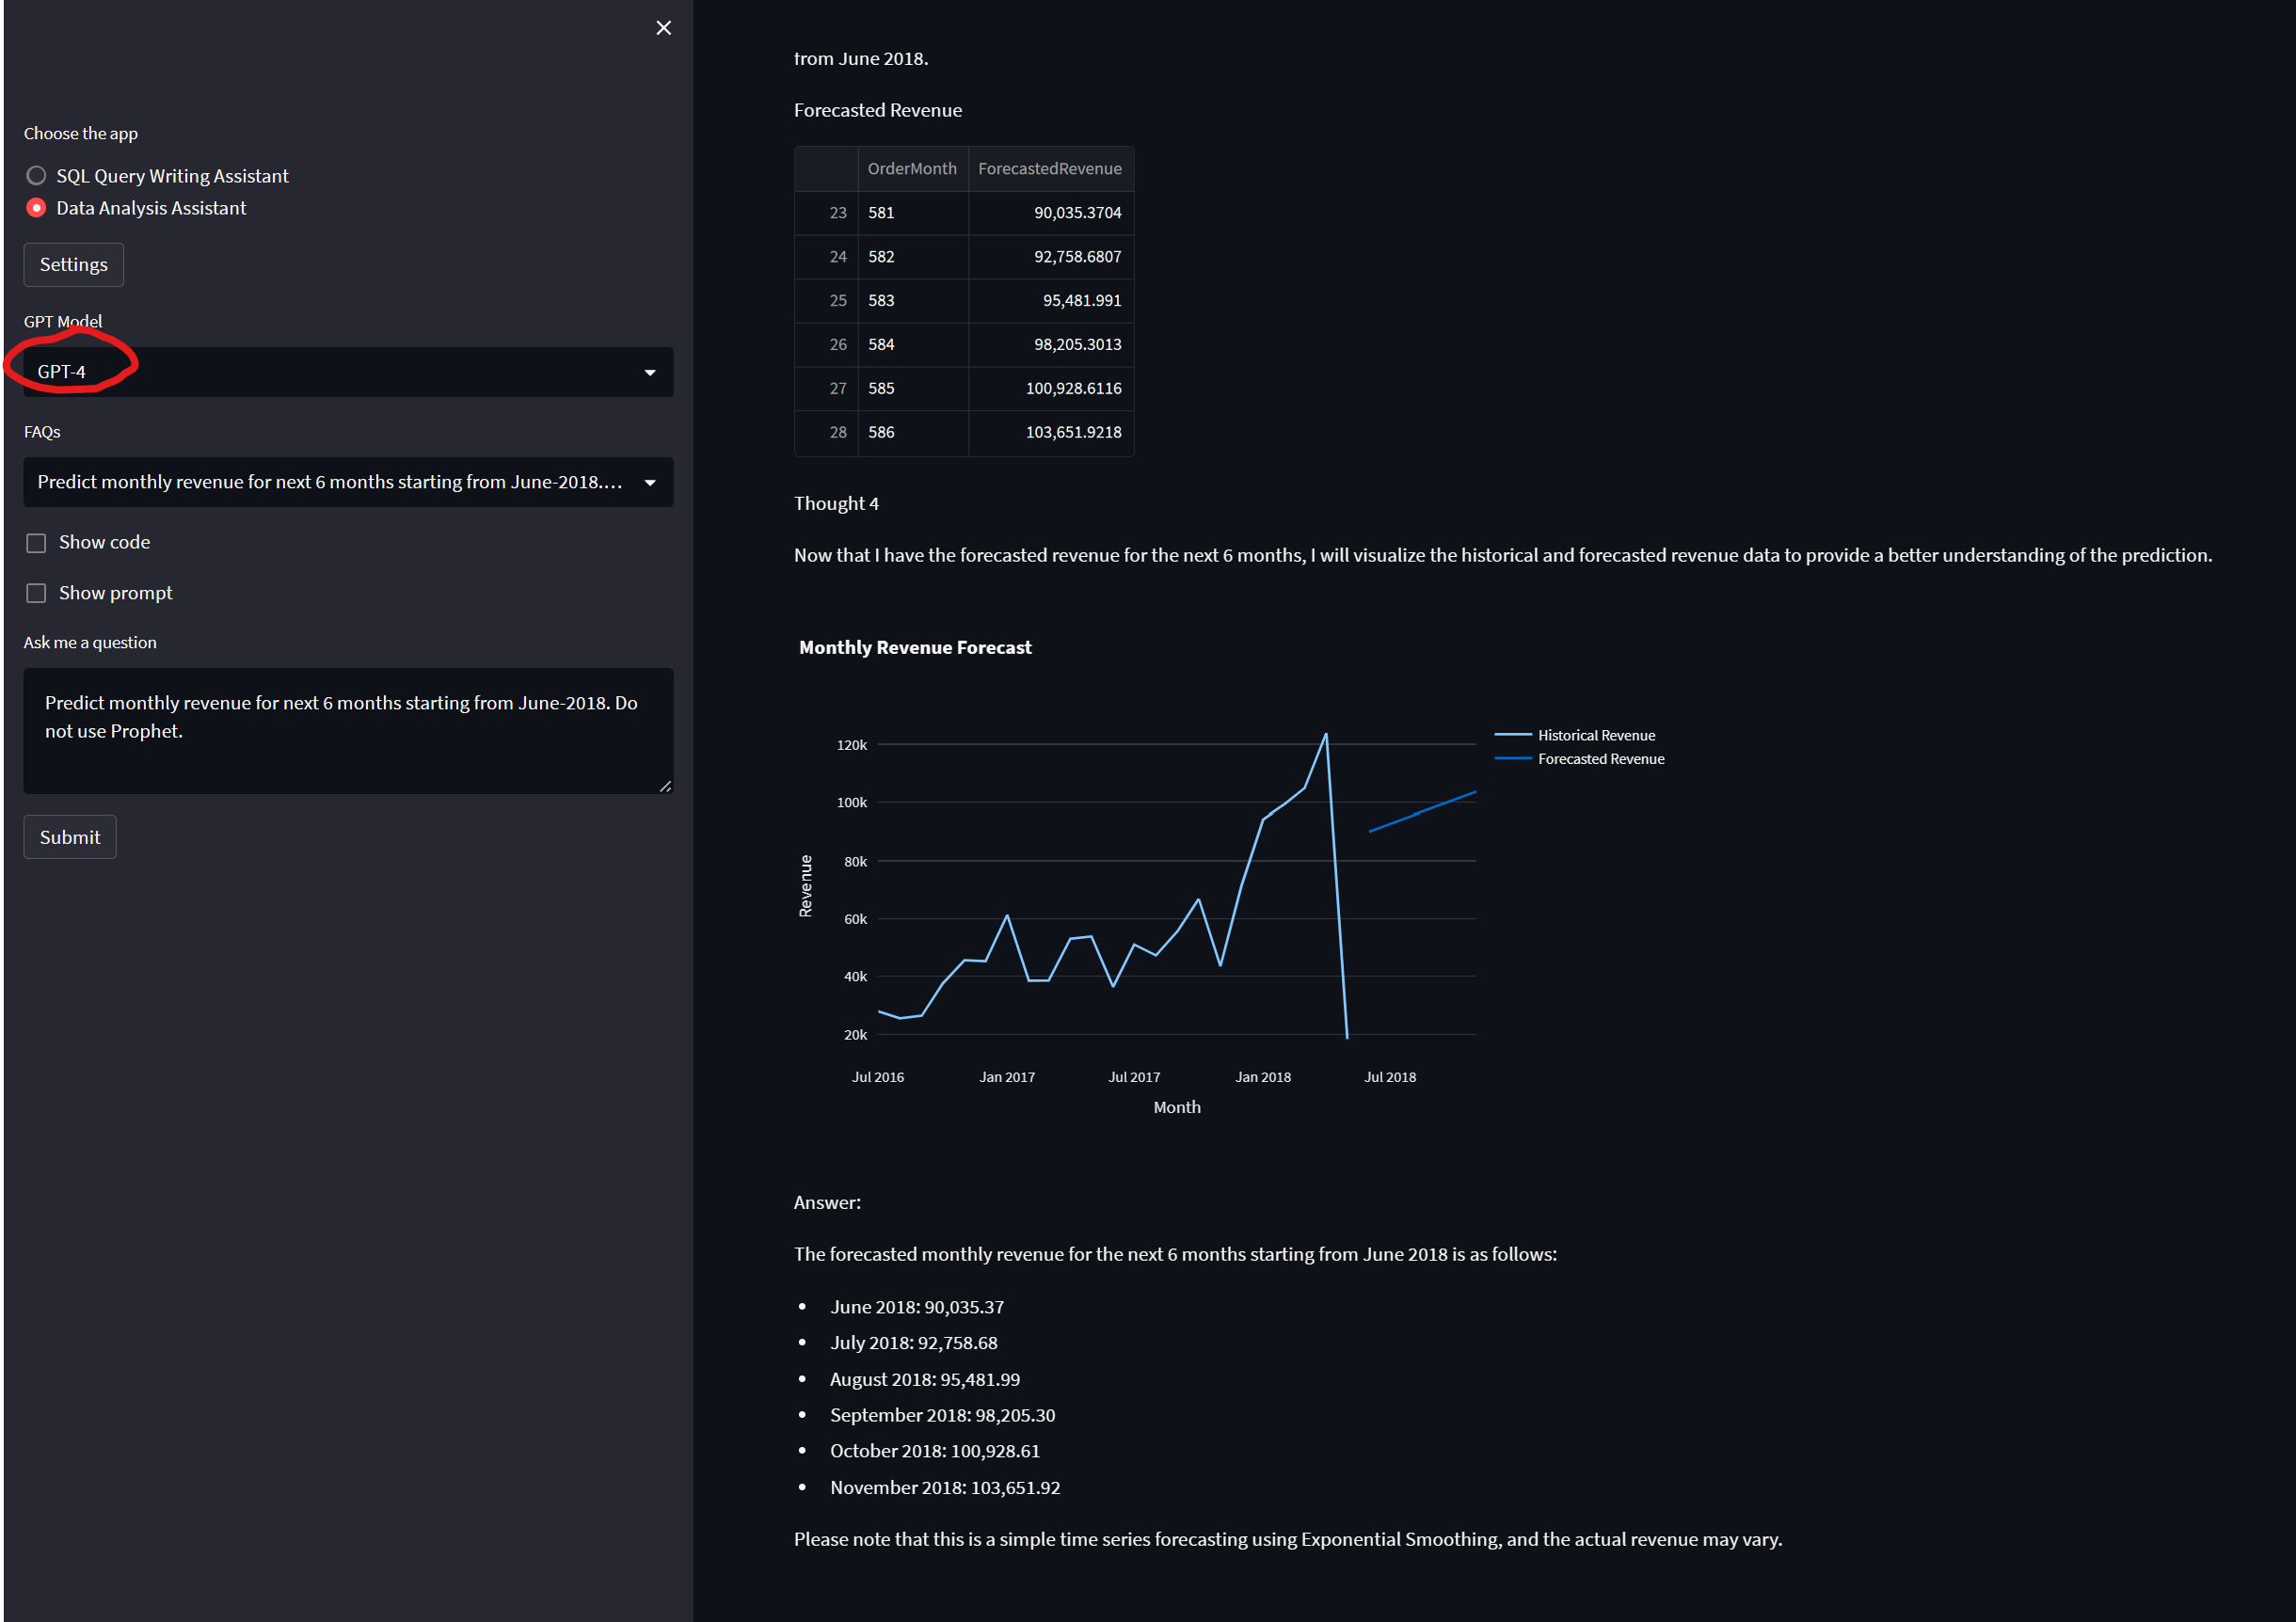
- Advanced: Forecast monthly revenue for next 12 months starting from June-2018
The application supports Python's built-in SQLITE as well as your own Microsoft SQL Server. The data files for SQLITE and SQL SERVER can be found at data folder.
-
Go to our hosted demo at https://app-web-ulajovkr7vyd4.azurewebsites.net/ if you do not want to install yourself.
-
Enter Open AI and database settings if these were not done during installation (see installation below if you want to install yourself).
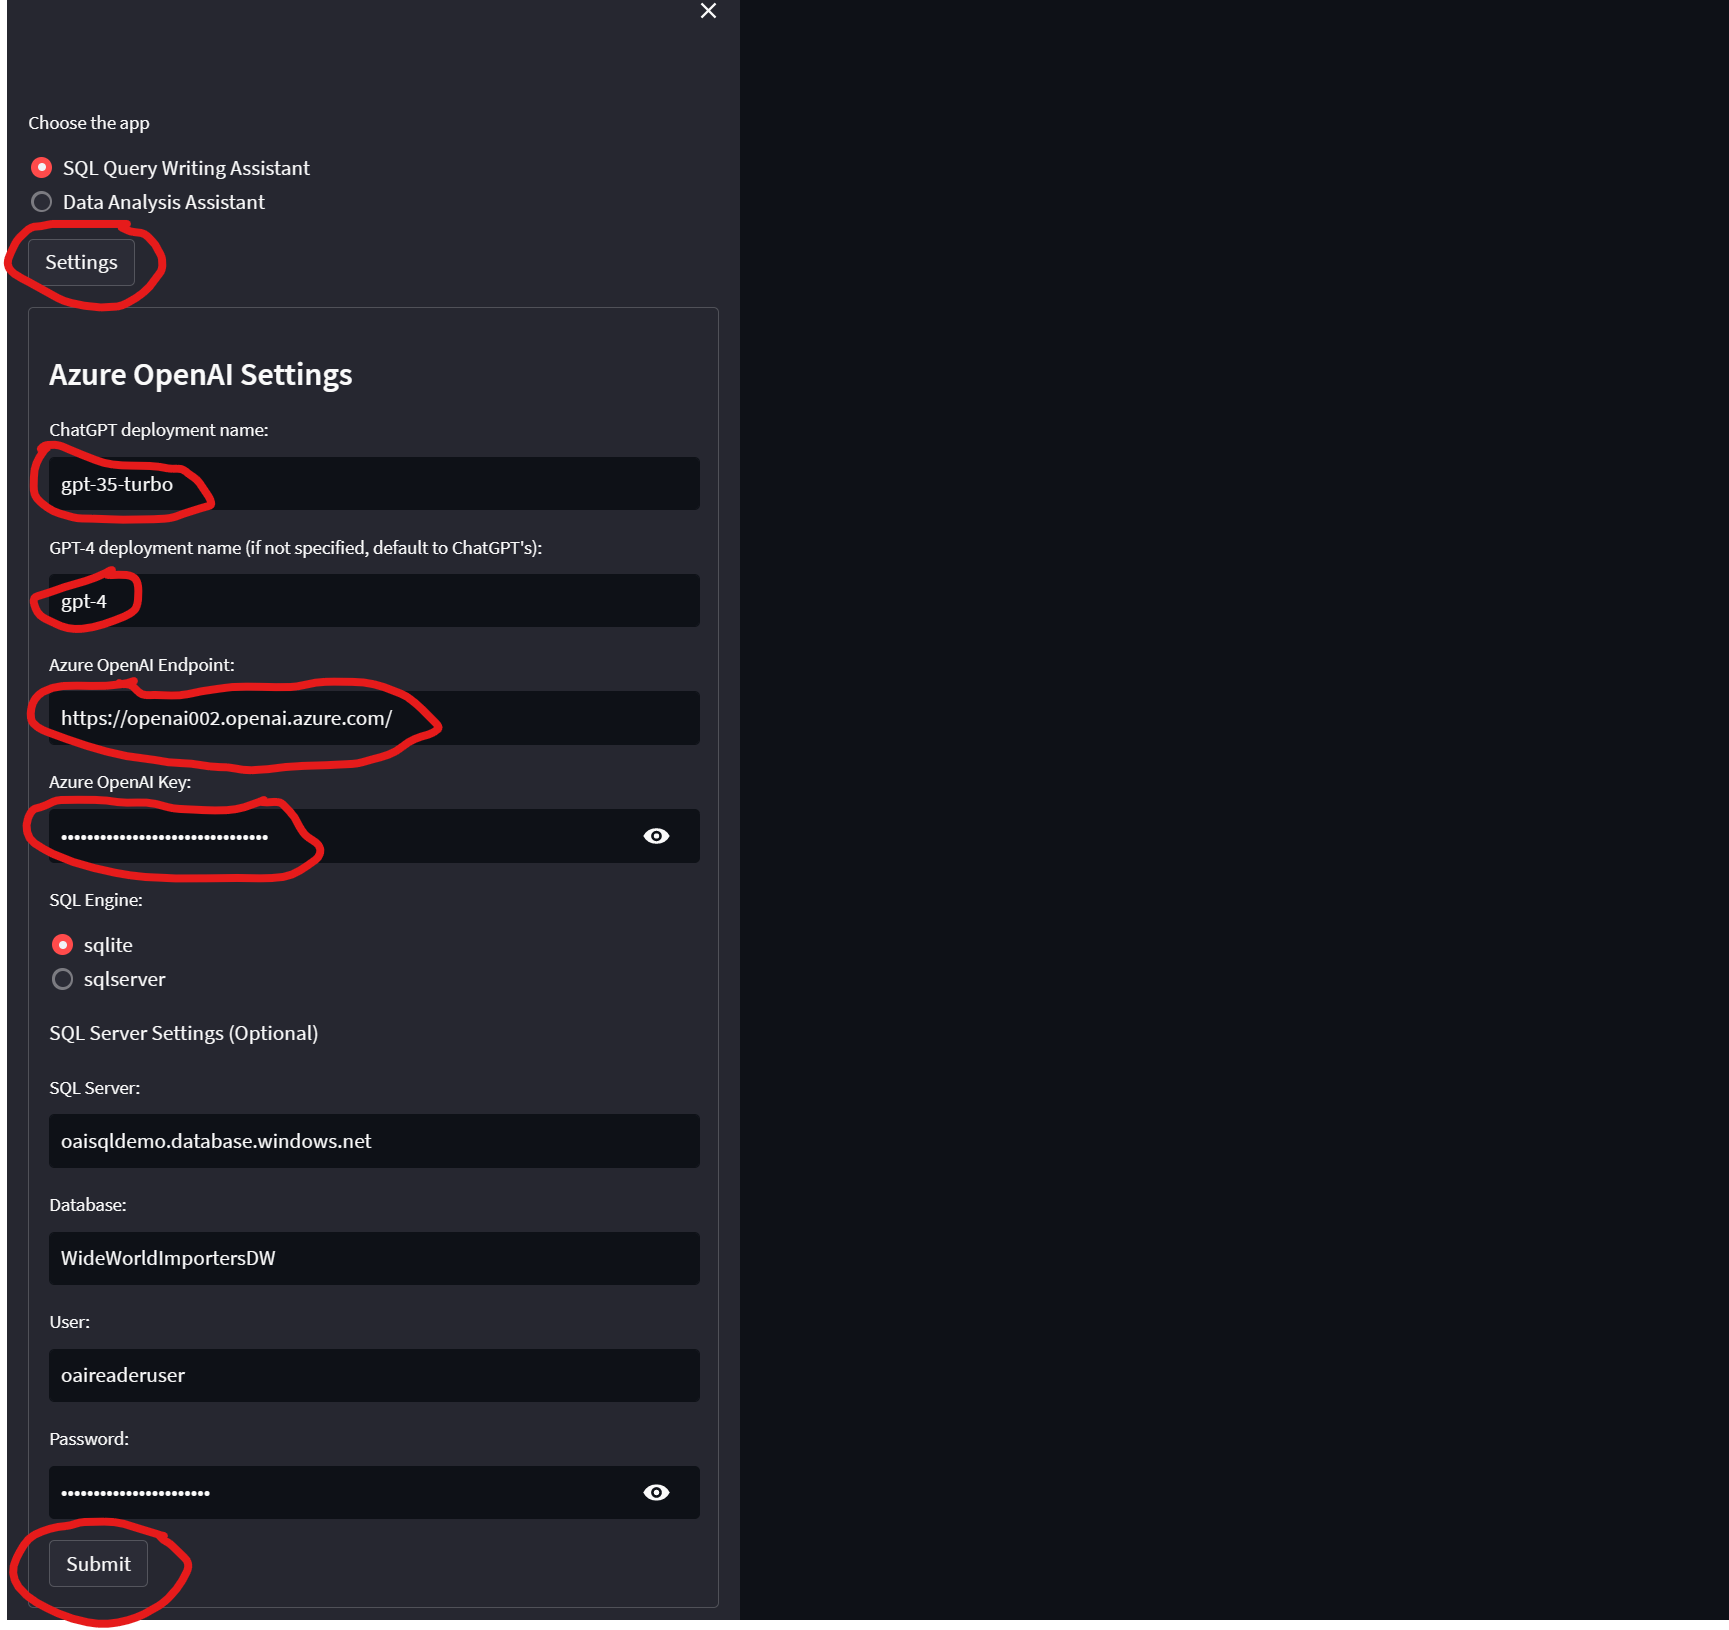
Click on settings. Provide Open AI keys, deployment name and URL for ChatGPT. Optionally, you can provide deployment name for GPT-4 for advanced questions. For data, you can use the built-in SQLITE demo dataset or you can choose to specify your own SQL Server. In case you use SQLITE, you don't need to enter details for SQL Server. Click on submit to save settings.
-
Use Data Ananalyst Assistant
- A sophisticated application to perform advanced data analytics such as statisical analysis and forecasting from business question. Here we demonstrate the use of Chain of Thought and React techniques to perform multi-step processing where the next step in the chain also depends on the observation/result from the previous step.
-
Use a question from the FAQ or enter your own question.
-
You can select
show codeand/orshow promptto show SQL & Python code and the prompt behind the scene. -
Click on submit to execute and see result.
-
For advanced questions such as forecasting, you can use GPT-4 as the engine


- Create an Azure OpenAI deployment in an Azure subscription with a GPT-35-Turbo deployment and preferably a GPT-4 deployment. Here we provide options to use both but GPT-4 should be used to address difficult & vague questions. We assume that your GPT-4 and CHATGPT deployments are in the same Azure Open AI resource.
-
Clone the repo. Then navigate to
cd src -
(Optional) Provide settings for Open AI and Database.You can either create a
secrets.envfile in the root of this folder (scenarios/natural_language_query/streamlit) as below or do it using the app's UI later on.-
Option 1: use built-in SQLITE. Then you don't need to install SQL Server.
AZURE_OPENAI_API_KEY="9999999999999999999999999"
AZURE_OPENAI_GPT4_DEPLOYMENT="NAME_OF_GPT_4_DEPLOYMENT"
AZURE_OPENAI_CHATGPT_DEPLOYMENT="NAME_OF_CHATGPT_4_DEPLOYMENT"
AZURE_OPENAI_ENDPOINT=https://openairesourcename.openai.azure.com/
SQL_ENGINE = "sqlite"
-
Option 2: use your own SQL Server
AZURE_OPENAI_API_KEY="9999999999999999999999999"
AZURE_OPENAI_ENDPOINT="https://openairesourcename.openai.azure.com/"
AZURE_OPENAI_GPT4_DEPLOYMENT="NAME_OF_GPT_4_DEPLOYMENT"
AZURE_OPENAI_CHATGPT_DEPLOYMENT="NAME_OF_CHATGPT_4_DEPLOYMENT"
SQL_USER="sqluserid"
SQL_PASSWORD="sqlpassword"
SQL_DATABASE="WideWorldImportersDW"
SQL_SERVER="sqlservername.database.windows.net"
-
-
Navigate to
cd src -
Create a python environment with version from 3.7 and 3.10
- Python 3+
- Important: Python and the pip package manager must be in the path in Windows for the setup scripts to work.
- Important: Ensure you can run
python --versionfrom console. On Ubuntu, you might need to runsudo apt install python-is-python3to linkpythontopython3.
- Python 3+
-
Import the requirements.txt
pip install -r requirements.txt -
To run the application from the command line:
streamlit run app.py -
The UI prompts for settings. If you want to save these so the next time you run the project you don't have to type them in, you can create a
secrets.envfile in the root of streamlit folder -
If you are a Mac user, please follow this to install ODBC for PYODBC
This application can be deployed to an Azure subscription using the Azure Developer CLI. There is no need to have any coding experience to deploy this application but you will need permissions to create resources in an Azure Subscription To deploy to Azure:
- Install Azure Developer CLI
- Use either git to clone the repo or download a zip
- Go to the local directory of the OpenAIWorkshop
- Authenticate to Azure by running
azd auth login - Create a local environment
azd env new💡 NOTE: If deploying to the same Subscription as others, use a unique name
- Deploy the app and infrastructure using
azd up