Contributing to Open Horizon pages
To visit this Open Horizon documentation site visit open-horizon.github.io
If you would like to contribute content, read the following documentation for helpful information and guidelines.
We appreciate and recognize all contributors.
Table of Contents
- Contributing to Open Horizon Pages
- Table of Contents
- Fork the Repository
- Make Necessary Changes
- Test in Local and Push Changes to GitHub
- Submit a Pull Request for Review
- Clean Up
Fork the Repository
Fork this repository by clicking on the fork button on the top of this page. This will create a copy of this repository in your account.
Make Necessary Changes
To make changes, clone the forked repository to your machine.
Clone the repository
Go to your GitHub account, open the forked repository, click Code, and then copy to clipboard.
Open a terminal and run the following git command:
git clone "url you just copied"
where "url you just copied" (without the quotation marks) is the url to this repository (your fork of this project).
Create a branch
Change to the repository directory on your computer:
cd open-horizon.github.io
Now create a branch using the git checkout command:
git checkout -b <add-your-new-branch-name>
For example:
git checkout -b add-readme
(The name of the branch does not need to have the word add in it, but it's a reasonable thing to include because the purpose of this branch is to add README to this repository.)
Make necessary changes
Now, you can suggest contributions, make necessary changes to existing files, or add new files.
Test in local and push changes to GitHub
Before you push changes to GitHub, build this GitHub pages site locally to preview and test the changes.
Prerequisites
This GitHub Pages site is built with Jekyll. Before you can use Jekyll to test a site, you must install Jekyll.
Test your changes locally
Change to the repository directory on your computer and execute the following command to run the Jekyll site locally.
- To install and update all dependencies.
make init
Note: Run the above command one time before using the tools each day.
- start the local web server, do not build the site first
make run
Note: This runs a local web server with live reload enabled. When running the make command on Windows, an error might occur that identifies the installed command as unrecognized. This can happen when the binary path is set incorrectly.
To preview the site in your web browser navigate to http://localhost:4000.
- To build and test the local documentation site:
make dev
- To Build the local documentation site:
make build
- Test the local documentation site locally:
make test
Note: This is typically done before make run
Commit changes
After you have a successful testing in local with your changes, you are ready to commit those changes.
If you go to the project directory and execute the command git status, you'll see your changes.
Add those changes to the branch you just created using the git add command:
git add <file>
All commits should be signed off (-s flag on git commit). To use the -s option, follow the guidance to make sure you configure your git name (user.name) and email address (user.email).
Now commit those changes using the git commit command:
git commit -s -m "Add README.md"
Push changes to GitHub
Push your changes using the command git push:
git push origin <add-your-branch-name>
replacing <add-your-branch-name> with the name of the branch you created earlier.
Possible Errors
When setting up a project locally, some errors can occur. Some of those are listed below.
- Missing
webrickandwdminGemfile
Change to:
Some users use the latest version of ruby, which is >2.7 that does not have pre-added webrick support. If they are using ruby versions >= 3.0.0, they might see the error listed below.
  Add the following to your Gemfile to avoid polling for changes:
    gem 'wdm', '>= 0.1.0' if Gem.win_platform?
 Auto-regeneration: enabled for 'C:/Users/yourUserName/Desktop/open-horizon/open-horizon.github.io'
C:/Ruby30-x64/lib/ruby/gems/3.0.0/gems/jekyll-3.9.0/lib/jekyll/commands/serve/servlet.rb:3:in `require': cannot load such file -- webrick (LoadError)
        from C:/Ruby30-x64/lib/ruby/gems/3.0.0/gems/jekyll-3.9.0/lib/jekyll/commands/serve/servlet.rb:3:in `<top (required)>'
        from C:/Ruby30-x64/lib/ruby/gems/3.0.0/gems/jekyll-3.9.0/lib/jekyll/commands/serve.rb:184:in `require_relative'
        from C:/Ruby30-x64/lib/ruby/gems/3.0.0/gems/jekyll-3.9.0/lib/jekyll/commands/serve.rb:184:in `setup'
        from C:/Ruby30-x64/lib/ruby/gems/3.0.0/gems/jekyll-3.9.0/lib/jekyll/commands/serve.rb:102:in `process'
        from C:/Ruby30-x64/lib/ruby/gems/3.0.0/gems/jekyll-3.9.0/lib/jekyll/commands/serve.rb:93:in `block in start'
        from C:/Ruby30-x64/lib/ruby/gems/3.0.0/gems/jekyll-3.9.0/lib/jekyll/commands/serve.rb:93:in `each'
        from C:/Ruby30-x64/lib/ruby/gems/3.0.0/gems/jekyll-3.9.0/lib/jekyll/commands/serve.rb:93:in `start'
        from C:/Ruby30-x64/lib/ruby/gems/3.0.0/gems/jekyll-3.9.0/lib/jekyll/commands/serve.rb:75:in `block (2 levels) in init_with_program'
        from C:/Ruby30-x64/lib/ruby/gems/3.0.0/gems/mercenary-0.3.6/lib/mercenary/command.rb:220:in `block in execute'
        from C:/Ruby30-x64/lib/ruby/gems/3.0.0/gems/mercenary-0.3.6/lib/mercenary/command.rb:220:in `each'
        from C:/Ruby30-x64/lib/ruby/gems/3.0.0/gems/mercenary-0.3.6/lib/mercenary/command.rb:220:in `execute'
        from C:/Ruby30-x64/lib/ruby/gems/3.0.0/gems/mercenary-0.3.6/lib/mercenary/program.rb:42:in `go'
        from C:/Ruby30-x64/lib/ruby/gems/3.0.0/gems/mercenary-0.3.6/lib/mercenary.rb:19:in `program'
        from C:/Ruby30-x64/lib/ruby/gems/3.0.0/gems/jekyll-3.9.0/exe/jekyll:15:in `<top (required)>'
        from C:/Ruby30-x64/bin/jekyll:25:in `load'
        from C:/Ruby30-x64/bin/jekyll:25:in `<main>'
To solve this error, add webrick and wdm to your local Gemfile by using the commands listed below and re-run the serve.
add webrick:
bundle add webrick
add wdm:
gem install wdm
Submit a Pull Request for Review
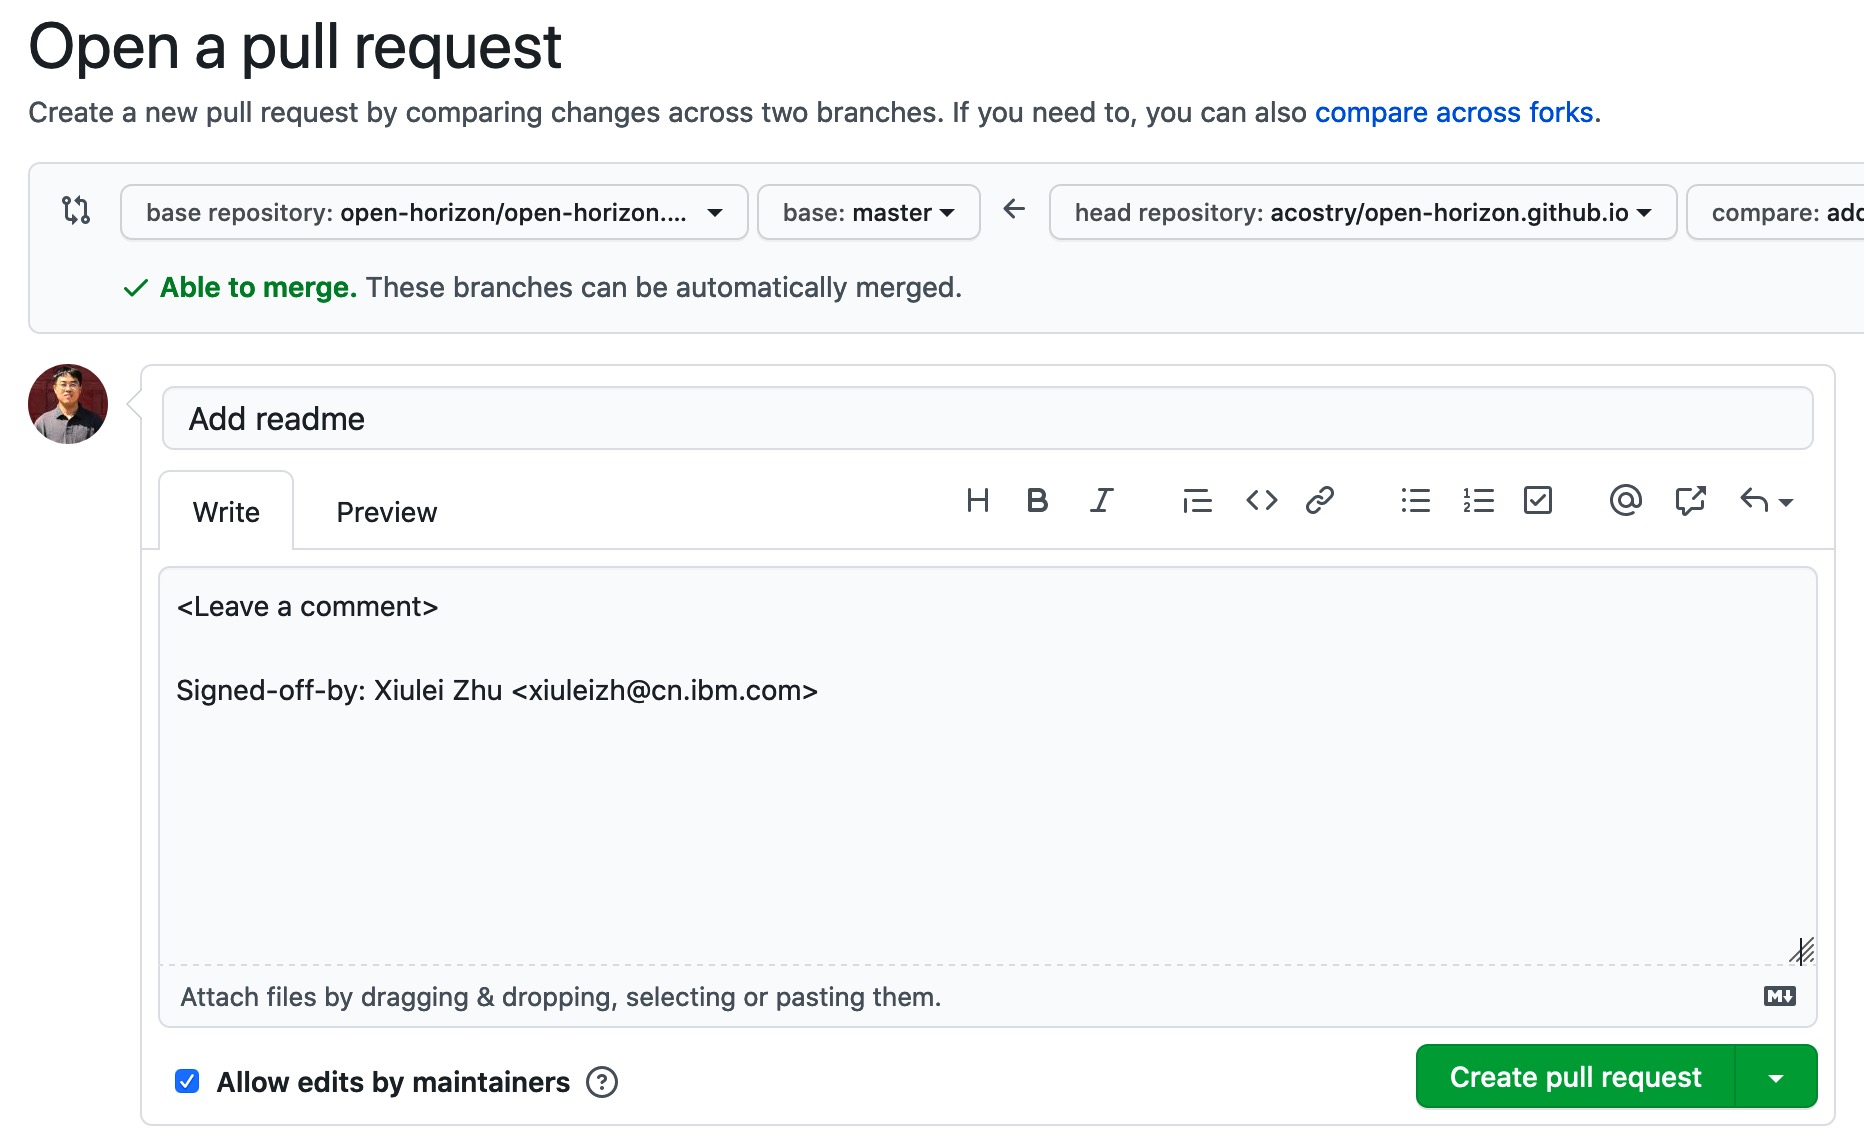
If you go to your repository on GitHub, you'll see a Compare & pull request button. Click on that button.
Now submit the pull request by clicking Create pull request.
You will get a notification email once the changes have been merged.
Clean Up
Delete the branch
Once your Pull Request has been approved/merged, you are safe to delete the branch created earlier. Change to the repository directory on your computer and execute the following commands to delete the branch:
Delete the local branch:
git branch -d <branch-name>
Delete remote branch:
git push origin :<branch-name>
Syncing a fork
Connect your local repository to the original, upstream repository by adding it as a remote. You should pull in changes from upstream often, so that you stay up-to-date. This helps avoid merge conflicts when you submit pull requests.
For more information, see Sync a fork of a repository to keep it up-to-date with the upstream repository.


