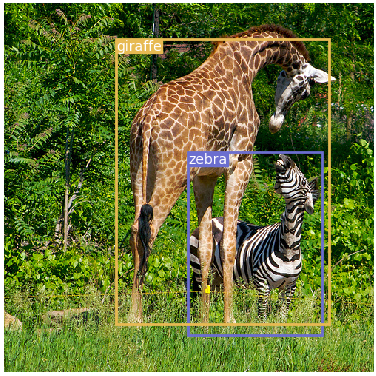
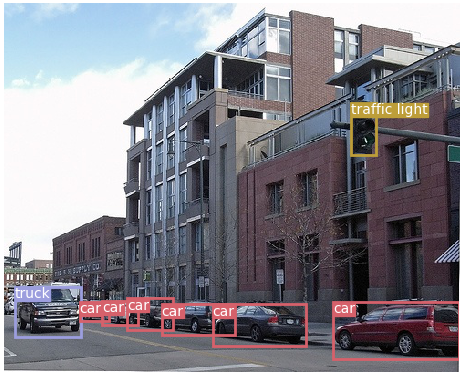
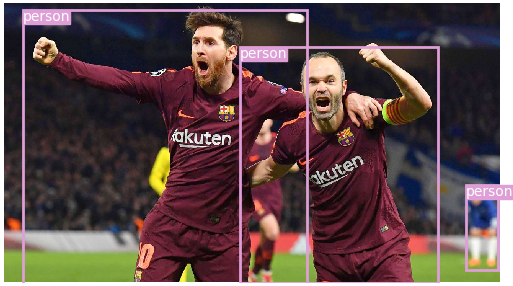
Originally from https://github.com/eriklindernoren/PyTorch-YOLOv3, retrained to detect and recognize traffic sign
A minimal PyTorch implementation of YOLOv3, with support for training, inference and evaluation.
$ git clone https://github.com/eriklindernoren/PyTorch-YOLOv3
$ cd PyTorch-YOLOv3/
$ sudo pip3 install -r requirements.txt
$ cd weights/
$ bash download_weights.sh
$ cd data/
$ bash get_coco_dataset.sh
Evaluates the model on COCO test.
$ python3 test.py --weights_path weights/yolov3.weights
| Model | mAP (min. 50 IoU) |
|---|---|
| YOLOv3 608 (paper) | 57.9 |
| YOLOv3 608 (this impl.) | 57.3 |
| YOLOv3 416 (paper) | 55.3 |
| YOLOv3 416 (this impl.) | 55.5 |
Uses pretrained weights to make predictions on images. Below table displays the inference times when using as inputs images scaled to 256x256. The ResNet backbone measurements are taken from the YOLOv3 paper. The Darknet-53 measurement marked shows the inference time of this implementation on my 1080ti card.
| Backbone | GPU | FPS |
|---|---|---|
| ResNet-101 | Titan X | 53 |
| ResNet-152 | Titan X | 37 |
| Darknet-53 (paper) | Titan X | 76 |
| Darknet-53 (this impl.) | 1080ti | 74 |
$ python3 detect.py --image_folder data/samples/
$ train.py [-h] [--epochs EPOCHS] [--batch_size BATCH_SIZE]
                [--gradient_accumulations GRADIENT_ACCUMULATIONS]
                [--model_def MODEL_DEF] [--data_config DATA_CONFIG]
                [--pretrained_weights PRETRAINED_WEIGHTS] [--n_cpu N_CPU]
                [--img_size IMG_SIZE]
                [--checkpoint_interval CHECKPOINT_INTERVAL]
                [--evaluation_interval EVALUATION_INTERVAL]
                [--compute_map COMPUTE_MAP]
                [--multiscale_training MULTISCALE_TRAINING]
To train on COCO using a Darknet-53 backend pretrained on ImageNet run:
$ python3 train.py --data_config config/coco.data --pretrained_weights weights/darknet53.conv.74
---- [Epoch 7/100, Batch 7300/14658] ----
+------------+--------------+--------------+--------------+
| Metrics    | YOLO Layer 0 | YOLO Layer 1 | YOLO Layer 2 |
+------------+--------------+--------------+--------------+
| grid_size  | 16           | 32           | 64           |
| loss       | 1.554926     | 1.446884     | 1.427585     |
| x          | 0.028157     | 0.044483     | 0.051159     |
| y          | 0.040524     | 0.035687     | 0.046307     |
| w          | 0.078980     | 0.066310     | 0.027984     |
| h          | 0.133414     | 0.094540     | 0.037121     |
| conf       | 1.234448     | 1.165665     | 1.223495     |
| cls        | 0.039402     | 0.040198     | 0.041520     |
| cls_acc    | 44.44%       | 43.59%       | 32.50%       |
| recall50   | 0.361111     | 0.384615     | 0.300000     |
| recall75   | 0.222222     | 0.282051     | 0.300000     |
| precision  | 0.520000     | 0.300000     | 0.070175     |
| conf_obj   | 0.599058     | 0.622685     | 0.651472     |
| conf_noobj | 0.003778     | 0.004039     | 0.004044     |
+------------+--------------+--------------+--------------+
Total Loss 4.429395
---- ETA 0:35:48.821929
Track training progress in Tensorboard:
- Initialize training
- Run the command below
- Go to http://localhost:6006/
$ tensorboard --logdir='logs' --port=6006
Storing the logs on a slow drive possibly leads to a significant training speed decrease.
You can adjust the log directory using --logdir <path> when running tensorboard or the train.py.
Run the commands below to create a custom model definition, replacing <num-classes> with the number of classes in your dataset.
$ cd config/                                # Navigate to config dir
$ bash create_custom_model.sh <num-classes> # Will create custom model 'yolov3-custom.cfg'
Add class names to data/custom/classes.names. This file should have one row per class name.
Move the images of your dataset to data/custom/images/.
Move your annotations to data/custom/labels/. The dataloader expects that the annotation file corresponding to the image data/custom/images/train.jpg has the path data/custom/labels/train.txt. Each row in the annotation file should define one bounding box, using the syntax label_idx x_center y_center width height. The coordinates should be scaled [0, 1], and the label_idx should be zero-indexed and correspond to the row number of the class name in data/custom/classes.names.
In data/custom/train.txt and data/custom/valid.txt, add paths to images that will be used as train and validation data respectively.
To train on the custom dataset run:
$ python3 train.py --model_def config/yolov3-custom.cfg --data_config config/custom.data
Add --pretrained_weights weights/darknet53.conv.74 to train using a backend pretrained on ImageNet.
Joseph Redmon, Ali Farhadi
Abstract
We present some updates to YOLO! We made a bunch
of little design changes to make it better. We also trained
this new network that’s pretty swell. It’s a little bigger than
last time but more accurate. It’s still fast though, don’t
worry. At 320 × 320 YOLOv3 runs in 22 ms at 28.2 mAP,
as accurate as SSD but three times faster. When we look
at the old .5 IOU mAP detection metric YOLOv3 is quite
good. It achieves 57.9 AP50 in 51 ms on a Titan X, compared
to 57.5 AP50 in 198 ms by RetinaNet, similar performance
but 3.8× faster. As always, all the code is online at
https://pjreddie.com/yolo/.
[Paper] [Project Webpage] [Authors' Implementation]
@article{yolov3,
  title={YOLOv3: An Incremental Improvement},
  author={Redmon, Joseph and Farhadi, Ali},
  journal = {arXiv},
  year={2018}
}


