-
Maven:
- Make sure Maven is installed on your system. If not, you can download it from Maven's official website and follow the installation instructions for your operating system.
-
PostgreSQL (or simply use docker):
- Install PostgreSQL on your machine if you haven't already. You can download it from PostgreSQL's official website and follow the installation instructions provided.
-
Java/JRE:
- Ensure that Java or Java Runtime Environment (JRE) is installed on your system. You can download it from Oracle's Java website or use OpenJDK, depending on your preference and operating system.
-
Clone the Repository:
- Clone the project repository to your local machine using Git:
git clone https://github.com/AnubhavHawk/splitwise-app
- Clone the project repository to your local machine using Git:
-
Navigate to the Project Directory:
- Open a terminal or command prompt and navigate to the root directory of the cloned project (i.e., splitwise-app/):
cd ./splitwise-app
- Open a terminal or command prompt and navigate to the root directory of the cloned project (i.e., splitwise-app/):
-
Database Configuration:
- Configure your PostgreSQL database by creating a new database
splitwiseand user for the project. You can do this using thepsqlcommand-line tool or a PostgreSQL administration tool like pgAdmin. - Update the database configuration in the project's configuration files (
splitwise-app/src/main/resources/application.propertiesor similar). Replace the values as per your database, URL (spring.datasource.url), username(spring.datasource.username), and password(spring.datasource.password).
- Configure your PostgreSQL database by creating a new database
-
Build the Project:
- Use Maven to build the project. In the project's root directory, run:
mvn clean install
- Use Maven to build the project. In the project's root directory, run:
-
Run the Application:
- Once the build is successful, you can run the application. Use Maven to run the project:
mvn spring-boot:run
This will start the application, and you should see the logs indicating that the application has started successfully.
- Once the build is successful, you can run the application. Use Maven to run the project:
-
Accessing the Application:
- Open a web browser and navigate to
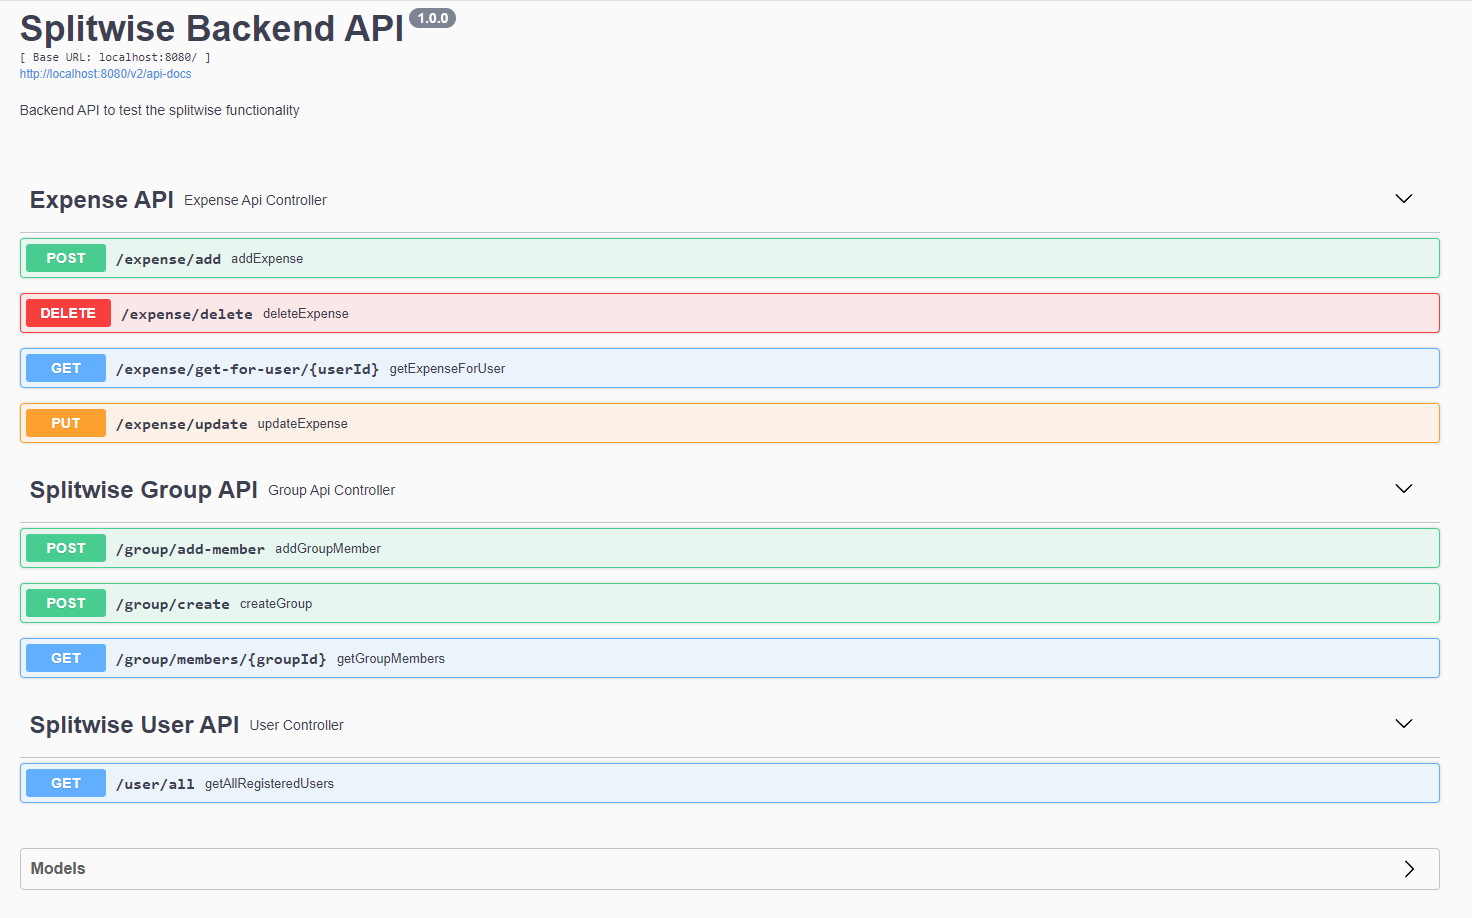
http://localhost:8080/swagger-ui/index.html#/(or the appropriate port if configured differently) to access the application.
- Open a web browser and navigate to
- The application inserts some hardcoded user in the database at the startup.
- If you are running the application for the very first time then users are inserted with a fixed primary key
- Second time when you try to run/build the application, it tries to re-insert the users, and it fails because of primary key constraint. You should see something like this on console
-
ERROR: duplicate key value violates unique constraint
- In order to avoid this, follow below steps if you are going to run the application second time (or later):
- Open the configuration file (
splitwise-app/src/main/resources/application.properties) in a text editor - Comment out this line 5 (spring.datasource.initialization-mode=always). Comments are added by placing
#at the begining of the line. - Once commented out, it will not try to persist the hard coded users again. You can now run the application again.
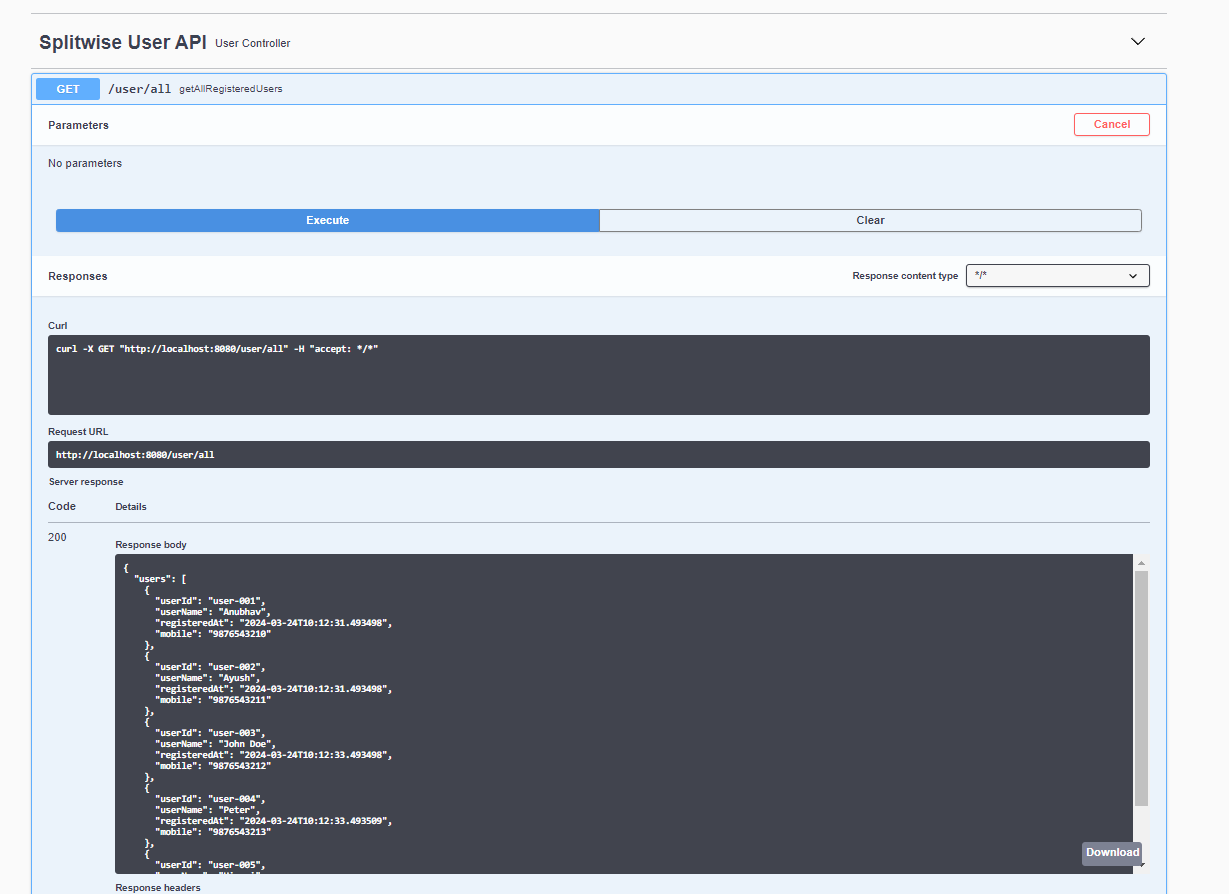
To begin with, there are 5 users already stored in the users table for demo purpose
| user_id | mobile | registered_at | user_name |
|---|---|---|---|
| user-001 | 9876543210 | 2024-03-24 10:12:31.493498 | Anubhav |
| user-002 | 9876543211 | 2024-03-24 10:12:31.493498 | Ayush |
| user-003 | 9876543212 | 2024-03-24 10:12:33.493498 | John Doe |
| user-004 | 9876543213 | 2024-03-24 10:12:33.493509 | Peter |
| user-005 | 9876543214 | 2024-03-24 10:12:33.493498 | Himani |
Same can be verified by calling the API from swagger-ui (http://localhost:8080/swagger-ui/index.html#/)
These pre-initialized users come handy when calling other APIs.
You can use any of those user_id for following fields in Expense and Group APIs.
- createdBy
- splitBetween
-
/expense/add:
Is used to create new expense.
createdByis theuserIdwho is creating the Expense.splitBetweenis the list ofuser_idamong which theamountneeds to be split -
/expense/delete:
To delete the expense. In case a user added expense by mistake
-
/expense/get-for-user/{userId}
To get all the expenses (PAID / UNPAID) for a particular
userId -
/expense/update:
To update the status of the split.
expenseBreakdownyou pass the list ofuserIdand thestatus. This API will be used whenever someone makes a payment/clears the due amount on application. -
/group/create:
To create a group for sharing any expense.
groupMemberIdListyou pass the list ofuserIdwho are supposed to be part of a particular group. -
/group/add-member:
To add more members to an existing group.
groupMemberListyou pass the list ofuserIdwhom you are trying to add to the group. -
/group/members/{groupId}:
To get the list of all the members of the group.
-
/user/all:
To get the list of all the available registered members on splitwise app.

