- MCU: ARM Cortex-M0 STM32F072C8T6 48MHz with CAN bus
- Stepper Dirver: Onboard TMC2209 in UART mode, UART address: 00, Rsense: 0.11R
- Onboard Accelerometer Sensor: ADXL345
- Onboard Temperature IC: Max31865 Select 2 / 4 lines PT100 / PT1000 by DIP switch (no Max31865 verson have not this feature)
- Input Voltage: DC12V-DC24V 6A
- Logic Voltage: DC 3.3V
- Heating Interface: Hotend (E0), maximum output current: 5A
- Fan Interfaces: two CNC fans (FAN0, FAN1)
- Maximum Output Current of Fan Interface: 1A, Peak Value 1.5A
- Expansion Interfaces: EndStop, I2C, Probe, RGB, PT100/PT1000, USB interface, CAN Interface
- Temperature Sensor Interface Optional: 1 Channel 100K NTC or PT1000(TH0), 1 Channel PT100/PT1000
- USB Communication Interface: USB-Type-C
- DC 5V Maximum Output Current: 1A
- Only supports Klipper at the present.
- EBB36 CAN V1.0
/EBB36%20CAN%20V1.0/Hardware/EBB36%20CAN%20V1.0-PIN.png)
- EBB42 CAN V1.0
/EBB42%20CAN%20V1.0/Hardware/EBB42%20CAN%20V1.0-PIN.png)
/EBB36%20CAN%20V1.0/Hardware/EBB36%20CAN%20V1.0-PIN.png)
/EBB42%20CAN%20V1.0/Hardware/EBB42%20CAN%20V1.0-PIN.png)
-
Precompiled firmware(The source code version used is Commits on May 18, 2022)
- firmware_USB.bin Use USB to communicate with raspberry pi.
- firmware_canbus.bin Use CAN bus to communicate with raspberry pi, baudrate = 250K.
-
Build your own firmware
-
Refer to klipper's official installation to download klipper source code to raspberry pi
-
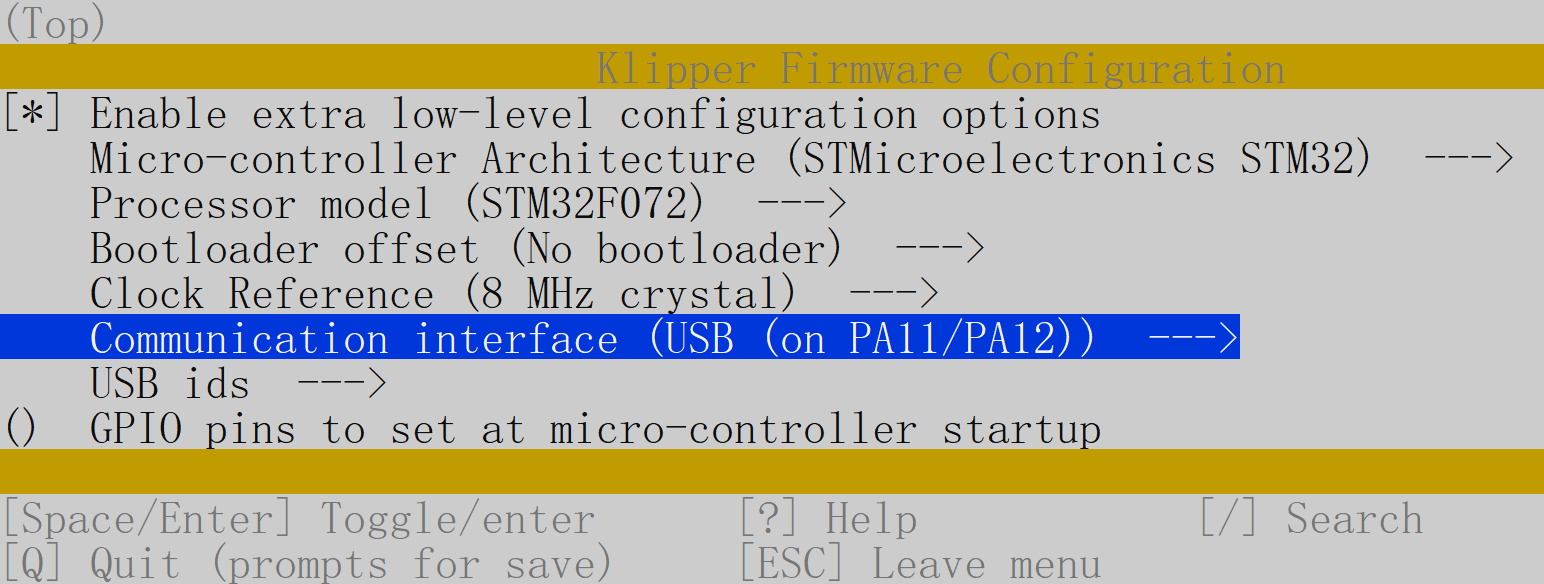
Building the micro-controllerwith the configuration shown below.- [*] Enable extra low-level configuration options
- Micro-controller Architecture =
STMicroelectronics STM32 - Processor model =
STM32F072 - Bootloader offset =
No bootloader - Clock Reference =
8 MHz crystal - IF USE USB
- Communication interface =
USB (on PA11/PA12)
- Communication interface =
- ElSE IF USE CAN bus
- Communication interface =
CAN bus (on PB8/PB9)
- Communication interface =
-
Once the configuration is selected, press
qto exit, and "Yes" when asked to save the configuration. -
Run the command
make -
The
klipper.binfile will be generated in the folderhome/pi/kliiper/outwhen themakecommand completed. And you can use the windows computer under the same LAN as raspberry pi to copyklipper.binfrom raspberry pi to the computer withpscpcommand in the CMD terminal. such aspscp -C pi@192.168.0.101:/home/pi/klipper/out/klipper.bin c:\klipper.bin(The terminal may prompt thatThe server's host key is not cachedand askStore key in cache?((y/n), Please typeyto store. And then it will ask for a password, please type the default passwordraspberryfor raspberry pi)
-

- sample-bigtreetech-ebb-canbus-v1.0.cfg includes all the correct pinout for EBB36 & 42 CAN V1.0
- MCU: ARM Cortex-M0+ STM32G0B1CBT6 64MHz whit FDCAN bus
- All other parameters are the same as EBB36 & 42 CAN V1.0
- Only supports Klipper at the present.
-
Precompiled firmware(The source code version used is Commits on May 18, 2022)
- firmware_USB.bin Use USB to communicate with raspberry pi.
- firmware_canbus.bin Use CAN bus to communicate with raspberry pi, baudrate = 250K.
-
Build your own firmware
Note: Only after STM32G0B1 CAN PR is merged into the main branch of Klipper, will the official firmware support the CAN bus feature of STM32G0B1. If you use CANBus communication, you can use the firmware_canbus.bin compiled by us on our GitHub, or use our source code to compile it yourself: https://github.com/bigtreetech/klipper/tree/stm32g0b1-canbus-
Refer to klipper's official installation to download klipper source code to raspberry pi
-
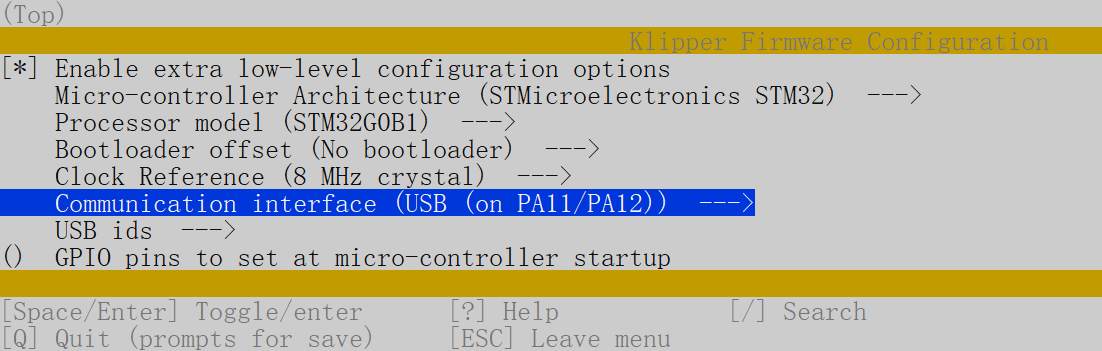
Building the micro-controllerwith the configuration shown below.- [*] Enable extra low-level configuration options
- Micro-controller Architecture =
STMicroelectronics STM32 - Processor model =
STM32G0B1 - Bootloader offset =
No bootloader - Clock Reference =
8 MHz crystal - IF USE USB
- Communication interface =
USB (on PA11/PA12)
- Communication interface =
- ElSE IF USE CAN bus
- Communication interface =
CAN bus (on PB0/PB1)
- Communication interface =
-
Once the configuration is selected, press
qto exit, and "Yes" when asked to save the configuration. -
Run the command
make -
The
klipper.binfile will be generated in the folderhome/pi/kliiper/outwhen themakecommand completed. And you can use the windows computer under the same LAN as raspberry pi to copyklipper.binfrom raspberry pi to the computer withpscpcommand in the CMD terminal. such aspscp -C pi@192.168.0.101:/home/pi/klipper/out/klipper.bin c:\klipper.bin(The terminal may prompt thatThe server's host key is not cachedand askStore key in cache?((y/n), Please typeyto store. And then it will ask for a password, please type the default passwordraspberryfor raspberry pi)
-

- sample-bigtreetech-ebb-canbus-v1.1.cfg includes all the correct pinout for EBB CAN 36&42 V1.1
STM32G0B1CB needs to jump to the System memory area to run bootloader (written by STMicroelectronics) when using DFU to update firmware through the Type-C port. Referring to the description in manual AN2606, The initialization process of this bootloader is shown in the following figure:

The IO of USART will be configured before going to the USB DFU mode.
After going to DFU mode, PA2 will be configured to output high level by bootloader in System memory area refer to the datasheet of STM32G0B1CB

PA2 is used for the hotend MOSFET in EBB36 & 42 CAN V1.1, The high level in the DFU mode change the hotend into heating state. Therefore, please pay attention to disconnect the main power VIN of the hotend when using the DFU of Type-C port to update the firmware, or ensure that the firmware update is completed soon and goto the normal working mode. Never keep MCU in DFU mode for a long time when the main power supply and hotend are connected.
- We appreciate all of your support to BIGTREETECH! To offer an excellent experience of creation to every makers,We’re devoted to design and produce high-quality and durable accessories!
- BIGTREETECH: service004@biqu3d.com
- Facebook: https://www.facebook.com/BIGTREETECH/
- Twitter: https://twitter.com/BigTreeTech
- Instagram: https://www.instagram.com/bigtreetech_official/
- Official Site: https://bigtree-tech.com/