The Workflow Report Email project adds a Workflow Report Method and an Email template to allow this report to be attached to a server event such as a workflow assignment.

A sample email generated by the project
This project adds an email template to run a workflow report method to get the current input item id and the attached workflow and then output the resulting report into an email. It is used by attaching that email template to a workflow activity that will then send the email at the specified trigger. This requires Aras Innovator to be setup to send emails and the from account listed on the email template to have a valid email address.
Note: The default report settings will only display closed items and will not cycle through subflows. (Example: the above screenshot is sitting at Activity C; if the email were sent from activity A, the email would only display the header with no information.) The report settings can be changed by altering the method code.
| Release | Notes |
|---|---|
| v1.0.1 | Minor cleanup |
| v1.0.0 | First release |
| Project | Aras |
|---|---|
| v1.0.1 | 11.0+, 12.0+ |
| v1.0.0 | 11.0+, 12.0+ |
Always back up your code tree and database before applying an import package or code tree patch!
- Aras Innovator installed
- Aras Package Import tool
- Workflow Report Email import package
- The target Aras instance must have an SMTP server configured. See Testing Options below for testing the project without a full SMTP server configured.
- Users must have email addresses in the target Aras database.
- Backup your database and store the BAK file in a safe place.
- Open up the Aras Package Import tool.
- Enter your login credentials and click Login
- Note: You must login as root for the package import to succeed!
- Enter the package name in the TargetRelease field.
- Optional: Enter a description in the Description field.
- Enter the path to your local
..\Workflow-Report-Email\Imports\imports.mffile in the Manifest File field. - Select aras.labs.WorkflowReportEmail in the Available for Import field.
- Select Type = Merge and Mode = Thorough Mode.
- Click Import in the top left corner.
- Close the Aras Package Import tool.
You are now ready to login to Aras and configure your workflows with the new email notification.
- Log in to Aras as admin.
- Navigate to Administration > Notification > E-Mail Message.
- Open the "Workflow Report Email" template.
- Set the "From User" property to the Aras User you want to appear as the email sender.
- Save and close the Email item.
- Navigate to Administration > Workflow Maps and open the Workflow you want to edit.
- In the Workflow Map editor, select the Activity you want to trigger the email.
- Select the Notifications tab.
- Click the Select Items (12.0+) or Pick Related (11.0+) button and choose the "Workflow Report Email" item from the search dialog.
- In the Event column of the relationship grid, select the event you want to trigger the email.
- In the Target column, select who you want to receive the email.
- You can find out more about these options by selecting Help (12.0+) or Help > Just Ask Innovator (11.0+) from the main menu and searching for "email" or "workflow".
- Repeat steps 7-11 for any other Activities you want to configure with the email notification.
- Save the Workflow Map.
The steps for using this project vary depending on the configuration you chose in the "Configuring Your Workflow" section above. Here's an example where we configured the ECN workflow to send an email when the "ECN Planning" Activity is activated.
- Create a new ECN.
- Vote "submit" on the new ECN to advance it from the "Submit ECN" activity to "ECN Planning".
- Check your email, log folder, or SMTP receiver to confirm the email was sent.
- This step depends on your SMTP configuration. Check out the "Testing Options" section below for more information on testing your emails in a local/non-production environment.
Note: It's important to create new items for testing your email configuration. Any changes to your workflow will not affect items that are already in process.
Don't have an SMTP server configured, or you don't want to spam your users with test emails? Here are two options for testing this project in a dev environment without a full SMTP server.
The InnovatorServerConfig.xml file in the root of every Aras Innovator installation contains an operating parameter for email debugging. Enabling this option will write all outgoing emails to files in Innovator\Server\temp\ by default.
- Open
InnovatorServerConfig.xmlfor editing. - Replace
<disabled_operating_parameter key="email_debug_option" value="file"/>with<operating_parameter key="email_debug_option" value="file"/>. - Follow the Usage Steps above to trigger an outgoing email.
- Open up the new file created in
Innovator\Server\temp\. It should look something like this:
TO: test@aras.fake
FROM: "Innovator Admin" <test@aras.fake>
SUBJECT: Workflow Report
<html>
  ... email content ...
</html>
To disable email debugging, simply revert the change to the operating parameter.
Another option for testing this project without a complete SMTP server is to use a lightweight SMTP Receiver like Papercut. Here's how:
-
Download and install the latest release of Papercut.
-
Open the Papercut client and click Options in the toolbar.
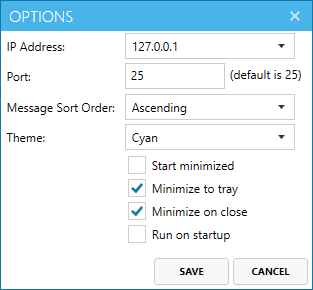
-
Choose an IP address to use and leave the default port. Save your options.
-
Open
InnovatorServerConfig.xmlfor editing. -
Set the IP address you chose in the Mail tag's SMTPServer attribute:
<Mail SMTPServer="127.0.0.1"/>. -
Save your changes.
-
Follow the Usage Steps above to trigger an outgoing email.

The outgoing email should appear in Papercut and look something like this:

- Fork it!
- Create your feature branch:
git checkout -b my-new-feature - Commit your changes:
git commit -am 'Add some feature' - Push to the branch:
git push origin my-new-feature - Submit a pull request
For more information on contributing to this project, another Aras Labs project, or any Aras Community project, shoot us an email at araslabs@aras.com.
Created by Sam Poe for Aras Labs. @sampoearas
Aras Labs projects are published to Github under the MIT license. See the LICENSE file for license rights and limitations.